
Let me guess. You saw that gorgeous layered dahlia flower and thought, "There’s no way I can make that." Maybe lace crochet feels intimidating, or you’ve never worked with multiple colors in the same project. I get it. Those stacked petals look like they belong in a museum, not on your dining table.
Get the Ad-Free PDF Pattern
You can find the free pattern below, or you can purchase the ad-free printable PDF from my shop.
Get the Printable PDF →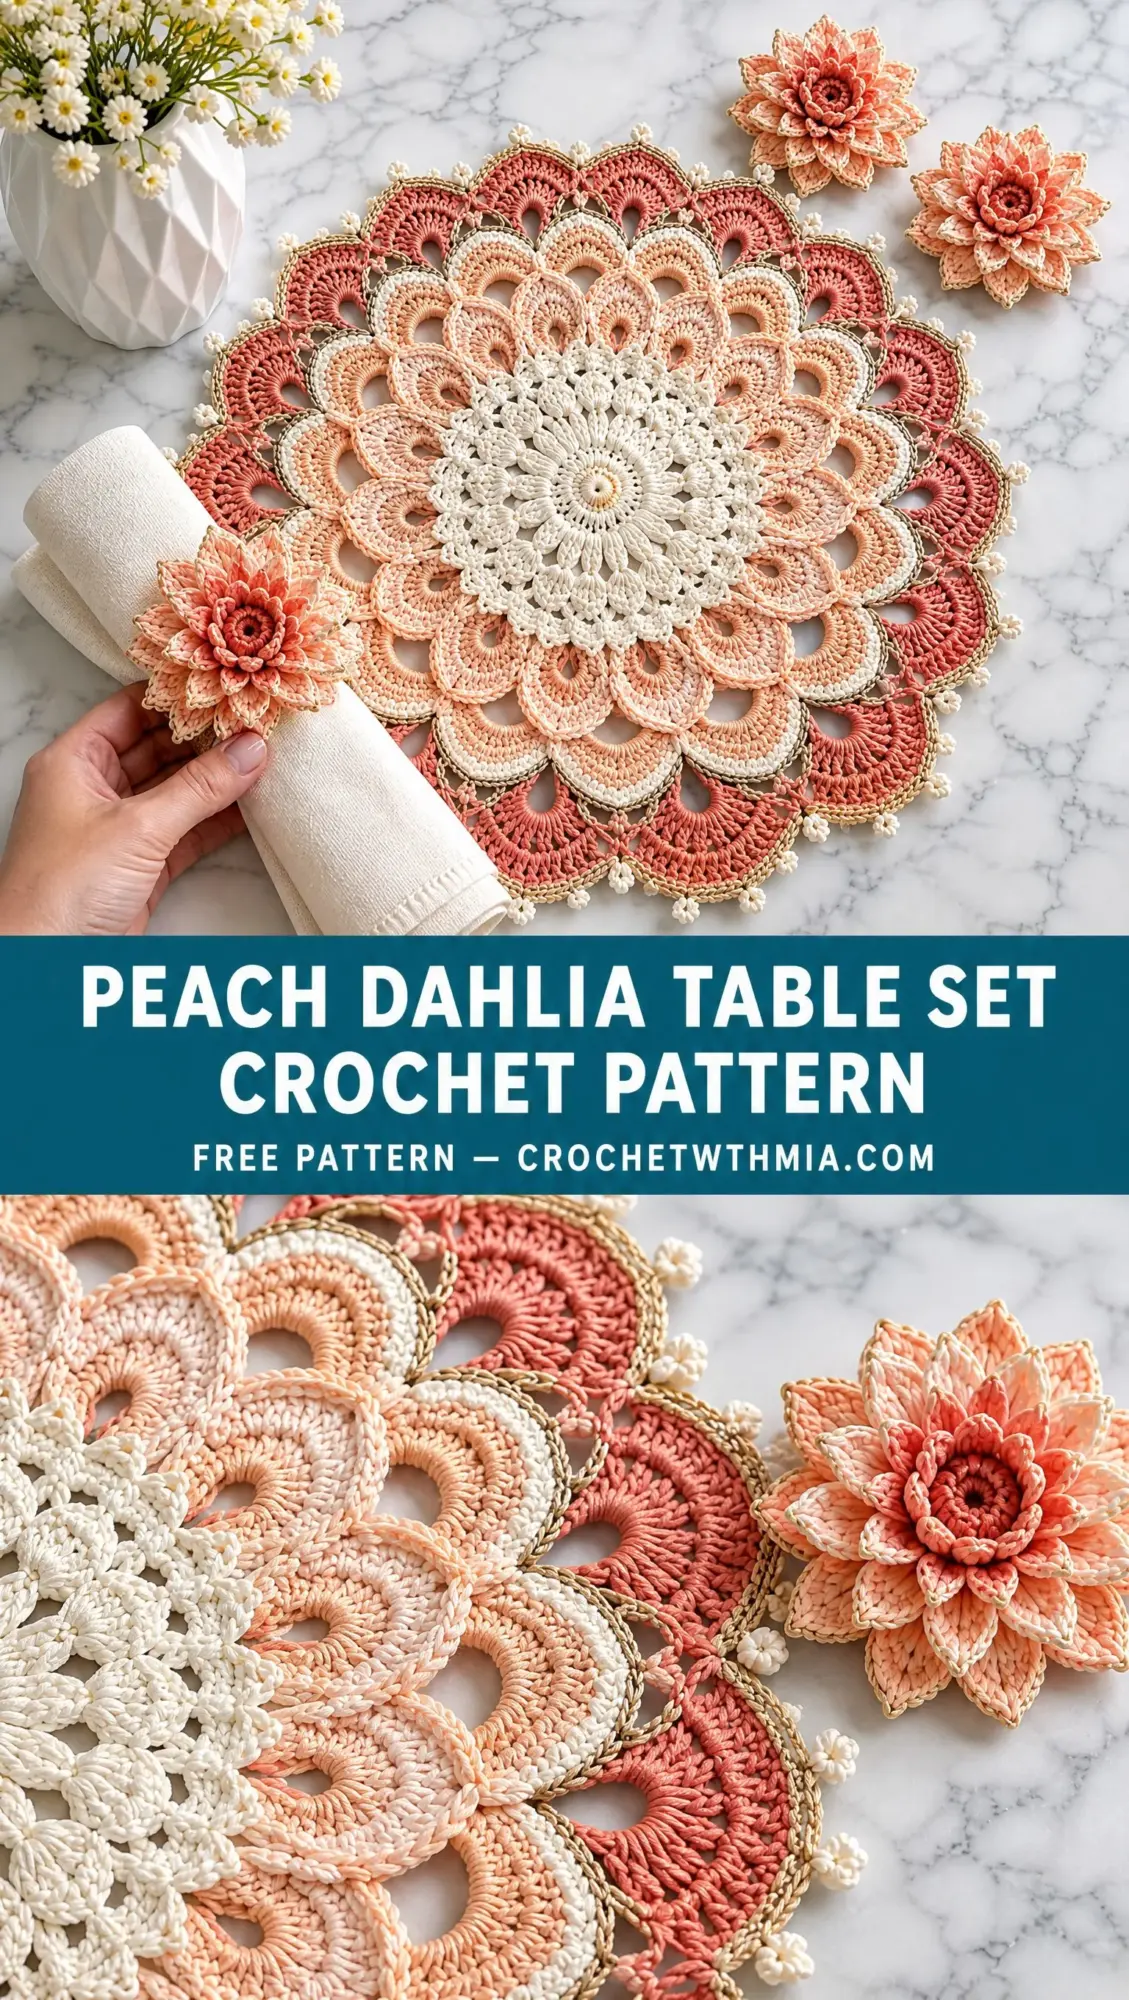
Here’s the thing though. This pattern breaks everything down into small, manageable pieces. The placemat is worked in simple joined rounds from the center out. The flower is built in separate tiers and assembled at the end. No magic tricks, no mystery stitches, no impossible techniques.
If you can double crochet, chain, and slip stitch, you can absolutely make this set. I’ll walk you through every round, every petal tier, and every finishing detail. By the end, you’ll have an elegant table setting that looks far more complex than it actually is.
What You’re Making
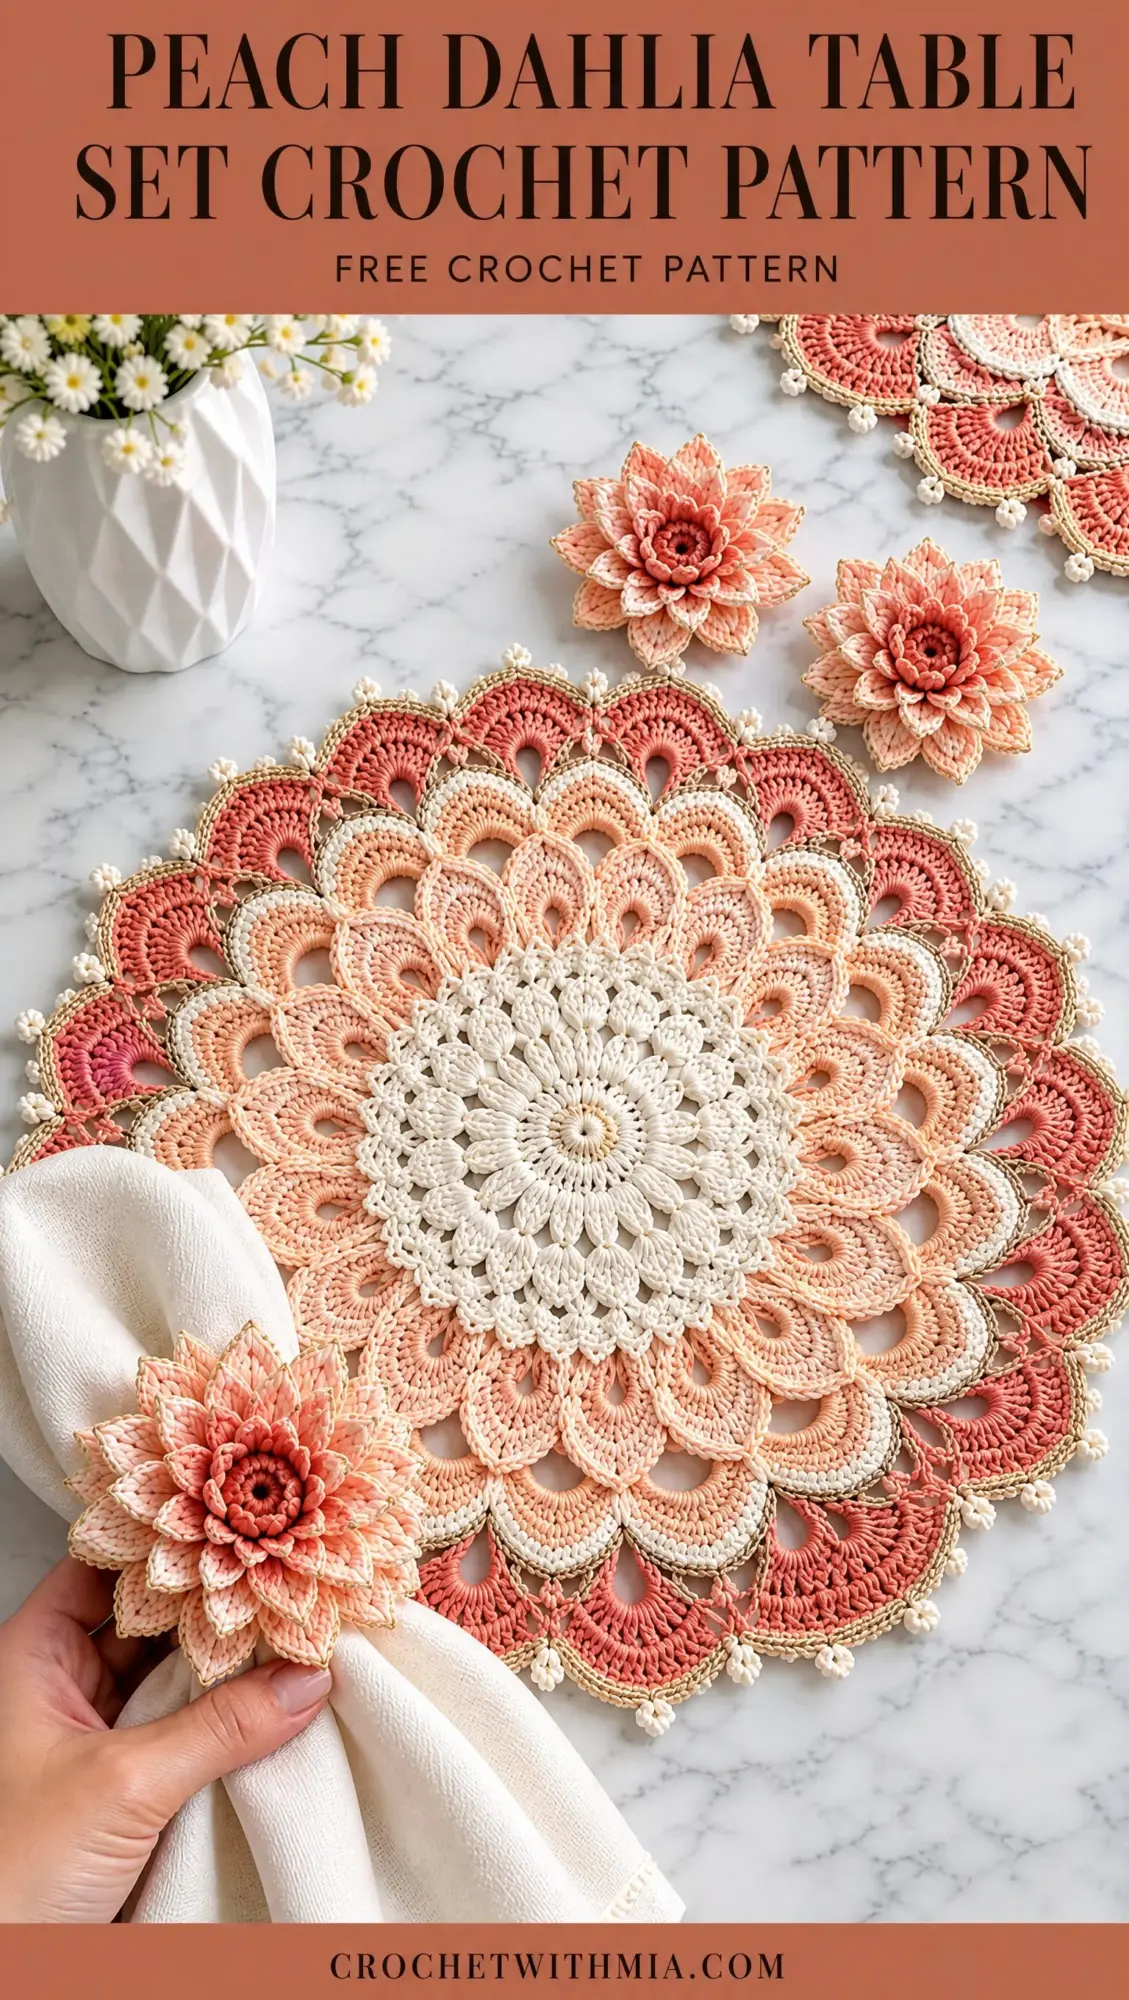
This Peach Dahlia Table Set includes a circular lace placemat and a layered dahlia napkin ring. The color palette uses ivory, pale apricot, coral, and restrained champagne gold for that soft, elegant look you see in the photos.
The placemat measures approximately 14 to 15 inches (35.5 to 38 cm) in diameter after blocking. It features an ivory center medallion, pale apricot shell arches, a coral fan border, narrow gold outlining, and tiny ivory picots around the edge.
The dahlia flower is about 4.5 to 5 inches (11.5 to 12.5 cm) across. It sits on a simple ivory napkin band that measures roughly 1.25 inches (3 cm) wide with a circumference of 5.5 to 6.5 inches (14 to 16.5 cm).
You can also make extra loose flowers for table decoration if you want the full styled look from the photos.
Materials You’ll Need
Yarn: Fine soft cotton, crochet thread, or mercerized cotton in four colors. Size 3 crochet thread or fingering weight cotton gives the crispest lace effect.
For one placemat plus one napkin ring, you’ll need approximately:
Hook: 2.25 to 2.75 mm, choosing the size that gives you a flat fabric
Additional supplies:
Gauge and Flatness Checkpoints
Exact stitch gauge matters less than keeping your circle flat. Here are your checkpoints:
If your work cups upward, add increases or use a larger hook. If it ruffles, reduce increases or use a smaller hook. Trust these measurements over stitch counts.
Abbreviations
Let me define every stitch before we start so nothing catches you off guard:
Peach Dahlia Placemat Instructions
Work in joined rounds. Unless stated otherwise, join with a slip stitch to the first stitch of the round. Beginning chains do not count as a stitch. Use a marker in the first stitch. Keep the joins aligned where possible.
Section A: Ivory Medallion
Round 1: With ivory, make an MR. Ch 1, work 12 dc into ring. Pull closed and join. 12 dc.
Round 2: Ch 1. Work 2 dc in each st around. Join. 24 dc.
Round 3: Ch 1. Dc in next st, 2 dc in next st; repeat from around. Join. 36 dc.
Round 4: Ch 1. Dc in next 2 sts, 2 dc in next st; repeat from around. Join. 48 dc.
Round 5: Ch 1. Dc in next 3 sts, 2 dc in next st; repeat from around. Join. 60 dc.
Round 6: Ch 1. Dc in next 4 sts, 2 dc in next st; repeat from around. Join. 72 dc.
Round 7: Ch 1. Sc in next 2 sts, ch 3, sk 1 st; repeat from around, adjusting the last repeat if needed so the arches are evenly distributed. Join. Aim for 24 ch-3 arches.
Round 8: Sl st into first ch-3 sp. Ch 1. In each ch-3 sp work (sc, hdc, 3 dc, hdc, sc). Join. This forms 24 shallow ivory petals. Fasten off ivory.
Checkpoint: The medallion should lie flat and measure about 5.5 to 6 inches. Lightly steam or finger block before continuing if the petals twist.
Section B: Pale Apricot Shell Arches
Round 9: Join pale apricot in the center dc of any ivory petal. Ch 1, sc in same st. Ch 5, sc in center dc of next petal; repeat from around. Join. 24 ch-5 arches.
Round 10: Sl st into first ch-5 sp. Ch 1. In each arch work (sc, hdc, 5 dc, hdc, sc). Join. 24 shells.
Round 11: Sl st to center dc of first shell. Ch 1, sc in same st. Ch 6, sc in center dc of next shell; repeat from around. Join. 24 ch-6 arches.
Round 12: In each ch-6 sp work (sc, hdc, dc, 3 tr, dc, hdc, sc). Join. This makes a taller pointed arch. 24 tall shells.
Round 13: Sl st to center tr of first shell. Ch 1, sc in same st. Ch 3, sc in gap between current and next shell, ch 3, sc in center tr of next shell; repeat from around. Join. 48 small arches.
Round 14: In next ch-3 sp work 5 dc; sc in next ch-3 sp; repeat from around. Join. You will have alternating 5-dc fans and anchoring sc sts. Fasten off pale apricot.
Section C: Champagne Outline and Coral Fan Border
Round 15: With champagne gold, join at any anchoring sc from Round 14. Ch 1, sc in same st. Working loosely, ch 4, FPsc around the center dc of the next 5-dc fan, ch 4, sc in next anchoring sc; repeat from around. Join. Fasten off gold. This creates the narrow metallic outline seen between the apricot and coral sections.
Round 16: Join coral in any anchoring sc from Round 14, working over or adjacent to the gold round. Ch 1, sc in same st. Ch 7, sc in next anchoring sc; repeat from around. Join. 24 ch-7 arches.
Round 17: Sl st into first ch-7 sp. In each arch work (sc, hdc, 2 dc, 3 tr, 2 dc, hdc, sc). Join. 24 coral fans.
Round 18: Sl st to center tr of first fan. Ch 1, sc in same st. Ch 4, sc in gap between fans, ch 4, sc in center tr of next fan; repeat from around. Join. 48 arches.
Round 19: In first ch-4 sp work 5 dc; in next ch-4 sp work sc. 5 dc in next sp, sc in next sp; repeat from around. Join.
Round 20: Sl st to center dc of first 5-dc group. Ch 1, sc in same st. Ch 5, sc in next sc, ch 5, sc in center dc of next 5-dc group; repeat from around. Join.
Round 21: In each ch-5 sp work (sc, hdc, 5 dc, hdc, sc). Join. The border should now read as a broad coral lace fan band. Fasten off coral.
Section D: Gold Scallop Edge and Ivory Picots
Round 22: Join champagne gold in the first sc of any shell from Round 21. Ch 1, sc in same st. Work 1 sc in each stitch across the shell, placing ch 1 over the lowest valley between adjacent shells. Continue around. Join. Fasten off gold. Keep this round relaxed so it outlines rather than tightens the scallops.
Round 23: Join ivory in any valley ch-1 sp. Ch 1, sc in same sp. Sc evenly across the next shell edge, placing a picot at the shell peak, then sc in next valley sp; repeat from around. Join. Fasten off and weave in ends.
Optional delicate picot finish: Instead of one picot per shell, place picots at approximately the one third, peak, and two thirds positions of each outer shell. Keep them tiny so the edge remains refined rather than frilly.
Blocking the Placemat
Soak the mat in cool water for 10 to 15 minutes. Press out water in a towel without twisting, then pin to a true circle on your blocking mat. Open every apricot and coral shell, align the gold outline, and pin each ivory picot. Let dry completely. For a dining mat, avoid heavy starch. A light mist is enough to preserve the lace definition.
Layered Peach Dahlia Flower
The flower is built as a firm spiral center plus separate petal tiers attached to a small crocheted base. The outer petals are pale apricot, the middle tiers blend apricot into coral, and the center is coral. Curl is created with tall stitches on a short chain, then shaped by hand after assembly.
Section A: Flower Base
Round 1: With ivory, make an MR and work 12 sc into the ring. Join.
Round 2: Ch 1, 2 sc in each st around. Join. 24 sc.
Round 3: Ch 1, *sc in next st, 2 sc in next st; repeat around. Join. 36 sc. Fasten off, leaving a long tail for sewing to the napkin band.
Section B: Petal Recipe
Each petal is worked from an attachment point on the flower base: ch 7, sl st in 2nd ch from hook, sc in next ch, hdc in next ch, dc in next ch, tr in next ch, 2 tr in last ch; sl st into the next designated base stitch.
This creates one pointed, slightly curled petal. For a longer petal, use ch 8 and add one dc before the tr. For a shorter inner petal, use ch 5 and work sl st, sc, hdc, dc. Work petals fairly tightly so they hold shape.
Section C: Outer Tier, 12 Pale Apricot Petals
Join pale apricot to the back loop of any base stitch on Round 3. Work 12 long petals, attaching each petal approximately every 3 base stitches around. Angle the petals outward as you work. Fasten off.
Section D: Second Tier, 12 Apricot Petals
Join pale apricot one round inward, using the unused front or inner loops or by surface slip stitching a guide circle through the base fabric. Work 12 standard petals, offset so each sits between two outer petals. Fasten off.
Section E: Third Tier, 10 Coral Apricot Petals
Join coral. Work 10 slightly shorter petals, evenly spaced and offset from the previous tier. For the soft color transition shown in the image, you may work the first half of each petal in pale apricot and complete the final 2 tall stitches in coral, carrying the unused color neatly behind the petal.
Section F: Fourth Tier, 8 Coral Petals
Work 8 short pointed petals around the inner base, using the ch-5 version. Pull each petal upward rather than outward so the flower gains depth.
Section G: Coral Spiral Center
With coral, ch 28. Beginning in the 2nd ch from hook, work 2 sc in each of next 5 ch, 2 hdc in each of next 7 ch, 2 dc in each remaining ch. The strip will curl strongly. Coil it from the sc end into a tight rosette, keeping the denser dc section toward the outside. Sew through all layers to secure, then stitch the rosette to the center of the dahlia base.
For the photographed look, steam the petals lightly over a kettle or garment steamer without touching the yarn, then pinch each tip and curve the sides backward with your fingers. A tiny amount of diluted fabric stiffener on the underside can help the flower stay palm sized and dimensional.
Optional Champagne Edging
Using champagne gold and a tapestry needle, surface crochet or embroider a very fine running or slip stitch line around only the outer 12 petal tips. Keep this sparse. The metallic accent should read as a glint, not a heavy border.
Concealed Ivory Napkin Band
The band is intentionally simple so the flower remains the focus. It should fit around a gathered cloth napkin without stretching excessively.
Row 1: With ivory, ch 9. Sc in 2nd ch from hook and across. Turn. 8 sc.
Rows 2 through 28: Ch 1, sc in each st across. Turn. Work more or fewer rows until the strip wraps comfortably around the gathered napkin with about 1/4 inch (6 mm) overlap.
Joining: Bring short ends together and slip stitch or whipstitch them to form a ring. Turn the seam to the inside.
Edge finish (optional): Work one round of sl st around each long edge for a smooth, corded appearance. Fasten off.
Attaching the Dahlia
Center the flower over the band seam. Using the long ivory tail from the flower base, sew through the flower base and band in a 1.5 to 2 inch (4 to 5 cm) circle. Do not sew through the outer petal tiers. Knot securely on the inside of the band and bury the tail. The flower should sit firmly while the band remains flexible.
Decorative Loose Flowers
Make three additional dahlias using the same instructions, but omit the napkin band. For display flowers, you can reduce the flower base to 30 stitches and make 10 outer petals, 10 second tier petals, 8 third tier petals, 6 fourth tier petals, and one smaller coral spiral. This gives a slightly varied handmade grouping while preserving the same visual language.
Troubleshooting Tips
If your placemat cups upward: You likely have too few increases or your tension is too tight. Move up 0.25 to 0.5 mm in hook size or add an occasional extra stitch in the next plain or sc round.
If your placemat ruffles: You have too many increases or your tension is too loose. Use a smaller hook or skip one increase repeat evenly around.
If the gold round puckers: Metallic thread tends to be shorter and tighter. Work gold stitches loosely and add ch 1 at tight valleys.
If your flower looks flat: All your petal tiers are angled outward. Angle inner tiers upward instead, then steam shape and pinch tips.
If the napkin band slips: The band is too large or the yarn is too slick. Remove 2 to 4 rows or add a narrow inner round of slip stitches.
Color Placement Guide
Understanding where each color goes helps you plan your yarn and visualize the finished piece:
Ivory: Central medallion, finishing picots, flower base, and napkin band
Pale apricot: Two shell and arch bands plus the two outer flower tiers
Coral: Broad outer fan border, inner flower tiers, and spiral center
Champagne gold: Very narrow outlining only
This restrained metallic placement keeps the finished set soft and elegant rather than overly sparkly.
Final Thoughts on the Peach Dahlia Table Set Crochet Pattern
This project looks complex, but you’ve seen how it breaks down into straightforward rounds and simple petal construction. The layered effect comes from stacking separate pieces, not from any complicated technique. Take your time with blocking, and your placemat will look professionally made.
I hope you love making this Peach Dahlia Table Set as much as I enjoyed writing out every detail for you. Thank you for trusting me with your crafting time. If you make this set, I’d absolutely love to see it. Tag me on Instagram or share a photo in my Facebook group.
If you want to find this pattern again later, go ahead and save it to your Pinterest boards. And please drop a comment below if you give it a try. I always love hearing how projects turn out and seeing your color choices.
Want a Quick & Easy Printable Version?
Get a clean, beautifully formatted PDF of this pattern — easy to follow step by step, ready to print or save on any device. No scrolling, no distractions, just the pattern.
Get the Printable PDF →