
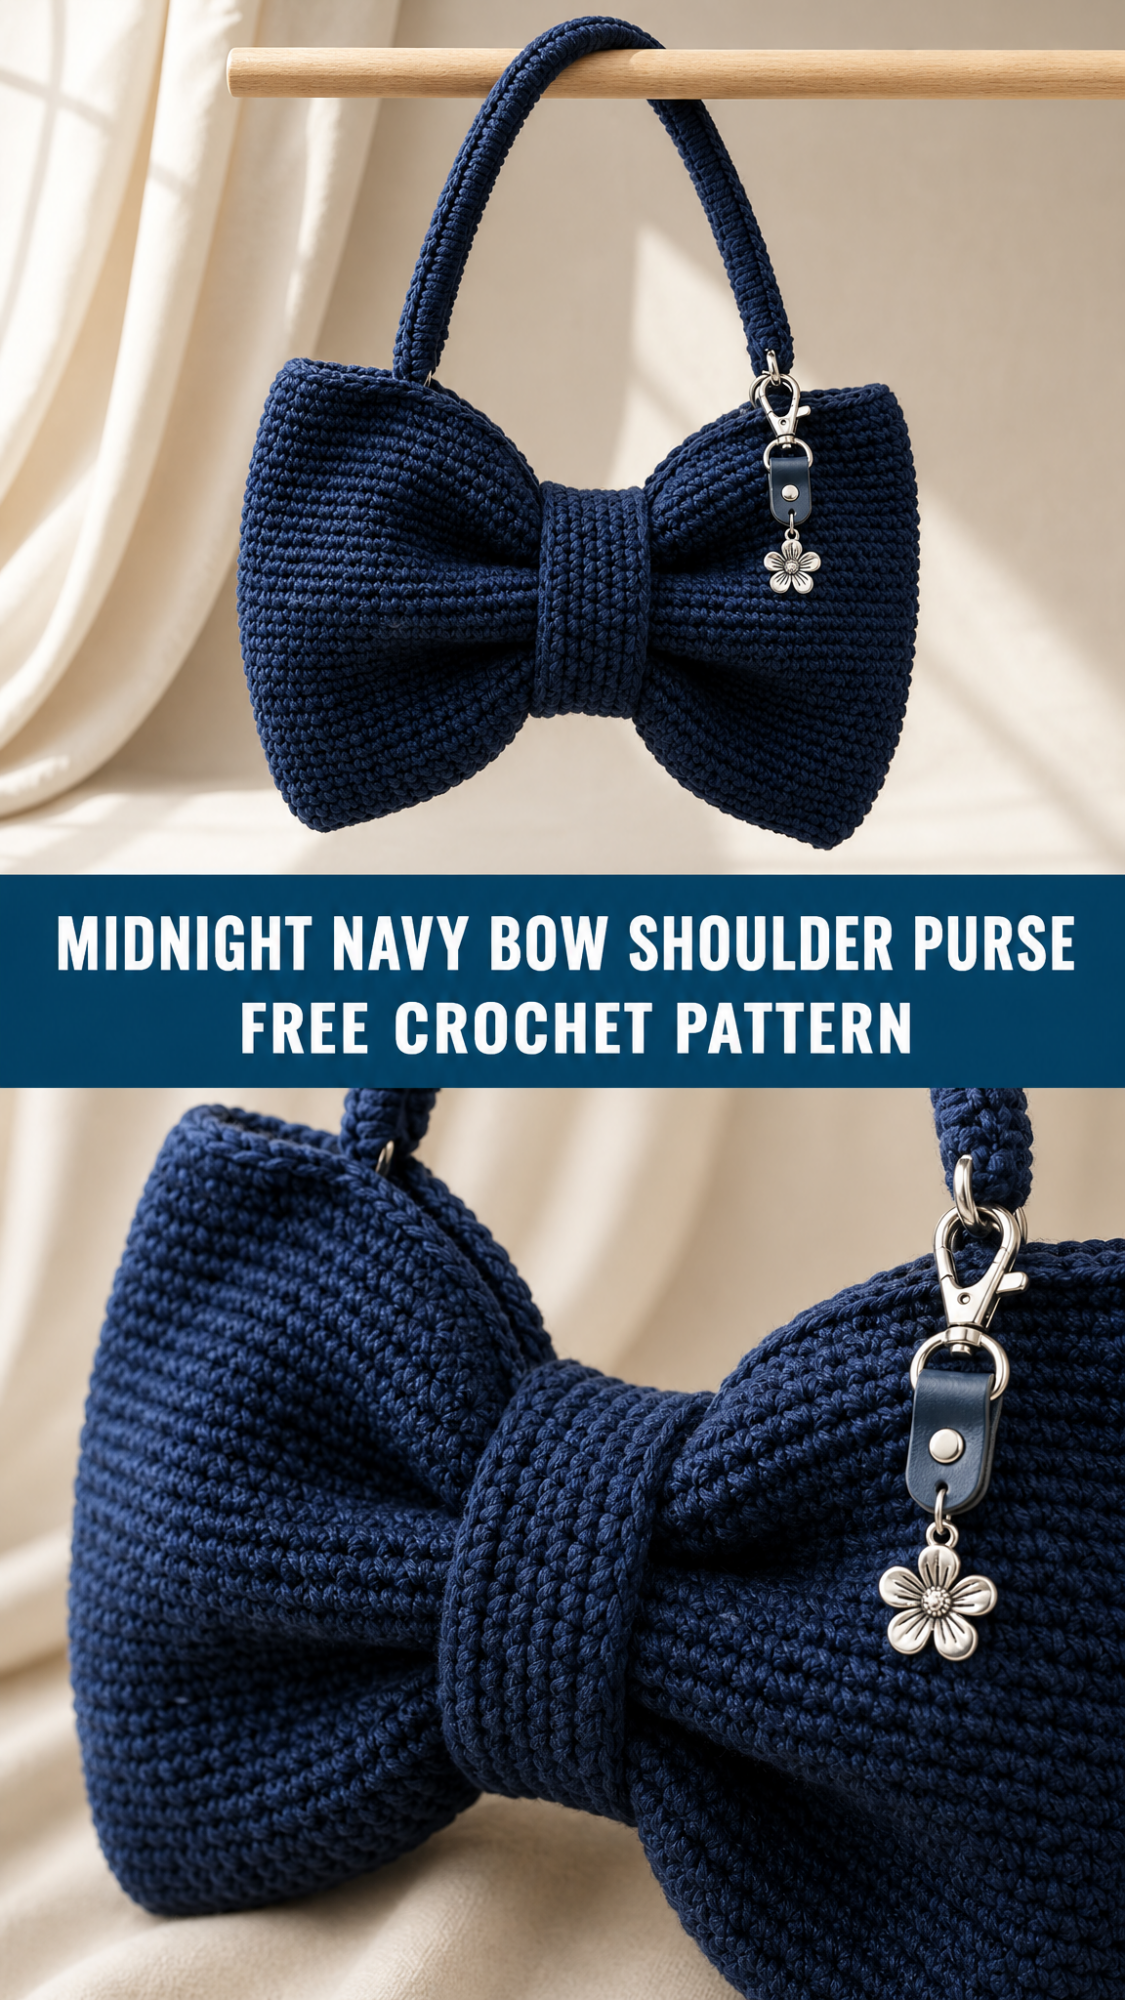
Go dig through your yarn stash right now because I know you have that perfect skein of cotton or cotton-blend yarn just waiting for the right project. This bow-shaped purse is exactly what it has been waiting for. The construction is genuinely interesting here. You will work flat panels, seam them together, and then cinch the center to create that dramatic bow silhouette. I will be honest with you about the skill level. This is an intermediate project, but a confident beginner who has made a few bags before can absolutely tackle it. The ribbed texture comes from a simple technique you probably already know, and the shaping is more about assembly than complicated stitch work.
Why This Crochet Bow Purse Pattern Works So Well
This Midnight Navy Bow Shoulder Purse has been getting compliments every single time I carry it. The structured bow shape holds up beautifully because of the dense stitch work and the cotton yarn’s natural body. Unlike floppy crochet bags that lose their shape after one use, this purse maintains that crisp bow silhouette.
The design looks complicated, but the construction breaks down into manageable pieces. You will make two identical bow wing panels, a center band, a base gusset, and a handle. Each piece uses straightforward stitches. The magic happens during assembly when you cinch everything together and watch it transform into this statement accessory.
Materials You Will Need
Yarn:
Hook:
Notions:
Gauge:
18 stitches and 20 rows = 4 inches in single crochet worked in back loops only
Take time to check your gauge. This pattern relies on a firm, structured fabric. If your gauge is too loose, your purse will be floppy. Go down a hook size if needed.
Finished Dimensions
Abbreviations and Stitch Definitions
Before we dive into the pattern, let me define every stitch abbreviation you will encounter:
Ch = Chain. Wrap yarn over hook and pull through the loop on your hook. This creates the foundation for your work.
Sc = Single crochet. Insert hook into stitch, yarn over and pull up a loop (2 loops on hook), yarn over and pull through both loops.
BLO = Back loop only. Instead of inserting your hook under both loops of the stitch below, you only go through the back loop. This creates the ribbed texture you see in the photos.
Sl st = Slip stitch. Insert hook into stitch, yarn over and pull through both the stitch and the loop on your hook in one motion.
Inc = Increase. Work 2 single crochet stitches into the same stitch.
Dec = Decrease. Insert hook into first stitch and pull up a loop, insert hook into next stitch and pull up a loop (3 loops on hook), yarn over and pull through all 3 loops.
Step by Step Crochet Pattern
Bow Wing Panels (Make 2)
These panels create the signature bow shape. The ribbed texture comes from working in the back loop only throughout.
Row 1: Ch 37. Sc in 2nd ch from hook and in each ch across. (36 sts)
Row 2: Ch 1, turn. Sc in BLO of each st across. (36 sts)
Rows 3-40: Repeat Row 2. (36 sts)
At this point, you have a ribbed rectangle. Now we will shape the curves that give the bow its characteristic rounded edges.
Row 41: Ch 1, turn. Dec, sc in BLO of each st to last 2 sts, dec. (34 sts)
Row 42: Ch 1, turn. Sc in BLO of each st across. (34 sts)
Row 43: Ch 1, turn. Dec, sc in BLO of each st to last 2 sts, dec. (32 sts)
Row 44: Ch 1, turn. Sc in BLO of each st across. (32 sts)
Rows 45-52: Repeat Rows 43-44 four more times. (24 sts after Row 52)
Row 53: Ch 1, turn. Dec, sc in BLO of each st to last 2 sts, dec. (22 sts)
Row 54: Ch 1, turn. Dec, sc in BLO of each st to last 2 sts, dec. (20 sts)
Rows 55-58: Repeat Row 54 four more times. (12 sts after Row 58)
Fasten off and leave a long tail for seaming.
You should now have a panel that is wider at one end and tapers at the other. The ribbed lines run horizontally across the piece. Make a second identical panel.
Center Gusset and Base Panel
This piece wraps around the bottom of the purse and connects the two bow wing panels. It also creates the depth of the bag.
Row 1: Ch 17. Sc in 2nd ch from hook and in each ch across. (16 sts)
Row 2: Ch 1, turn. Sc in BLO of each st across. (16 sts)
Rows 3-90: Repeat Row 2. (16 sts)
This creates a long narrow strip. The length may need adjustment depending on your gauge. The strip should be long enough to wrap around the bottom curved edge of one bow panel, across the base, and around the opposite bow panel’s bottom edge.
Fasten off and leave a long tail.
Center Band (The Bow Knot)
This smaller piece wraps around the center of the purse to create the pinched bow effect and hides the seaming.
Row 1: Ch 13. Sc in 2nd ch from hook and in each ch across. (12 sts)
Row 2: Ch 1, turn. Sc in BLO of each st across. (12 sts)
Rows 3-24: Repeat Row 2. (12 sts)
Fasten off and leave a long tail for seaming.
Handle (Make 1)
The handle is a tube worked in continuous rounds. This creates a sturdy, rounded handle that is comfortable to hold.
Round 1: Ch 4. Sl st to first ch to form a ring. Ch 1, work 8 sc into the ring. Do not join. Place a stitch marker in the first stitch of each round and move it up as you work. (8 sts)
Rounds 2-80: Sc in each st around. (8 sts)
The handle should measure approximately 12-14 inches long. Adjust the number of rounds if you prefer a longer or shorter handle.
Sl st to next st. Fasten off and leave a long tail.
Important tip: The handle may want to curl as you work. This is normal. It will straighten out when you attach it and the weight of the purse pulls it down.
Assembly Instructions
Take your time with assembly. This is where the bow shape comes together, and careful seaming makes a huge difference in the finished look.
Step 1: Prepare the Bow Wing Panels
Lay both bow wing panels flat with the right side facing up. The ribbed lines should run horizontally. Identify the tapered end of each panel. This tapered end will be the center of the bow where everything cinches together.
Step 2: Add Light Stuffing (Optional but Recommended)
Before closing the panels, add a small amount of polyester fiberfill to the wider curved sections of each bow wing. This helps the bow hold its rounded shape. Do not overstuff. You want gentle fullness, not a firm pillow.
Step 3: Attach the Gusset
Using your tapestry needle and matching yarn, whipstitch or mattress stitch the center gusset strip around the outer curved edge of one bow wing panel. Start at one tapered end, work around the curved bottom edge, and end at the opposite tapered end.
Repeat for the second bow wing panel, attaching it to the other long edge of the gusset strip.
Your purse should now have dimension and hold its shape.
Step 4: Create the Bow Center
This is the fun part. Bring the two tapered ends of the bow wings together at the center top of the purse. Pinch the fabric inward to create that classic bow silhouette.
Wrap the center band piece around this pinched section. Pull it snug enough to create nice gathers, but not so tight that you cannot fit items inside the purse. Whipstitch the short ends of the center band together on the inside of the purse. Tack the band to the bow panels in a few spots to keep it from sliding around.
Step 5: Attach the Handle
Position the handle ends at the top of the center band, one on each side of the bow knot. Stitch each end securely to the inside of the purse, reinforcing with several passes of yarn. The handle should form a smooth arc above the bow center.
Step 6: Add Closure and Finishing Touches
For a magnetic snap closure, install the snap pieces inside the purse opening before you complete the center band attachment. Position them so the purse closes securely when carried.
Add a decorative charm to the center band if desired. A small lobster clasp attached to a leather tab looks elegant against the navy yarn.
Weave in all remaining ends. Block gently by misting with water and shaping with your hands if the bow wings need adjusting.
Tips for Success with This Crochet Bow Purse
Maintain consistent tension throughout. The ribbed texture looks best when your stitches are uniform. If you notice your tension loosening as you work, take a break. Tired hands make uneven stitches.
Count your stitches at the end of every row. The shaping rows require accuracy. Losing or gaining a stitch will throw off the symmetry of your bow wings.
Use cotton yarn specifically. Acrylic yarn will not hold the structured shape as well. Cotton has natural body and memory that keeps the bow crisp. If you must substitute, look for a cotton-acrylic blend with at least 50% cotton content.
Do not skip the gauge swatch. I know swatching is not the exciting part, but this pattern depends on a firm fabric. A looser gauge means a floppy purse that will not hold the bow shape.
Customization Ideas
Once you master the basic construction, you can personalize this design in countless ways:
Final Thoughts on the Midnight Navy Bow Shoulder Purse Crochet Pattern
This bow purse crochet pattern takes a bit more time and attention than a simple tote, but the result is absolutely worth it. Every time you carry this purse, someone will ask where you got it. You get to say you made it yourself.
The combination of simple stitches, interesting construction, and dramatic finished shape makes this a satisfying project from start to finish. Whether you make it in classic navy like mine or choose a bright pop of color, this crochet bow bag will become a favorite in your handmade wardrobe.
I hope this step by step crochet tutorial gives you everything you need to create your own version. The pattern works up faster than you might expect once you get into the rhythm of those ribbed rows. Put on a good audiobook, settle into your favorite crafting spot, and enjoy watching this unique accessory take shape under your hands.
Thank you so much for choosing to make this pattern. I genuinely appreciate you being here. If you finish your bow purse, I would absolutely love to see it. Tag me on Instagram or share a photo in our Facebook group. Seeing your creations makes my whole day.
If you loved this pattern, save it to your Pinterest boards so you can find it easily when you are ready to start. And please drop a comment below if you make one. I read every single comment and love hearing how your projects turn out.