
I call this one "Fern" because she sat in my design notebook for almost two years before I finally brought her to life.
Get the Ad-Free PDF Pattern
You can find the free pattern below, or you can purchase the ad-free printable PDF from my shop.
Get the Printable PDF →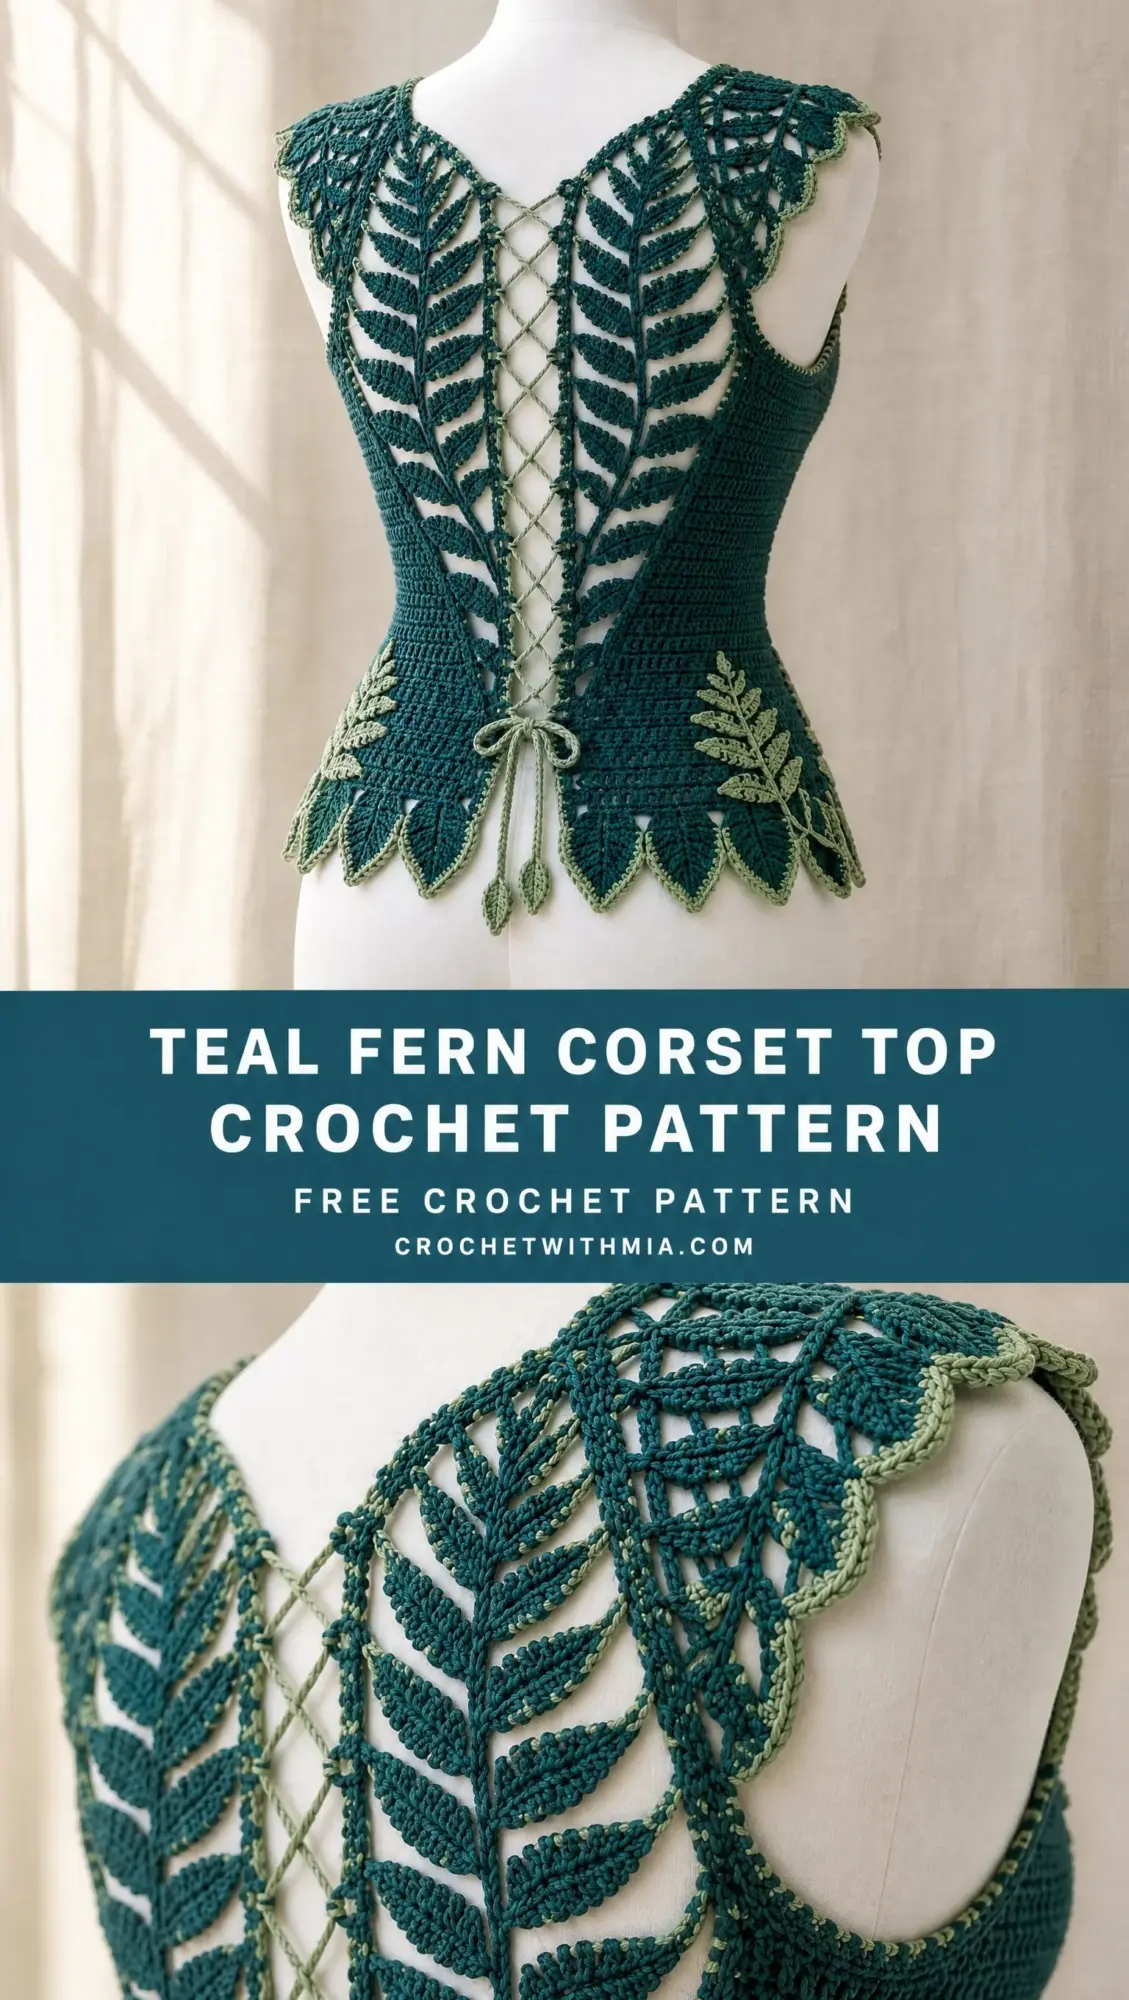
The original sketch was just a quick doodle of a corset back with botanical lace spilling down like vines. I kept coming back to it, adding notes about leaf shapes and lacing details, but the construction felt too complicated to figure out. Then one afternoon I picked up some gorgeous mercerized cotton in this deep teal shade, and Fern finally told me exactly how she wanted to be made.
She is dramatic. She is romantic. She is absolutely worth every hour you will spend on her.
About This Botanical Corset Top Pattern
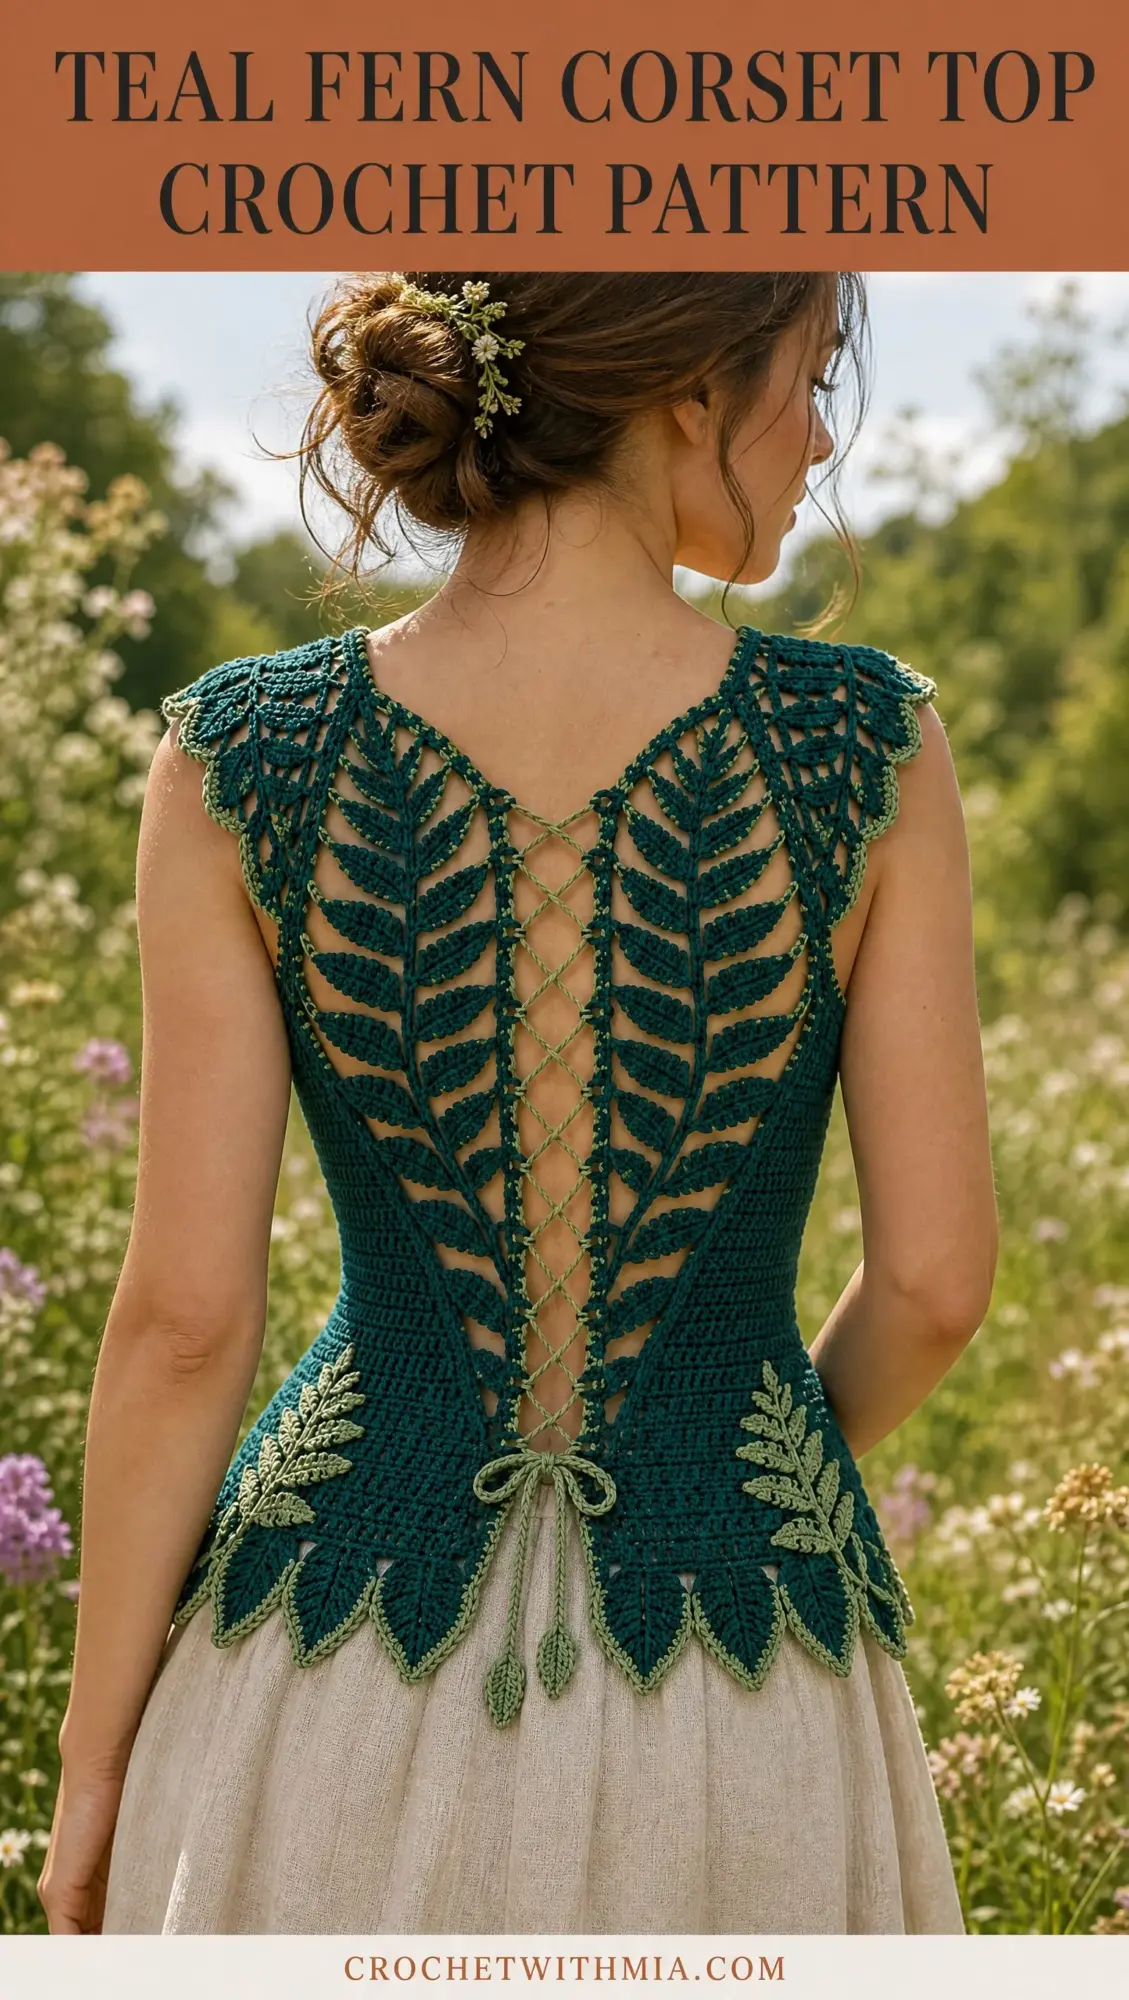
This teal fern corset top crochet pattern creates a fitted, waist-length garment with an open back, decorative fern lace panels, sage green corset lacing, and a stunning pointed leaf hem. The design features broad shoulder lace caps that drape elegantly, two long fern frond motifs that frame the corset opening, and delicate hip appliques in a contrasting sage color.
The silhouette is close-fitting with 2 to 5 centimeters of negative ease through the bust and waist. That sounds intimidating, but the corset lacing at the back gives you plenty of room to adjust the fit. You can lace it tighter for a more dramatic hourglass shape or leave it looser for comfortable all-day wear.
This crochet tutorial walks you through every component. You will make dense side panels for structure, delicate fern motifs for drama, scalloped shoulder sections for elegance, a reinforced corset edge with eyelets, pointed leaf edging at the hem, and a simple lacing cord. The pieces come together in a way that looks incredibly complex but is actually quite logical once you understand the construction map.
Skill Level
This pattern is rated intermediate to advanced. If you are comfortable with basic shaping, working from charts or written instructions, and joining separate motifs, you will do great here.
The construction method combines motif work, shaped panels, and join-as-you-go finishing. You will work increases and decreases for waist shaping, create freestanding lace fern fronds, and attach everything with careful seaming and strategic tacking.
For confident beginners: This is a stretch project, but a good one. Read through the entire pattern first. Make a test fern frond before starting the full garment. Take your time with blocking. You can absolutely do this if you are patient with yourself.
Materials You Will Need
Here is everything required to make this botanical crochet corset top:
Yarn A (Deep Teal): Sport weight or light DK cotton, 250 to 475 yards depending on your size. I recommend smooth mercerized cotton or a cotton/bamboo blend for crisp stitch definition. The lace really pops with a yarn that has some sheen.
Yarn B (Pale Sage): Same weight, 60 to 110 yards. This is your contrast color for the corset lacing, the sage tracing on the hem leaves, and the small hip fern appliques.
Hooks: 3.0 mm for the lace sections and 3.5 mm for the body panels. Use whatever sizes you need to match gauge. The lace hook should be smaller than your body hook so the openwork lies flat and clean.
Notions: 6 locking stitch markers, tapestry needle, scissors, tape measure, blocking pins and mat.
Optional: 1.5 to 2 cm soft twill tape or grosgrain ribbon for hidden waist stabilization if you want a firmer corset edge.
Gauge
Getting gauge right matters here because fit is everything with a corset-style top.
Body gauge: 20 double crochet stitches by 10 rows equals 10 cm or 4 inches after blocking, using your larger hook.
Lace gauge: One 6-leaf fern repeat measures about 6.5 cm or 2.5 inches wide at its broadest point and 9 cm or 3.5 inches tall after blocking.
Match your body gauge first. Then use the smaller hook for the fern motifs. If your gauge is off, your top will be too big or too small, and no amount of lacing adjustment will fix that.
Always swatch and block your swatch before measuring. Cotton especially can change quite a bit with wet blocking.
Finished Size Guide
This pattern includes seven sizes. The finished bust measurement assumes the back opening is laced to a 2.5 to 5 cm gap. For fuller coverage, enlarge the side panels slightly. For a more dramatic open corset back, reduce them.
| Size | Fits Bust | Finished Bust | Waist | Body Length |
|---|---|---|---|---|
| XS | 30-32 in | 29-30 in | 24-26 in | 17.5 in |
| S | 33-35 in | 31-33 in | 27-29 in | 18 in |
| M | 36-38 in | 34-36 in | 30-32 in | 18.5 in |
| L | 39-42 in | 37-40 in | 33-36 in | 19 in |
| XL | 43-46 in | 41-44 in | 37-40 in | 19.5 in |
| 2XL | 47-50 in | 45-48 in | 41-44 in | 20 in |
| 3XL | 51-54 in | 49-52 in | 45-48 in | 20.5 in |
Abbreviations
Before we dive into the step by step instructions, here are all the abbreviations you will encounter:
ch = chain. Wrap yarn over hook and pull through the loop on your hook.
sl st = slip stitch. Insert hook, yarn over, pull through both the stitch and the loop on your hook in one motion.
sc = single crochet. Insert hook, yarn over and pull up a loop, yarn over and pull through both loops.
hdc = half double crochet. Yarn over, insert hook, yarn over and pull up a loop, yarn over and pull through all three loops.
dc = double crochet. Yarn over, insert hook, yarn over and pull up a loop, yarn over and pull through two loops, yarn over and pull through remaining two loops.
tr = treble crochet. Yarn over twice, insert hook, yarn over and pull up a loop, then yarn over and pull through two loops three times.
dtr = double treble crochet. Yarn over three times, insert hook, yarn over and pull up a loop, then yarn over and pull through two loops four times.
sp = space
st(s) = stitch or stitches
RS / WS = right side / wrong side
yo = yarn over
picot = chain 3, slip stitch in first chain
dc2tog = double crochet 2 together. A decrease that joins two stitches into one.
Construction Overview
Understanding how this garment comes together will help everything make sense. The top is built from the waist upward, then the decorative lower edge is added last.
The strongest structural elements are the compact teal side panels and the reinforced back-opening edges. The fern motifs are decorative but also bridge the side panels to the shoulder sections.
You will make:
Sizing Formula Before You Begin
Take your measurements before starting. You will need: high bust, full bust, waist, shoulder-to-waist back length, and desired back-opening width.
At gauge, each body-panel double crochet is about 0.5 cm or 0.2 inches wide. Use this table as your starting point:
| Size | Foundation Stitches | Rows to Underarm | Back Opening Target |
|---|---|---|---|
| XS | 43 | 34 | 3-4 in |
| S | 47 | 35 | 3-4 in |
| M | 51 | 36 | 3.5-4.5 in |
| L | 56 | 37 | 4-5 in |
| XL | 61 | 38 | 4-5 in |
| 2XL | 66 | 39 | 4.5-5.5 in |
| 3XL | 71 | 40 | 4.5-6 in |
Part 1: Dense Side/Body Panels
Make 2 mirrored panels. Use Yarn A and your larger hook.
1. Foundation: Chain the number listed for your size plus 3 turning chains. Double crochet in 4th chain from hook and in each chain across. Turn.
2. Rows 2-6: Chain 2 (this does not count as a stitch), double crochet in each stitch across. Turn. This establishes your hip and waist fabric. (stitch count remains the same as foundation)
3. Waist shaping: Over the next 8 rows, decrease 1 stitch at the back edge on Rows 2, 4, 6, and 8 by working dc2tog over the final 2 stitches. Keep the side-seam edge straight. You have decreased 4 stitches total.
4. Upper-waist return: Work 4 rows even, then increase 1 stitch at the back edge on every other row 3 times by working 2 dc in the last stitch.
5. Underarm shaping: At the side-seam edge, leave 4 (4, 5, 5, 6, 6, 7) stitches unworked once. Then decrease 1 stitch at the same edge on the next 3 right-side rows.
6. Continue: Work even until panel length from lower edge is approximately 13 (13.5, 14, 14.5, 15, 15.5, 16) inches, or 3 to 4 inches below your shoulder point.
7. Back neckline slope: At the back-opening edge, decrease 1 stitch every row 5 times. Fasten off after the final row.
Fit checkpoint: Pin both panels around your torso with the intended center-back gap. The side seams should sit just behind the midline of your body, and the upper edge should reach the underarm without cutting in. Add or remove even rows here before making the lace.
Part 2: Reinforced Corset Edge
With right side facing and Yarn A, join at the lower back edge of one side panel.
Row 1: Single crochet evenly up the entire back-opening edge. Aim for 2 sc per 3 row ends. Adjust so the band lies flat.
Row 2: Chain 1, turn. Single crochet in first 2 stitches, chain 2, skip 2 stitches, single crochet in next 4 stitches. Repeat to near top, ending symmetrically. These chain-2 spaces are your corset eyelets.
Row 3: Chain 1, turn. Single crochet in each sc and work 2 sc in every chain-2 space. Fasten off.
Repeat for the second side, mirroring eyelet placement so every opening aligns horizontally with its partner.
Part 3: Long Fern Lace Yoke
Make 2 mirrored fern fronds with Yarn A and your smaller hook. Each frond has a central chain spine with paired graduated leaflets. The motif is worked from the lower tip upward.
Leaflet Stitch Sequences
Small leaflet: Working around a chain arch: sc, hdc, 2 dc, tr, 2 dc, hdc, sc.
Medium leaflet: sc, hdc, 2 dc, 2 tr, dtr, 2 tr, 2 dc, hdc, sc.
Large leaflet: sc, hdc, 2 dc, 2 tr, 2 dtr, tr, 2 dtr, 2 tr, 2 dc, hdc, sc.
Fern Frond Instructions
1. Spine: Chain 49. Beginning in 2nd chain from hook, slip stitch in next 8 chains. Place marker. The unworked foundation forms the upper spine.
2. Pair 1: Chain 7, work a Small Leaflet around the chain, slip stitch back into marked spine point. Rotate slightly. Chain 7 and make a second Small Leaflet on the opposite side. Slip stitch into next spine chain.
3. Pair 2: Slip stitch in next 3 spine chains. Chain 9, make Medium Leaflet. Return with slip stitch to spine. Repeat opposite side.
4. Pair 3: Slip stitch in next 3 spine chains. Chain 11, make Large Leaflet on each side.
5. Pairs 4-6: Repeat Pair 3 three more times, spacing each pair 3 spine chains apart. These create the widest middle portion of the fern.
6. Pair 7: Chain 9 and make Medium Leaflets on each side.
7. Pair 8: Chain 7 and make Small Leaflets on each side.
8. Upper taper: Slip stitch toward the spine tip, then work 3 tiny terminal leaves: chain 5, sc, hdc, 2 dc, hdc, sc around chain, slip stitch into next spine chain. Repeat for all three.
9. Finish: Single crochet down the opposite exposed side of the spine, placing 1 sc per foundation chain. This stabilizes the frond. Fasten off leaving a long sewing tail.
Mirror the second frond by arranging the leaflets so the fuller outside edge faces the shoulder and the straighter spine faces the center back. Block both fronds to equal length before joining.
Part 4: Joining Ferns to the Body
1. Lay the two side panels flat with the back edges parallel and the intended corset gap between them.
2. Position one fern from the lower back edge upward at a diagonal so its bottom tip begins about 2 to 3 inches above the waist and its upper end reaches the shoulder zone.
3. Using Yarn A and a tapestry needle, tack the outer tips of each leaflet to the top/inner edge of the side panel. Keep 0.5 to 1 inch open spaces between leaflets so the lace remains airy.
4. Secure the fern spine to the inner/top edge only at every third spine stitch. Do not over-sew or the motif will pucker.
5. Repeat symmetrically for the second side. The two spines should frame the corset opening without touching.
Part 5: Shoulder Scallop Sections
These broad shoulder pieces bridge the upper side panel to the top of each fern. Make 2.
Row 1: Chain 31 (35, 39, 43, 47, 51, 55). Double crochet in 4th chain from hook and across.
Row 2: Chain 4, turn. Skip 2 stitches, 5 tr in next stitch, skip 2 stitches, sc in next stitch. Repeat across. Adjust the final repeat to end with sc.
Row 3: Chain 5. Single crochet in center tr of shell, chain 5, sc in next sc, chain 5. Repeat across. This forms open arches.
Row 4: Into each chain-5 arch work (sc, hdc, 3 dc, hdc, sc). These are your broad scallops.
Fasten off. Block to a gently curved shoulder-cap shape.
Sew the lower long edge to the upper side panel. Join the inner scalloped edge to the final 2 to 3 leaflets of the fern using discreet whip stitches.
Part 6: Neck and Upper Back Stabilizing Edge
1. With Yarn A, join at the outer shoulder. Single crochet evenly around the full upper opening, including across shoulder lace and the top edge of the fern. Do not work across the center-back opening.
2. Work a second row of single crochet, decreasing every 10 to 12 stitches as needed so the edge gently hugs the body rather than flaring.
3. With Yarn B, surface slip stitch along the completed upper edge for a fine sage outline. Keep tension loose.
Part 7: Pointed Leaf Hem
Work the hem after the top fits correctly. The sample uses large pointed leaves outlined in sage.
Basic Hem Leaf Motif
Join Yarn A to lower edge. Chain 10. Starting in 2nd chain from hook: slip stitch, sc, hdc, dc, 2 tr, dc, hdc, sc. Chain 2, then work back up the unused loops on the opposite side: sc, hdc, dc, 2 tr, dc, hdc, sc, slip stitch. Slip stitch into body edge 3 to 4 stitches from origin. Repeat around the lower edge, adjusting spacing so the final leaves are even.
Sage Tracing
With Yarn B, join at the base of a leaf and surface slip stitch around the entire leaf outline. At the very tip, make a picot, then continue down the opposite edge. Repeat for all leaves. This creates the pale sage botanical line visible in the design.
Part 8: Hip Fern-Tip Appliques
Make 2 in Yarn B.
1. Chain 19. Slip stitch in 2nd chain and next 3 chains.
2. Chain 5, work sc, hdc, 2 dc, hdc, sc around chain, slip stitch in next 2 spine chains. Repeat 4 times.
3. Finish with one 3-chain tip leaf, then slip stitch down the opposite side of the foundation chain.
4. Block flat. Sew one applique to each back hip above the leaf hem, with the stem angled upward toward the waist.
Part 9: Sage Corset Lacing Cord
1. With Yarn B and smaller hook, chain 220 to 260, or enough to lace from upper back to waist plus at least 16 inches extra for tying.
2. Slip stitch in each chain back to the beginning for a firm round cord. Fasten off and weave ends tightly.
3. Optional sturdier cord: Make a crochet Romanian cord instead, working to the same finished length.
4. Beginning at the top, lace in an even X pattern through corresponding eyelets. Keep tension comfortable and symmetrical.
5. At the waist, tie a small bow. Trim cord length only after trying on.
Part 10: Side Seams and Final Assembly
1. With right sides together, seam each side from the lower hem to the underarm using mattress stitch or a neat slip-stitch seam. Leave enough ease for normal breathing and movement.
2. If the shoulder pieces were made separately, secure all joins again from the wrong side with short invisible tacks.
3. Weave in every yarn end. Split thick tails and weave in two directions through dense fabric for security.
4. Steam or wet block: Pin body panels to measurements, then separately pin each fern leaflet and hem leaf to a clean point. Allow to dry completely.
5. Insert the lacing cord only after blocking so it does not stretch unevenly.
Fit Adjustments
| Issue | Adjustment |
|---|---|
| Back gap too wide | Add 1 to 3 rows of dc to each back edge before working the corset band |
| Back gap too narrow | Remove 1 to 2 columns of dc from each back edge or lace more loosely |
| Underarm gapes | Add an extra decrease at the side-seam edge on 1 to 2 RS rows |
| Waist too loose | Add a decrease row to each side panel, or add hidden elastic/twill tape inside the waist |
| Shoulder lace slips outward | Tighten the upper stabilizing sc edge by decreasing every 7 to 9 stitches |
| Fern motif buckles | Block more aggressively and resew only leaflet tips instead of entire edges |
| Hem flares too much | Anchor each leaf 1 stitch closer together or omit 1 to 2 leaves total |
Optional Front Construction
The pattern focuses on the dramatic back, so the front is intentionally flexible. For a matching fitted front, continue each side panel around the torso and join at center front with a vertical seam. Alternatively, create two simple triangular bust cups.
Simple Cup Option
1. Chain 14 (15, 16, 17, 18, 19, 20). Half double crochet in 2nd chain and across. In last chain work 5 hdc, then work hdc down the opposite side of the foundation chain. Turn.
2. For each next row, hdc to the center 5-stitch group, work 2 hdc in each of the center 3 stitches, then hdc to end. Turn.
3. Repeat until cup covers from center front to side breast with 0.5 inch negative ease. Make 2.
4. Seam cup bottoms to the front body edge. Join inner cup edges together for 1 to 2 inches at center front.
5. Finish neckline with 2 rows of single crochet and optional sage surface slip stitch.
Finishing Checklist
Before you call this project complete, run through this list:
Care Instructions
Hand wash or use a gentle cold cycle in a mesh bag. Reshape while damp and dry flat. Avoid hanging when wet, as cotton lace can lengthen. Store folded.
If using bamboo-rich yarn, block lightly because the fabric may grow more than pure cotton.
Final Thoughts on This Teal Fern Corset Top Crochet Pattern
This is one of those projects that looks absolutely impossible until you break it down into pieces. And then suddenly you realize you are just making leaves and rectangles and putting them together in a clever way.
The finished corset top is a true statement piece. Wear it to a garden party, a festival, a romantic dinner, or just around the house when you want to feel like a woodland queen. The botanical details catch the light beautifully, and the corset lacing gives you that adjustable fit that works across weight fluctuations and different layering needs.
I hope Fern brings you as much joy to make as she brought me to design. She was worth the wait.
Thank you so much for choosing this pattern. If you make your own version, I would absolutely love to see it! Tag me on Instagram or share a photo on Facebook. Seeing your finished projects genuinely makes my whole week.
If you loved this teal fern corset top crochet pattern, save it to your Pinterest boards so you can find it when you are ready to start. And please leave a comment below if you make one! I read every single comment and love hearing about your projects.
Want a Quick & Easy Printable Version?
Get a clean, beautifully formatted PDF of this pattern — easy to follow step by step, ready to print or save on any device. No scrolling, no distractions, just the pattern.
Get the Printable PDF →