
Got a beautiful skein of cotton yarn sitting in your stash, waiting for the perfect project? This is it. Pull out that coral, peach, or soft apricot DK weight you have been saving and turn it into something truly special.
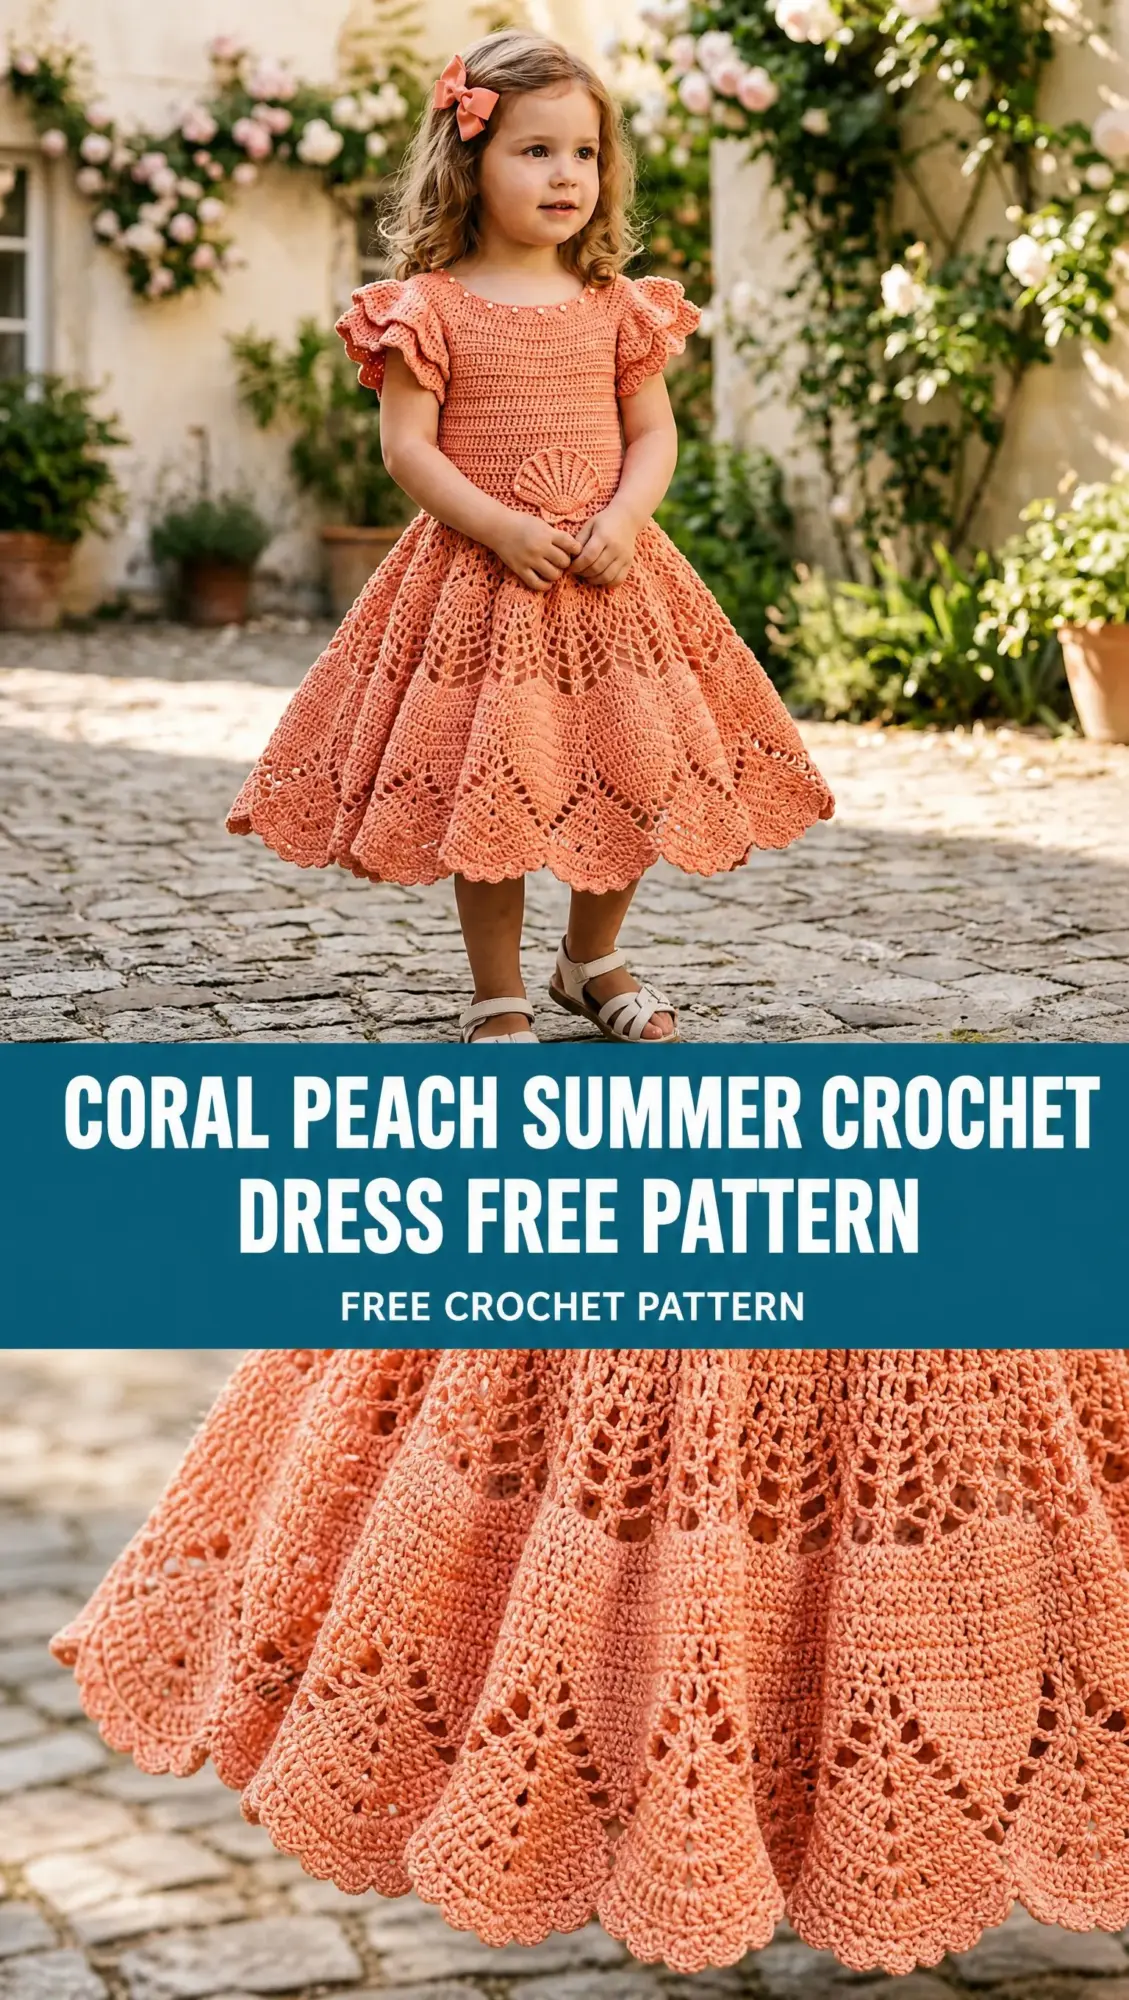
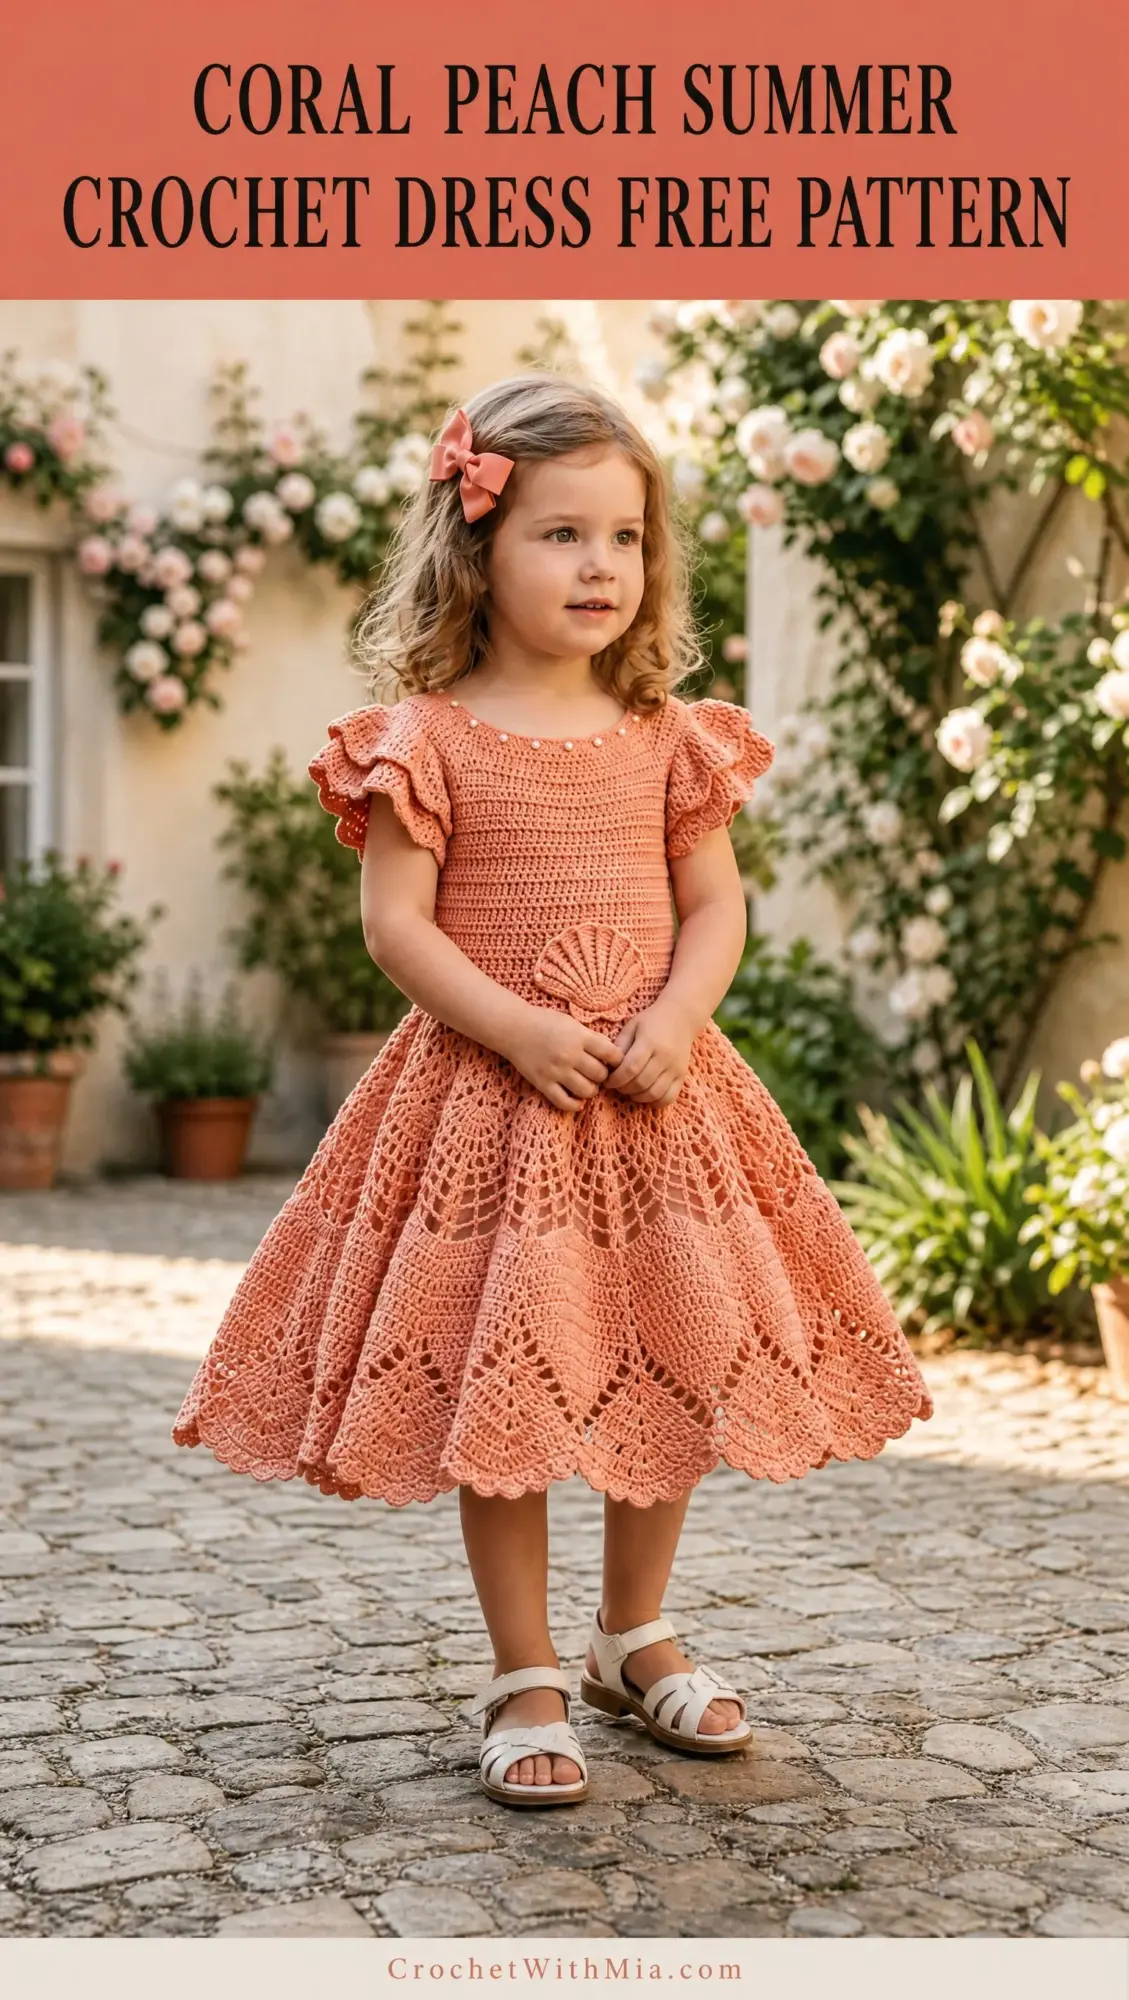
This dress combines a fitted single crochet bodice with the most gorgeous fan-and-shell lace skirt that flares out like a dream. The construction is clever: you work from the top down, add flutter ruffle sleeves directly into the armholes, then let the lace do its magic as the skirt expands naturally through strategic increases. There is even a sweet seashell motif at the waist that ties the whole coastal vibe together.
I will be honest with you about the skill level here. If you have made at least one garment and one lace project before, you can absolutely do this. The bodice is all single crochet (sc), which is straightforward. The skirt lace requires reading multi-step repeats and keeping track of chain spaces, so give yourself patience and trust the process.
Why This Crochet Dress Pattern Works So Well
The genius of this crochet dress pattern is in the construction method. Working from the top down means you can try it on as you go, which is incredibly helpful when making children’s garments. The back opening makes dressing easy for little ones, and you can choose between button loops or a simple ribbon tie closure.
The skirt uses a 12-stitch repeat that doubles through the tiers, creating that beautiful flare without you having to do complex math. The pattern does the thinking for you. Just follow the stitch counts carefully, and the lace opens up beautifully after blocking.
Materials You Will Need
Yarn: Light worsted weight or DK-weight cotton or cotton-blend yarn. Choose something smooth and mercerized for the best stitch definition. You will need approximately:
Yarn Suggestions:
Avoid fuzzy or textured yarns. They will not show the lace pattern clearly and will not block properly.
Hooks:
Using a slightly larger hook for the skirt helps the lace open correctly.
Notions:
Finished Sizes
All measurements taken after blocking. The skirt hem circumference after blocking is approximately 55 in / 140 cm for size 3T, which creates that gorgeous full silhouette.
The pattern is written for size 3T with other sizes noted in parentheses in the format: 2T (3T, 4T, 5).
Gauge
With E-4 hook (3.5 mm):
20 sc x 24 rows = 4 in x 4 in / 10 cm x 10 cm, measured after light blocking
With F-5 hook (3.75 mm) over fan lace pattern:
One complete 12-stitch fan repeat = approximately 2.25 in / 5.7 cm wide
4 rows of lace = approximately 2 in / 5 cm tall
Gauge matters here. If your swatch is too small, go up one hook size. If too large, go down one hook size. Block your swatch before measuring.
Abbreviations and Stitch Definitions
beg: beginning
BLO: back loop only
ch: chain (yarn over, pull through loop on hook)
ch-sp: chain space (the gap created by chain stitches in previous row)
dc: double crochet (yarn over, insert hook, pull up loop, yarn over and draw through 2 loops twice)
hdc: half double crochet
inc: increase (2 sc in same stitch)
join: slip stitch to join round
rem: remaining
rep: repeat
rnd: round
RS: right side
sc: single crochet (insert hook, pull up loop, yarn over, draw through both loops)
sc2tog: single crochet two together (insert hook in next st, pull up loop, insert hook in following st, pull up loop, yarn over, draw through all 3 loops)
sk: skip
sl st: slip stitch
sp: space
st(s): stitch(es)
tr: treble crochet (yarn over twice, insert hook, pull up loop, yarn over and draw through 2 loops three times)
WS: wrong side
yo: yarn over
Special Stitches for This Crochet Tutorial
Fan Stitch: Work 5 dc all into the same stitch or chain space. This cluster of 5 double crochets forms one fan. Count the fan as 5 stitches.
Picot: Ch 3, then sl st into the third chain from hook. This creates a small decorative loop.
Shell Stitch: (2 dc, ch 2, 2 dc) all into the same stitch or chain space. Count as 4 dc plus the chain-2 space.
Button Loop: Ch 5, sl st into the same stitch to form a small loop large enough for your button.
Step by Step Instructions
Section 1: Yoke and Back Opening
The dress begins with a flat piece for the back opening, then joins to work in the round.
Foundation Row (WS): Ch 73 (77, 81, 85).
Row 1 (WS): Sc in second ch from hook and in every ch across. Turn. 72 (76, 80, 84) sc
Row 2 (RS): Ch 1, sc in first st, inc in next st, sc across to last 2 sts, inc in next st, sc in last st. Turn. 74 (78, 82, 86) sc
Row 3 (WS): Ch 1, sc across. Turn. 74 (78, 82, 86) sc
Row 4 (RS): Ch 1, sc in first 10 (11, 11, 12) sts, inc in next st, sc in next 12 (12, 14, 14) sts, inc in next st, sc in next 26 (28, 28, 30) sts, inc in next st, sc in next 12 (12, 14, 14) sts, inc in next st, sc in rem 12 (12, 12, 12) sts. Turn. 78 (82, 86, 90) sc
Row 5 (WS): Ch 1, sc across. Turn. 78 (82, 86, 90) sc
Row 6 (RS): Ch 1, sc in first 10 (11, 11, 12) sts, inc in next st, sc in next 14 (14, 16, 16) sts, inc in next st, sc in next 26 (28, 28, 30) sts, inc in next st, sc in next 14 (14, 16, 16) sts, inc in next st, sc in rem 12 (12, 12, 12) sts. Turn. 82 (86, 90, 94) sc
Row 7 (WS): Ch 1, sc across. Turn. 82 (86, 90, 94) sc
Row 8 (RS): Ch 1, sc in first 10 (11, 11, 12) sts, inc in next st, sc in next 16 (16, 18, 18) sts, inc in next st, sc in next 26 (28, 28, 30) sts, inc in next st, sc in next 16 (16, 18, 18) sts, inc in next st, sc in rem 12 (12, 12, 12) sts. Turn. 86 (90, 94, 98) sc
Row 9 (WS): Ch 1, sc across. Turn. 86 (90, 94, 98) sc
Row 10 (RS): Ch 1, sc in first 10 (11, 11, 12) sts, inc in next st, sc in next 18 (18, 20, 20) sts, inc in next st, sc in next 26 (28, 28, 30) sts, inc in next st, sc in next 18 (18, 20, 20) sts, inc in next st, sc in rem 12 (12, 12, 12) sts. Turn. 90 (94, 98, 102) sc
Row 11 (WS): Ch 1, sc across. Turn. 90 (94, 98, 102) sc
Row 12 (RS): Ch 1, sc in first 10 (11, 11, 12) sts, inc in next st, sc in next 20 (20, 22, 22) sts, inc in next st, sc in next 26 (28, 28, 30) sts, inc in next st, sc in next 20 (20, 22, 22) sts, inc in next st, sc in rem 12 (12, 12, 12) sts. Turn. 94 (98, 102, 106) sc
Row 13 (WS): Ch 1, sc across. Turn. 94 (98, 102, 106) sc
Row 14 (RS): Ch 1, sc in first 11 (11, 12, 12) sts, inc in next st, sc in next 20 (22, 22, 24) sts, inc in next st, sc in next 28 (28, 30, 30) sts, inc in next st, sc in next 20 (22, 22, 24) sts, inc in next st, sc in rem 12 (12, 12, 12) sts. Turn. 98 (102, 106, 110) sc
Row 15 (WS): Ch 1, sc across. Turn. 98 (102, 106, 110) sc
Checkpoint: After Row 15, your piece should measure approximately 2.5 in / 6.4 cm from the foundation chain.
Section 2: Dividing for Armholes
Now you will separate the sleeves and join front to back to work in the round.
Row 16 (RS): Ch 1, sc across right back 11 (12, 12, 13) sts, sk next 22 (22, 24, 26) sleeve sts (place markers at first and last skipped st), ch 4, sc across front 30 (32, 34, 34) sts, sk next 22 (22, 24, 26) sleeve sts, ch 4, sc across left back 13 (14, 12, 11) sts. Do not join. Turn.
Row 17 (WS): Ch 1, sc across all sts including into each ch of both underarm bridges. Turn. 62 (66, 66, 66) sc
Row 18 (RS, sizes 2T and 3T): Ch 1, sc across. Turn. 62 (66) sc
Row 18 (RS, sizes 4T and 5): Ch 1, sc across first 17 sts, inc in next st, sc across to last 17 sts, inc in next st, sc to end. Turn. 68 (68) sc
Now join to work in rounds.
Round 19: Ch 1, sc in each st around, join. 62 (66, 68, 68) sc
Rounds 20 through 28: Ch 1, sc in each st around, join. 62 (66, 68, 68) sc each round
Checkpoint: After Round 28, the bodice should measure approximately 4.5 in / 11.4 cm from the neckline foundation.
Section 3: Waist Round
This round prepares the stitch count for the skirt lace. You need a count divisible by 12.
Round 29 (Waist Increase Round): Ch 1, sc evenly around, working increases evenly spaced to reach the target count. Join.
Round 30 (sizes 3T, 4T, 5 only): Ch 1, sc around with increases spaced evenly. Join.
Final stitch counts entering skirt:
Switch to the F-5 hook now.
Section 4: Flutter Ruffle Sleeves
Work the sleeves before the skirt.
With F-5 hook and RS facing, join yarn at center underarm of one armhole.
Round 1: Ch 1, sc evenly around the entire armhole opening. Join. 26 (26, 28, 30) sc
Round 2 (Ruffle Increase): Ch 3 (counts as dc), dc in same st, 2 dc in each st around. Join to top of beginning ch-3. 52 (52, 56, 60) dc
Round 3 (Ruffle Scallop): Ch 1, sl st in first st, (sk 1 st, 5 dc in next st, sk 1 st, sl st in next st) across. Join. 13 (13, 14, 15) scallop repeats
Fasten off and weave in ends. Repeat for second armhole.
Optional: For a fuller double-layer ruffle, re-join yarn to the sl sts of Round 3 and repeat Rounds 2 and 3 once more.
Section 5: Seashell Waist Motif
Round 1: Magic ring, ch 3 (counts as dc), work 11 dc into ring. Join with sl st to top of beginning ch-3. 12 dc
Round 2: Ch 1, sc in same st, (ch 3, sk 1 st, sc in next st) 5 times, ch 3, join to first sc. 6 ch-3 spaces
Round 3: Sl st into first ch-3 sp, ch 3, work 4 dc into same sp, ch 1, (5 dc into next ch-3 sp, ch 1) 5 times, join to top of beginning ch-3. 6 fans of 5 dc, 6 ch-1 sps
Fasten off, leaving a 12 in tail. Sew the motif flat at center front waistline.
Section 6: Skirt Lace Panels
Switch to F-5 hook if not already.
Skirt Foundation Round (Round 31): Ch 4 (counts as dc plus ch 1), (dc in next st, ch 1) around. Join to 3rd ch of beginning ch-4. 36 (42, 42, 48) dc plus 36 (42, 42, 48) ch-1 sps
Tier 1
Round A (Fan Round): Sl st into first ch-1 sp, ch 3, 2 dc in same sp, ch 1, sk next ch-1 sp, (3 dc in next ch-1 sp, ch 1, sk next ch-1 sp) around. Join.
Round B (Arch Round): Ch 1, sc in center dc of first 3-dc group, ch 5, (sc in center dc of next 3-dc group, ch 5) around. Join to first sc. 18 (21, 21, 24) sc, 18 (21, 21, 24) ch-5 arches
Round C (Shell Round): Sl st into first ch-5 arch sp, ch 3, 4 dc in same arch sp, ch 1, sc into next sc between arches, ch 1, (5 dc into next ch-5 arch sp, ch 1, sc into next sc, ch 1) around. Join. 18 (21, 21, 24) fans of 5 dc each
Tier 2
Round D (Increase Arch Round): Sl st into sp between first dc-fan and adjacent ch-1, ch 1, sc in this sp, ch 3, sc into top center of same fan, ch 3, (sc in ch-1 sp after fan, ch 3, sc in center of next fan, ch 3) around. Join. 36 (42, 42, 48) sc, 36 (42, 42, 48) ch-3 arches
Round E (Fan Increase Round): Sl st into first ch-3 arch sp, ch 3, 4 dc in same sp, ch 2, (5 dc into next ch-3 arch sp, ch 2) around. Join. 36 (42, 42, 48) fans of 5 dc each
This round doubles the number of fans, creating the skirt flare.
Round F (Connector Round): Ch 1, sc into top of first dc of first fan, ch 2, sk 3 dc, sc into top of last dc of same fan, ch 2, sc into ch-2 sp, ch 2, (sc into first dc of next fan, ch 2, sk 3 dc, sc into last dc of same fan, ch 2, sc into ch-2 sp, ch 2) around. Join.
Tier 3
Round G (Large Fan Round): Sl st into first ch-2 sp, ch 3, 2 dc in same sp, ch 2, sk 1 ch-2 sp, sc in next ch-2 sp, ch 2, sk 1 ch-2 sp, (3 dc in next ch-2 sp, ch 2, sk 1 ch-2 sp, sc in next ch-2 sp, ch 2, sk 1 ch-2 sp) around. Join.
Round H (Deep Arch Round): Ch 1, sc in center dc of first 3-dc group, ch 6, sc in next sc between groups, ch 6, (sc in center dc of next 3-dc group, ch 6, sc in next sc, ch 6) around. Join.
Round I (Large Shell Round): Sl st into first ch-6 arch sp, ch 3, 6 dc in same arch sp, ch 1, sc in next sc, ch 1, (7 dc into next ch-6 arch sp, ch 1, sc in next sc, ch 1) around. Join.
Continue working Tier patterns or proceed to scalloped border as desired for additional length.
Finishing Your Crochet Dress
Back Closure: Work 4 to 5 button loops evenly spaced along the left back edge. Sew buttons to the right back edge to correspond.
Blocking: Soak the dress in cool water with a drop of wool wash for 15 minutes. Gently squeeze out excess water without wringing. Lay flat on blocking mats and pin the skirt lace open, stretching gently to reveal the fan patterns. Allow to dry completely.
Weave in all ends using your yarn needle, working tails through several stitches on the wrong side.
Optional ribbon: Thread matching satin ribbon through the waistline round for an accent.
Tips for Success with This Beginner Friendly Pattern
Take your time with the gauge swatch. Seriously. The bodice fit depends on it.
Count your stitches at every checkpoint. The pattern gives you specific numbers for a reason.
Use locking stitch markers liberally. Mark the beginning of rounds, mark increase positions, mark your place when you set down your work.
The skirt lace gets easier after the first tier. Once you understand the rhythm of fans to arches to shells, it flows naturally.
Block aggressively. Cotton needs to be stretched and pinned to show off the lacework properly. Do not skip this step.
Time Estimate
Plan for 14 to 22 hours for size 3T, depending on your speed. Larger sizes add 2 to 4 hours. This is not a weekend project, but it is absolutely worth the investment.
Thank you so much for choosing this pattern. I really hope you love making it as much as I loved designing it. If you finish your coral peach summer dress, I would absolutely love to see it. Tag me on Instagram or share a photo in our Facebook group.
Save this pattern to your Pinterest boards so you can find it when you are ready to start. And if you make this dress, please come back and leave a comment below. I read every single one, and hearing about your projects makes my day.