
A crocheted baby dress with raglan shaping, lace shell stitches, and applique work sounds intimidating, right? I hear this all the time from crocheters who scroll past gorgeous garment patterns because they assume the construction is beyond their skill level. Here’s the truth: if you can single crochet, double crochet, and count to six, you can absolutely make this dress.
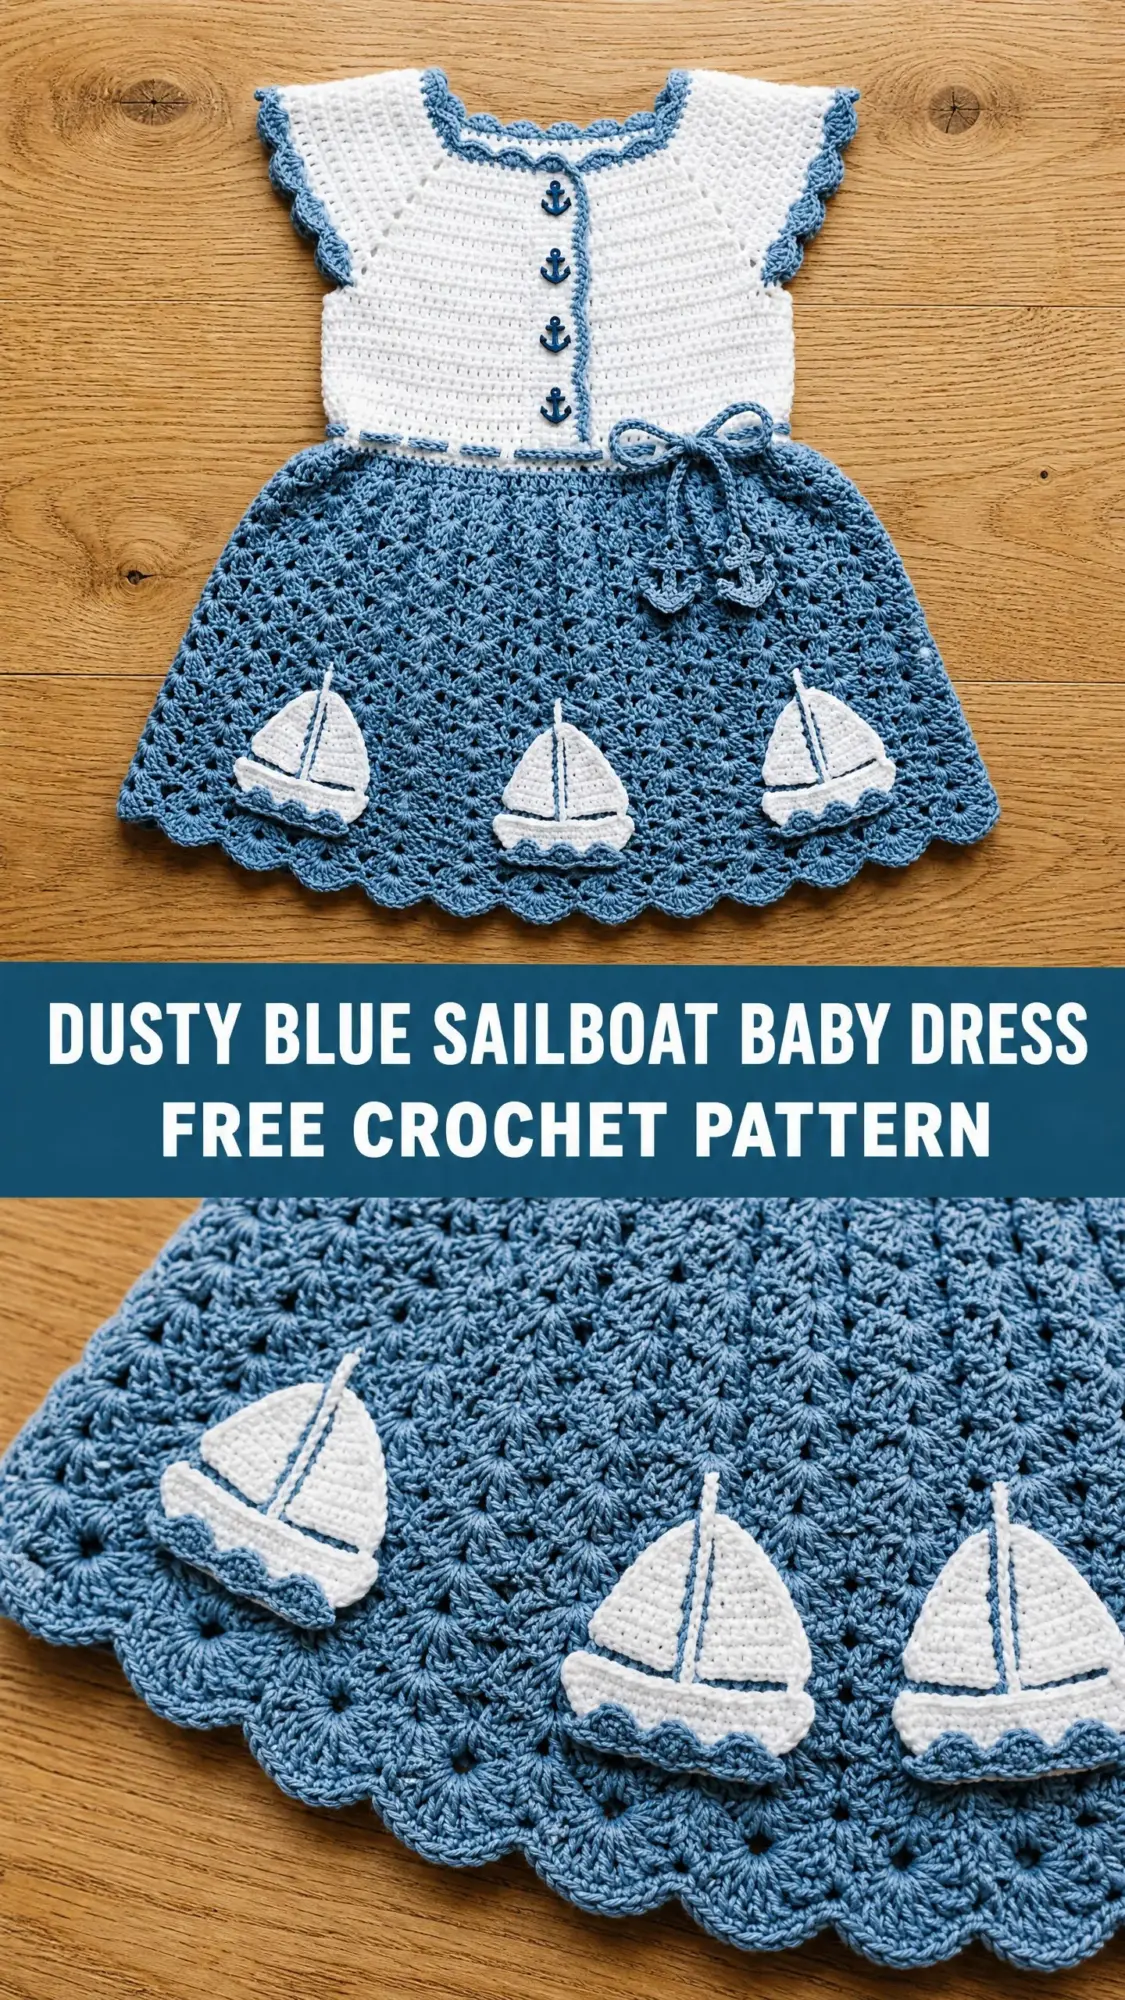
The raglan yoke is just single crochet worked flat with increases at four marked points. The lace shell skirt is a simple six stitch repeat you’ll memorize after two rounds. And those adorable sailboat appliques? Basic triangles and trapezoids sewn together. Nothing fancy, just small pieces that look impressive when assembled.
Whether you’re a confident beginner ready to level up or an experienced crocheter looking for your next baby shower gift, this pattern breaks everything down into manageable chunks. I’ll walk you through each section, explain why we’re doing what we’re doing, and give you checkpoints along the way so you always know you’re on track.
Why This Nautical Baby Dress Works So Well
The Dusty Blue Sailboat Baby Dress combines classic construction techniques with charming coastal details. The top down raglan approach means minimal seaming and easy size adjustments as you work. You start at the neckline, increase outward for the yoke, separate the sleeves, work the bodice, then let the skirt flow naturally downward.
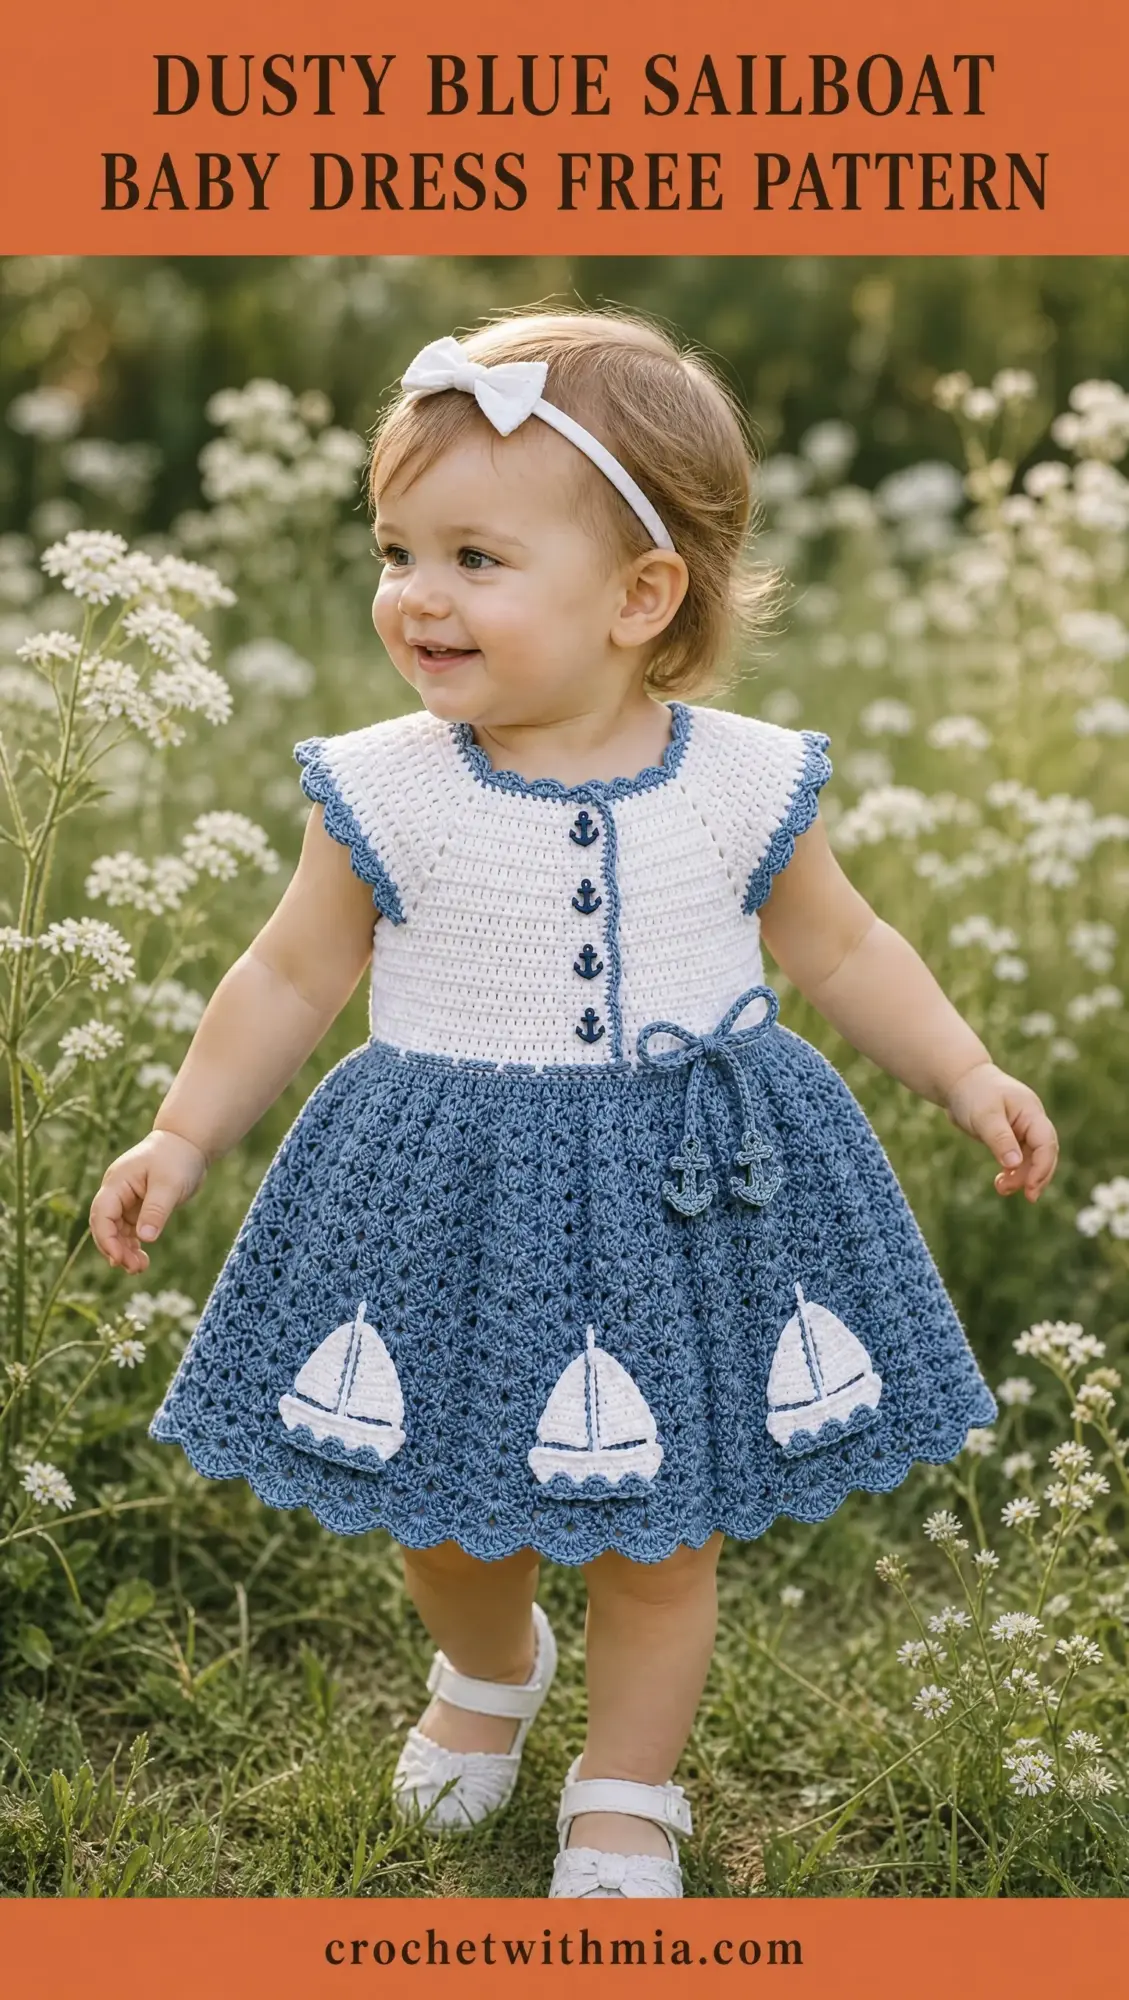
The color combination of crisp white and dusty slate blue gives this dress a timeless nautical feel without being overly themey. The anchor shaped buttons down the front, the scalloped edgings, and the sweet sailboat appliques along the hem all reinforce the seaside aesthetic.
This dress fits babies from 3 months through 24 months, with four distinct size options. The fitted bodice and flared lace skirt create a silhouette that photographs beautifully and actually stays put on a wiggly baby.
Skill Level and Time Commitment
I’m calling this an intermediate level pattern, but don’t let that scare you off. You need comfort with:
If you’ve completed two or three garment projects before, you’ll find this very achievable. If this is your first garment, just take it slow and trust the stitch counts.
Time estimate: 12 to 18 hours depending on your experience level, not including blocking and finishing.
Finished Measurements
Size 3 to 6 months: Chest 16 inches, Length 11 inches
Size 6 to 12 months: Chest 18 inches, Length 12.5 inches
Size 12 to 18 months: Chest 19 inches, Length 13.5 inches
Size 18 to 24 months: Chest 20 inches, Length 14.5 inches
All instructions are written for size 3 to 6 months. Changes for larger sizes appear in parentheses in this order: 6 to 12 months, 12 to 18 months, 18 to 24 months. Where only one number appears, it applies to all sizes.
Materials Needed
Yarn
Color A (white): Approximately 150 (175, 200, 225) yards of DK weight yarn
Color B (dusty slate blue): Approximately 250 (300, 350, 400) yards of DK weight yarn
Yarn suggestions:
Choose any DK weight yarn that achieves gauge. For baby garments, prioritize machine washable options. Avoid fuzzy or halo yarns as they’ll blur the lace pattern and applique details.
Hook
US size G-6 / 4.0 mm for all sections. Use whatever hook size achieves gauge for you.
Notions
Gauge
In single crochet flat with Color A: 18 stitches and 22 rows = 4 inches, blocked
In shell lace stitch in the round with Color B: One full repeat of 6 stitches = approximately 1.25 inches wide, 4 rounds = approximately 1.5 inches tall, blocked
Gauge matters for a fitted garment. Please swatch and adjust your hook size if needed. A smaller hook creates smaller, denser fabric. A larger hook creates looser, larger fabric.
Abbreviations and Stitch Definitions
ch = chain: yarn over, pull through loop on hook
sc = single crochet: insert hook, yarn over, pull up a loop (2 loops on hook), yarn over, pull through both loops
dc = double crochet: yarn over, insert hook, yarn over, pull up a loop (3 loops on hook), yarn over, pull through 2 loops, yarn over, pull through remaining 2 loops
sc2tog = single crochet two together (a decrease): insert hook in first stitch, pull up a loop, insert hook in next stitch, pull up a loop (3 loops on hook), yarn over, pull through all 3 loops
sl st = slip stitch: insert hook, yarn over, pull through stitch and loop on hook in one motion
sk = skip
st(s) = stitch(es)
sp = space
pm = place marker
RS = right side (the public facing side)
WS = wrong side
Special Stitches
Shell Stitch
Work 5 double crochet stitches all into the same stitch or space. This creates a fan shaped shell. The shell is the signature stitch of the skirt section.
Scallop Edging
This creates the wavy decorative edge on the sleeves, neckline, and hem.
Step 1: Slip stitch into first stitch.
Step 2: Chain 1. Work single crochet in same stitch.
Step 3: Work (skip 1 stitch, 5 double crochet in next stitch, skip 1 stitch, single crochet in next stitch) to end.
Step 4: Slip stitch to first single crochet to join.
Pattern Notes Before You Begin
1. The yoke is worked flat in rows from the neckline down, creating the front button opening.
2. Raglan increases happen on every right side row by working 2 single crochet in each of the 4 raglan marker positions.
3. After the yoke, sleeves go on hold while you join and work the bodice in the round.
4. The skirt stitch count must always be a multiple of 6 for the shell pattern to work.
5. Color A (white) is used for yoke and bodice. Color B (dusty blue) is used for skirt and all edgings.
6. All turning chains are NOT counted as stitches unless explicitly stated.
7. Move your markers up as you work.
Step by Step Instructions
Yoke
The yoke is worked flat, beginning at the neckline. It divides into five sections marked for raglan shaping: left front, left sleeve, back, right sleeve, right front.
Foundation setup:
With Color A and G-6 hook, ch 54 (58, 62, 66).
Row 1 (WS): Sc in 2nd ch from hook and in each ch across. (53 sc, 57 sc, 61 sc, 65 sc) Ch 1, turn.
Place markers as follows for size 3 to 6 months on 53 stitches:
The right front has more stitches because it includes the button band area.
For sizes 6 to 12 months (57 sts): Left front: 3 sts, sleeve: 6 sts, back: 23 sts, sleeve: 6 sts, right front: 19 sts.
For sizes 12 to 18 months (61 sts): Left front: 3 sts, sleeve: 7 sts, back: 25 sts, sleeve: 7 sts, right front: 19 sts.
For sizes 18 to 24 months (65 sts): Left front: 4 sts, sleeve: 7 sts, back: 27 sts, sleeve: 7 sts, right front: 20 sts.
Row 2 (RS, raglan increase row): Sc across to 1 st before marker A, 2 sc in next st, pm, 2 sc in next st, sc across to 1 st before marker B, 2 sc in next st, pm, 2 sc in next st, sc across to 1 st before marker C, 2 sc in next st, pm, 2 sc in next st, sc across to 1 st before marker D, 2 sc in next st, pm, 2 sc in next st, sc to end. (8 sts increased, total 61 sc, 65 sc, 69 sc, 73 sc) Ch 1, turn.
Row 3 (WS): Sc in each st across. Ch 1, turn.
Repeat Rows 2 and 3 for raglan shaping. Work a total of 10 (11, 12, 13) raglan increase rows.
After all raglan rows are complete:
CHECKPOINT: Measure your yoke depth. It should be approximately 3.5 inches for size 3 to 6 months (4 inches, 4.25 inches, 4.5 inches for larger sizes).
Separating Sleeves from Body
Next row (RS): Sc across left front (13 sts), ch 2, skip left sleeve sts (25 sts), sc across back (41 sts), ch 2, skip right sleeve sts (25 sts), sc across right front (25 sts). (83 sts total) Ch 1, turn.
Next row (WS): Sc across all sts including into each ch. (83 sc) Ch 1, turn.
Row A: Sc in each st across. (83 sc) Ch 1, turn.
Row B: Sc in each st across. (83 sc) Do not turn. Do not fasten off.
Joining Bodice to Work in Round
Fold the piece so the right front overlaps the left front by approximately 0.75 inches (the button band extension). With RS facing, slip stitch the edges together at underarm level, working 3 slip stitches through both layers.
Join Color A yarn at center front seam with slip stitch. Ch 1. Work sc around the entire bodice, adjusting stitch count to reach a multiple of 6. Slip stitch to first sc to join.
Target counts: 78 sc (84 sc, 90 sc, 96 sc)
Bodice
Work in the round in single crochet.
Rounds 1 through 6: Ch 1, sc in each st around. Sl st to first sc. (78 sc, 84 sc, 90 sc, 96 sc)
For sizes 12 to 18 months and 18 to 24 months, work 2 additional rounds.
CHECKPOINT: Bodice section should measure approximately 2 inches tall. Full piece from neckline should measure approximately 5.5 inches for size 3 to 6 months.
Waist Join Row
This row creates the eyelets for the waist tie.
With Color A: Ch 3 (counts as dc), dc in next st, (ch 1, sk 1 st, dc in next 2 sts) to end of round, ch 1, sk 1 st. Sl st to top of beginning ch-3 to join.
Next round: Ch 1, sc in each dc and sc in each ch-1 sp around. Sl st to first sc to join. (78 sc, 84 sc, 90 sc, 96 sc)
Cut Color A. Join Color B.
Skirt Increase Round
With Color B, ch 1. Work the following increase round:
Size 3 to 6 months: (Sc in next 2 sts, 2 sc in next st) 26 times, then adjust to reach 102 sc (multiple of 6).
Size 6 to 12 months: Adjust to 114 sc
Size 12 to 18 months: 120 sc (no adjustment needed)
Size 18 to 24 months: Adjust to 126 sc
Skirt Body
The skirt uses a 6 stitch lace shell repeat.
Setup round: Sl st to first st, ch 3 (counts as dc), dc in same st (half shell to begin), sk 2 sts, sc in next st, sk 2 sts, (shell of 5 dc in next st, sk 2 sts, sc in next st, sk 2 sts) to last 4 sts, 3 dc in last st. Sl st to top of ch-3.
Skirt Round 1: Ch 1, sc in first st (sc of previous round). (Sk 2, shell in next st, sk 2, sc in next st) around. Sl st to first sc.
Skirt Round 2: Ch 3, 2 dc in first st for partial beginning shell, (sc in center dc of next shell, sk 2 dc, shell in next sc between shells) around, ending with sc in center dc of last shell. Sl st to top of ch-3.
Repeat Rounds 1 and 2 alternately for a total of 14 (16, 18, 20) rounds.
CHECKPOINT: Skirt should measure approximately 4.5 inches (5.5 inches, 6 inches, 6.5 inches) depending on size.
Scallop Hem Edging
Adjust final stitch count to a multiple of 4 for scallop edging:
Scallop Round: Ch 1, sc in first st. (Sk 1 st, 5 dc in next st, sk 1 st, sc in next st) around. Sl st to first sc. Fasten off. Weave in end.
Sleeves
Return to held sleeve stitches. Join Color A at center underarm.
Pickup round: Ch 1, sc in each held sleeve st, pick up and sc 2 sts from the ch-2 underarm bridge. Sl st to first sc. (27 sc, 29 sc, 31 sc, 33 sc)
Rounds 1 and 2: Ch 1, sc in each st around. Sl st to first sc.
Join Color B. Adjust stitch count to multiple of 4 (28 or 32 sts depending on size).
Sleeve Scallop Edging: Ch 1, sc in first st. (Sk 1, 5 dc in next st, sk 1, sc in next st) around. Sl st to first sc. Fasten off.
Repeat for second sleeve.
Neckline Edging
With Color B and RS facing, join yarn at top right corner of neckline.
Work sc evenly along right front edge (approximately 1 sc per row end), sc across back neckline, sc down left front edge.
Work scallop pattern: sc in first st. (Sk 1, 5 dc in next st, sk 1, sc in next st) across. Fasten off.
Sailboat Appliques
Make 3 sailboats for size 3 to 6 months (2 to 4 depending on skirt circumference for larger sizes).
Hull
With Color A, ch 13.
Row 1 (RS): Sc in 2nd ch from hook, sc in each ch across. (12 sc) Ch 1, turn.
Row 2: Sc in each st across. (12 sc) Ch 1, turn.
Row 3: Sc2tog, sc in next 8 sts, sc2tog. (10 sc) Ch 1, turn.
Row 4: Sc2tog, sc in next 6 sts, sc2tog. (8 sc) Ch 1, turn.
Row 5: Sc2tog, sc in next 4 sts, sc2tog. (6 sc) Fasten off, leaving long tail for sewing.
Edging: With Color B, work 1 round of sc evenly around hull. Sl st to join. Fasten off.
Main Sail (Large Triangle)
With Color A, ch 2.
Row 1: 3 sc in 2nd ch from hook. (3 sc) Ch 1, turn.
Row 2: 2 sc in first st, sc in next st, 2 sc in last st. (5 sc) Ch 1, turn.
Row 3: 2 sc in first st, sc in next 3 sts, 2 sc in last st. (7 sc) Ch 1, turn.
Row 4: 2 sc in first st, sc in next 5 sts, 2 sc in last st. (9 sc) Ch 1, turn.
Row 5: 2 sc in first st, sc in next 7 sts, 2 sc in last st. (11 sc) Ch 1, turn.
Row 6: 2 sc in first st, sc in next 9 sts, 2 sc in last st. (13 sc) Ch 1, turn.
Row 7: Sc in each st across. (13 sc) Fasten off.
With Color B, work 1 sc per st along all edges. Sl st to join. Fasten off.
Jib Sail (Small Triangle)
With Color A, ch 2.
Row 1: 3 sc in 2nd ch from hook. (3 sc) Ch 1, turn.
Row 2: 2 sc in first st, sc in next st, 2 sc in last st. (5 sc) Ch 1, turn.
Row 3: 2 sc in first st, sc in next 3 sts, 2 sc in last st. (7 sc) Ch 1, turn.
Row 4: 2 sc in first st, sc in next 5 sts, 2 sc in last st. (9 sc) Ch 1, turn.
Row 5: Sc in each st across. (9 sc) Fasten off.
With Color B, work 1 sc per st along all edges. Sl st to join. Fasten off.
Sailboat Assembly
Place the hull flat. Position the main sail triangle above and slightly left of center on the hull, overlapping the base of the sail over the top edge of the hull. Position the jib sail to the right of the main sail. Using Color B and a yarn needle, whip stitch each piece securely in place. Finished sailboat measures approximately 2.5 inches wide and 2.75 inches tall.
Waist Tie
Create a 24 inch length of surface chain or twisted cord in Color B. Thread through the waist join row eyelets. Attach an anchor button or crocheted anchor charm to one or both ends.
Finishing
Weave in all ends securely. Block the dress gently to measurements, using rust proof pins. Sew anchor shaped buttons evenly spaced along the front button band. Position and sew sailboat appliques evenly around the skirt hem, sitting just above the scallop edging.
Tips for Success
Take your time with the raglan increases. They seem repetitive, but consistent placement creates a professional looking yoke.
Count your stitches after every few rounds in the skirt section. The shell pattern is forgiving visually, but being off by one stitch will compound.
Block before attaching appliques. This lets the fabric relax to its true dimensions so you can place the sailboats evenly.
Use the checkpoint measurements. They’re there to catch sizing issues early, before you’ve invested hours in the skirt.
Thank you so much for choosing this pattern for your next project. I really hope you love making it as much as I loved designing it. If you make this little dress, I would absolutely love to see it! Tag me on Instagram or share a photo in my Facebook group. Seeing your finished projects honestly makes my whole week.
If this pattern is calling your name, go ahead and save it to your Pinterest boards so you can find it when you’re ready to cast on. And please drop a comment below if you make one. I love hearing which size you chose, what colors you picked, and how the little one you made it for looked wearing it!