
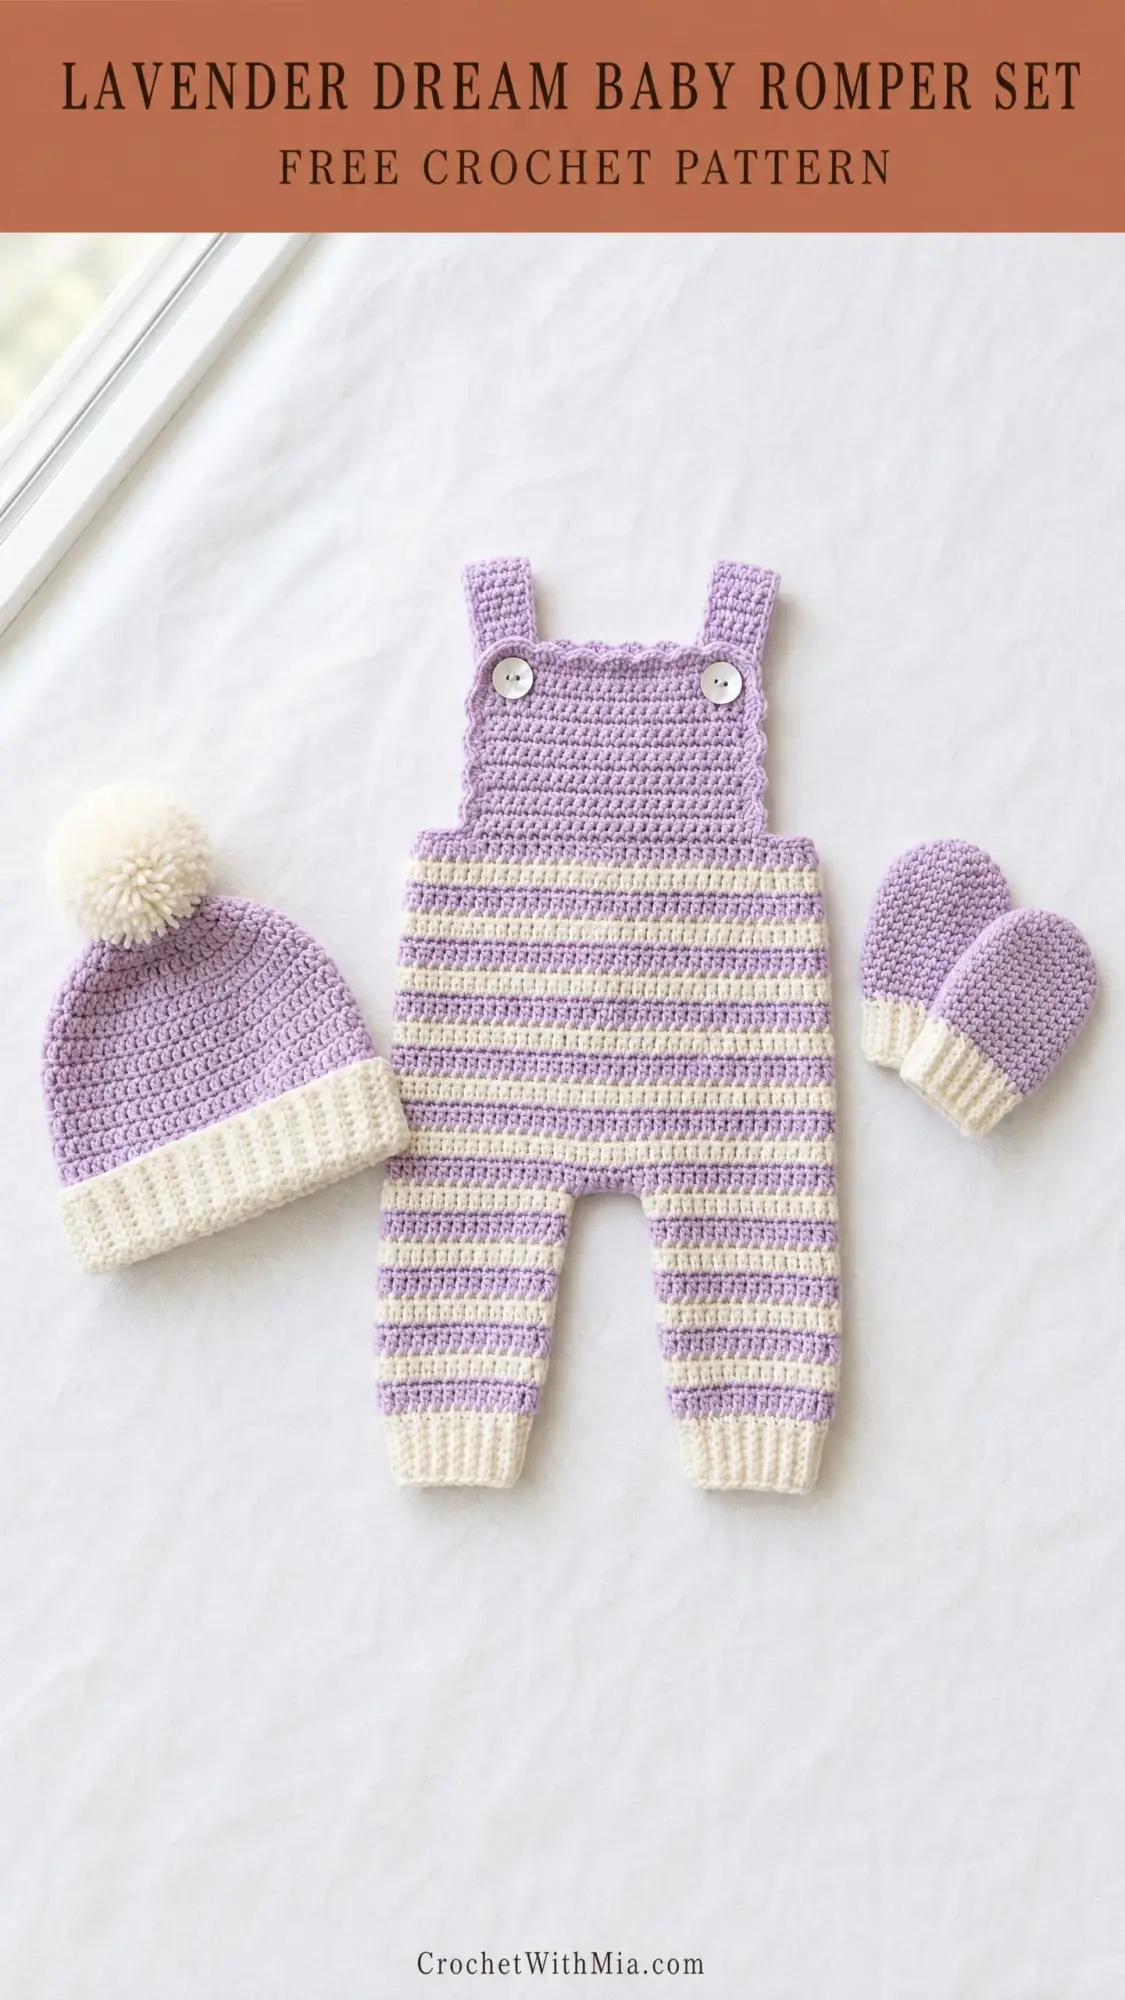
This is a three-piece baby set with a striped romper, pompom beanie, and thumbless mittens. It uses single crochet throughout with simple color changes. The finished set fits newborn to 3 months and works up in about 12 to 18 hours total.
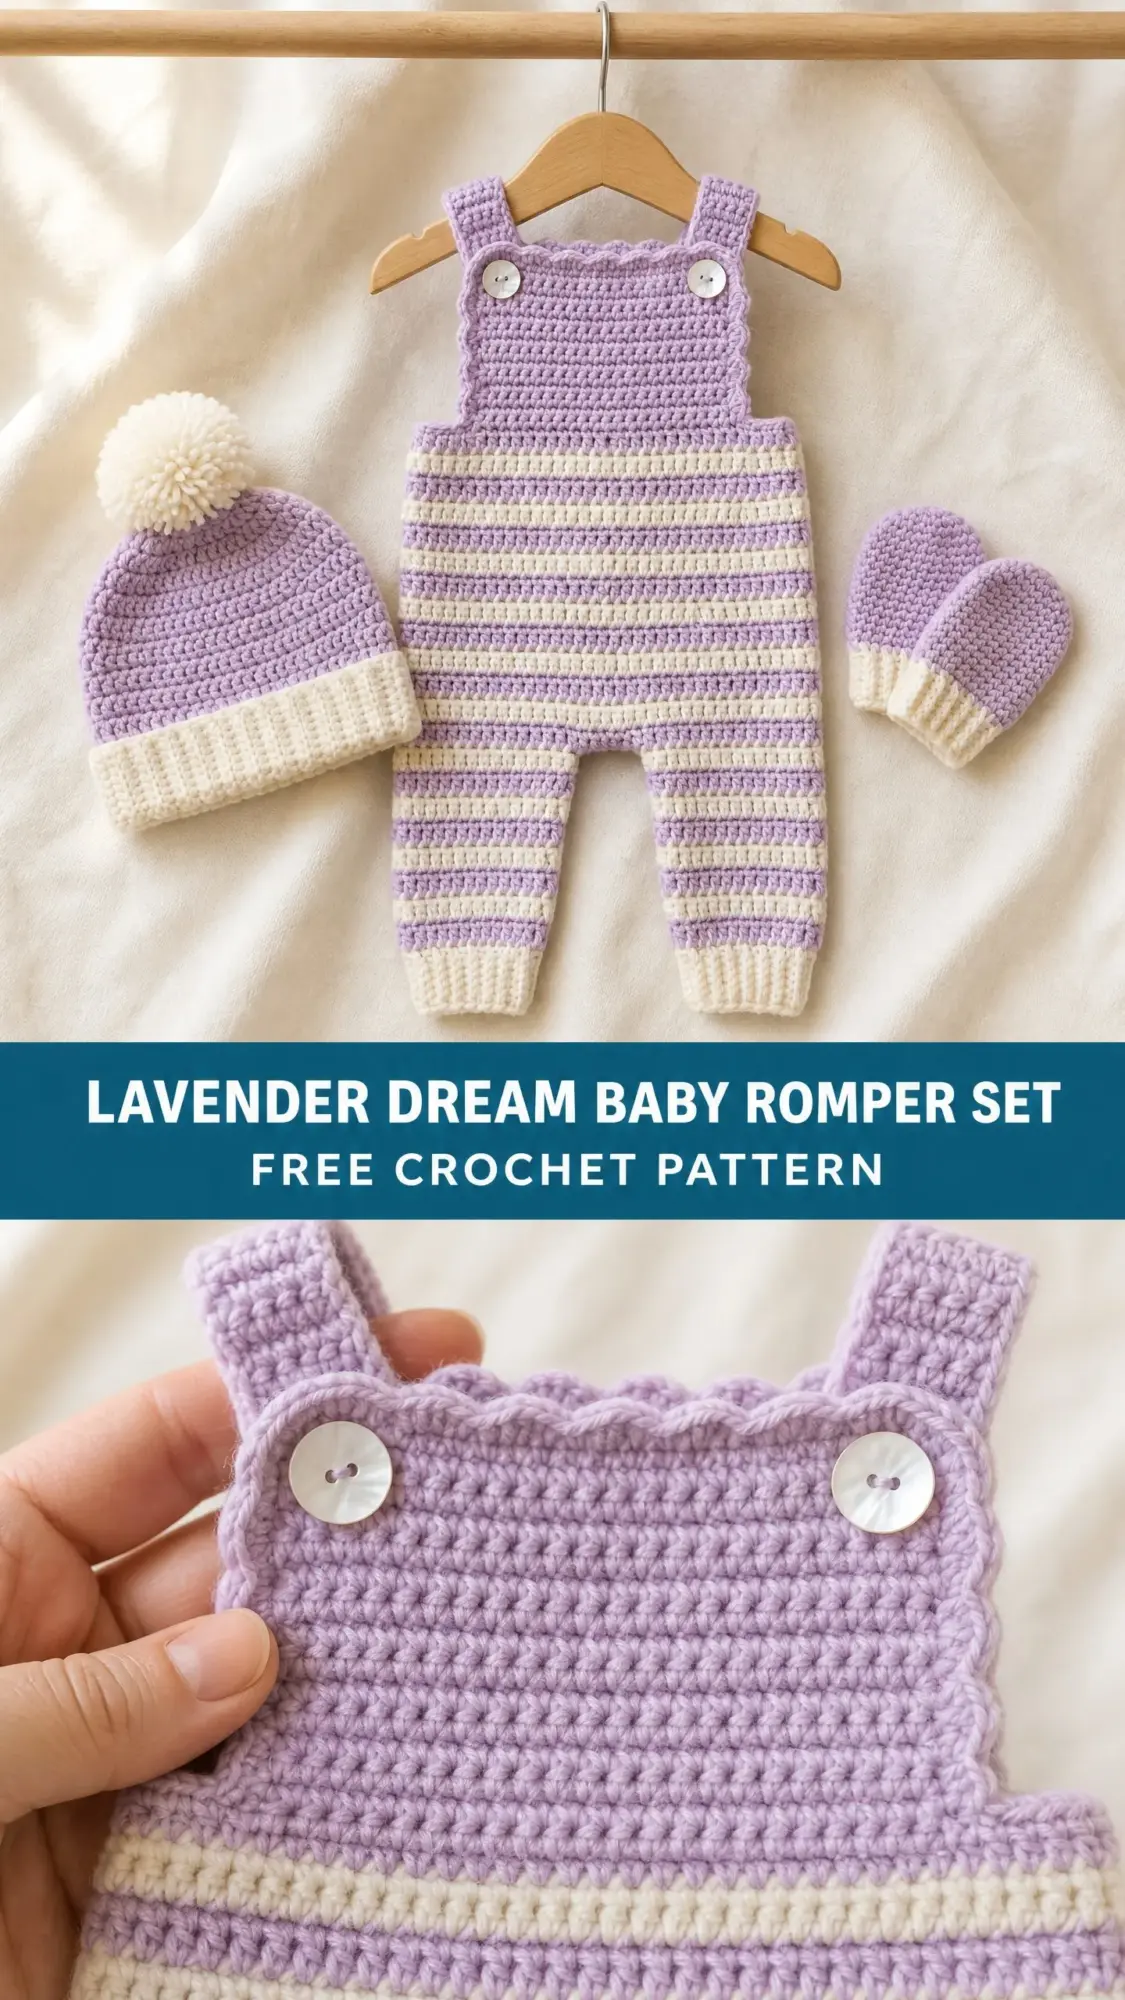
I love how the lavender and cream stripes give this set a classic handmade look without complicated colorwork. The romper has a sweet scalloped bib edge that looks fancy but only uses basic double crochet stitches grouped together.
If you can single crochet in rows and rounds, you can absolutely make this set. Let me walk you through every step.
About This Baby Romper Crochet Pattern
This pattern creates a complete baby outfit with an overall-style romper, a cozy beanie with a fluffy pompom, and a pair of simple thumbless mittens. The romper features horizontal stripes on the legs and body, a solid lavender bib with decorative scallop edging, button closures at the shoulders, and ribbed ankle cuffs.
The construction might sound tricky, but I promise it breaks down into manageable pieces. You work each leg flat as a rectangle, seam them into tubes, join them at the crotch, then work the body in rounds. The bib gets worked flat again at the top. The hat starts from the crown and works down. The mittens start from the cuff and work up.
Skill level: Intermediate. You need to be comfortable working both flat and in the round, changing colors, and doing basic seaming. No advanced stitches here, just single crochet and a bit of double crochet for the scallop trim.
Finished Measurements
Romper:
Hat:
Mittens:
Materials Needed
Yarn: DK weight (CYCA 3 / Light) in two colors
Good yarn choices include Lion Brand Pound of Love in Lavender and Vanilla, or Paintbox Yarns Simply DK in Dusty Lilac and Champagne White. Pick a smooth, plied yarn so your stripes show up crisp and clear. Baby-safe acrylic or superwash merino works great for easy washing.
Hooks:
Notions:
Gauge
With G-6 / 4.0 mm hook in single crochet (sc):
Gauge matters here because this is a fitted garment. Make a swatch, wash and dry it the way you will wash the finished set, then measure. Adjust your hook size up or down until you match.
Abbreviations
Let me explain each stitch term before we start:
Special Techniques
Stripe Sequence
The stripes follow a simple four-row repeat:
Keep repeating this pattern. When working flat, carry the unused color loosely up the side. To change colors cleanly, work your last stitch until two loops remain on the hook, then pull the new color through both loops.
BLO Single Crochet Rib
This creates stretchy ribbed cuffs. Simply work every single crochet through the back loop only instead of both loops. The ridged texture mimics knit ribbing.
Scallop Edging
This decorative trim goes along the top of the bib. You work slip stitch, skip one stitch, five double crochet in the next stitch, skip one stitch, slip stitch. Repeat across. It creates sweet little shell shapes.
Pattern Notes
The ch 1 at the beginning of single crochet rows and rounds does NOT count as a stitch throughout this entire pattern. This keeps your edges neat and your stitch counts accurate.
Color changes should always happen on the last pull-through of the previous stitch. This way the new color appears cleanly at the start of the next stitch.
Romper Instructions
Left Leg
With Color A and G-6 hook, ch 23.
Row 1 (RS): Sc in the 2nd ch from hook and in each ch across. Turn. (22 sc)
Row 2: Ch 1, sc in each st across. Turn. (22 sc)
Rows 3-22: Continue working sc in each st across, following the Stripe Sequence and changing colors as needed. Turn at the end of each row. (22 sc per row)
At the end of Row 22, do not fasten off. Set this piece aside.
Your left leg panel should measure about 5 inches tall and 5.5 inches wide.
Right Leg
With Color A and G-6 hook, ch 23.
Row 1 (RS): Sc in the 2nd ch from hook and in each ch across. Turn. (22 sc)
Row 2: Ch 1, sc in each st across. Turn. (22 sc)
Rows 3-22: Continue working sc in each st across, following the Stripe Sequence. Turn at the end of each row. (22 sc per row)
At the end of Row 22, fasten off, leaving a 12-inch (30.5 cm) tail for seaming.
Seam Each Leg
Fold each leg panel in half lengthwise with wrong sides together (so the right side faces out). Whipstitch the short edges together using the yarn tail to create a tube. This seam becomes the inseam. Weave in ends.
Join Legs and Work Body in the Round
Arrange both leg tubes so the seams sit at center back and center front.
With the working yarn still attached to the left leg, place the right leg directly alongside.
Round 1: Sc in each of the 22 sts across the top of the left leg, then sc in each of the 22 sts across the top of the right leg. Join with sl st to the first sc. PM at join. (44 sc)
You are now working in the round. Continue the stripe sequence from where you left off.
Rounds 2-16: Ch 1, sc in each st around. Join with sl st to first sc. Change color per Stripe Sequence. (44 sc per round)
After Round 16, the joined body should measure about 7 inches from the crotch join upward.
Divide for Bib Front
The bib front uses the front 28 stitches. The remaining 16 stitches form the back opening.
Count forward 14 stitches from each side seam point to mark your 28-stitch front section. PM at each end.
Row 1 (RS, flat): With Color A, join yarn at the right bib marker. Ch 1, sc in each of the next 28 sts. Turn. Do not work the back 16 sts. (28 sc)
Row 2: Ch 1, sc in each st across. Turn. (28 sc)
Rows 3-14: Continue in sc, using Color A only (no stripes on the bib front). Turn at end of each row. (28 sc per row)
The bib front should measure about 3 inches tall and 7 inches wide.
Scallop Edging on Bib Front
First, work an adjustment row to get the right stitch count for the scallop pattern:
Adjustment Row: Ch 1, sc in the first st, sc2tog, sc in each of next 22 sts, sc2tog, sc in the last st. Turn. (26 sc)
Scallop Row: Do not turn. Working along the top edge in the same direction: Sl st in the first st, (skip 1 st, 5 dc in next st, skip 1 st, sl st in next st) repeat across. (6 scallops)
Fasten off. Weave in ends.
Bib Back Straps (Make 2)
With Color A and G-6 hook, ch 9.
Row 1: Sc in the 2nd ch from hook and in each ch across. Turn. (8 sc)
Rows 2-18: Ch 1, sc in each st across. Turn. (8 sc per row)
Buttonhole Row 19: Ch 1, sc in the first 3 sts, ch 2, skip 2 sts, sc in the last 3 sts. Turn. (6 sc plus ch-2 space)
Row 20: Ch 1, sc in the first 3 sts, 2 sc in the ch-2 sp, sc in the last 3 sts. Turn. (8 sc)
Rows 21-24: Ch 1, sc in each st across. Turn. (8 sc per row)
Fasten off, leaving a 12-inch tail for seaming.
Each strap should measure about 1.75 inches wide and 6 inches long.
Attach Straps
Position each strap on the back of the romper so the cast-on end overlaps the top edge of the back section by about 0.5 inch. Space the straps about 2.5 inches apart from center. Whipstitch each strap securely on three sides.
Bring the buttonhole end of each strap over the shoulder to overlap the front bib by about 0.5 inch. Sew a button to the bib front at each strap position, aligning with the buttonhole.
Ankle Cuffs (Make 2)
With Color B and F-5 hook, join yarn to any st along the bottom edge of one leg.
Round 1: Ch 1, sc in BLO around the entire bottom edge. Join with sl st to first sc. (22 sc)
Rounds 2-6: Ch 1, sc in BLO in each st around. Join with sl st to first sc. (22 sc per round)
Fasten off. Weave in ends. Repeat for the second leg.
Each cuff should measure about 1 inch tall.
Pompom Beanie Instructions
Crown
With Color A and G-6 hook, make a magic ring.
Round 1: Ch 1, 6 sc in ring. Join with sl st to first sc. (6 sc)
Round 2: Ch 1, 2 sc in each st around. Join with sl st to first sc. (12 sc)
Round 3: Ch 1, (sc in next st, 2 sc in next st) around. Join with sl st to first sc. (18 sc)
Round 4: Ch 1, (sc in next 2 sts, 2 sc in next st) around. Join with sl st to first sc. (24 sc)
Round 5: Ch 1, (sc in next 3 sts, 2 sc in next st) around. Join with sl st to first sc. (30 sc)
Round 6: Ch 1, (sc in next 4 sts, 2 sc in next st) around. Join with sl st to first sc. (36 sc)
Round 7: Ch 1, (sc in next 5 sts, 2 sc in next st) around. Join with sl st to first sc. (42 sc)
Round 8: Ch 1, (sc in next 6 sts, 2 sc in next st) around. Join with sl st to first sc. (48 sc)
Round 9: Ch 1, (sc in next 7 sts, 2 sc in next st) around. Join with sl st to first sc. (54 sc)
The crown circle should measure about 4.75 inches in diameter.
Hat Body
Round 10: Ch 1, sc in each st around. Join with sl st to first sc. Change to Color B. (54 sc)
Rounds 11-18: Continue in sc around, following the Stripe Sequence. Join with sl st to first sc. (54 sc per round)
Hat Brim
Switch to F-5 hook and Color B only.
Round 19: Ch 1, sc in BLO in each st around. Join with sl st to first sc. (54 sc)
Rounds 20-23: Ch 1, sc in BLO in each st around. Join with sl st to first sc. (54 sc per round)
Fasten off. Weave in ends.
Make Pompom
Using Color B, wrap yarn about 80 times around a 2.5-inch pompom maker or cardboard template. Tie off tightly at center with a 12-inch length of Color A. Cut loops, fluff, and trim into a round shape about 2 inches in diameter. Thread the ties through the center of Round 1 at the crown. Knot securely inside and weave in ends.
Thumbless Mittens Instructions (Make 2)
Cuff
With Color B and F-5 hook, ch 18. Join with sl st to first ch to form a ring, being careful not to twist.
Round 1: Ch 1, sc in BLO in each ch around. Join with sl st to first sc. (18 sc)
Rounds 2-4: Ch 1, sc in BLO in each st around. Join with sl st to first sc. (18 sc per round)
The cuff should measure about 0.75 inch tall. Switch to G-6 hook.
Mitten Body
Round 5: With Color A and G-6 hook, ch 1, sc in each st around. Join with sl st to first sc. (18 sc)
Rounds 6-16: Continue in sc around, following the Stripe Sequence starting from Color A. Join with sl st to first sc. (18 sc per round)
Mitten Top Shaping
Switch to Color A for all remaining rounds.
Round 17: Ch 1, (sc in next 7 sts, sc2tog) twice. Join with sl st to first sc. (16 sc)
Round 18: Ch 1, (sc in next 6 sts, sc2tog) twice. Join with sl st to first sc. (14 sc)
Round 19: Ch 1, (sc in next 5 sts, sc2tog) twice. Join with sl st to first sc. (12 sc)
Round 20: Ch 1, (sc in next 4 sts, sc2tog) twice. Join with sl st to first sc. (10 sc)
Round 21: Ch 1, (sc in next 3 sts, sc2tog) twice. Join with sl st to first sc. (8 sc)
Fasten off, leaving a 10-inch tail. Thread tail through remaining 8 sts, pull tight to close. Knot securely and weave in end on inside.
Size Customization Tips
For 3-6 months: Add 2 stitches to each leg panel (24 sts per leg), add 4 rounds to leg length before joining, add 4 rounds to body before the bib, and increase bib width to 30 stitches. For the hat, add one more increase round (60 sc) and 2 more body rounds. For mittens, chain 20 for the cuff and add 2 body rounds.
For 6-9 months: Add 4 stitches to each leg panel (26 sts per leg), add 8 rounds to leg length, add 6 rounds to body, and adjust bib to 32 stitches. Hat circumference increases to 66 sc. Mitten cuff starts with 22 stitches plus 4 extra body rounds.
Finishing and Care
Weave in all yarn tails on the wrong side. For wet blocking, hand wash in cool water with mild detergent, squeeze out excess water without wringing, and lay flat to dry pinned to measurements.
For acrylic yarn, steam block by holding a steam iron several inches above the fabric. Never press directly onto the yarn.
Machine wash cold on gentle cycle in a mesh bag. Lay flat to dry. Do not tumble dry.
You Did It!
This baby romper set crochet pattern looks impressive, but it really is just single crochet with a few color changes and simple shaping. Take your time with each piece, check your stitch counts, and you will end up with an heirloom-quality baby gift.
The scalloped bib edge adds that special handmade touch that makes people say "you made that?!" And the matching hat and mittens turn it into a complete coming-home outfit or photo prop.
Thank you so much for choosing this pattern. I hope you enjoy every stitch.
If you want to save this lavender baby romper crochet pattern for your next project, go ahead and pin it to your Pinterest boards. And please drop a comment below if you make this set. I would absolutely love to see your finished projects and hear which colors you chose!