
Baby garments with bobble stitches look intimidating. I get it. All those little textured bumps, the color changes, the tiny armholes. It feels like a project reserved for advanced crocheters with years of experience under their belts.
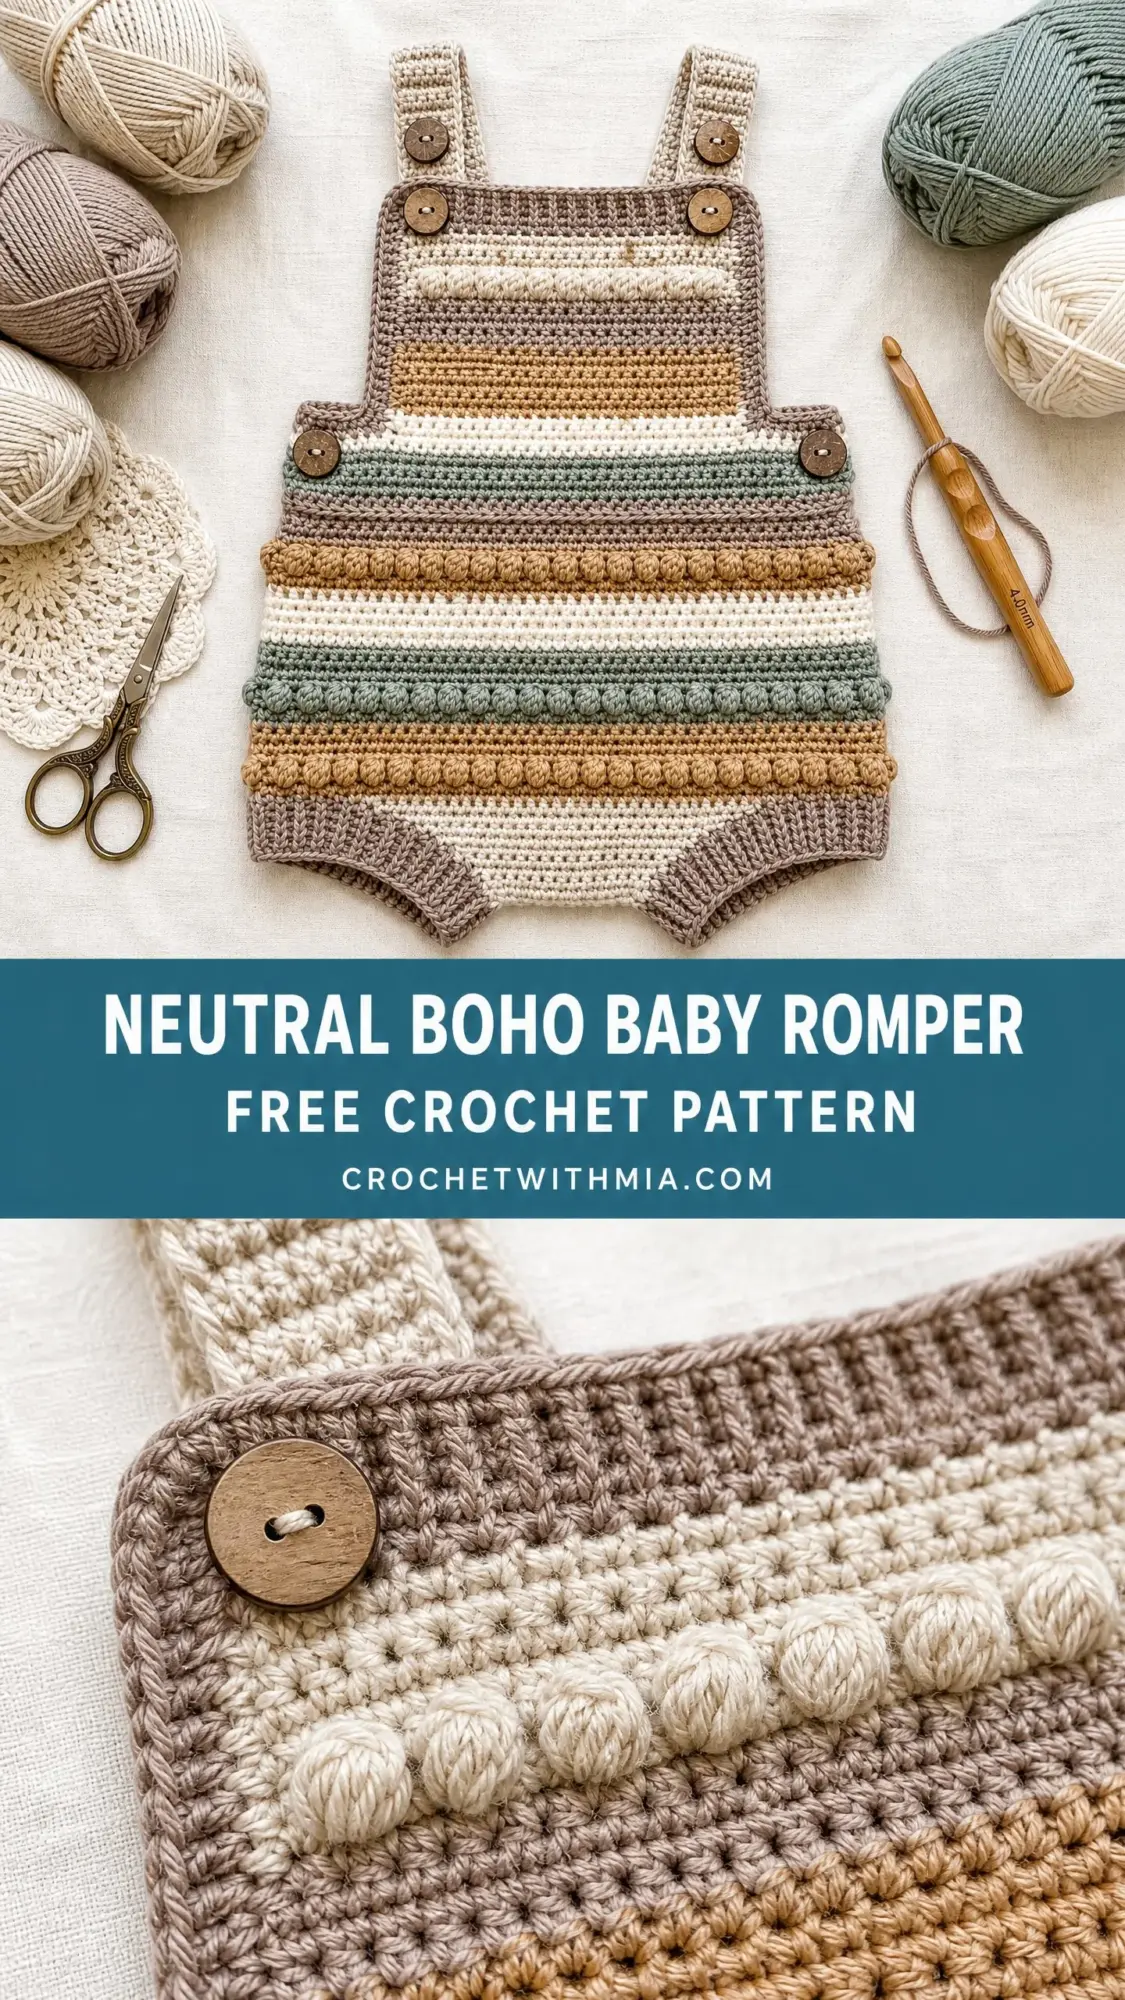
Here is the truth: if you can single crochet and follow a simple repeat, you can absolutely make this romper. The bobble stitch is just a series of half-finished double crochets pulled together at the end. That is it. No magic, no mystery, just a straightforward technique that creates stunning texture.
Whether you have been crocheting for six months or six years, this pattern breaks everything down into manageable pieces. You will work two flat panels, seam them together, add some straps, and finish with ribbed leg cuffs. The earthy stripe sequence practically tells you where to change colors. By the end, you will have a gorgeous handmade baby romper that looks like it belongs in a boutique window.
Why This Baby Romper Pattern Works
This neutral boho baby romper combines everything I love about baby garments. The construction is straightforward since you work the front and back panels separately, then join them with simple seams. No working in the round, no complicated shaping, no confusing decreases scattered across multiple rows.
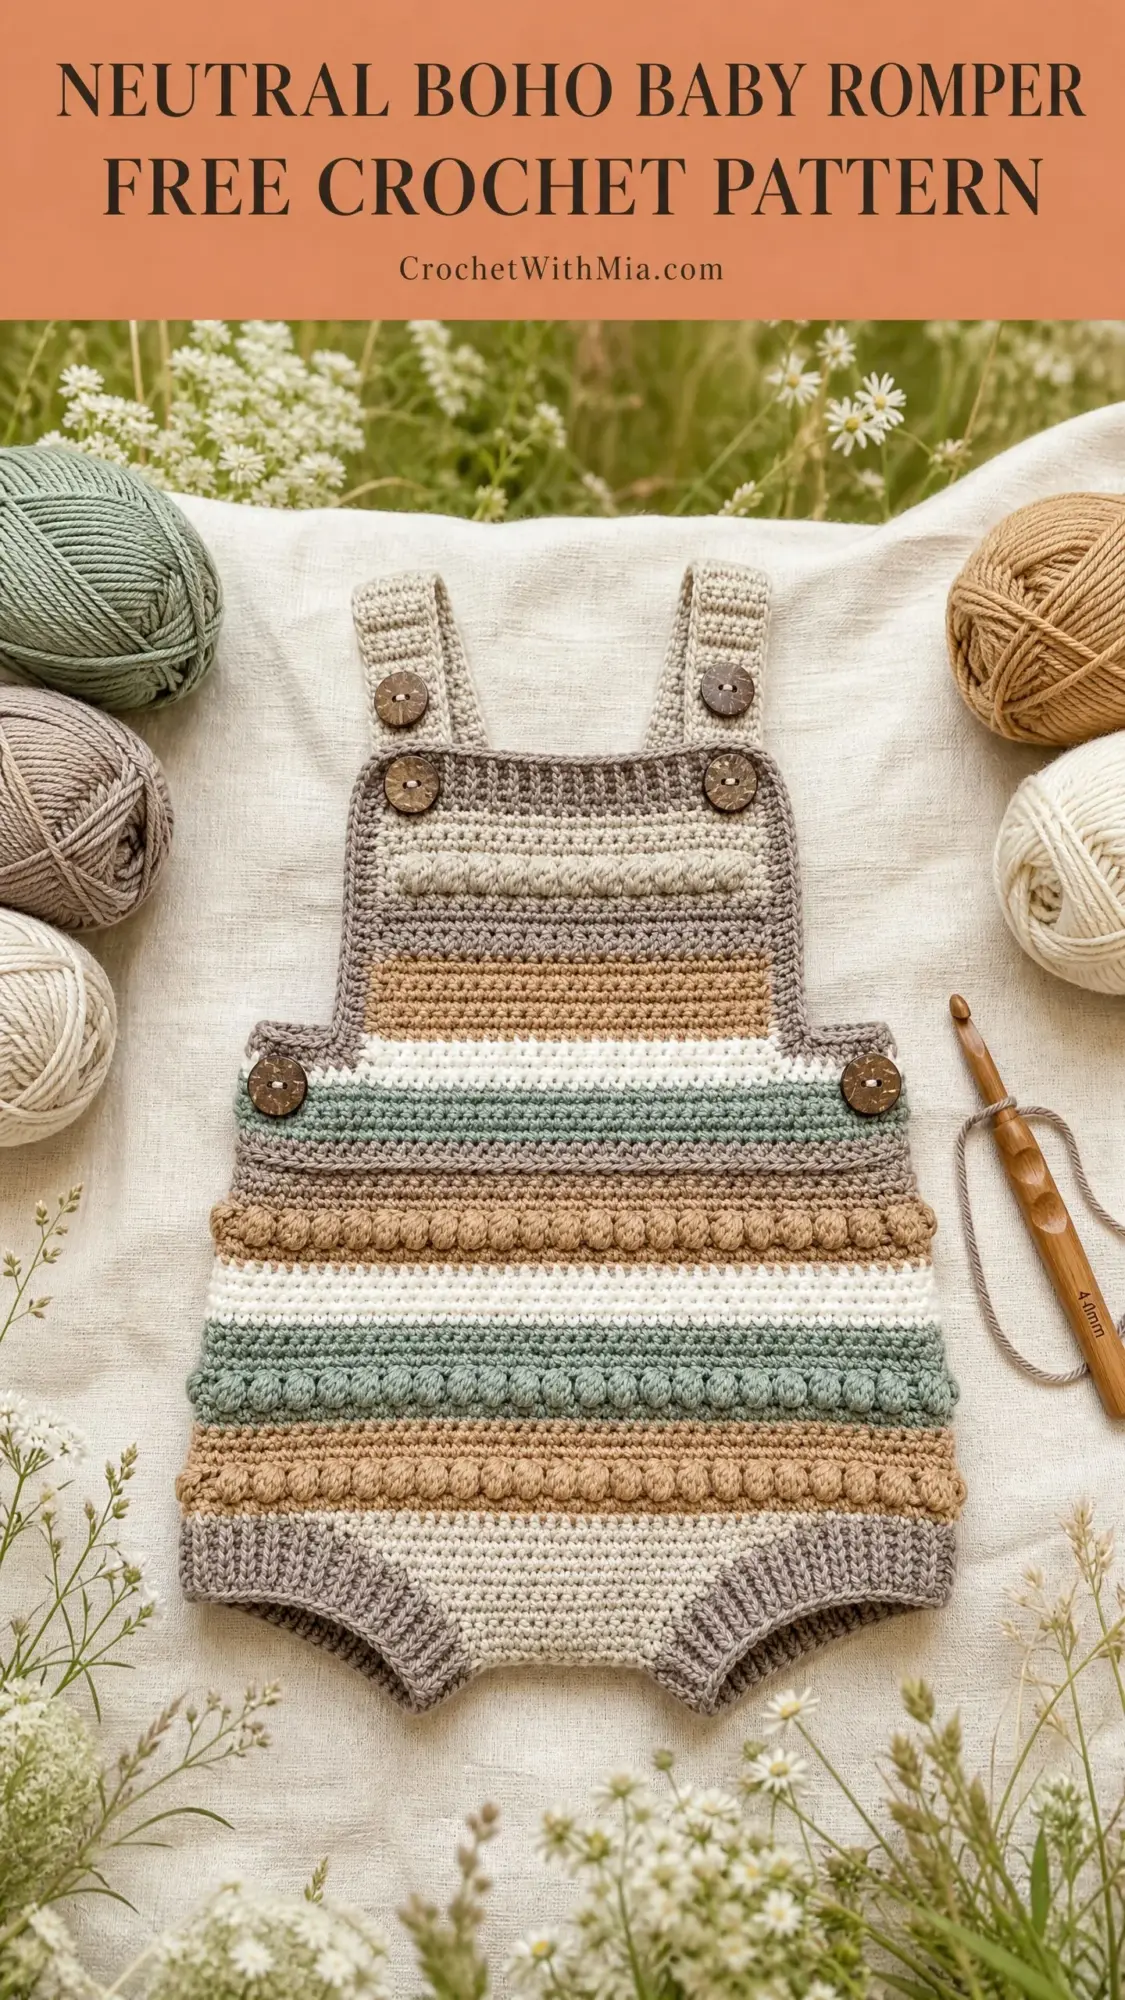
The stripe sequence uses four colors in a soft, earthy palette: taupe, camel, cream, and sage green. These neutrals work beautifully for any baby, and the muted tones give the finished piece that modern boho aesthetic everyone loves right now. The bobble stitch rows appear at regular intervals, adding texture without overwhelming the design.
The adjustable shoulder straps with coconut shell buttons make this romper practical for real life. Easy diaper changes, room for growth, and that handmade charm that store-bought clothes simply cannot replicate.
Materials You Will Need
Gather these supplies before you begin:
Yarn: DK weight yarn (CYCA 3), approximately 300 to 400 yards total across all colors
Hook: US size G-6 / 4.0 mm crochet hook, or size needed to meet gauge
Notions:
Recommended Yarn Options:
Lion Brand 24/7 Cotton works beautifully for this project. It is 100 percent mercerized cotton, machine washable, and widely available. Paintbox Yarns Simply DK is another excellent choice, especially if you want a budget-friendly acrylic option with great stitch definition for the bobble work.
Choose any DK weight yarn labeled baby-safe and machine washable. Avoid mohair blends or loosely spun yarns since they will obscure your beautiful bobble texture.
Gauge Information
18 sc x 20 rows = 4 inches / 10 cm worked flat in single crochet using a G-6 / 4.0 mm hook, after blocking.
I cannot stress this enough: gauge matters for garments. A difference of even one stitch per 4 inches will significantly alter the finished chest measurement and length. Make a swatch, measure it, and adjust your hook size if needed.
Finished Sizes
This pattern is written for the 3 to 6 month size. Adjustments for other sizes appear in the size customization section.
Abbreviations and Stitch Definitions
ch: chain, the foundation stitch created by pulling yarn through a loop
sl st: slip stitch, insert hook, yarn over, pull through both loops at once
sc: single crochet, insert hook, yarn over, pull up a loop, yarn over, pull through both loops
hdc: half double crochet
dc: double crochet
sk: skip
st(s): stitch or stitches
RS: right side, the public-facing side of your work
WS: wrong side, the inside of your work
rep: repeat
sc2tog: single crochet two stitches together, a decrease that joins two stitches into one
bob: bobble stitch, see special stitch instructions below
BLO: back loop only, working into just the back loop of each stitch
pm: place marker
Special Stitch: The Bobble
The bobble stitch creates those gorgeous textured bumps you see in the photos. Here is exactly how to make one:
Step 1: Yarn over, insert hook into the indicated stitch.
Step 2: Yarn over and pull up a loop. Yarn over and pull through 2 loops only. You now have 2 loops on your hook.
Step 3: Yarn over, insert hook into the same stitch.
Step 4: Yarn over and pull up a loop. Yarn over and pull through 2 loops only. You now have 3 loops on your hook.
Step 5: Yarn over, insert hook into the same stitch again.
Step 6: Yarn over and pull up a loop. Yarn over and pull through 2 loops only. You now have 4 loops on your hook.
Step 7: Yarn over and pull through all 4 loops on your hook at once.
Step 8: Chain 1 to close and secure the bobble.
Important: Work bobble rows on wrong side rows so the bobbles pop out on the right side of your fabric. The closing chain 1 counts as 1 stitch in your total count.
Pattern Notes Before You Begin
Read through these notes carefully. They will save you confusion later.
1. The romper is worked in two flat panels: Front Panel and Back Panel. Both are worked from the bottom up.
2. The Front Panel has a bib section extending above the waist. The Back Panel is shorter with no bib.
3. Chain 1 at the beginning of each row for sc rows. This turning chain does not count as a stitch.
4. Always turn at the end of every row unless instructed otherwise.
5. Stitch counts in parentheses at the end of each row reflect working stitches, excluding turning chains.
6. When changing colors, make the switch on the last yarn over of the final stitch of each color section. Pull the new color through the final loops of the old color.
7. For bobble rows, work as follows: sc 1, (bob, sc 1) across, ending sc 1. The first and last stitches of every bobble row are plain sc for clean edges.
Stripe Sequence for Front Panel Body
Follow this color order for Rows 1 through 22 of the Front Panel:
The Back Panel uses the same stripe sequence for Rows 1 through 20 only.
Front Panel Instructions
Foundation: Using Color A, ch 38.
Row 1 (RS): Sc in 2nd ch from hook and in each ch across. Turn. (37 sc)
Row 2 (WS): Ch 1, sc in each st across. Turn. (37 sc)
Row 3 (RS): Ch 1, sc in each st across. Turn. (37 sc)
Row 4 (WS, bobble row): Change to Color C. Ch 1, sc in first st, (bob in next st, sc in next st) across to last st, sc in last st. Turn. (37 sts)
Row 5 (RS): Ch 1, sc in each st across. Turn. (37 sc)
Row 6 (WS): Ch 1, sc in each st across. Turn. (37 sc)
Row 7 (RS): Change to Color B. Ch 1, sc in each st across. Turn. (37 sc)
Row 8 (WS, bobble row): Ch 1, sc in first st, (bob in next st, sc in next st) across to last st, sc in last st. Turn. (37 sts)
Row 9 (RS): Ch 1, sc in each st across. Turn. (37 sc)
Row 10 (WS): Change to Color C. Ch 1, sc in each st across. Turn. (37 sc)
Row 11 (RS): Ch 1, sc in each st across. Turn. (37 sc)
Row 12 (WS): Change to Color D. Ch 1, sc in each st across. Turn. (37 sc)
Row 13 (RS): Ch 1, sc in each st across. Turn. (37 sc)
Row 14 (WS, bobble row): Ch 1, sc in first st, (bob in next st, sc in next st) across to last st, sc in last st. Turn. (37 sts)
Row 15 (RS): Ch 1, sc in each st across. Turn. (37 sc)
Row 16 (WS): Change to Color B. Ch 1, sc in each st across. Turn. (37 sc)
Row 17 (RS): Ch 1, sc in each st across. Turn. (37 sc)
Row 18 (WS, bobble row): Ch 1, sc in first st, (bob in next st, sc in next st) across to last st, sc in last st. Turn. (37 sts)
Row 19 (RS): Change to Color C. Ch 1, sc in each st across. Turn. (37 sc)
Row 20 (WS): Ch 1, sc in each st across. Turn. (37 sc)
Row 21 (RS): Change to Color A. Ch 1, sc in each st across. Turn. (37 sc)
Row 22 (WS): Ch 1, sc in each st across. Turn. (37 sc)
Checkpoint: Your Front Panel body should measure approximately 4.5 inches from the foundation chain.
Bib Shaping (Front Panel Continued)
The bib is a narrower rectangle centered on the front panel. You will work across only the center 25 stitches, leaving 6 stitches unworked on each side for the armhole indentations.
Row 23 (RS, bib begins): Ch 1, sk first 6 sts, sc in next 25 sts. Turn. (25 sc)
Row 24 (WS): Ch 1, sc in each st across. Turn. (25 sc)
Row 25 (RS, bobble row): Change to Color C. Ch 1, sc in first st, (bob in next st, sc in next st) across to last st, sc in last st. Turn. (25 sts)
Row 26 (WS): Change to Color B. Ch 1, sc in each st across. Turn. (25 sc)
Row 27 (RS): Ch 1, sc in each st across. Turn. (25 sc)
Row 28 (WS): Ch 1, sc in each st across. Turn. (25 sc)
Row 29 (RS): Ch 1, sc in each st across. Turn. (25 sc)
Row 30 (WS): Change to Color A. Ch 1, sc in each st across. Turn. (25 sc)
Row 31 (RS): Ch 1, sc in each st across. Turn. (25 sc)
Row 32 (WS): Ch 1, sc in each st across. Turn. (25 sc)
Fasten off Color A.
Checkpoint: The bib should measure approximately 4 inches in height. The full front panel from foundation to bib top should measure approximately 8.5 inches.
Back Panel Instructions
Foundation: Using Color A, ch 38.
Row 1 (RS): Sc in 2nd ch from hook and in each ch across. Turn. (37 sc)
Work Rows 2 through 22 exactly as written for the Front Panel body, following the same stripe and bobble sequence. (37 sts at end of Row 22)
Row 23 (RS): Ch 1, sc in each st across. Turn. (37 sc)
Row 24 (WS): Ch 1, sc in each st across. Turn. (37 sc)
Fasten off.
Using Color A, join yarn and work 1 row of sc across the top edge of the Back Panel. This creates a clean edging and the attachment point for the strap buttons. Fasten off.
Shoulder Straps (Make 2)
Using Color A, ch 5.
Row 1: Sc in 2nd ch from hook and in each ch across. Turn. (4 sc)
Repeat Row 1 (sc in each st across, turn) until strap measures 7 inches. Fasten off, leaving a long tail for sewing.
Button Loop: Join Color A at corner of strap end. Ch 4, sl st in same corner st. Fasten off. Create a button loop at each end of both straps.
Leg Cuff Ribbing
Work the leg cuffs after seaming the panels together.
With RS facing, join Color A at one edge of the leg opening with a sl st. Work sc evenly around the leg opening. You should have approximately 28 to 32 sc around each opening.
Ribbing Row 1: Ch 1, sc in BLO of each st around. Join with sl st to first sc. (28 to 32 sc)
Ribbing Row 2: Ch 1, sc in BLO of each st around. Join with sl st. (28 to 32 sc)
Ribbing Row 3: Ch 1, sc in BLO of each st around. Join with sl st. (28 to 32 sc)
Fasten off and weave in ends. Repeat for second leg opening.
If the leg opening pulls tight, add 2 sc evenly in the first ribbing round. If it is too loose, work sc2tog twice evenly in the first round.
Assembly Instructions
Step 1, Side Seams: Place Front Panel and Back Panel with wrong sides together. Align side edges carefully. Using a yarn needle and Color A, seam both sides using a slip stitch seam or whip stitch seam from the foundation row up to Row 22. Do not seam the bib section.
Step 2, Crotch Seam: Fold the joined panels so the front foundation chain aligns with the back foundation chain at the bottom. Seam across the crotch opening, working from the center outward to each leg opening edge. Leave each leg opening approximately 3 inches wide.
Step 3, Leg Cuffs: Work leg cuff ribbing as described above on each leg opening.
Step 4, Strap Placement: Pin each strap to the top corners of the bib. The inner edges of the straps should sit approximately 1.5 inches apart at the bib top. Sew the front end of each strap to the bib top edge securely. Bring the strap over the shoulder and attach the back end to the top edge of the Back Panel using button loops and coconut buttons.
Step 5, Side Buttons: Sew 1 coconut button on each side of the bib at the armhole notch level (Row 23 of the Front Panel), positioned approximately 0.5 inches from the side edge.
Step 6: Weave in all ends securely on the wrong side, especially at color change points.
Size Customization
For Newborn size: Begin with a foundation chain of 32 stitches (31 sc). Work the bib starting at Row 21 across the center 21 stitches, with 5 stitches unworked on each side. Work bib through Row 28 instead of Row 32. Shorten straps to 5.5 inches.
For 6 to 12 months size: Begin with a foundation chain of 44 stitches (43 sc). Work the bib starting at Row 25 across the center 29 stitches, with 7 stitches unworked on each side. Work bib through Row 36 instead of Row 32. Lengthen straps to 8 inches.
Each 2 foundation chain stitches added or removed equals approximately 0.5 inches in width. Each 2 rows added or removed equals approximately 0.4 inches in length.
Blocking and Care Instructions
Wet blocking works best for cotton or cotton blend yarns. Hand wash the completed romper in cool water with gentle soap. Gently squeeze out excess water without wringing. Lay flat on a blocking mat and ease into shape. Use rust-proof pins to hold straps and leg openings in position. Allow to dry completely.
For acrylic yarns, steam blocking is effective. Hold a steam iron 1 to 2 inches above the surface and steam lightly. Do not press the iron directly onto the fabric.
Care: Hand wash in cool water with baby-safe detergent. Do not wring or twist. Reshape and lay flat to dry. Do not tumble dry. Store flat or loosely folded to preserve the bobble texture.
Final Thoughts on This Baby Romper Crochet Pattern
This neutral boho baby romper is the kind of project that looks impressive without requiring years of experience. The bobble stitch adds professional texture, the stripe sequence creates visual interest, and the simple construction keeps everything manageable. You will end up with a handmade heirloom that any parent would treasure.
Thank you so much for choosing this pattern. I truly hope you enjoy making it as much as I enjoyed designing it. If you complete your romper, I would absolutely love to see your finished piece on Instagram or Facebook. Tag me so I can admire your beautiful work.
Save this baby romper crochet pattern to your Pinterest boards so you can find it whenever you are ready to start. And please drop a comment below if you make one. I love hearing how these turn out in different color combinations and seeing the creative choices you make along the way.