
Looking for a summer project that actually gets worn? This crochet tank top keeps you cool while showing off your skills. It features half double crochet stripes, delicate shell lace dividers, and those adorable pompom balls dangling from the hem.
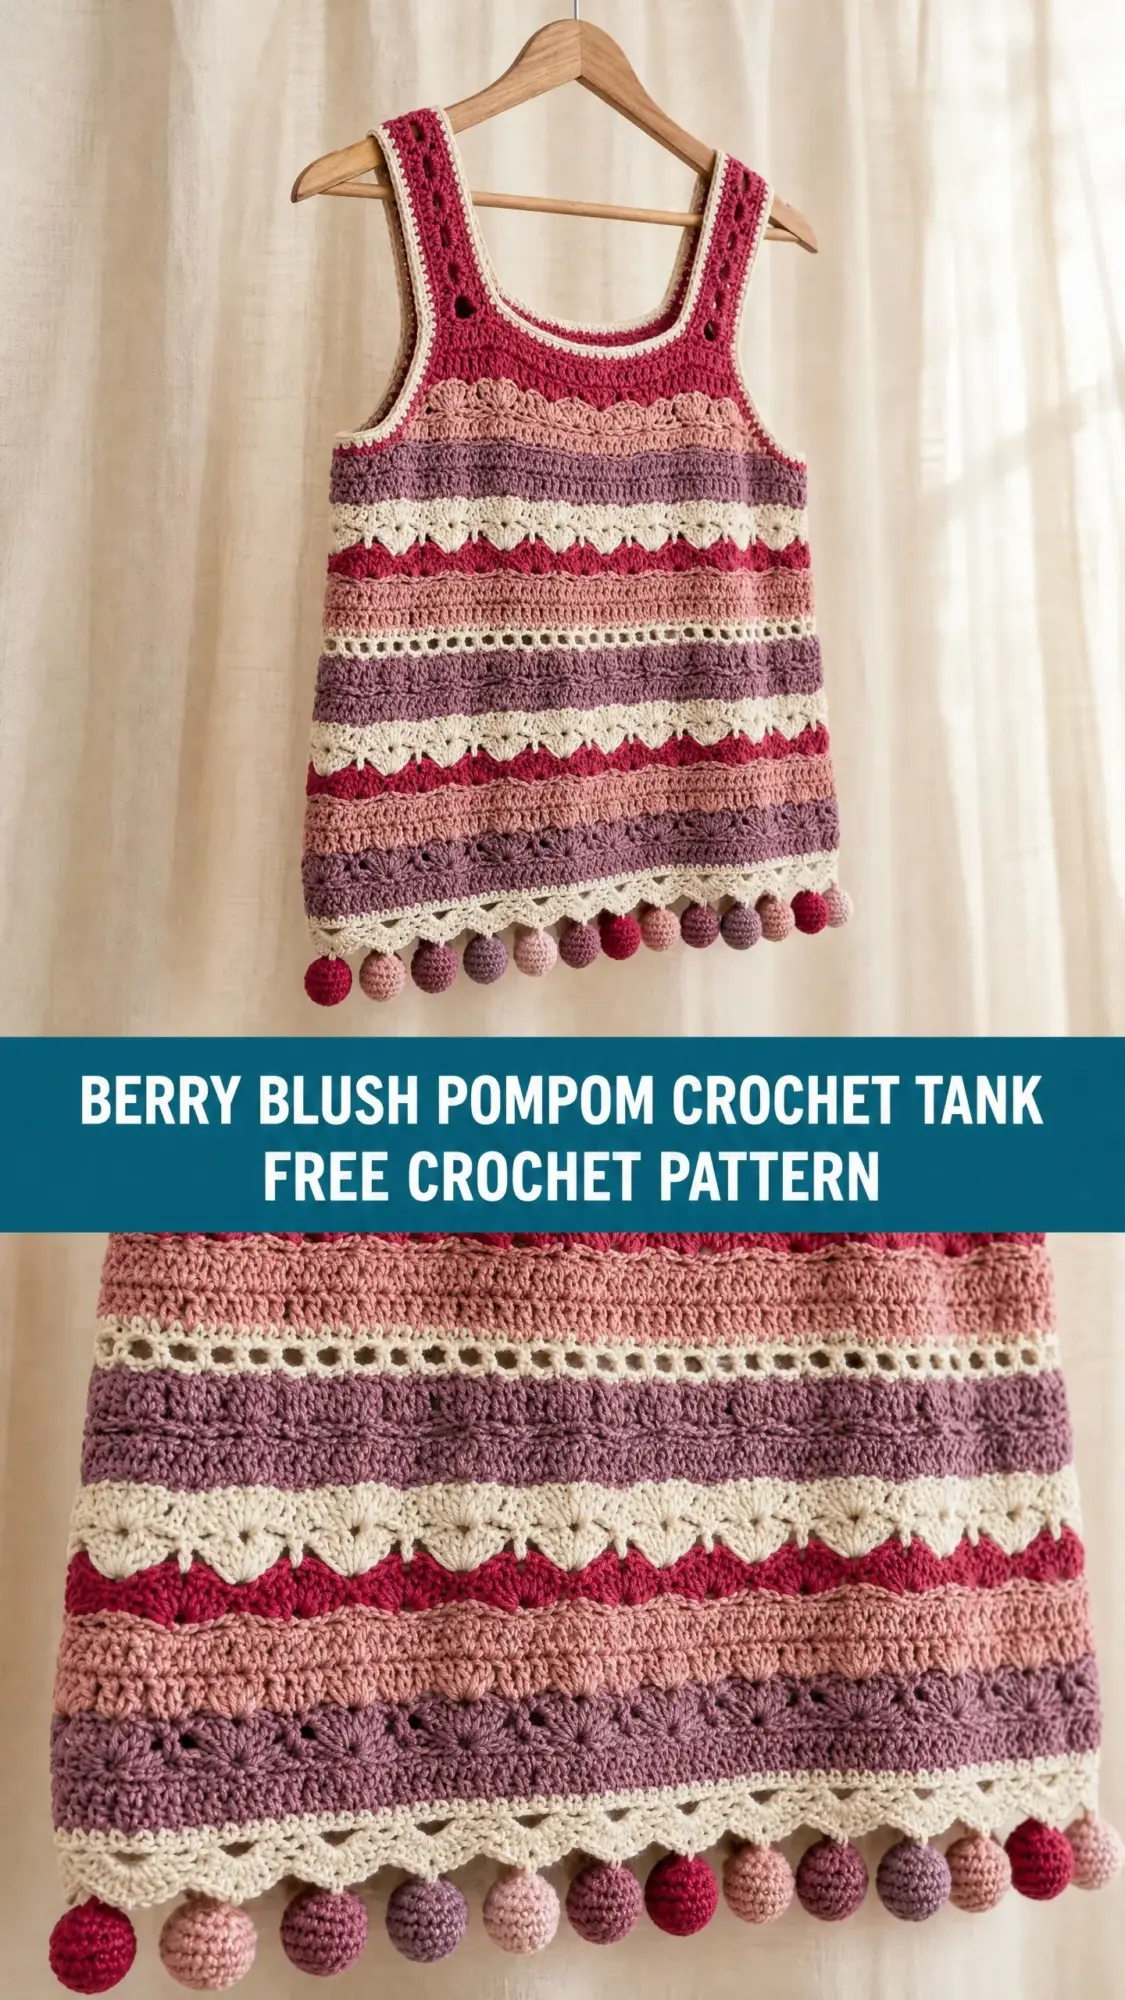
The Berry Blush Pompom Crochet Tank uses worsted weight cotton yarn in a warm berry and mauve color palette. It works up in two flat panels from the bottom up, so you can binge your favorite show while you stitch. The construction is straightforward once you get the rhythm of the stripe sequence down.
This pattern suits intermediate crocheters who are comfortable with color changes and basic shaping. It makes a gorgeous gift for a friend who appreciates handmade pieces, or treat yourself to something special for your summer wardrobe. The finished tank has a relaxed retro silhouette with a square neckline and wide shoulder straps that feel effortlessly cool.
Why You Will Love This Crochet Tank Pattern
This tank top hits all the right notes. The stripe sequence keeps things interesting without being complicated. You get to play with five beautiful colors while practicing shell stitches and texture rows. The pompom hem adds a playful finishing touch that makes this piece truly unique.
The square neckline gives it a vintage vibe that flatters most body types. Wide shoulder straps mean no fussy thin straps digging into your skin. And because it is worked in cotton, this tank breathes beautifully on warm days.
I also love that you can customize the length easily. Want a cropped version? Stop the stripe sequence earlier. Prefer a longer tunic or mini-dress style? Just keep repeating the pattern. The math works out cleanly because of the way the shell lace rows are designed.
Skill Level
Intermediate. You should feel comfortable with half double crochet, shell stitches, working in rows with color changes, seaming, and making small crocheted balls. The armhole and neckline shaping involves simple decreases and leaving stitches unworked. Nothing too tricky here.
If you have made a basic garment before, you can handle this. If this is your first wearable project, read through the whole pattern first and take your time with the shell lace rows.
Finished Measurements
This pattern is written for size Small (S) with size Medium (M) and Large (L) in parentheses.
Materials Needed
Yarn
Worsted weight (category 4), smooth cotton or cotton blend yarn in 5 colors:
Recommended Yarn Brands
Lion Brand 24/7 Cotton in Berry, Dusty Pink, Lavender, Pink, and Ecru works beautifully. It has excellent stitch definition and holds its shape after blocking.
Paintbox Yarns Simply DK held as a light worsted is another great option with accurate solids.
Drops Paris (100% cotton, worsted weight) offers a budget-friendly choice with a matte finish.
Avoid fuzzy or textured novelty yarns. They will hide those pretty shell lace rows.
Hook
US size J / 6.0 mm crochet hook
Notions
Gauge
With US size J / 6.0 mm hook:
14 hdc = 4 inches / 10 cm
10 rows hdc = 4 inches / 10 cm
To check gauge, chain 20 with Color A. Work half double crochet (hdc) across for 12 rows. Block your swatch lightly. Measure the center 4 inches horizontally and vertically. Adjust hook size as needed.
Gauge is critical for fit. Do not skip the gauge swatch.
Abbreviations (US Terms)
Special Stitches
Shell Stitch
Work 5 double crochet (dc) all into the same stitch or chain space. This creates a fan shape that forms the decorative lace divider rows.
Crocheted Pompom Ball
Step 1: With chosen color, make a magic ring.
Step 2: Round 1: Work 6 sc into the ring. Do not join. Work in a continuous spiral. (6 sc)
Step 3: Round 2: Work 2 sc into each stitch around. (12 sc)
Step 4: Round 3: Work 1 sc in each stitch around. (12 sc)
Step 5: Round 4: Work sc2tog six times around. (6 sc) Stuff firmly with yarn scraps or fiberfill.
Step 6: Round 5: Work sc2tog three times. (3 sc) Pull tail through remaining stitches, pull tight, and secure. Leave a long tail for attaching to hem.
Pattern Notes Before You Begin
1. The front and back panels are identical. Work them flat from the lower hem upward, then join at shoulders and side seams.
2. The turning chain 2 for hdc rows counts as the first hdc throughout unless otherwise stated.
3. Make color changes on the last yarn over of the last stitch of the current row. Pull the new color through to complete the stitch, then turn and proceed.
4. Do not cut yarn between stripe rows of the same color unless that color will not be used again for more than 4 rows. Carry yarn loosely up the side edge instead.
5. After each shell lace unit, work into the tops of the dc stitches and the sc stitches evenly to restore the correct hdc count for the next section. Use stitch markers to ensure you hit the correct count.
Stripe Sequence
Repeat this sequence throughout the body:
Then repeat from Section 1 as needed to reach full length.
Crochet Tank Top Pattern Instructions
Front Panel
Foundation chain setup:
With Color A and US J hook, chain 62 (68, 74).
Row 1 (RS): Hdc into 3rd chain from hook and into each chain across. Turn. (60, 66, 72 hdc)
Row 2: Chain 2 (counts as hdc). Hdc into each stitch across to end. Turn. (60, 66, 72 hdc)
Row 3: Chain 2. Hdc into each stitch across. Turn. (60, 66, 72 hdc)
Color A section complete. Change to Color E on last stitch of Row 3.
Shell Lace Rows 4 and 5 (Color E)
Row 4 (Shell Lace Row A, RS): Chain 3 (counts as dc). Work 2 dc into first stitch. Skip 2 stitches. Sc into next stitch. Skip 2 stitches, work 5 dc shell into next stitch, skip 2 stitches, sc into next stitch. Repeat from to across until 3 stitches remain. Skip 2 stitches. Work 3 dc into last stitch. Turn.
Row 5 (Shell Lace Row B, WS): Chain 1. Sc into first dc. Chain 2, work 5 dc shell into sc of previous row, chain 2, sc into center dc of next shell. Repeat from to across, ending with chain 2, work 5 dc into last sc, chain 2, sc into top of turning chain. Turn. Change to Color B on last stitch of Row 5.
Rows 6, 7, 8 (Color B, hdc)
Chain 2, hdc into each stitch across. Work the first hdc of Row 6 into each stitch and chain space of Row 5 evenly to restore 60 (66, 72) stitches. Turn at end of each row. (60, 66, 72 hdc)
Continuing the Stripe Sequence
Rows 9 and 10 (Color E, shell lace unit): Repeat Rows 4 and 5. Change to Color C on last stitch of Row 10.
Rows 11, 12, 13 (Color C, hdc): Chain 2, hdc into each stitch across. Restore 60 (66, 72) stitches on Row 11. Turn. (60, 66, 72 hdc)
Rows 14 and 15 (Color E, shell lace unit): Repeat Rows 4 and 5. Change to Color D on last stitch of Row 15.
Rows 16, 17, 18 (Color D, hdc): Chain 2, hdc into each stitch across. Restore 60 (66, 72) stitches on Row 16. Turn. (60, 66, 72 hdc)
Rows 19 and 20 (Color E, shell lace unit): Repeat Rows 4 and 5. Change to Color A on last stitch of Row 20.
Rows 21, 22, 23 (Color A, hdc): Chain 2, hdc into each stitch across. Restore 60 (66, 72) stitches on Row 21. Turn. (60, 66, 72 hdc)
Rows 24 and 25 (Color E, shell lace unit): Repeat Rows 4 and 5. Change to Color B on last stitch of Row 25.
Rows 26, 27, 28 (Color B, hdc): Chain 2, hdc into each stitch across. Restore count on Row 26. Turn. (60, 66, 72 hdc)
Rows 29 and 30 (Color E, shell lace unit): Repeat Rows 4 and 5. Change to Color C on last stitch of Row 30.
Rows 31, 32, 33 (Color C, hdc): Chain 2, hdc into each stitch across. Restore count on Row 31. Turn. (60, 66, 72 hdc)
Rows 34 and 35 (Color E, shell lace unit): Repeat Rows 4 and 5. Change to Color D on last stitch of Row 35.
Rows 36, 37, 38 (Color D, hdc): Chain 2, hdc into each stitch across. Restore count on Row 36. Turn. (60, 66, 72 hdc)
Rows 39 and 40 (Color E, shell lace unit): Repeat Rows 4 and 5. Change to Color A on last stitch of Row 40.
Checkpoint: After Row 40, your panel should measure approximately 16 inches / 40.5 cm from the foundation chain edge to the current row.
Armhole Shaping (Rows 41 to 48)
Row 41 (Color A, RS): Sl st across first 5 (5, 6) stitches. Chain 2. Hdc into each stitch across until 5 (5, 6) stitches remain. Leave remaining stitches unworked. Turn. (50, 56, 60 hdc)
Row 42 (Color A): Chain 2. Hdc into each stitch across. Turn. (50, 56, 60 hdc)
Row 43 (Color A): Chain 2. Hdc into each stitch across. Turn. (50, 56, 60 hdc)
Rows 44 and 45 (Color E, shell lace unit): Work shell lace rows across the 50 (56, 60) working stitches. Adjust partial edge shells as needed to maintain width. Change to Color B on last stitch of Row 45.
Rows 46, 47, 48 (Color B, hdc): Restore 50 (56, 60) stitches on Row 46. Chain 2, hdc across. Turn. (50, 56, 60 hdc)
Checkpoint: After Row 48, your panel from foundation to current row should measure approximately 19 inches / 48.5 cm.
Neckline Shaping and Straps (Rows 49 to 55)
Neckline opening widths:
Left Strap
Row 49 (RS, Color B): Chain 2. Hdc into next 14 (16, 17) stitches only. Turn, leaving remaining stitches unworked. (15, 17, 18 hdc)
Row 50: Chain 2. Hdc across. Turn. (15, 17, 18 hdc)
Rows 51 and 52 (Color E, shell lace): Work shell lace unit across 15 (17, 18) stitches. Change to Color C on last stitch of Row 52.
Row 53 (Color C): Chain 2. Hdc across. Restore 15 (17, 18) stitches. Turn. (15, 17, 18 hdc)
Row 54: Chain 2. Hdc across. Turn. (15, 17, 18 hdc)
Row 55: Chain 2. Hdc across. Turn. (15, 17, 18 hdc)
Fasten off Color C, leaving a 12 inch / 30.5 cm tail for shoulder seaming.
Right Strap
With RS facing, skip the center 20 (22, 24) stitches after the left strap. Rejoin Color B in the next stitch.
Row 49 (RS, Color B): Chain 2. Hdc into each remaining stitch across. Turn. (15, 17, 18 hdc)
Work Rows 50 through 55 exactly as for Left Strap. Fasten off with a 12 inch / 30.5 cm tail.
Back Panel
Work the back panel identically to the front panel, following all rows from the foundation chain through Row 55. The back neckline and shoulder straps are worked the same. Fasten off with tails for seaming.
Assembly and Seaming
Step 1: Block both panels before seaming. Wet block by soaking in cool water for 15 minutes. Squeeze gently without wringing. Pin to finished measurements and let dry completely.
Step 2: Shoulder seams. Hold front and back panels with wrong sides together, aligning shoulder straps. With Color A and yarn needle, whipstitch or mattress stitch through both layers across the top 15 (17, 18) stitch widths of each strap. Fasten off and weave in ends.
Step 3: Side seams. With wrong sides together, align front and back panels at side edges. Beginning at the lower hem edge, use mattress stitch with Color A to seam up each side, stopping when you reach Row 40. The armhole opening is the unseamed portion above Row 40 through Row 48. Fasten off and weave in ends.
Edging
Armhole Edging (work on each armhole)
Join Color E with a sl st at the base of the armhole at the side seam. Work sc evenly around the entire armhole opening, placing 1 sc per row end along vertical edges and 1 sc per stitch along horizontal edges. At corners, work 3 sc into the corner stitch. Join with sl st to first sc. Do not turn. Work 1 round of sl st loosely into the back loop of each sc around. Fasten off and weave in end.
Neckline Edging
Join Color E with sl st at any point along the neckline edge. Work sc evenly around the entire neckline, placing 1 sc per row end along strap edges, 1 sc per stitch along the bound-off neckline edges. At inner corners, work sc2tog to prevent flaring. Work 2 rounds of sc around the neckline, then 1 round of sl st in back loops. Fasten off and weave in end.
Lower Hem Edging
Join Color E with sl st at any point along the lower foundation edge. Work 1 round of sc into each foundation chain stitch around the full lower edge. Join with sl st. Fasten off.
Pompom Balls
Make the following crocheted pompom balls:
Pompom Attachment
Space the pompoms evenly across the lower hem edge, attaching one pompom roughly every 3 to 4 stitches of the sc hem round. Alternate colors in a random but balanced distribution. Thread the long tail from each pompom through the yarn needle, insert into the hem edge stitch, and knot securely on the inside. Weave in all ends.
Size Customization Tips
To adjust width: Add or subtract stitches in multiples of 6 to maintain shell lace repeat divisibility. Each 6 stitch addition adds approximately 1.7 inches / 4.5 cm to each panel, or approximately 3.4 inches / 9 cm to finished circumference.
To adjust length: Add or subtract complete stripe sequences. Each full sequence (3 hdc rows plus 2 shell lace rows) adds approximately 2 inches / 5 cm to the length.
To adjust strap width: Add or subtract 2 stitches to each strap, ensuring the neckline center stitch count adjusts correspondingly.
Time Estimate
Approximately 20 to 28 hours for a size Medium, not including pompom assembly and finishing. This is a perfect project to work on over a few weekends.
Care Instructions
Hand wash in cool water with gentle detergent. Do not wring. Roll in a clean towel to remove excess moisture. Lay flat to dry, reshaping to measurements while damp. Do not tumble dry. Do not bleach.
Final Thoughts on This Crochet Tank Top Pattern
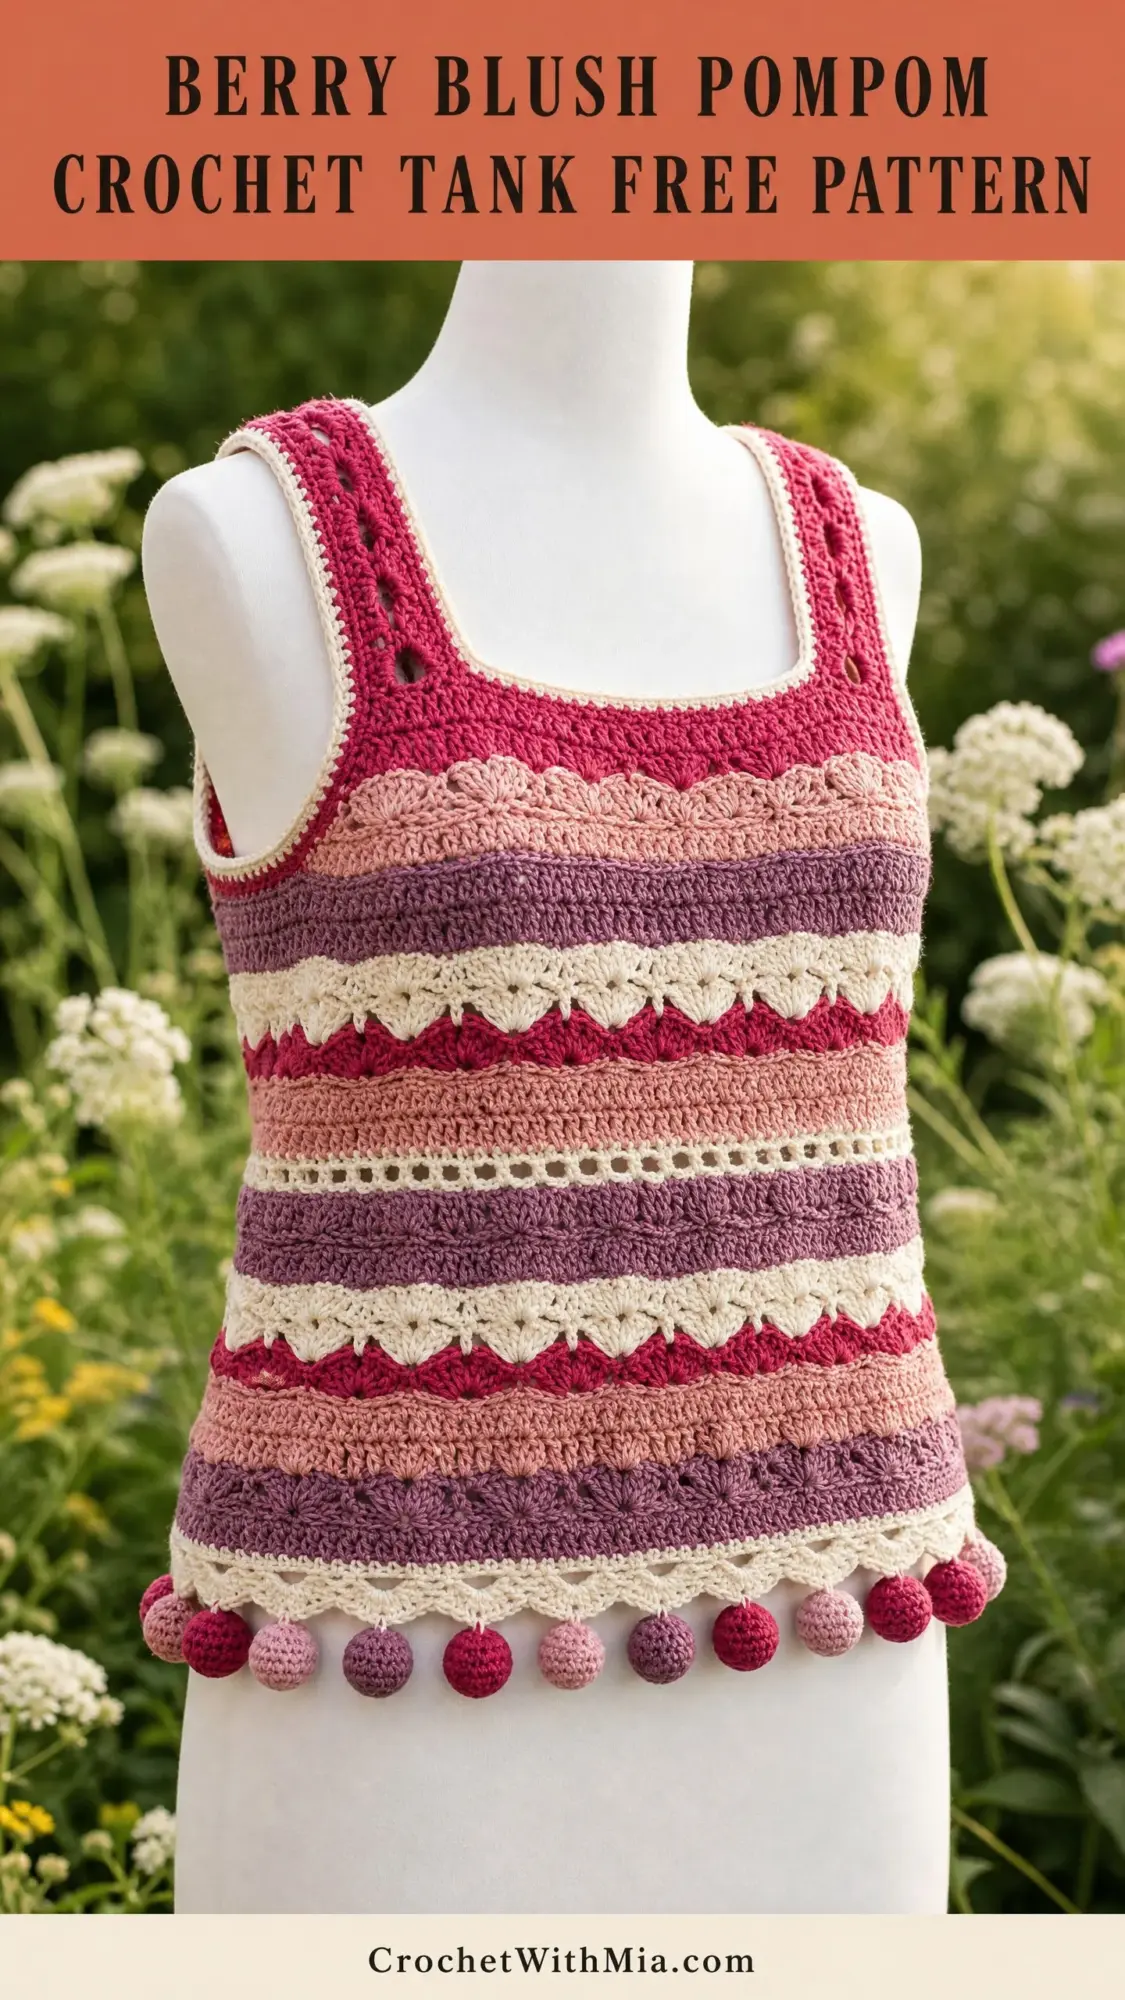
This Berry Blush Pompom Crochet Tank is everything I love in a summer project. The color changes keep you engaged, the shell lace rows add elegance, and those pompoms at the hem are just pure fun. Once you get into the rhythm of the stripe sequence, the rows fly by.
The finished tank has such a lovely drape in cotton yarn. It is lightweight enough for the warmest days but substantial enough to feel like a real garment, not just a flimsy layering piece. I think you will reach for this one all season long.
Thank you so much for choosing this pattern. I hope you love making it as much as I loved designing it. If you finish your tank, I would absolutely love to see it. Tag me on Instagram or share a photo on Facebook. Nothing makes my day like seeing your finished projects.
If this crochet tank top pattern caught your eye, go ahead and pin it to your Pinterest boards so you can find it when you are ready to start. And if you make one, please drop a comment below. I always love hearing which colors you chose and how it turned out for you.