
I’ve been searching for the perfect summer cardigan pattern for ages, and this one is my absolute favourite. This cropped watermelon cardigan combines a relaxed boxy silhouette with the most adorable fruit appliques, and I rounded up all the details you need to make your own. The mint green body paired with those cheerful pink watermelon slices creates a garment that’s playful, modern, and surprisingly wearable.
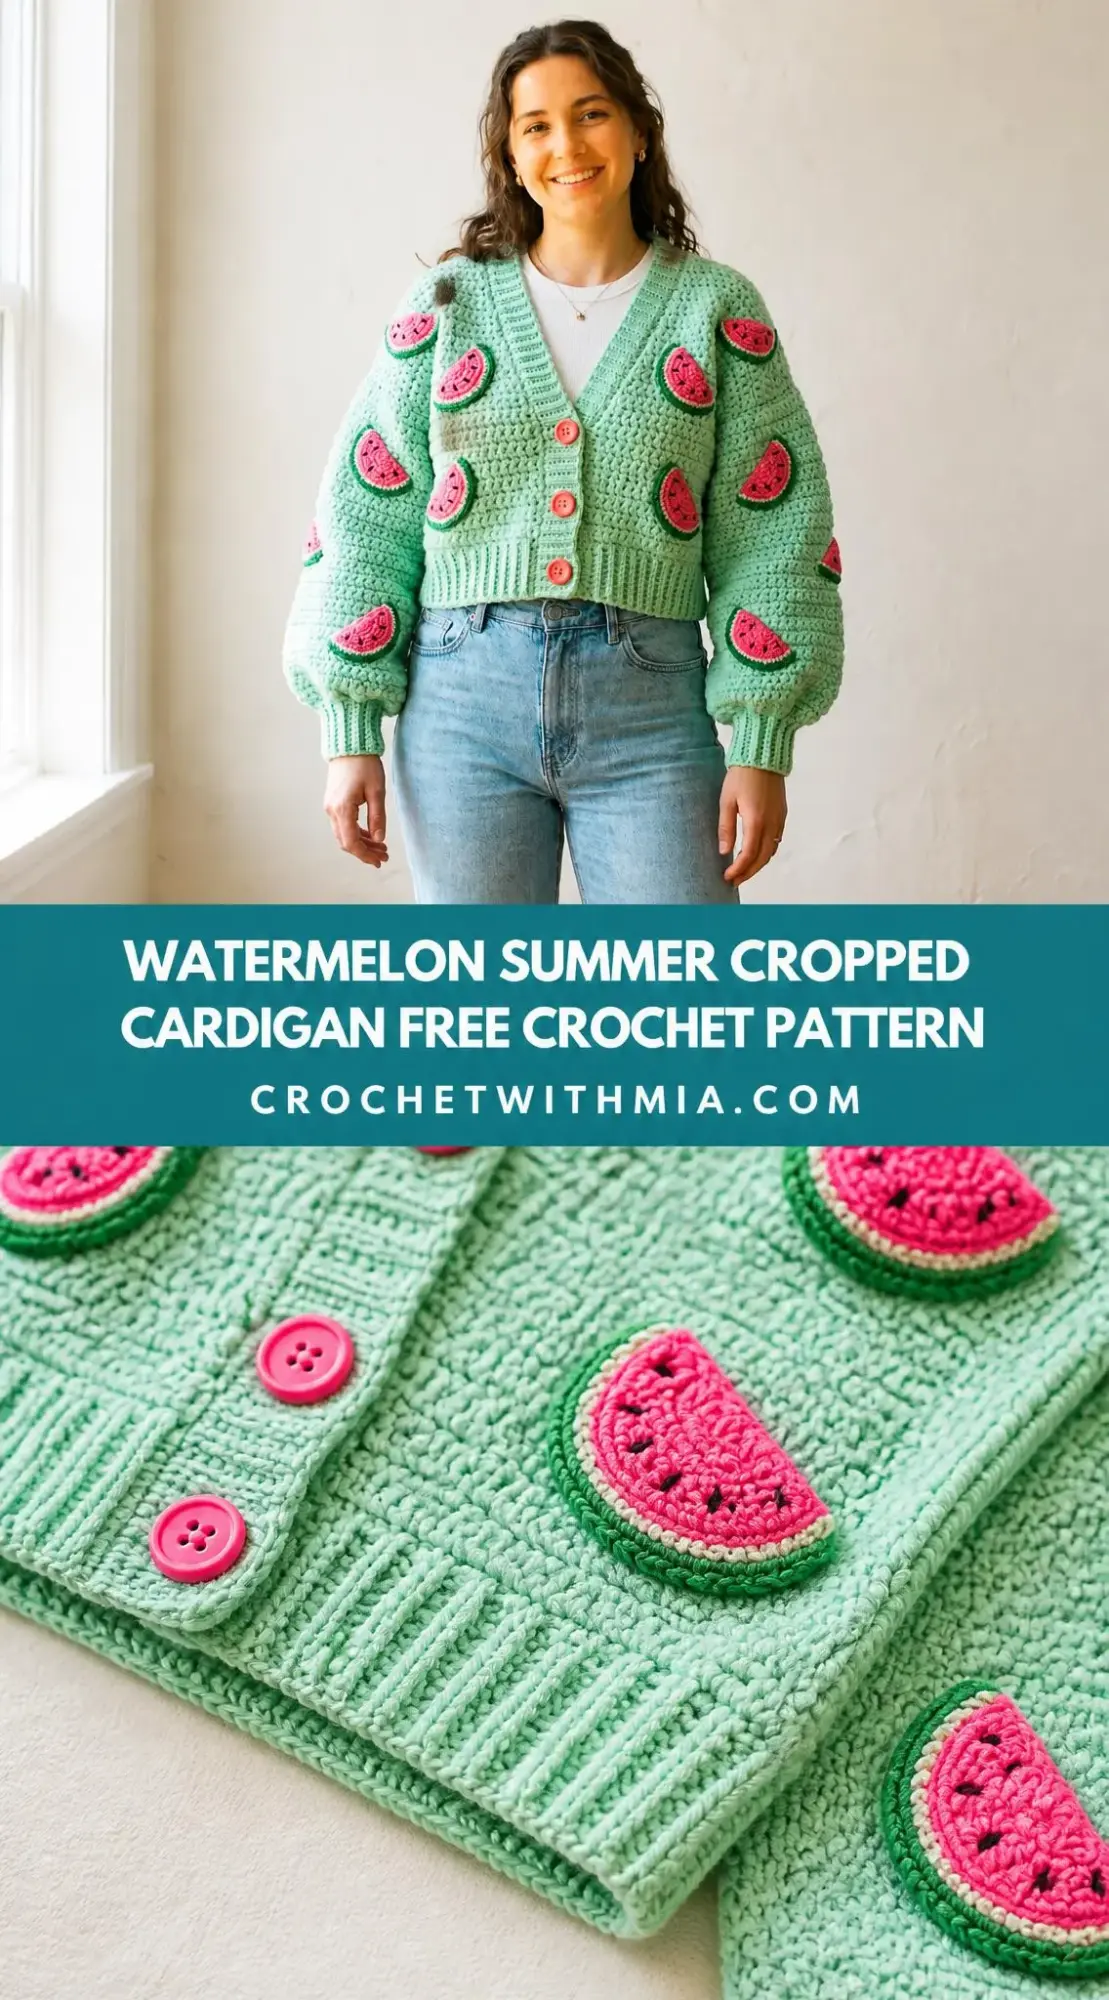
If you’ve been eyeing those trendy applique cardigans on social media, this is your sign to finally make one yourself. The construction is straightforward once you break it down into manageable pieces.
I won’t pretend this is a weekend project. But if you’re comfortable with basic garment construction and ready to level up your skills, this cardigan will reward you with compliments every single time you wear it.
About This Watermelon Cardigan Crochet Pattern
This cropped cardigan features a mint green body worked in half double crochet (hdc), which creates a lovely textured fabric that’s dense enough to hold its shape but still has beautiful drape. The watermelon slice appliques are crocheted separately and sewn onto the finished garment, so you can customize their placement however you like.
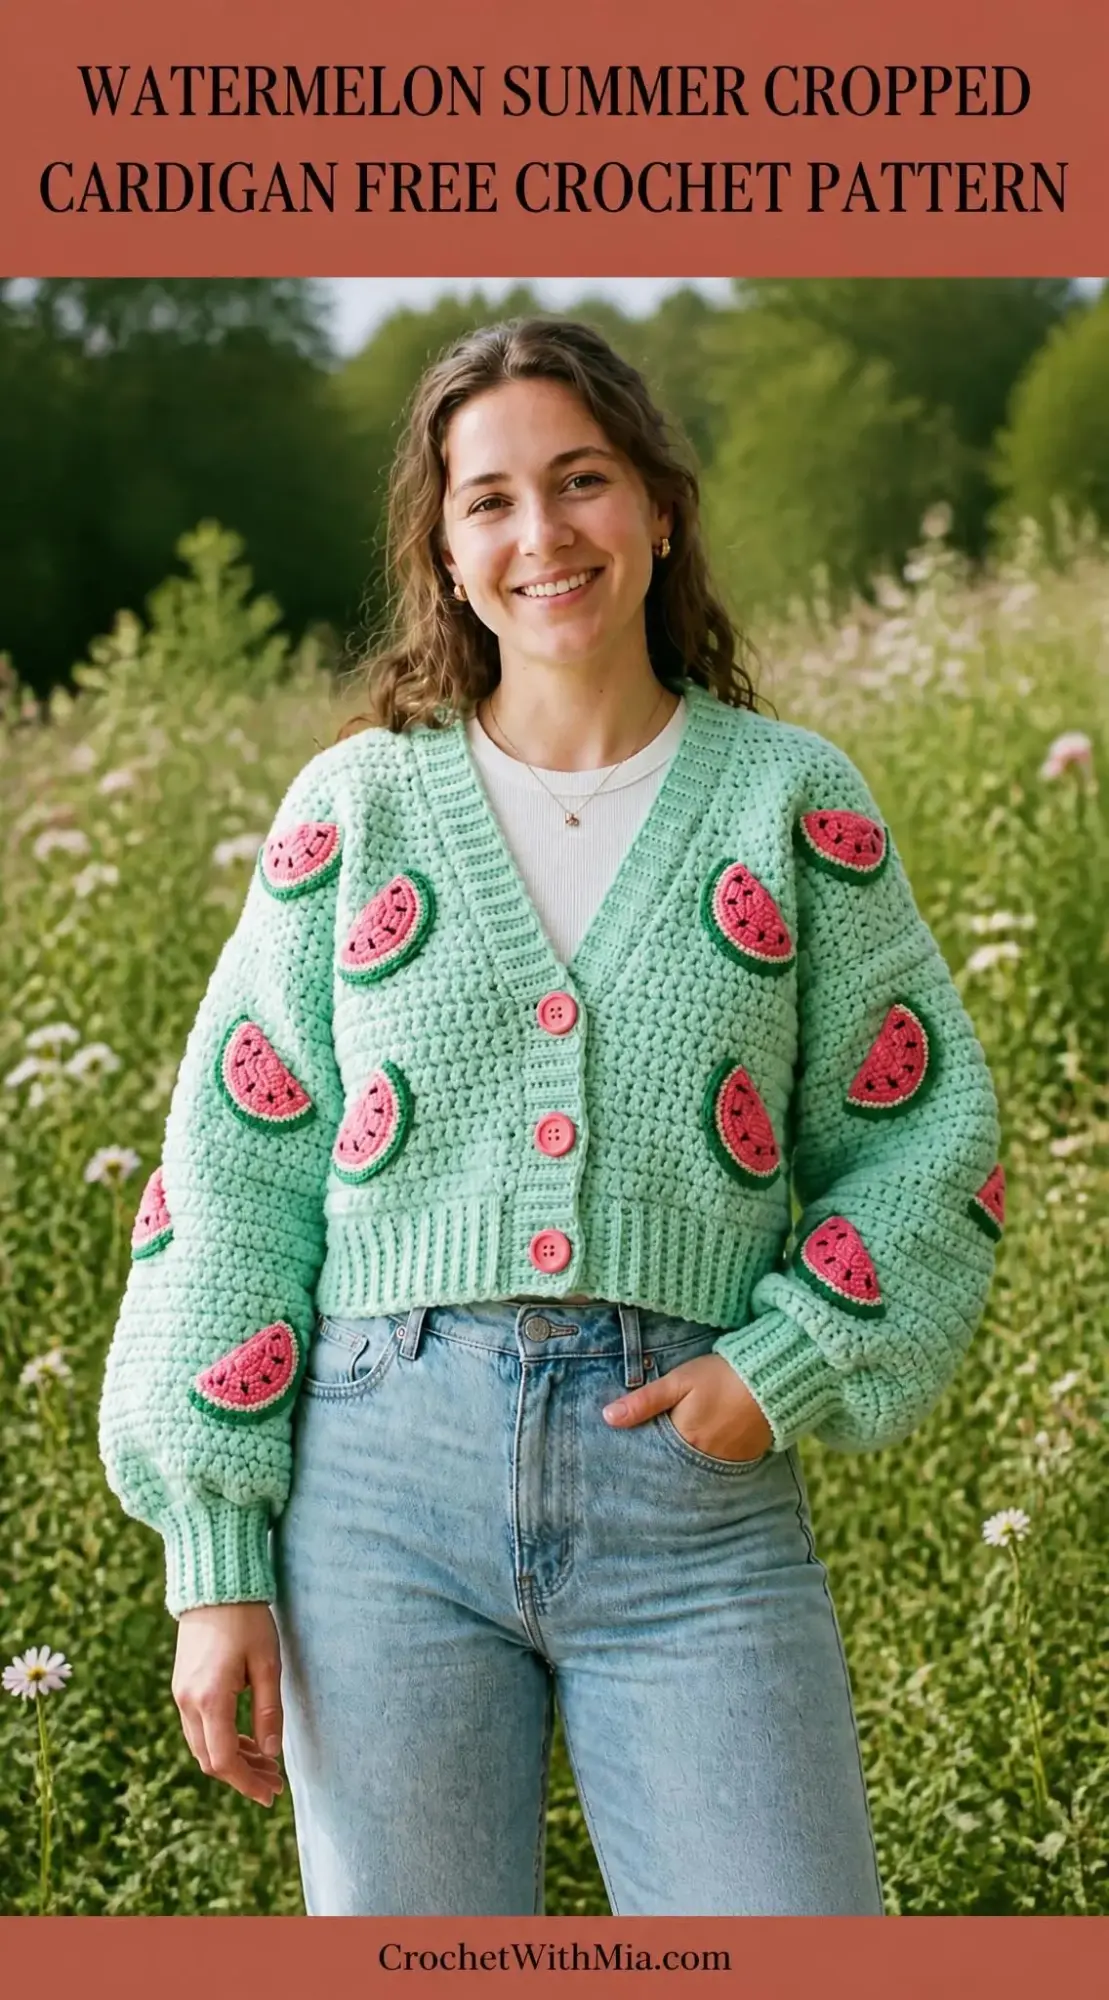
The design includes several classic cardigan elements: a flattering V-neckline, oversized balloon sleeves with ribbed cuffs, a ribbed hem band, and a front button band with three large pink buttons. The finished silhouette is boxy and cropped, hitting just above your natural waist.
You’ll work the body flat in three separate pieces. That’s two front panels and one back panel. Then you’ll seam everything together at the shoulders and sides. The sleeves are also worked flat, seamed along the underarm, and then set into the armhole openings. It sounds like a lot, but I’ll walk you through every single step.
Skill Level
This pattern is rated intermediate. You should feel comfortable working flat panels, seaming pieces together, picking up stitches for ribbing, reading shaping instructions, and constructing a set-in sleeve.
Don’t let that scare you off if you’re a confident beginner though. If you’ve made a few projects and understand how to read a pattern, you can absolutely tackle this with patience. The stitches themselves are basic. It’s the assembly that requires attention.
Time Estimate
Plan for approximately 40 to 60 hours of crochet time, not including blocking. The watermelon appliques add another 6 to 10 hours depending on how many you make. This is definitely a project to savour over several weeks rather than rush through.
Finished Measurements
This pattern is written for one size with a relaxed, oversized fit suitable for sizes Small through Large depending on your ease preference.
Finished Bust: 48 inches / 122 cm (measured flat across chest, then doubled)
Finished Length (hem to shoulder): 18 inches / 46 cm
Sleeve Length (cuff to underarm): 19 inches / 48 cm
Upper Arm Circumference: 18 inches / 46 cm
I’ve included size customization tips at the end if you need to adjust for a smaller or larger fit.
Materials You’ll Need
Yarn
Main Color (MC): Mint Green, bulky weight (weight 5), approximately 1200 yards / 1097 meters
Contrast Color A (CA): Hot Pink or Coral, bulky weight (weight 5), approximately 80 yards / 73 meters for appliques
Contrast Color B (CB): Dark Green, bulky weight (weight 5), approximately 40 yards / 37 meters for applique rind
Contrast Color C (CC): Black, any weight scrap yarn, for embroidered seeds on appliques
Recommended Yarn Options
Lion Brand Pound of Love in Mint and Coral works beautifully. It’s widely available, machine washable, very soft against skin, and holds stitch definition well.
Paintbox Yarns Simply Chunky in Spearmint and Bubblegum offers excellent stitch clarity and a smooth finish. It’s affordable and easy to source online.
WeCrochet Brava Bulky in Aloe and Coral is extremely consistent in weight, easy to frog if needed, and fully machine washable.
When substituting yarn, choose any bulky weight (weight 5) yarn that gets approximately 12 to 13 hdc over 4 inches on a size K hook. Avoid fuzzy or bouclé yarns since they’ll obscure those cute applique details.
Hooks
US Size K-10.5 (6.5 mm) for main body
US Size J-10 (6.0 mm) for ribbing and appliques
Notions
Gauge
With MC and size K-10.5 (6.5 mm) hook:
12 hdc x 9 rows = 4 inches / 10 cm, worked flat and blocked
Please check your gauge before beginning. This is critical for garment fit. A difference of even one stitch per 4 inches can change the finished bust measurement by 4 inches or more across the full cardigan. Adjust your hook size up or down as needed.
Applique gauge (with size J-10 hook): Each completed watermelon slice measures approximately 3.5 inches / 9 cm wide at the widest point and 2.5 inches / 6.5 cm tall.
Abbreviations Used in This Crochet Pattern
blo = back loop only (insert your hook under only the back loop of the stitch instead of both loops)
ch = chain (wrap yarn over hook and pull through loop on hook)
ch-sp = chain space (the gap created by a chain in the previous row)
dc = double crochet (yarn over, insert hook, pull up loop, yarn over and pull through 2 loops twice)
hdc = half double crochet (yarn over, insert hook, pull up loop, yarn over and pull through all 3 loops at once)
hdc2tog = half double crochet two together, which is a decrease stitch
inc = increase (work 2 stitches into the same stitch)
pm = place marker
rep = repeat
RS = right side (the side that faces outward when worn)
sc = single crochet (insert hook, pull up loop, yarn over and pull through both loops)
sk = skip
sl st = slip stitch (insert hook, yarn over and pull through stitch and loop on hook in one motion)
st(s) = stitch(es)
t-ch = turning chain
WS = wrong side
yo = yarn over
Special Stitches
Half Double Crochet Two Together (hdc2tog)
This is your decrease stitch. Yarn over, insert hook into the next stitch, yarn over and pull up a loop. You now have 3 loops on your hook. Without finishing that stitch, yarn over again, insert hook into the following stitch, yarn over and pull up a loop. You now have 5 loops on your hook. Yarn over and draw through all 5 loops at once. You’ve turned two stitches into one.
Ribbing Row
All single crochet stitches in the ribbing sections are worked in the back loop only. This creates that stretchy, knit-like rib texture you see in the cuffs, hem, and button band. Turn with chain 1 at the start of every ribbing row. That chain 1 does not count as a stitch.
Pattern Notes Before You Begin
1. The cardigan body pieces are worked flat from the hem upward.
2. The hem ribbing is worked first as a horizontal strip, then the main body is worked off the long edge of that ribbing.
3. Turning chains for hdc rows: Chain 2 at the beginning of each row. This chain 2 does NOT count as a stitch. Always work your first hdc into the first stitch at the base of the chain 2.
4. Turning chains for sc ribbing rows: Chain 1 at the beginning of each row. This chain 1 does NOT count as a stitch.
5. V-neck shaping begins partway through the front panels and is worked by decreasing on the center front edge.
6. Sleeves are worked flat, seamed, then set into the armhole.
7. The button band is picked up along both front edges after seaming.
8. Stitch counts at the end of each row reflect working stitches only, not turning chains.
9. Make approximately 14 to 18 watermelon appliques depending on how densely you want to cover the cardigan.
10. Right side faces you on odd-numbered rows when starting from the hem.
Crochet Pattern Instructions
Back Panel
Hem Ribbing (Back)
With MC and size J-10 hook, chain 9.
Row 1 (RS): Sc in 2nd ch from hook and in each ch across. Turn. (8 sc)
Rows 2 through 58: Ch 1, sc in blo of each st across. Turn. (8 sc)
At the end of Row 58, do not fasten off. Rotate your work 90 degrees to work along the long edge of the ribbing strip.
Body (Back)
Change to size K-10.5 hook.
Row 1 (RS): Ch 2, work 1 hdc into each row-end edge across the ribbing strip. Work into approximately every other row-end edge to achieve 58 hdc evenly across. Turn. (58 hdc)
Rows 2 through 22: Ch 2, hdc in each st across. Turn. (58 hdc)
Checkpoint: After Row 22, the back panel above the ribbing should measure approximately 10 inches / 25.5 cm tall.
Armhole Shaping
Row 23 (RS): Sl st across first 4 sts, ch 2, hdc in each st across to last 4 sts, leave last 4 sts unworked. Turn. (50 hdc)
Row 24: Ch 2, hdc2tog, hdc in each st across to last 2 sts, hdc2tog. Turn. (48 hdc)
Row 25: Ch 2, hdc2tog, hdc in each st across to last 2 sts, hdc2tog. Turn. (46 hdc)
Row 26: Ch 2, hdc2tog, hdc in each st across to last 2 sts, hdc2tog. Turn. (44 hdc)
Rows 27 through 36: Ch 2, hdc in each st across. Turn. (44 hdc)
At end of Row 36, fasten off and weave in ends.
Shoulder placement: The outer 12 stitches on each side are the shoulder zones. The center 20 stitches form the back neck. Mark these with stitch markers.
Left Front Panel
This is the left front as worn, meaning it will be on the wearer’s left side.
Hem Ribbing (Left Front)
With MC and size J-10 hook, chain 9.
Row 1 (RS): Sc in 2nd ch from hook and in each ch across. Turn. (8 sc)
Rows 2 through 28: Ch 1, sc in blo of each st across. Turn. (8 sc)
Rotate work 90 degrees.
Body (Left Front)
Change to size K-10.5 hook.
Row 1 (RS): Ch 2, work 28 hdc evenly along long edge of ribbing. Turn. (28 hdc)
Rows 2 through 14: Ch 2, hdc in each st across. Turn. (28 hdc)
V-Neck and Armhole Shaping (Left Front)
Row 15 (RS): Ch 2, hdc in each st across to last 2 sts, hdc2tog. Turn. (27 hdc)
Rows 16 and 17: Ch 2, hdc in each st across. Turn. (27 hdc)
Row 18: Ch 2, hdc in each st across to last 2 sts, hdc2tog. Turn. (26 hdc)
Rows 19 and 20: Ch 2, hdc in each st across. Turn. (26 hdc)
Row 21: Ch 2, hdc in each st across to last 2 sts, hdc2tog. Turn. (25 hdc)
Row 22: Ch 2, hdc in each st across. Turn. (25 hdc)
Row 23 (RS): Sl st across first 4 sts, ch 2, hdc in each st across to last 2 sts, hdc2tog. Turn. (19 hdc)
Row 24: Ch 2, hdc2tog, hdc in each st across. Turn. (18 hdc)
Row 25: Ch 2, hdc2tog, hdc in each st across to last 2 sts, hdc2tog. Turn. (16 hdc)
Row 26: Ch 2, hdc2tog, hdc in each st across. Turn. (15 hdc)
Row 27: Ch 2, hdc in each st across to last 2 sts, hdc2tog. Turn. (14 hdc)
Row 28: Ch 2, hdc in each st across. Turn. (14 hdc)
Row 29: Ch 2, hdc in each st across to last 2 sts, hdc2tog. Turn. (13 hdc)
Row 30: Ch 2, hdc in each st across. Turn. (13 hdc)
Row 31: Ch 2, hdc in each st across to last 2 sts, hdc2tog. Turn. (12 hdc)
Rows 32 through 36: Ch 2, hdc in each st across. Turn. (12 hdc)
Fasten off and weave in ends.
Right Front Panel
This is the right front as worn.
Hem Ribbing (Right Front)
With MC and size J-10 hook, chain 9.
Row 1 (RS): Sc in 2nd ch from hook and in each ch across. Turn. (8 sc)
Rows 2 through 28: Ch 1, sc in blo of each st across. Turn. (8 sc)
Rotate work 90 degrees.
Body (Right Front)
Change to size K-10.5 hook.
Row 1 (RS): Ch 2, work 28 hdc evenly along long edge of ribbing. Turn. (28 hdc)
Rows 2 through 14: Ch 2, hdc in each st across. Turn. (28 hdc)
V-Neck and Armhole Shaping (Right Front)
Row 15 (RS): Ch 2, hdc2tog, hdc in each st across. Turn. (27 hdc)
Rows 16 and 17: Ch 2, hdc in each st across. Turn. (27 hdc)
Row 18: Ch 2, hdc2tog, hdc in each st across. Turn. (26 hdc)
Rows 19 and 20: Ch 2, hdc in each st across. Turn. (26 hdc)
Row 21: Ch 2, hdc2tog, hdc in each st across. Turn. (25 hdc)
Row 22: Ch 2, hdc in each st across. Turn. (25 hdc)
Row 23 (RS): Ch 2, hdc2tog, hdc in each st across to last 4 sts, leave last 4 sts unworked. Turn. (19 hdc)
Row 24: Ch 2, hdc in each st across to last 2 sts, hdc2tog. Turn. (18 hdc)
Row 25: Ch 2, hdc2tog, hdc in each st across to last 2 sts, hdc2tog. Turn. (16 hdc)
Row 26: Ch 2, hdc in each st across to last 2 sts, hdc2tog. Turn. (15 hdc)
Row 27: Ch 2, hdc2tog, hdc in each st across. Turn. (14 hdc)
Row 28: Ch 2, hdc in each st across. Turn. (14 hdc)
Row 29: Ch 2, hdc2tog, hdc in each st across. Turn. (13 hdc)
Row 30: Ch 2, hdc in each st across. Turn. (13 hdc)
Row 31: Ch 2, hdc2tog, hdc in each st across. Turn. (12 hdc)
Rows 32 through 36: Ch 2, hdc in each st across. Turn. (12 hdc)
Fasten off and weave in ends.
Seaming the Body
Lay your back panel flat with the right side facing up. Place the right front panel (right side up) against the right side of the back panel, matching the shoulder edges (12 stitches each). Whipstitch the shoulder seam using your yarn needle and MC. Repeat for the left shoulder seam.
After the shoulder seams are joined, fold the garment so right sides face together. Use a mattress stitch or whipstitch to join the side seams from the hem up to the base of the armhole (Row 22, approximately 10 inches / 25.5 cm). Leave the armhole open.
Checkpoint: Each armhole opening should measure approximately 8 inches / 20.5 cm vertically from base to shoulder seam.
Sleeves (Make 2)
Cuff Ribbing
With MC and size J-10 hook, chain 9.
Row 1: Sc in 2nd ch from hook and in each ch across. Turn. (8 sc)
Rows 2 through 24: Ch 1, sc in blo of each st across. Turn. (8 sc)
Rotate 90 degrees.
Sleeve Body
Change to size K-10.5 hook.
Row 1 (RS): Ch 2, work 24 hdc evenly along long edge of cuff ribbing. Turn. (24 hdc)
Row 2: Ch 2, hdc in each st across. Turn. (24 hdc)
Row 3 (increase row): Ch 2, 2 hdc in first st, hdc in each st across to last st, 2 hdc in last st. Turn. (26 hdc)
Rows 4 and 5: Ch 2, hdc in each st across. Turn. (26 hdc)
Row 6 (increase row): Ch 2, 2 hdc in first st, hdc in each st across to last st, 2 hdc in last st. Turn. (28 hdc)
Rows 7 and 8: Ch 2, hdc in each st across. Turn. (28 hdc)
Continue this pattern of increasing every 3rd row:
Row 9: Increase to 30 hdc
Row 12: Increase to 32 hdc
Row 15: Increase to 34 hdc
Row 18: Increase to 36 hdc
Row 21: Increase to 38 hdc
Row 24: Increase to 40 hdc
Row 27: Increase to 42 hdc
Rows 28 through 33: Ch 2, hdc in each st across. Turn. (42 hdc)
Sleeve Cap Shaping
Row 34: Sl st across first 4 sts, ch 2, hdc in each st across to last 4 sts, leave last 4 sts unworked. Turn. (34 hdc)
Rows 35 through 41: Ch 2, hdc2tog, hdc in each st across to last 2 sts, hdc2tog. Turn.
After Row 41, you should have 20 hdc.
Row 42: Ch 2, hdc2tog across (10 hdc2tog). Turn. (10 hdc)
Fasten off, leaving a 12 inch / 30.5 cm tail for seaming.
Fold the sleeve in half lengthwise with right sides together. Seam the underarm from cuff edge to the base of the sleeve cap using mattress stitch. Turn right side out.
Setting in Sleeves
Pin the sleeve cap into the armhole opening with right sides together. Match the underarm seam of the sleeve to the side seam of the body. The top of the sleeve cap (Row 42 edge) sits at the shoulder seam. Distribute any ease evenly around the cap. Whipstitch the sleeve cap into the armhole. Repeat for the second sleeve.
Button Band and Buttonhole Band
The bands are worked as one continuous strip picked up along both front edges and around the V-neck.
With MC and size J-10 hook, right side facing, begin at the lower right front edge.
Pickup Row: Work 1 sc per row-end of body rows, and 1 sc per 2 rows of ribbing rows. Continue around the V-neckline, work approximately 20 sc evenly across the back neck, then continue down the left front edge.
Approximate pickup: 36 sc up right front, 24 sc up right V-neck, 20 sc across back neck, 24 sc down left V-neck, 36 sc down left front. Total approximately 140 sc.
Row 1: Ch 1, sc in blo of each st across. Turn. (140 sc)
Row 2 (buttonhole row): Ch 1, work in sc blo across. When you reach each of the 3 marked button positions on the right front (at approximately 2, 7, and 12 inches from the lower edge), ch 2 and skip 2 sts. Continue to end. Turn.
Row 3: Ch 1, sc in blo of each st across. When you reach each ch-2 space, work 2 sc into the space. Turn. (140 sc)
Row 4: Ch 1, sc in blo of each st across. Turn. (140 sc)
Fasten off and weave in ends.
Watermelon Slice Appliques (Make 14 to 18)
With CA (hot pink) and size J-10 hook:
Foundation: Ch 2.
Row 1: Work 3 sc in 2nd ch from hook. Turn. (3 sc)
Row 2: Ch 1, 2 sc in first st, sc in next st, 2 sc in last st. Turn. (5 sc)
Row 3: Ch 1, 2 sc in first st, sc in each st across to last st, 2 sc in last st. Turn. (7 sc)
Row 4: Ch 1, 2 sc in first st, sc in each st across to last st, 2 sc in last st. Turn. (9 sc)
Row 5: Ch 1, 2 sc in first st, sc in each st across to last st, 2 sc in last st. Turn. (11 sc)
Row 6: Ch 1, sc in each st across. Turn. (11 sc) Do not fasten off.
Rind Border
Change to CB (dark green).
Round 1: Ch 1, do not turn. Work sc around the entire perimeter: approximately 2 sc across the bottom point, 6 sc up the right side, 11 sc across the top edge, 6 sc down the left side, 2 sc across the bottom. Sl st to first sc to join. (Approximately 27 sc)
Round 2: Ch 1, sc in each sc around. Sl st to join. Fasten off, leaving a 10 inch / 25.5 cm tail for sewing.
Seed Embroidery
Using CC (black) and your yarn needle, embroider 4 to 6 small elongated oval shapes on the pink flesh to represent seeds. Use a straight stitch or satin stitch.
Blocking and Finishing
Wet blocking is strongly recommended. Submerge your cardigan in cool water for 20 minutes. Gently press out excess water by rolling in a towel. Do not wring. Lay flat on a blocking mat and pin to finished measurements. Allow to dry completely.
Once dry, pin the watermelon appliques in place before sewing. Scatter them randomly across both fronts and both sleeves. Some can be angled slightly for a playful look. Whipstitch each applique around its full perimeter using the long tail.
Sew buttons to the left front band opposite the buttonholes.
Size Customization Tips
For a smaller size (fitted S/M): Reduce the back panel from 58 hdc to 50 hdc, and each front panel from 28 hdc to 24 hdc. Start sleeves at 22 hdc and increase to 36 hdc maximum. Reduce button band pickup to approximately 120 sc.
For a larger size (XL/2X): Increase the back panel to 66 hdc, and each front panel to 32 hdc. Start sleeves at 26 hdc and increase to 46 hdc maximum. Adjust button band pickup to approximately 155 sc.
Care Instructions
For acrylic yarn: Machine wash cold on gentle cycle. Tumble dry low or lay flat to dry. Do not iron directly on the appliques.
Store folded rather than hung to prevent shoulder stretching.
Thank you so much for choosing this watermelon cardigan pattern! I genuinely cannot wait to see your finished cardigans. If you make one, please tag me on Instagram or share your photo in my Facebook group.
If you loved this pattern, go ahead and pin it to your crochet boards on Pinterest so you can find it when you’re ready to start. And please drop a comment below if you have any questions or just want to share your progress. Happy crocheting!