
I call this one "Little Sea Star," and it has quite the backstory. About three years ago, I sketched this design in a battered notebook while waiting at a coffee shop, dreaming up the perfect newborn photography prop that would make parents gasp with delight. The notebook sat in my craft room drawer until my niece announced her pregnancy last spring.
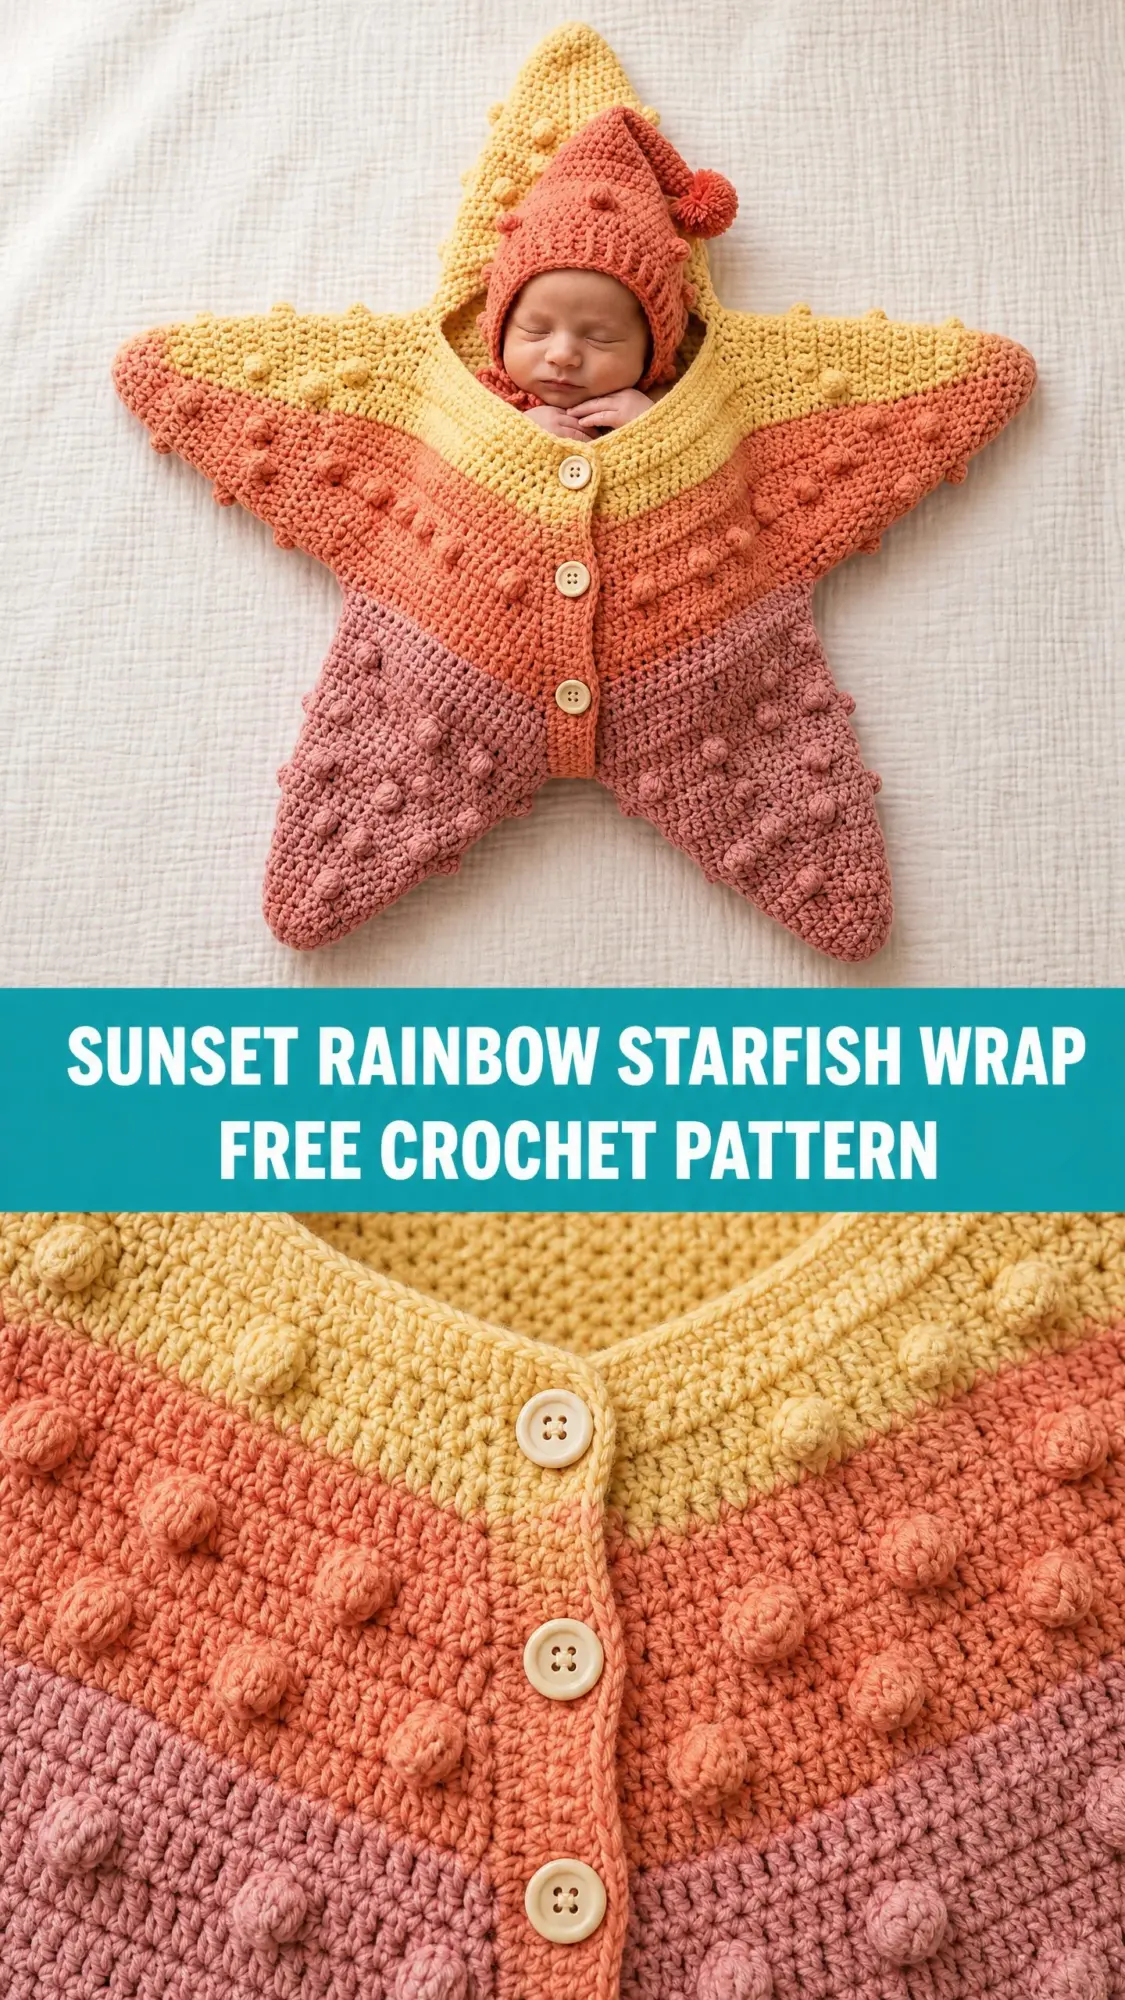
Suddenly I had the motivation to bring Little Sea Star to life. I wanted something that would photograph beautifully, keep a tiny baby cozy during those precious first photo sessions, and look unlike anything else out there. The five-pointed starfish shape felt perfect, and that warm sunset gradient from buttery yellow through coral to dusty rose? Absolute magic against a white backdrop.
After dozens of swatches and three complete rewrites of my scribbled notes, I finally have a pattern I am thrilled to share with you. This starfish wrap cocoon envelops a newborn in the most adorable sea creature silhouette, complete with textured bobble stitches that mimic real starfish tubercles. Trust me when I say the finished photos are worth every single stitch.
What Makes This Starfish Baby Wrap Special
This crochet pattern creates a flat, star-shaped wrap that works as both a photography prop and a functional snuggle sack. The baby nestles into the center opening while the front panels wrap around and button closed with three wooden buttons. A matching pointed hat with a tiny pom-pom completes the ocean-themed set.
The ombre color effect is what really makes this piece stunning. You will work from warm yellow at the top point down through coral and salmon in the middle body, finishing with dusty rose and mauve at the lower points. The color transitions happen at specific row intervals, so you get that beautiful gradient without any complicated colorwork techniques.
Those raised dots scattered across the surface? Those are bobble stitches, and they add so much personality. Real starfish have little bumps called tubercles all over their bodies, and the bobbles recreate that texture perfectly. They pop out on the right side of your work and catch the light beautifully in photographs.
Pattern Details at a Glance
Skill Level: Intermediate
Finished Dimensions:
Time Estimate: The wrap panel takes approximately 10 to 14 hours. The hat takes approximately 2 to 3 hours. Total project time runs 12 to 17 hours depending on your experience level.
Materials You Will Need
Yarn: Worsted weight (weight category 4), approximately 600 yards (550 m) total, divided as follows:
Hook: US size J-10 / 6.0 mm crochet hook (or size needed to meet gauge)
Additional Materials:
Yarn Suggestions
Lion Brand Pound of Love works wonderfully for this project. It is worsted weight, 100% premium acrylic, and comes in huge 1020-yard skeins. Look for Buttercup, Tangerine, and Rose Blush. This yarn is machine washable, soft against newborn skin, and holds color vibrancy beautifully.
Paintbox Yarns Simply DK held double gives you an effective worsted weight with tons of color options. Try Daffodil Yellow, Coral Blush, and Dusty Rose. Remember that holding two strands doubles the yardage needed per color.
Bernat Softee Baby is a classic choice that you can find almost anywhere. It is worsted weight, 100% acrylic, and comes in Soft Yellow, Peach, and Soft Rose shades that work perfectly for this sunset palette.
Whatever you choose, stick with smooth yarns. Fuzzy or textured yarns will hide those pretty bobble stitches.
Gauge
In half double crochet (hdc) with US J-10 / 6.0 mm hook:
Gauge swatch instructions: Chain 20. Work hdc across for 15 rows. Block lightly. Measure the center 14 stitches and center 10 rows. Adjust your hook size up or down as needed before beginning.
I cannot stress this enough: gauge matters here. The finished dimensions directly affect how well the wrap fits a newborn. A wrap that is too small will not enclose the baby properly, and one that is too large will look sloppy in photographs. Take the time to swatch.
Abbreviations and Stitch Definitions
Let me walk you through every stitch and term you will encounter:
Special Stitches Explained
Bobble Stitch (bob)
The bobble stitch creates a raised cluster that pops to the front of your work. You will always work bobbles on wrong side rows so they pop to the right side. Here is exactly how to make one:
Step 1: Yarn over, insert hook into indicated stitch, yarn over and pull up a loop, yarn over and draw through first 2 loops on hook. You now have 1 incomplete double crochet made with 2 loops remaining on hook.
Step 2: Yarn over, insert hook into the SAME stitch, yarn over and pull up a loop, yarn over and draw through first 2 loops on hook. You now have 2 incomplete double crochets made with 3 loops on hook.
Step 3: Yarn over, insert hook into the SAME stitch, yarn over and pull up a loop, yarn over and draw through first 2 loops on hook. You now have 3 incomplete double crochets made with 4 loops on hook.
Step 4: Yarn over, insert hook into the SAME stitch, yarn over and pull up a loop, yarn over and draw through first 2 loops on hook. You now have 4 incomplete double crochets made with 5 loops on hook.
Step 5: Yarn over and draw through all 5 loops on hook. Chain 1 to close and lock the bobble in place.
Important note: The chain 1 closing the bobble does NOT count as a stitch in this pattern. Work your next hdc into the stitch immediately following the bobble.
Hdc2tog (Half Double Crochet Decrease)
This decrease joins 2 stitches into 1:
Step 1: Yarn over, insert hook into next stitch, yarn over and pull up a loop (3 loops on hook).
Step 2: Yarn over, insert hook into following stitch, yarn over and pull up a loop (5 loops on hook).
Step 3: Yarn over and draw through all 5 loops on hook. You have decreased by 1 stitch.
Hdc2inc (Half Double Crochet Increase)
Simply work 2 hdc into the same indicated stitch. This increases your stitch count by 1.
Important Pattern Notes Before You Begin
1. The wrap is worked as a single flat star shape with a front opening, not as separate panels that get sewn together.
2. Construction order: Work the five-pointed star body panel first, then work the button band, then work the hat separately, then seam where indicated, then attach buttons.
3. All turning chains in this pattern: Chain 2 at the beginning of each hdc row. The chain 2 turning chain does NOT count as a stitch. Always work your first hdc into the first stitch of the row, which is the stitch directly at the base of the turning chain.
4. Color change technique: Change to the next color at the end of the last stitch of the indicated row. Work the last stitch until 2 loops remain on hook, draw the new color through both loops, then turn. Cut the old color and weave in the end.
5. Color placement guide:
6. Bobble placement: Bobbles appear every 5th stitch on wrong side rows, offset by 2 to 3 stitches on alternating bobble rows. This creates the irregular organic dot pattern seen on real starfish.
Step-by-Step Crochet Pattern Instructions
Part 1: The Back Star Panel
The back star panel is worked as a single flat piece, built from the bottom center point upward.
Lower Point (Bottom Arm)
Begin with Color C.
Row 1 (RS): Ch 3. Work 2 hdc in 3rd ch from hook. Turn. (2 sts)
Row 2 (WS): Ch 2, hdc2inc in first st, hdc in next st, hdc2inc in last st. Turn. (4 sts)
Row 3 (RS): Ch 2, hdc2inc in first st, hdc across to last st, hdc2inc in last st. Turn. (6 sts)
Row 4 (WS): Ch 2, hdc2inc in first st, hdc in next 2 sts, bob in next st, hdc in next st, hdc2inc in last st. Turn. (8 sts)
Row 5 (RS): Ch 2, hdc2inc in first st, hdc across to last st, hdc2inc in last st. Turn. (10 sts)
Row 6 (WS): Ch 2, hdc2inc in first st, hdc in next 3 sts, bob in next st, hdc in next 3 sts, hdc2inc in last st. Turn. (12 sts)
Row 7 (RS): Ch 2, hdc2inc in first st, hdc across to last st, hdc2inc in last st. Turn. (14 sts)
Row 8 (WS): Ch 2, hdc2inc in first st, hdc in next 2 sts, bob in next st, hdc in next 5 sts, bob in next st, hdc in next 2 sts, hdc2inc in last st. Turn. (16 sts)
Row 9 (RS): Ch 2, hdc2inc in first st, hdc across to last st, hdc2inc in last st. Turn. (18 sts)
Row 10 (WS): Ch 2, hdc2inc in first st, hdc in next 4 sts, bob in next st, hdc in next 5 sts, bob in next st, hdc in next 4 sts, hdc2inc in last st. Turn. (20 sts)
Checkpoint: Your bottom point triangle should measure approximately 3.5 inches (9 cm) wide and 4 inches (10 cm) tall at this stage. If you are way off, check your gauge.
Lower Body Expansion
Continue with Color C.
Row 11 (RS): Ch 2, hdc2inc in first st, hdc across to last st, hdc2inc in last st. Turn. (22 sts)
Row 12 (WS): Ch 2, hdc2inc in first st, hdc in 4 sts, bob, hdc in 5 sts, bob, hdc in 5 sts, bob, hdc in 4 sts, hdc2inc in last st. Turn. (24 sts)
Row 13 (RS): Ch 2, hdc2inc in first st, hdc across to last st, hdc2inc in last st. Turn. (26 sts)
Row 14 (WS): Ch 2, hdc2inc in first st, hdc in 3 sts, bob, hdc in 5 sts, bob, hdc in 5 sts, bob, hdc in 5 sts, bob, hdc in 3 sts, hdc2inc in last st. Turn. (28 sts)
Row 15 (RS): Ch 2, hdc2inc in first st, hdc across to last st, hdc2inc in last st. Turn. (30 sts)
Row 16 (WS): Ch 2, hdc across. Turn. (30 sts)
Change to Color B at end of Row 16.
Row 17 (RS): Ch 2, hdc2inc in first st, hdc across to last st, hdc2inc in last st. Turn. (32 sts)
Row 18 (WS): Ch 2, hdc in 3 sts, bob, (hdc in 5 sts, bob) 4 times, hdc in 3 sts. Turn. (32 sts)
Row 19 (RS): Ch 2, hdc2inc in first st, hdc across to last st, hdc2inc in last st. Turn. (34 sts)
Row 20 (WS): Ch 2, hdc across. Turn. (34 sts)
Lower Arm Extensions
Row 21 Setup: At end of Row 20 (WS), do not turn. Ch 12 for right arm extension. Turn.
Row 21 (RS): Ch 2, hdc2inc in 3rd ch from hook, hdc in remaining 10 ch (12 sts right arm), then hdc across all 34 body sts, hdc2inc in last st. Do not turn yet. Ch 12 for left arm extension at far end. Turn. (60 sts total)
Row 22 (WS): Ch 2, hdc2inc in first st, hdc across all 60 sts, hdc2inc in last st. Turn. (62 sts)
Row 23 (RS): Ch 2, hdc across. Turn. (62 sts)
Row 24 (WS): Ch 2, hdc in 4 sts, bob, (hdc in 5 sts, bob) 8 times, hdc in 3 sts. Turn. (62 sts)
Row 25 (RS): Ch 2, hdc across. Turn. (62 sts)
Lower Arm Taper
Row 26 (WS): Ch 2, hdc2tog (dec at left edge), hdc across center, hdc2tog at last 2 sts (dec at right edge). Turn. (60 sts)
Row 27 (RS): Ch 2, hdc2tog, hdc across to last 2 sts, hdc2tog. Turn. (58 sts)
Row 28 (WS): Ch 2, hdc2tog, hdc in 3 sts, bob, (hdc in 5 sts, bob) 6 times, hdc in 3 sts, hdc2tog. Turn. (56 sts)
Row 29 (RS): Ch 2, hdc2tog, hdc across to last 2 sts, hdc2tog. Turn. (54 sts)
Row 30 (WS): Ch 2, hdc2tog, hdc across to last 2 sts, hdc2tog. Turn. (52 sts)
Row 31 (RS): Ch 2, hdc2tog, hdc across to last 2 sts, hdc2tog. Turn. (50 sts)
Row 32 (WS): Ch 2, hdc2tog, hdc in 4 sts, bob, (hdc in 5 sts, bob) 5 times, hdc in 3 sts, hdc2tog. Turn. (48 sts)
Row 33 (RS): Ch 2, hdc2tog, hdc across to last 2 sts, hdc2tog. Turn. (46 sts)
Row 34 (WS): Ch 2, hdc2tog, hdc across to last 2 sts, hdc2tog. Turn. (44 sts)
Row 35 (RS): Ch 2, hdc2tog, hdc across to last 2 sts, hdc2tog. Turn. (42 sts)
Row 36 (WS): Ch 2, hdc2tog, hdc in 3 sts, bob, (hdc in 5 sts, bob) 4 times, hdc in 4 sts, hdc2tog. Turn. (40 sts)
Row 37 (RS): Ch 2, hdc2tog, hdc across to last 2 sts, hdc2tog. Turn. (38 sts)
Checkpoint: At Row 37, the lower portion of the star should be complete. The piece should measure approximately 10 inches (25 cm) tall from bottom tip to current working row and 14 inches (36 cm) across at the widest arm span.
Upper Body (Central Waist)
Row 38 (WS): Ch 2, hdc across all 38 sts. Turn. (38 sts)
Row 39 (RS): Ch 2, hdc across. Turn. (38 sts)
Row 40 (WS): Ch 2, hdc in 3 sts, bob, (hdc in 5 sts, bob) 4 times, hdc in 4 sts. Turn. (38 sts)
Row 41 (RS): Ch 2, hdc across. Turn. (38 sts)
Row 42 (WS): Ch 2, hdc across. Turn. (38 sts)
Change to Color A at end of Row 42.
Row 43 (RS): Ch 2, hdc across. Turn. (38 sts)
Row 44 (WS): Ch 2, hdc in 4 sts, bob, (hdc in 5 sts, bob) 3 times, hdc in 4 sts. Turn. (38 sts)
Upper Arm Extensions
Row 45 Setup: At end of Row 44 (WS), ch 12 for right upper arm. Turn.
Row 45 (RS): Ch 2, hdc2inc in 3rd ch from hook, hdc in remaining 10 ch (12 sts), hdc across all 38 body sts, then at far end ch 12 for left upper arm. Turn. (64 sts)
Row 46 (WS): Ch 2, hdc2inc in first st, hdc across to last st, hdc2inc in last st. Turn. (66 sts)
Row 47 (RS): Ch 2, hdc across. Turn. (66 sts)
Row 48 (WS): Ch 2, hdc in 3 sts, bob, (hdc in 5 sts, bob) 8 times, hdc in 3 sts. Turn. (66 sts)
Row 49 (RS): Ch 2, hdc across. Turn. (66 sts)
Upper Arm Taper
Row 50 (WS): Ch 2, hdc2tog, hdc across to last 2 sts, hdc2tog. Turn. (64 sts)
Row 51 (RS): Ch 2, hdc2tog, hdc across to last 2 sts, hdc2tog. Turn. (62 sts)
Row 52 (WS): Ch 2, hdc2tog, hdc in 3 sts, bob, (hdc in 5 sts, bob) 6 times, hdc in 4 sts, hdc2tog. Turn. (60 sts)
Row 53 (RS): Ch 2, hdc2tog, hdc across to last 2 sts, hdc2tog. Turn. (58 sts)
Row 54 (WS): Ch 2, hdc2tog, hdc across to last 2 sts, hdc2tog. Turn. (56 sts)
Row 55 (RS): Ch 2, hdc2tog, hdc across to last 2 sts, hdc2tog. Turn. (54 sts)
Row 56 (WS): Ch 2, hdc2tog, hdc in 4 sts, bob, (hdc in 5 sts, bob) 4 times, hdc in 5 sts, hdc2tog. Turn. (52 sts)
Row 57 (RS): Ch 2, hdc2tog, hdc across to last 2 sts, hdc2tog. Turn. (50 sts)
Row 58 (WS): Ch 2, hdc2tog, hdc across to last 2 sts, hdc2tog. Turn. (48 sts)
Row 59 (RS): Ch 2, hdc2tog, hdc across to last 2 sts, hdc2tog. Turn. (46 sts)
Row 60 (WS): Ch 2, hdc2tog, hdc in 3 sts, bob, (hdc in 5 sts, bob) 4 times, hdc in 4 sts, hdc2tog. Turn. (44 sts)
Row 61 (RS): Ch 2, hdc2tog, hdc across to last 2 sts, hdc2tog. Turn. (42 sts)
Checkpoint: Your upper two arms are now tapered. The piece should look like a five-pointed star with only the top center point remaining.
Top Center Point
Continue with Color A.
Row 62 (WS): Ch 2, hdc2tog, hdc across to last 2 sts, hdc2tog. Turn. (40 sts)
Row 63 (RS): Ch 2, hdc2tog, hdc across to last 2 sts, hdc2tog. Turn. (38 sts)
Row 64 (WS): Ch 2, hdc2tog, hdc across to last 2 sts, hdc2tog. Turn. (36 sts)
Row 65 (RS): Ch 2, hdc2tog, hdc across to last 2 sts, hdc2tog. Turn. (34 sts)
Row 66 (WS): Ch 2, hdc2tog, hdc across to last 2 sts, hdc2tog. Turn. (32 sts)
Row 67 (RS): Ch 2, hdc2tog, hdc across to last 2 sts, hdc2tog. Turn. (30 sts)
Row 68 (WS): Ch 2, hdc2tog, hdc across to last 2 sts, hdc2tog. Turn. (28 sts)
Row 69 (RS): Ch 2, hdc2tog, hdc in 3 sts, bob, hdc in 5 sts, bob, hdc in 5 sts, bob, hdc in 3 sts, hdc2tog. Turn. (26 sts)
Row 70 (WS): Ch 2, hdc2tog, hdc across to last 2 sts, hdc2tog. Turn. (24 sts)
Row 71 (RS): Ch 2, hdc2tog, hdc across to last 2 sts, hdc2tog. Turn. (22 sts)
Row 72 (WS): Ch 2, hdc2tog, hdc across to last 2 sts, hdc2tog. Turn. (20 sts)
Row 73 (RS): Ch 2, hdc2tog, hdc across to last 2 sts, hdc2tog. Turn. (18 sts)
Row 74 (WS): Ch 2, hdc2tog, hdc in 2 sts, bob, hdc in 5 sts, bob, hdc in 2 sts, hdc2tog. Turn. (16 sts)
Row 75 (RS): Ch 2, hdc2tog, hdc across to last 2 sts, hdc2tog. Turn. (14 sts)
Row 76 (WS): Ch 2, hdc2tog, hdc across to last 2 sts, hdc2tog. Turn. (12 sts)
Row 77 (RS): Ch 2, hdc2tog, hdc across to last 2 sts, hdc2tog. Turn. (10 sts)
Row 78 (WS): Ch 2, hdc2tog, hdc across to last 2 sts, hdc2tog. Turn. (8 sts)
Row 79 (RS): Ch 2, hdc2tog, hdc in 4 sts, hdc2tog. Turn. (6 sts)
Row 80 (WS): Ch 2, hdc2tog, hdc in 2 sts, hdc2tog. Turn. (4 sts)
Row 81 (RS): Ch 2, hdc2tog, hdc2tog. Turn. (2 sts)
Row 82 (WS): Ch 2, hdc2tog. (1 st)
Fasten off. Weave in end. The back panel is complete.
Part 2: The Front Panels
The front of the star wrap mirrors the back except the center vertical front splits into a left front panel and a right front panel.
Work the front panel as ONE piece identical to the back. After blocking, carefully cut up the center 8 rows to create the front opening, then reinforce immediately with the button band. This cut-and-trim approach works well with tightly crocheted acrylic yarn.
Alternatively, work only the right half of each row after Row 37, keeping the center edge straight. This creates a natural vertical center front opening without cutting.
Right Front Panel from Row 38 onward:
Row 38 (WS): Ch 2, hdc across first 19 sts (half of 38). Turn. (19 sts)
Row 39 (RS): Ch 2, hdc across 19 sts. Turn. (19 sts)
Continue in this manner, working the right half of every row from the matching back panel instructions, keeping the center edge straight.
Finishing Your Starfish Wrap
Button Band
Work a single crochet border along both center front edges. Space three buttonholes evenly along one edge by chaining 2 and skipping 2 stitches where buttons will align. Sew the three wooden buttons to the opposite edge using matching thread.
Blocking
Pin your completed star flat on a blocking board. Spray lightly with water or use steam. Allow to dry completely before removing pins. This step makes a huge difference in how professional your finished piece looks.
The Matching Hat
The pointed hat is worked in the round from brim to tip using Color B and Color A. Work a foundation chain to fit a 12.5 inch circumference, join, and work in rounds of hdc. Decrease gradually to form the pointed tip. Add a small 1 inch pom-pom to the top using your pom-pom maker or cardboard circles.
Tips for Photography Success
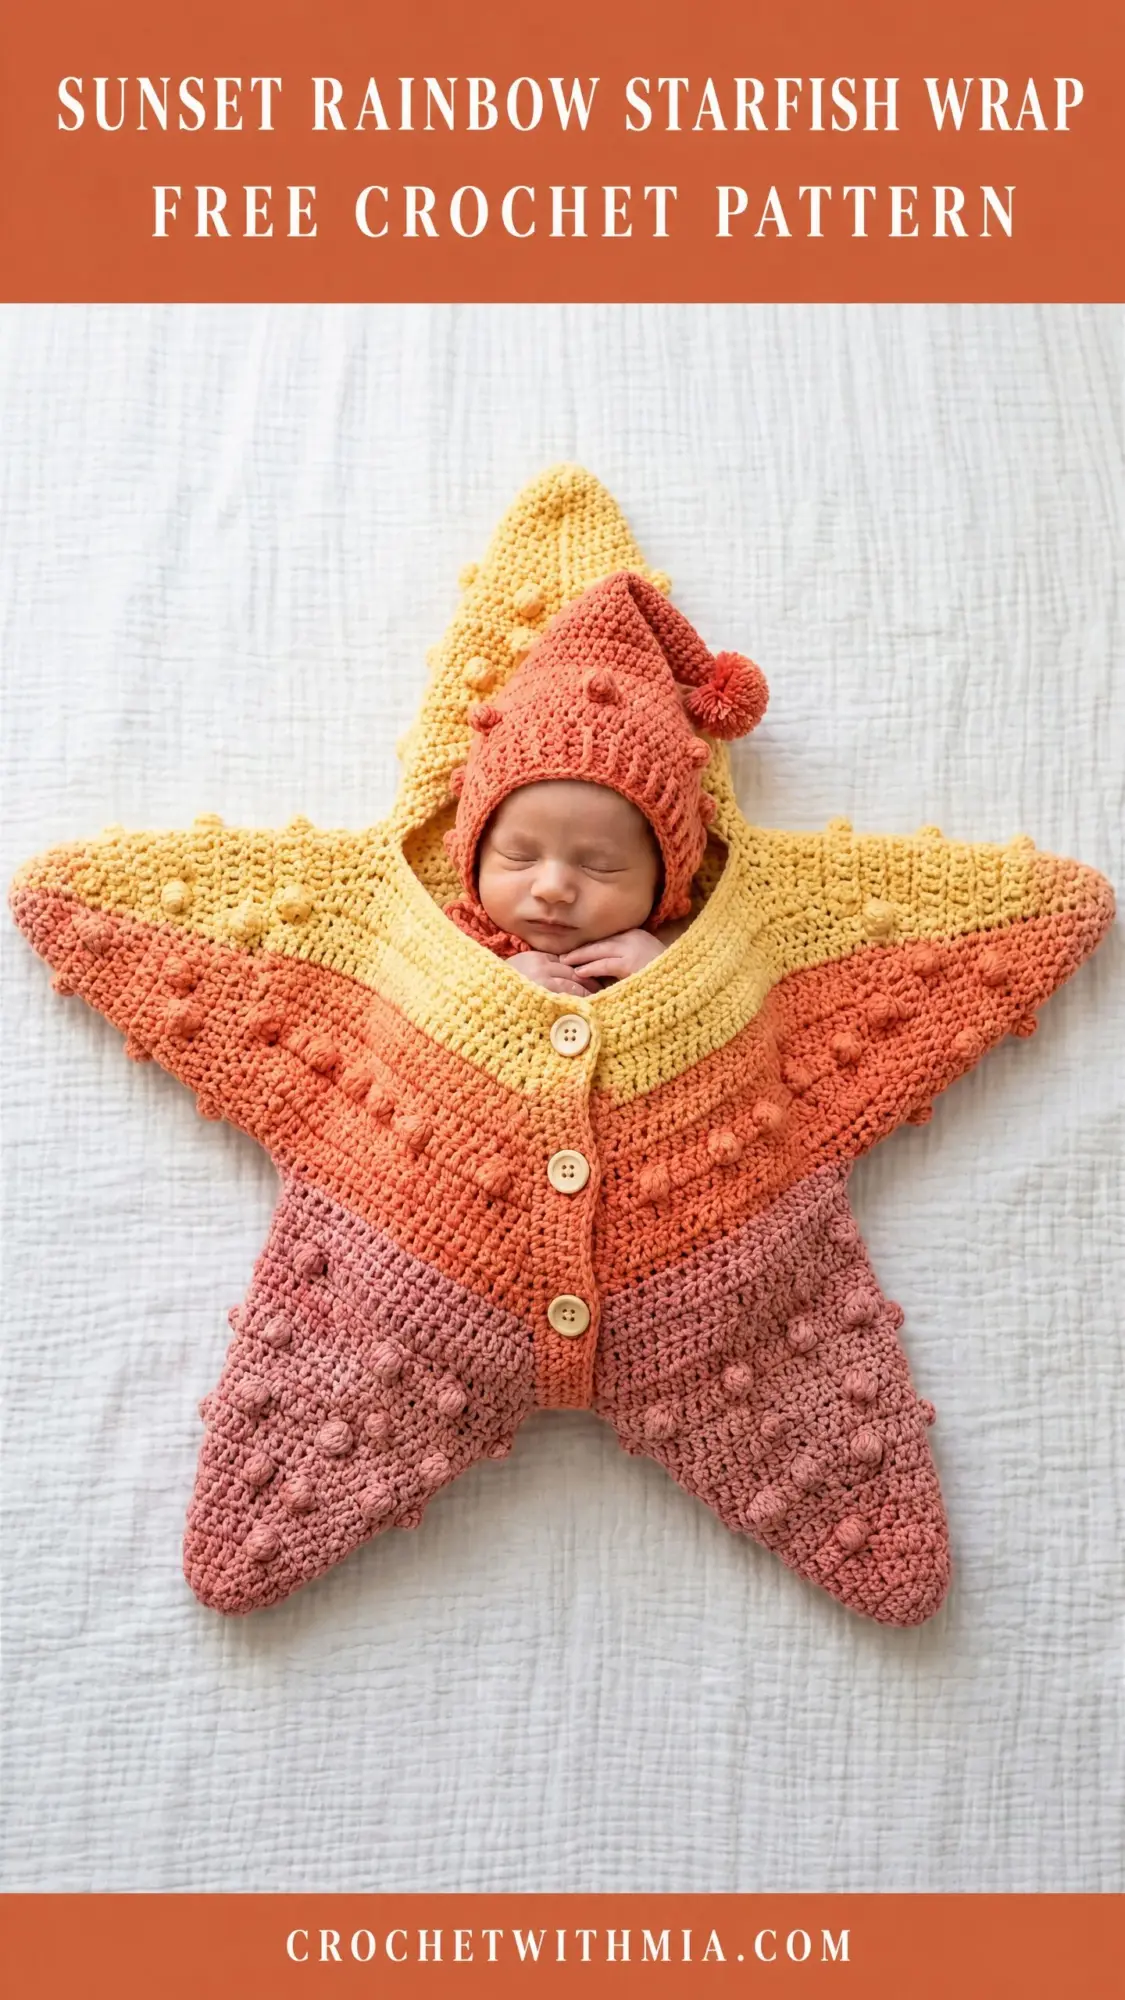
This wrap was designed specifically for newborn photography sessions. For best results, position the baby on a flat white or cream surface. Spread the star points outward so the full shape is visible. Tuck the baby’s hands under their chin for that classic newborn pose. The warm sunset colors photograph beautifully against neutral backgrounds.
Thank you so much for choosing this pattern for your next project. I truly hope you love making your own Little Sea Star as much as I loved designing it. If you make one, I would absolutely love to see it! Tag me on Instagram or share your photos in my Facebook group.
If this crochet tutorial helped you, save it to your Pinterest boards so you can find it easily when you are ready to start. And please drop a comment below to let me know how your starfish wrap turns out. I read every single one and they make my day!