
If you have a little one to dress this summer, this toddler romper and hat set will keep them looking adorable while staying cool in lightweight cotton or acrylic yarn. The outfit combines classic granny squares with an open mesh stitch that creates a breezy, breathable fabric perfect for warm weather. It works up in DK weight yarn using basic stitches that most intermediate crocheters already know.
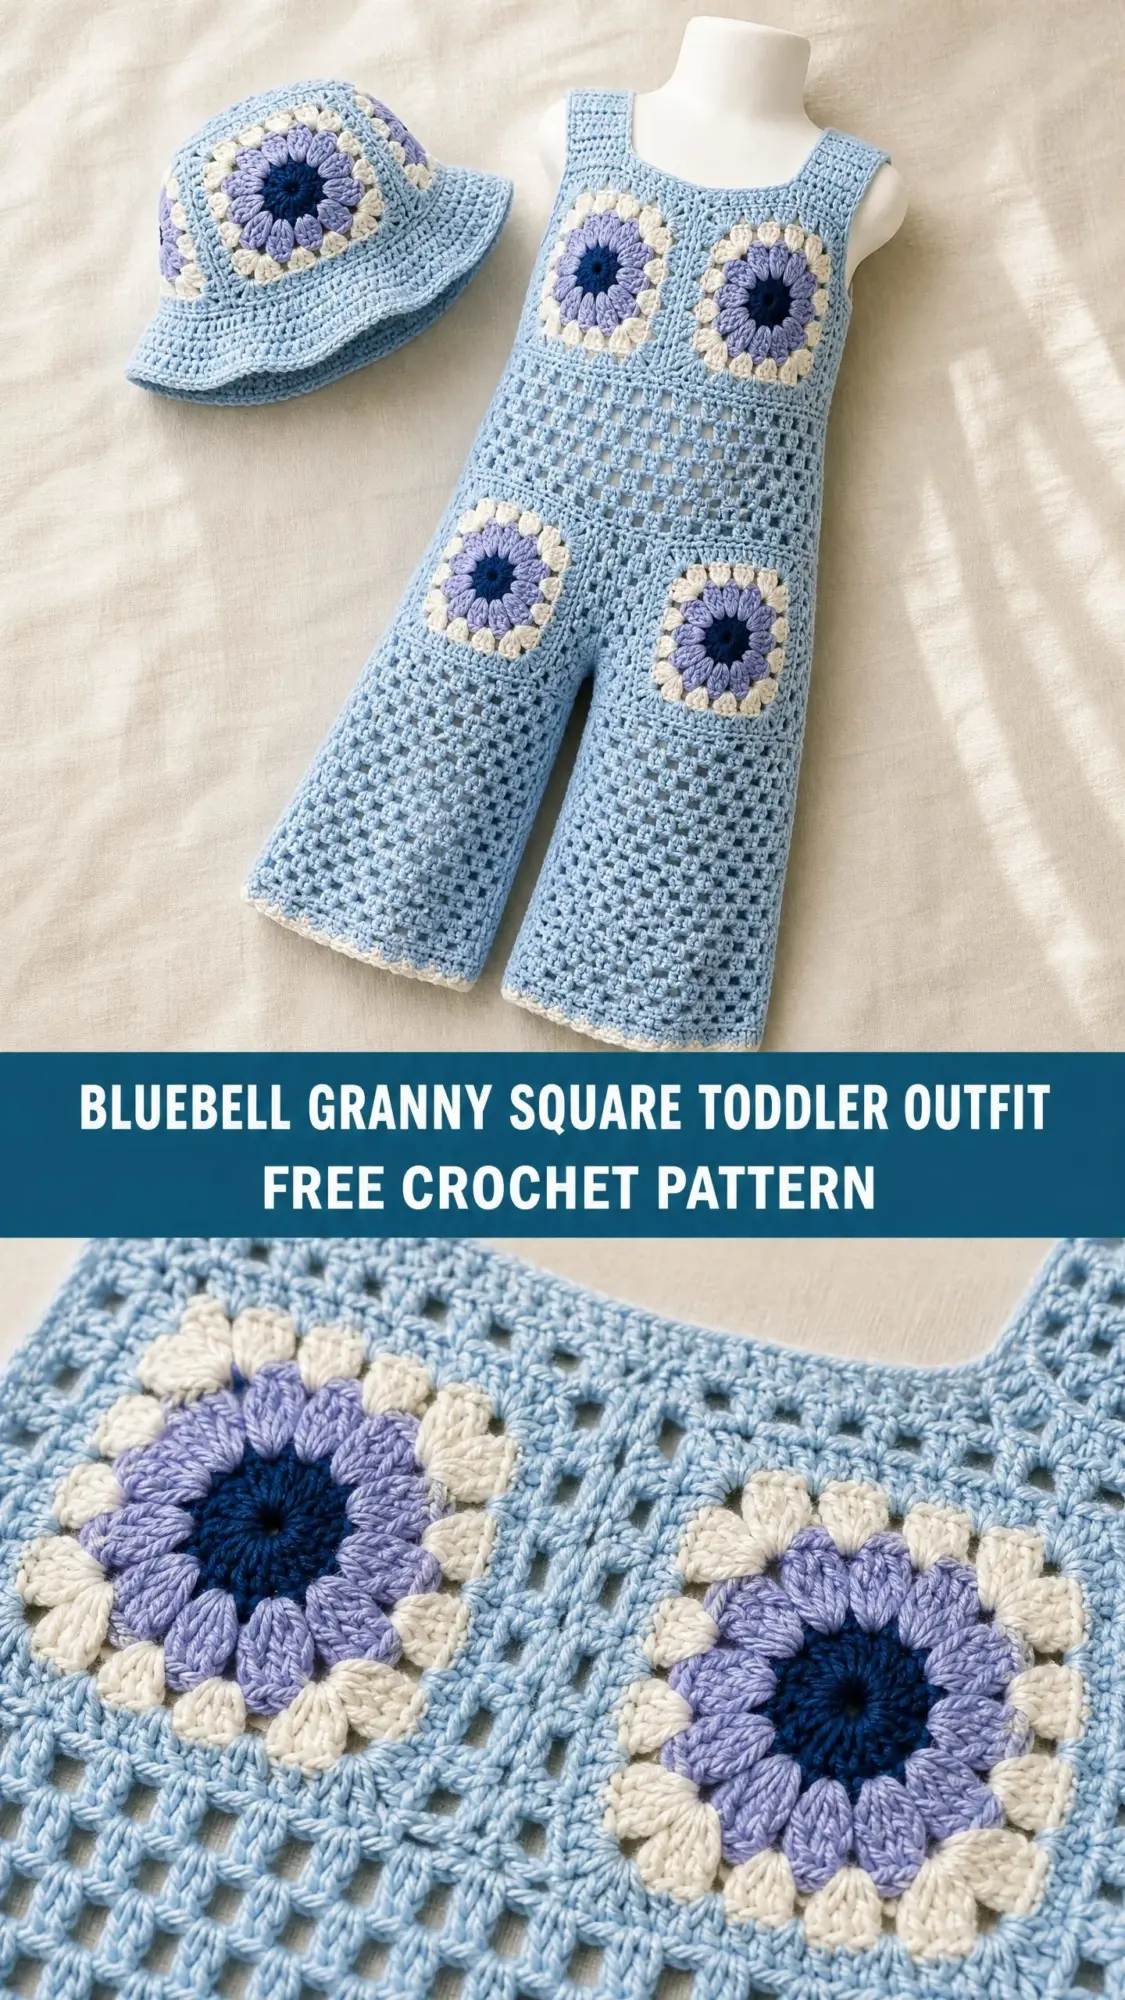
This pattern makes a wonderful handmade gift for birthdays, baby showers, or just because. The coordinating bucket hat adds the finishing touch that transforms this from a simple romper into a complete outfit. Plus, the granny squares give you a chance to play with color in a project that still comes together relatively quickly.
Whether you are making this for your own toddler, a grandchild, or a friend’s little one, the finished set looks far more complicated than it actually is. Let me walk you through everything you need to know to create this sweet summer outfit.
About This Toddler Romper and Hat Pattern
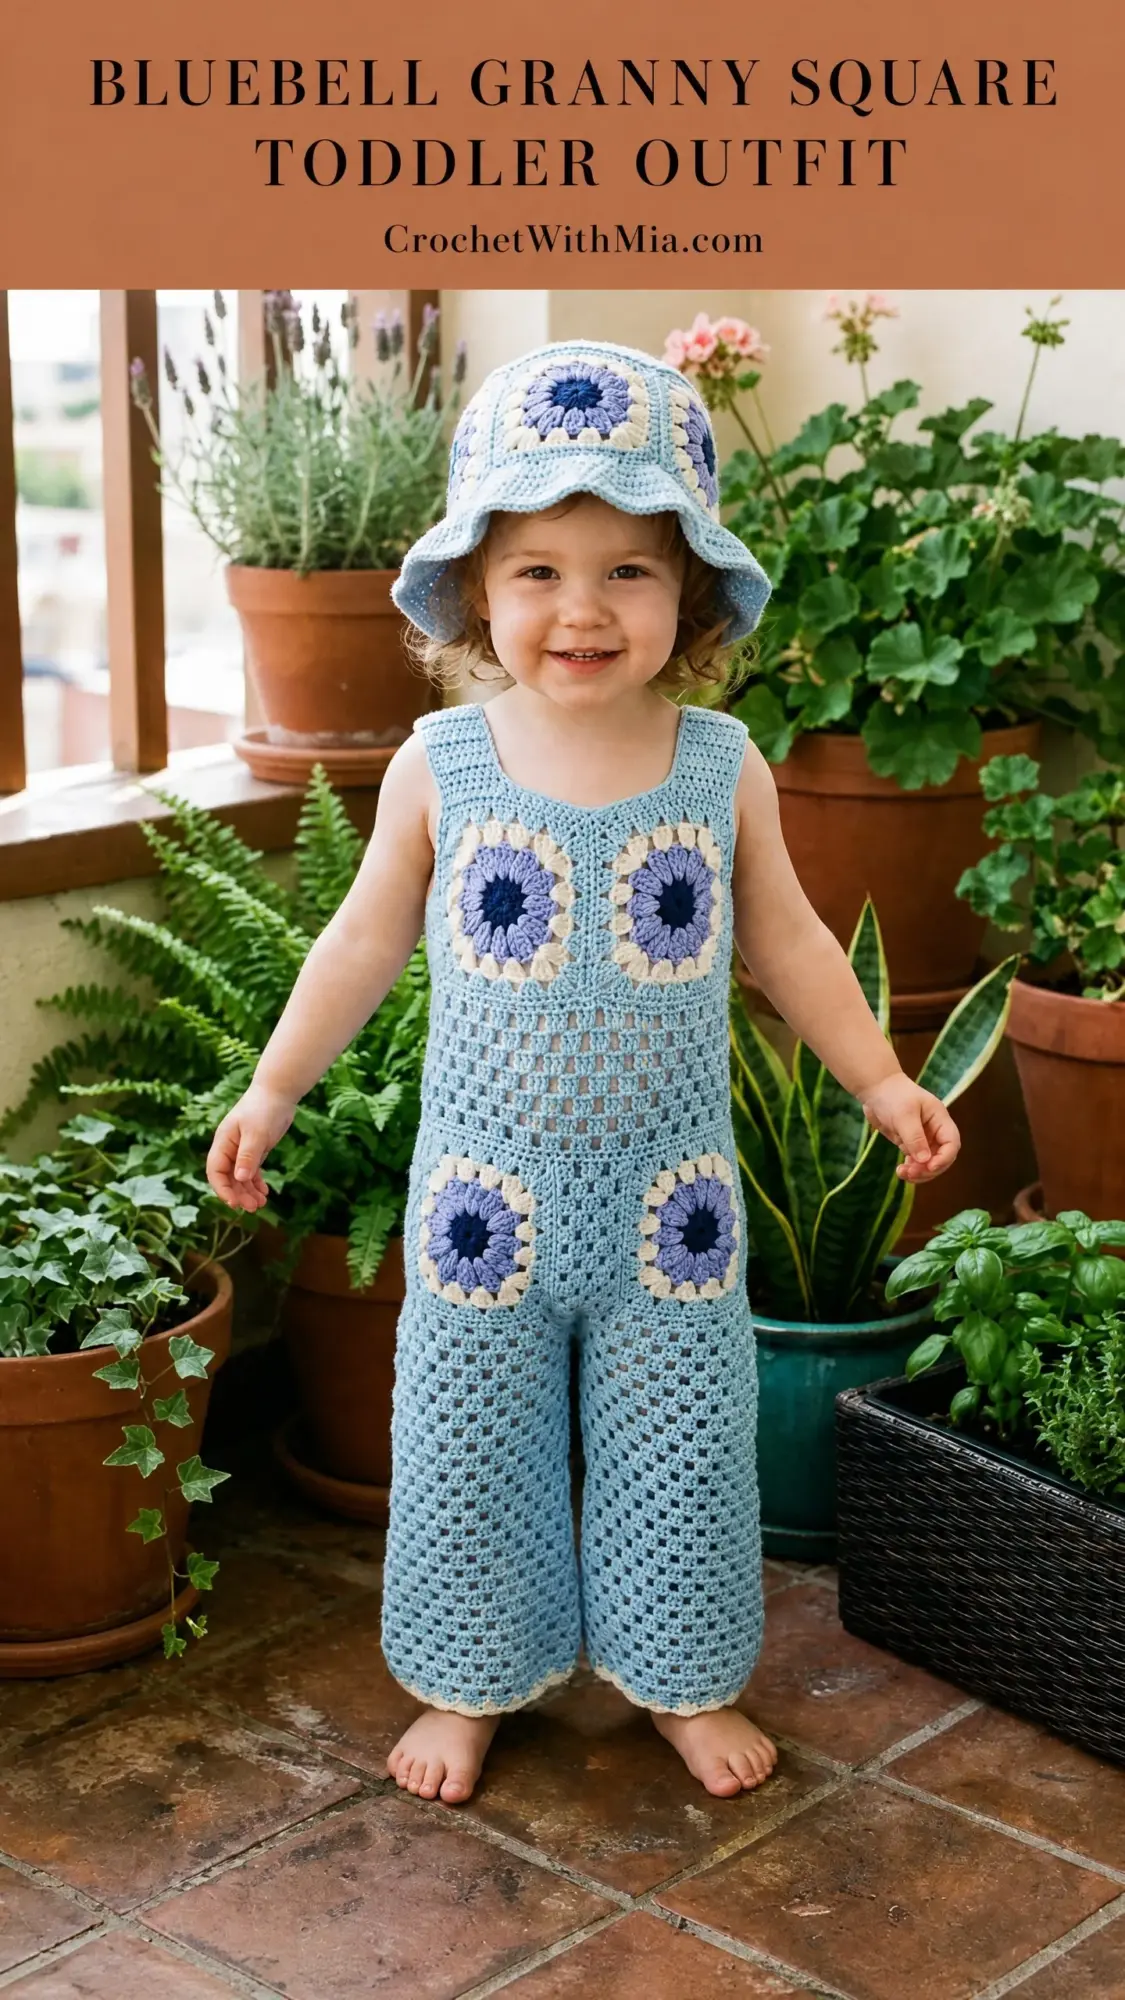
This outfit consists of two coordinating pieces. The romper features wide palazzo-style legs and a relaxed bodice made from an open shell mesh stitch. Four large granny squares decorate the front, with two at the chest and two at the hips. A fifth square sits centered on the back.
The matching bucket hat uses four granny squares joined at the crown, with a mesh band and a gently flared brim. Both pieces share the same color palette and granny square design, creating a polished, cohesive look.
The romper is constructed by working the back and front panels flat, then seaming them together at the sides and shoulders. The pants section is worked in the round from the waist down, then split at the crotch for each leg tube. The granny squares are made separately and sewn on as applique panels.
Skill level: Intermediate. You should be comfortable working granny squares, joining motifs, working in the round, and basic garment shaping including shoulder straps and crotch gussets.
Time estimate: Approximately 18 to 24 hours total. The granny squares alone take about 3 to 4 hours. The romper body takes 10 to 12 hours. The hat takes 3 to 4 hours, and finishing adds another 2 hours.
Finished Measurements
Romper (fits toddler size 2T):
Hat (fits toddler head circumference 19 to 20 in / 48 to 51 cm):
Materials Needed
Yarn:
Hooks:
Additional materials:
Yarn Suggestions
Option 1: Lion Brand Yarn Pound of Love. 100% acrylic. Machine washable with excellent stitch definition and a wide color range. Slightly heavier than DK but yields a soft drape appropriate for toddler garments. Swatch carefully and adjust hook size to G-6 if needed.
Option 2: Paintbox Yarns Simply DK. 100% acrylic, CYCA 3 DK weight. Excellent stitch definition, consistent yardage, and available in all colors needed. Machine washable and budget-friendly.
Option 3: Cascade 220 Superwash Sport (used held double for the romper body sections if preferred for warmth). 100% superwash merino. Soft against toddler skin and machine washable on gentle cycle.
Any smooth DK to light worsted yarn with good stitch definition will work beautifully. Avoid fuzzy or textured yarns as they obscure the open mesh and granny square detail.
Gauge
With H-8 / 5.0 mm hook and MC in mesh stitch:
14 stitches and 8 rows = 4 in / 10 cm (measured over shell mesh pattern)
With G-6 / 4.0 mm hook in granny square pattern:
1 completed granny square (5 rounds) = 4.5 in / 11.4 cm square
Gauge is critical for garment fit. Please swatch both gauges before beginning. If your gauge is looser than stated, go down one hook size. If tighter, go up one hook size.
Abbreviations
Special Stitches
Shell Mesh Stitch (worked flat, multiple of 6 plus 3)
This creates the beautiful open, lacy fabric you see in the romper body.
Foundation: Work a foundation chain divisible by 6 plus 3 plus 2 for turning chain.
Row 1 (RS): Sc in second ch from hook, sk 2 ch, 5 dc in next ch (shell made), sk 2 ch, sc in next ch; rep from beginning of pattern across, ending sc. Turn.
Row 2 (WS): Ch 3 (counts as dc), 2 dc in first sc (half-shell at edge), sk 2 dc, sc in center dc of shell, sk 2 dc, 5 dc in sc (shell made); rep across, ending 3 dc in last sc (half-shell). Turn.
Row 3 (RS): Ch 1, sc in first dc, sk 2 dc, 5 dc in sc, sk 2 dc, sc in center dc of shell; rep across, ending sc in top of turning chain. Turn.
Repeat Rows 2 and 3 for pattern.
Granny Square Instructions (Make 9 Total)
You will need 5 squares for the romper and 4 for the hat. Use your G-6 / 4.0 mm hook throughout.
Color sequence per round:
Round 1: With CD, make a magic ring. Ch 3 (counts as first dc here and throughout), 2 dc in ring, ch 2, (3 dc in ring, ch 2) 3 times. Join with sl st to top of beginning ch-3. Fasten off CD. (4 groups of 3 dc, 4 ch-2 corner sps)
Round 2: Join CC in any ch-2 corner sp. Ch 3, 2 dc in same sp, ch 2, 3 dc in same sp (corner made), ch 1, (3 dc in next ch-2 sp, ch 2, 3 dc in same sp, ch 1) 3 times. Join with sl st to top of beginning ch-3. Fasten off CC. (8 groups of 3 dc, 4 ch-2 corner sps, 4 ch-1 side sps)
Round 3: Join CB in any ch-2 corner sp. Ch 3, 2 dc in same sp, ch 2, 3 dc in same sp, ch 1, 3 dc in ch-1 side sp, ch 1, (3 dc in next ch-2 corner sp, ch 2, 3 dc in same sp, ch 1, 3 dc in ch-1 side sp, ch 1) 3 times. Join with sl st to top of beginning ch-3. Fasten off CB. (12 groups of 3 dc, 4 ch-2 corner sps, 8 ch-1 side sps)
Round 4: Join CA in any ch-2 corner sp. Ch 3, 2 dc in same sp, ch 2, 3 dc in same sp, (ch 1, 3 dc in next ch-1 sp) twice, ch 1, (3 dc in next ch-2 corner sp, ch 2, 3 dc in same sp, (ch 1, 3 dc in next ch-1 sp) twice, ch 1) 3 times. Join with sl st to top of beginning ch-3. Fasten off CA. (16 groups of 3 dc, 4 ch-2 corner sps, 12 ch-1 side sps)
Round 5: Join MC in any ch-2 corner sp. Ch 3, 2 dc in same sp, ch 2, 3 dc in same sp, (ch 1, 3 dc in next ch-1 sp) 3 times, ch 1, (3 dc in next ch-2 corner sp, ch 2, 3 dc in same sp, (ch 1, 3 dc in next ch-1 sp) 3 times, ch 1) 3 times. Join with sl st to top of beginning ch-3. Fasten off MC. (20 groups of 3 dc, 4 ch-2 corner sps, 16 ch-1 side sps)
Finished square measures 4.5 in / 11.4 cm from corner to corner.
Block all squares before seaming. Pin to measurements, mist with water, and allow to dry completely.
Romper Back Panel
Use your H-8 / 5.0 mm hook and MC throughout.
The back panel is worked flat in shell mesh stitch from hem to shoulder.
Foundation chain: Ch 39.
Row 1 (RS): Sc in 2nd ch from hook, sk 2 ch, 5 dc in next ch, (sk 2 ch, sc in next ch, sk 2 ch, 5 dc in next ch) 5 times, sk 2 ch, sc in last ch. Turn. (6 shells, 7 sc)
Row 2 (WS): Ch 3 (counts as dc), 2 dc in first sc, sc in center dc of first shell, (5 dc in next sc, sc in center dc of next shell) 5 times, 3 dc in last sc. Turn. (5 full shells, 2 half-shells at edges, 6 sc)
Row 3 (RS): Ch 1, sc in first dc, 5 dc in first sc, (sc in center dc of shell, 5 dc in sc) 5 times, sc in top of tch. Turn. (6 shells, 7 sc)
Rows 4 through 16: Repeat Rows 2 and 3 alternately, ending after a Row 3 repeat.
Checkpoint: After Row 16, the back panel should measure approximately 8 in / 20.3 cm tall and 10.5 in / 26.7 cm wide. Count 6 complete shells across each RS row to confirm.
Armhole Shaping
Row 17 (WS): Sl st across first 6 sts (to end of first half-shell and sc), ch 3, 2 dc in same sc (half-shell beg), sc in center of next shell, (5 dc in sc, sc in center of shell) 4 times, 3 dc in next sc, leave remaining sts unworked. Turn. (4 full shells, 2 half-shells, 5 sc)
Row 18 (RS): Ch 1, sc in first dc, (5 dc in sc, sc in center of shell) 4 times, 5 dc in sc, sc in top of tch. Turn. (5 shells, 6 sc)
Row 19 (WS): Ch 3, 2 dc in first sc, (sc in center of shell, 5 dc in sc) 4 times, sc in center of last shell, 3 dc in last sc. Turn. (4 full shells, 2 half-shells, 5 sc)
Rows 20 through 26: Repeat Rows 18 and 19 alternately, ending after a Row 19 repeat.
After Row 26, back panel measures approximately 13 in / 33 cm from foundation.
Left Shoulder Strap (Back)
Row 27 (RS): Ch 1, sc in first dc, 5 dc in next sc, sc in center of next shell only. Turn, leaving remaining sts unworked. (1 shell, 2 sc)
Row 28 (WS): Ch 3, 2 dc in sc, sc in center dc of shell, 3 dc in last sc. Turn. (1 shell: 2 half-shells, 1 sc)
Row 29 (RS): Ch 1, sc in first dc, 5 dc in sc, sc in top of tch. Turn. (1 shell, 2 sc)
Rows 30 through 36: Repeat Rows 28 and 29.
Fasten off after Row 36. Strap measures approximately 3.5 in / 8.9 cm long.
Right Shoulder Strap (Back)
Rejoin MC with RS facing at center of the 4th shell from left edge (counting from armhole edge to center), leaving the two center shells unworked as the back neck opening.
Work Rows 27 through 36 to mirror left strap. Fasten off.
The two center shells (approximately 3 in / 7.6 cm) left unworked form the back neck opening.
Romper Front Panel
Work exactly as back panel through Row 16.
Checkpoint: Front panel after Row 16 should match back panel at 8 in / 20.3 cm tall and 10.5 in / 26.7 cm wide.
Row 17 armhole shaping: Work same as back panel Row 17. (4 full shells, 2 half-shells, 5 sc)
Rows 18 through 22: Continue in pattern as established, same as back. (5 shells, 6 sc on RS rows)
Front Neck Shaping
Row 23 (RS): Ch 1, sc in first dc, 5 dc in sc, sc in center of next shell, 5 dc in next sc, sc in center of next shell. Turn, leaving center and right sts unworked. Left front panel only. (2 shells, 3 sc)
Row 24 (WS): Ch 3, 2 dc in sc, sc in center of shell, 5 dc in sc, sc in center of last shell, 3 dc in last sc. Turn. (2 full shells, 2 half-shells)
Row 25 (RS): Ch 1, sc in first dc, 5 dc in sc, sc in center of shell, 5 dc in sc, sc in top of tch. Turn. (2 shells, 3 sc)
Rows 26 through 36: Repeat Rows 24 and 25 alternately to match back strap length.
Fasten off.
Right front panel: Rejoin MC at center of row with RS facing, skipping one shell for center front neck opening. Work to mirror left front panel, reversing shaping.
The front neck opening is approximately 3 shells wide (about 4.5 in / 11.4 cm), creating a wide scoop neck.
Assembly of Bodice
Block both flat panels.
With MC and yarn needle, seam side seams by aligning back and front panels at side edges (Row 1 through Row 16 portion). Use mattress stitch or slip stitch seam worked through the outermost loop of each side edge. Seam from hem up to the armhole shaping point.
Join shoulder straps by holding corresponding back and front straps with wrong sides together. Slip stitch through both layers across the top edge of each strap to join.
The assembled bodice should now measure approximately 10.5 in / 26.7 cm across the front and 21 in / 53 cm total chest circumference. Armhole depth (from shoulder seam to underarm seam) is approximately 4 in / 10.2 cm.
Armhole Edging
With CA and G-6 / 4.0 mm hook, join yarn at underarm seam.
Round 1: Sc evenly around entire armhole opening, working approximately 2 sc for every 2 row-ends along the side edges and 1 sc in each stitch along any horizontal edges. Total sc count should equal a multiple of 6 for the shell edging. Work approximately 42 sc around each armhole. Join with sl st to first sc. (42 sc)
Round 2: Ch 1, sc in first sc, sk 2 sc, 5 dc in next sc, sk 2 sc, (sc in next sc, sk 2 sc, 5 dc in next sc, sk 2 sc) around. Join with sl st to first sc. Fasten off CA. (7 shells, 7 sc)
Waist Edging
With MC and H-8 / 5.0 mm hook, working into the foundation chain edge (bottom of romper body), join MC at the side seam.
Round 1: Sc evenly around the waist opening working into the foundation chain. Work 1 sc into each chain stitch. (76 sc). Join with sl st to first sc. Place marker.
Round 2: Sc in each sc around. (76 sc)
This creates a slightly tightened waistband edge for pants attachment.
Pants Section
The pants are worked from the waist downward in the round in shell mesh stitch, then split into two leg tubes.
Use H-8 / 5.0 mm hook and MC.
Round 1: Join MC in any sc of waist edging. Ch 3 (counts as dc), 2 dc in same sc, sk 2 sc, sc in next sc, (sk 2 sc, 5 dc in next sc, sk 2 sc, sc in next sc) around, ending with 2 dc in same sc as beg ch-3, sl st to top of beg ch-3. (12 shells, 12 sc around)
Round 2: Sl st to center dc of first shell, ch 1, sc in same dc, (sk 2 dc, 5 dc in sc, sk 2 dc, sc in center dc of shell) around. Join with sl st to first sc. (12 shells, 12 sc)
Round 3: Sl st to center dc of first shell, ch 3, 2 dc in same dc, sc in sc, (5 dc in center dc of shell, sc in sc) around, sl st to top of ch-3 to close. (12 shells, 12 sc)
Continue alternating Rounds 2 and 3 until pants section from waist measures 6 in / 15.2 cm, approximately 12 rounds total.
Checkpoint: After 12 rounds, pants section should measure 6 in / 15.2 cm from waist and 21 in / 53 cm in circumference.
Crotch Split and Leg Tubes
Mark the midpoint on each side: mark sc at the center front (6th sc from side seam) and sc at center back (6th sc from other side seam).
Left Leg Tube:
Beginning at one side seam point, work in pattern across the first 6 shells (38 sts), then chain 4 and join to the opposite side of the same half to close the crotch gusset.
Setup round (RS): Work in pattern across 38 sts of front half (6 shells, 7 sc), ch 4, sl st to join at back half edge at the corresponding point. This chain-4 bridge forms the crotch. Continue working in round picking up 4 sts from chain bridge plus the back 38 sts. Total for leg round: approximately 78 sts (13 shells).
Leg Rounds 1 through 6: Work in shell mesh stitch in the round for 6 rounds (approximately 3 in / 7.6 cm).
Do not taper or decrease the leg. The leg is intentionally wide to the hem.
Leg Edging with CA:
Work one round of sc in CA: sc in each dc and sc around. (approximately 78 sc)
Ch 1, sc in each sc around. (78 sc)
Ch 1, sc in first sc, sk 2 sc, 5 dc in next sc, sk 2 sc, (sc in next sc, sk 2 sc, 5 dc in next sc, sk 2 sc) around, sl st to first sc. Fasten off CA. (13 shells, 13 sc)
Right Leg Tube:
Work to mirror the left leg tube using the remaining 38 sts of back half, picking up the 4 ch from gusset bridge. Work exactly as left leg through all rounds. Fasten off and weave in ends.
Attaching Granny Squares to Romper
Block all 5 granny squares.
Placement:
To attach: Pin each square in position. Thread MC onto yarn needle. Using a whipstitch or mattress stitch through the outermost loops of the granny square edge and the corresponding mesh bars or sc sts of the romper body, sew each square securely to the romper surface. The squares sit on top of the mesh fabric as applique panels. Do not cut holes in the mesh beneath.
Hat Crown
Use G-6 / 4.0 mm hook.
Make 4 granny squares following the same instructions as above (all 5 rounds). Block squares.
Arrange 4 squares in a 2 by 2 grid. Join squares using flat slip stitch seam through outer loops. Hold two squares with right sides facing out (wrong sides together), slip stitch through both outer edges. Join all 4 into a flat 2 by 2 panel. This forms the hat crown (approximately 9 in / 22.9 cm square as a flat panel before shaping).
Hat Band
Use G-6 / 4.0 mm hook and MC.
With RS facing, join MC in any corner ch-2 sp of the joined crown panel at the outer edge.
Round 1: Work 1 sc into each st and ch-sp around the entire outer edge of the 2 by 2 crown, working 3 sc in each outer corner ch-sp. Total approximately 80 sc. Join with sl st. (80 sc)
Round 2: Ch 1, sc in each sc around. (80 sc)
Round 3: Work as (sc in next 39 sc, sc2tog) twice. (78 sc)
Round 4 (shell mesh, begin hat band): Ch 3, 2 dc in first sc, sk 2 sc, sc in next sc, (5 dc in sc, sk 2 sc, sc in next sc, sk 2 sc) around, end 2 dc in first sc, sl st to top of beg ch. (13 shells, 13 sc)
Round 5: Sc in center dc of each shell, 5 dc in each sc, around. (13 shells)
Round 6: Rep Round 4 structure.
Round 7: Rep Round 5 structure.
Work Rounds 4 through 7 pattern for approximately 2 in / 5 cm total band height.
Checkpoint: Hat band after completion should allow the hat to sit snugly on a 19 to 20 in / 48 to 51 cm head circumference.
Hat Brim
Brim Round 1: Work in sc around, increasing by working (sc in next 5 sts, 2 sc in next st) around. (91 sc)
Brim Round 2: Work in sc around. (91 sc)
Brim Round 3: (Sc in next 6 sts, 2 sc in next st) around. (104 sc)
Brim Round 4: Sc around. (104 sc)
Brim Round 5: Adjust to 102 sc to set up for shell edging. Sc in each sc around, decreasing 2 sts evenly. (102 sc)
Brim edging (CA):
Join CA. Sc in each sc around. (102 sc)
Ch 1, sc in first sc, sk 2 sc, 5 dc in next sc, sk 2 sc, (sc in next sc, sk 2 sc, 5 dc in next sc, sk 2 sc) around, sl st to first sc. (17 shells, 17 sc). Fasten off CA.
Size Customization Tips
For 18M (smaller): Reduce foundation chain to 33 for body panels (5 shells). Reduce pants circumference accordingly to 66 sts (11 shells). Reduce hat band to 72 sts (12 shells).
For 3T (larger): Increase foundation chain to 45 for body panels (7 shells). Increase pants circumference to 84 sts (14 shells). Increase hat band to 84 sts (14 shells). Add 2 rows to strap length.
General rule: Each shell repeat in DK weight at H-8 / 5.0 mm adds approximately 1.7 in / 4.3 cm to the chest width. Add or remove in full shell increments (each equals 6 sts in chain) and adjust granny square placement accordingly.
For length adjustments: Add or remove 2 rows (one pattern repeat) at a time to the body panels before armhole shaping. Each 2-row repeat adds approximately 1 in / 2.5 cm.
Finishing and Blocking
1. Weave in all ends securely on wrong side using yarn needle.
2. Wet block all granny squares before seaming. Pin to 4.5 in / 11.4 cm square. Mist with water, pat into shape, allow to dry completely.
3. Block assembled romper by wetting thoroughly and gently pressing to shape. Lay flat to dry.
4. Steam block lightly if needed after assembly to smooth seams.
Pattern Notes to Remember
The right side of the garment is the outside. Work all body panels beginning with right side facing.
All color changes within granny squares are made at the final yarn over of the last stitch in the old color. Cut and join new color at each round change.
To keep the mesh stitch neat, always count your stitches at the end of each row during the first repeat. The shell mesh can be deceptive because the turning chain at the edge creates a partial shell.
The pants legs are intentionally wide (palazzo style). Do not decrease down the leg.
Thank you so much for choosing this pattern for your little one! I hope the construction process is enjoyable and that the finished outfit brings lots of smiles. If you make this set, I would absolutely love to see your finished project. Tag me on Instagram or share a photo on Facebook so I can admire your work!
If you found this crochet pattern helpful, save it to your Pinterest boards so you can find it easily when you are ready to start. And please leave a comment below if you make this adorable toddler outfit. I love hearing which color combinations you choose and seeing how your granny squares turn out!