
When I sat down to design this dress, I had a very specific vision in mind. I wanted something that felt effortlessly bohemian, worked from the top down with minimal seaming, and featured those dramatic bell sleeves that make you feel like you’re floating when you walk. I also wanted it to be achievable for crocheters who have made a garment or two and are ready to level up their skills without diving into something overwhelming.
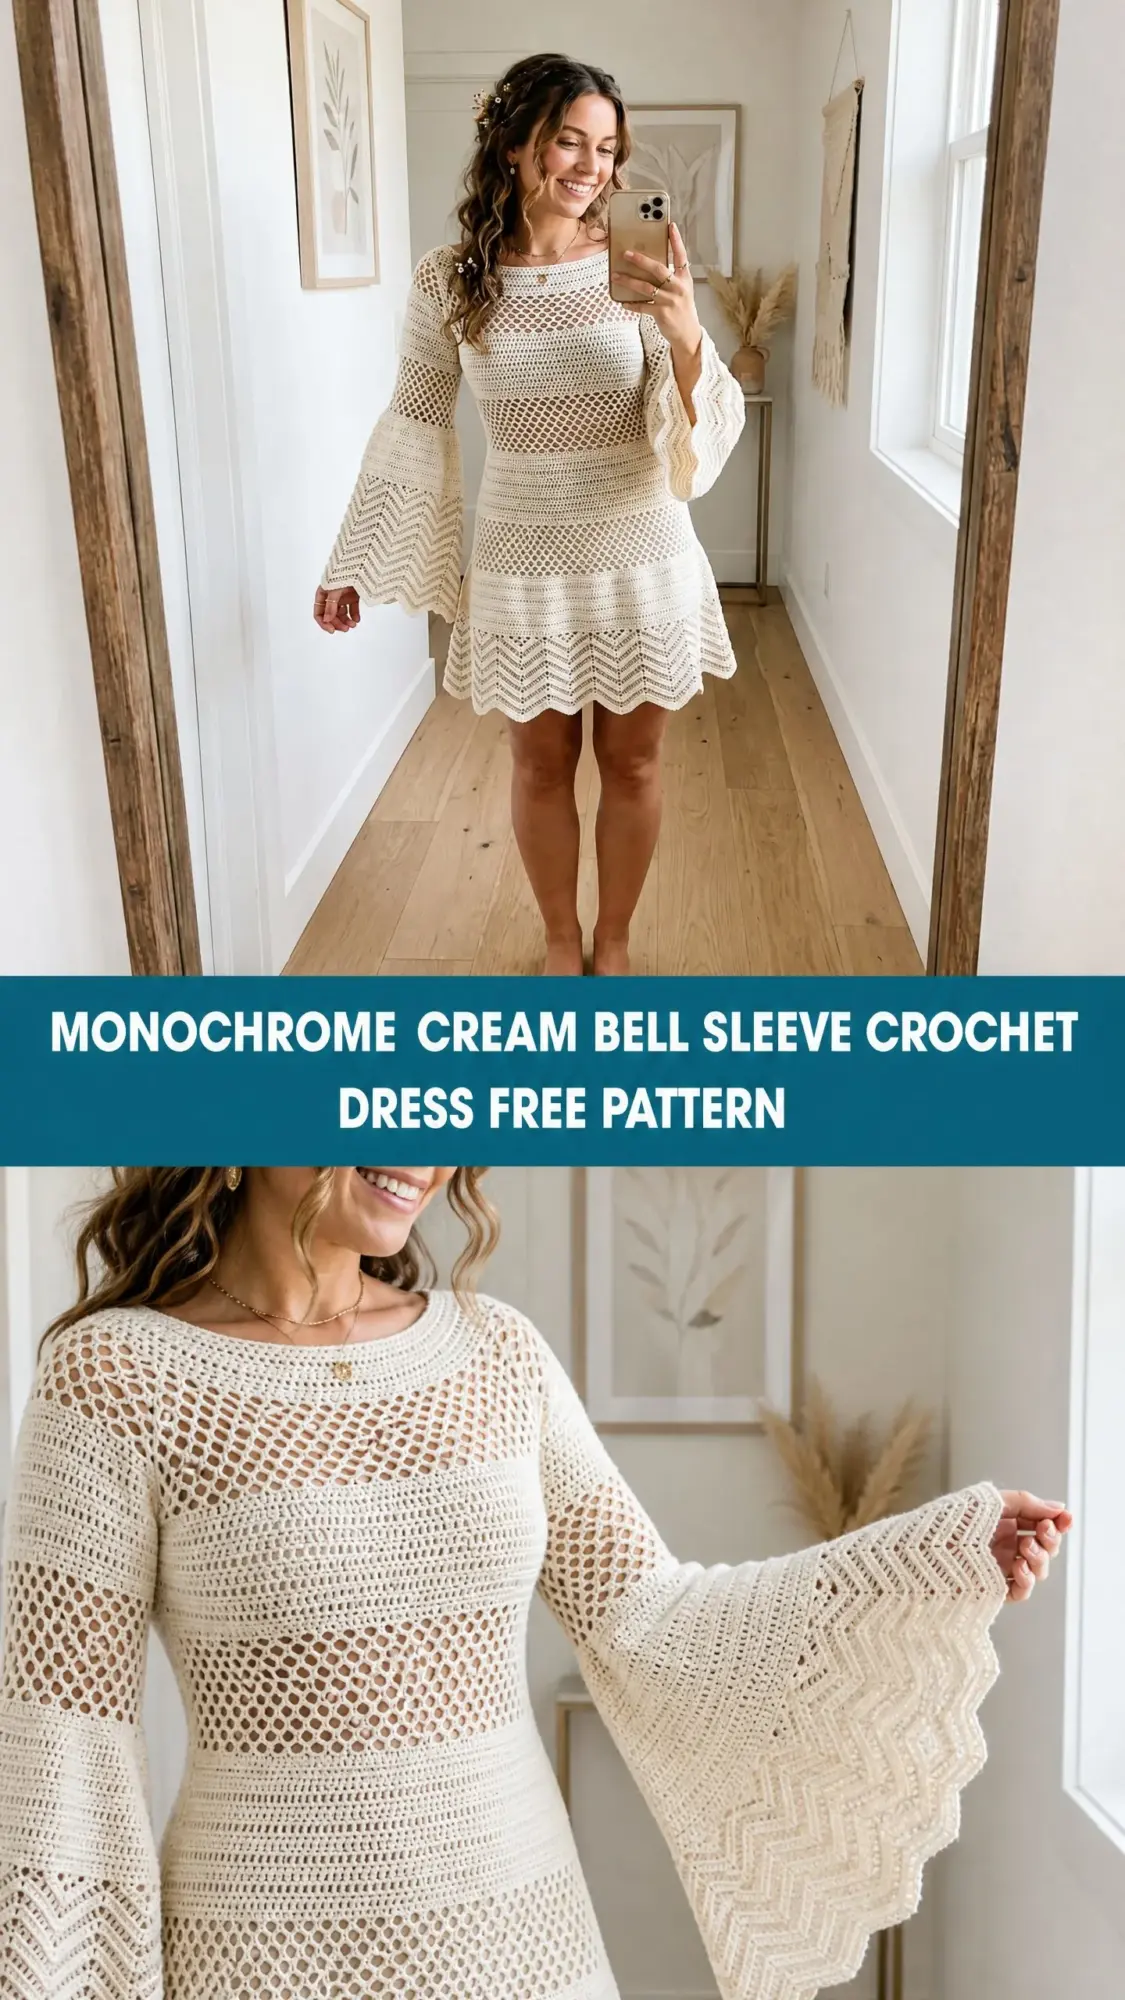
The alternating mesh and chevron panels were the design decision I’m most proud of. They create visual interest, natural waist shaping, and that gorgeous flared skirt silhouette without complicated increases. The open mesh sections are beautifully simple to work, while the chevron bands add texture and that unmistakable zigzag wave pattern.
I am SO pleased with how this turned out. It’s the kind of piece that looks incredibly complex but breaks down into straightforward, repeating stitch patterns once you get the hang of them.
About This Crochet Dress Pattern
This cream bell sleeve crochet dress is a bohemian inspired mini dress that you work in the round from the neckline down. The construction keeps seaming to an absolute minimum, which means less finishing work and more time actually crocheting.
The dress features four distinct elements that repeat throughout: open mesh stitch panels, dense chevron stitch bands, dramatic bell sleeves with matching chevron trim at the cuffs, and a scalloped hem to finish everything off beautifully.
Because the mesh panels are open and see through, this dress is designed to be worn over a slip or nude undergarment. Just something to keep in mind as you plan your wardrobe pairing.
Skill Level
I’d rate this pattern as Advanced Beginner to Intermediate. The individual stitch patterns are actually quite straightforward once you understand them. What makes it intermediate is managing multiple stitch textures, working in the round with shaping, and attaching the sleeves.
If you’ve completed at least two garments and feel comfortable with chevron stitches, you will absolutely be able to make this dress. The key is taking your time and trusting the process.
Time Estimate
Plan for approximately 30 to 45 hours of work depending on your speed and experience. This isn’t a weekend project, but it’s the kind of satisfying long term make that you can pick up and put down over several weeks.
Finished Measurements
This pattern is written for size Small (S) with instructions for Medium (M) and Large (L) in parentheses, formatted as S (M, L).
Bust: 34 (36, 38) inches / 86 (91.5, 96.5) cm
Waist: 28 (30, 32) inches / 71 (76, 81) cm
Hip: 36 (38, 40) inches / 91.5 (96.5, 101.5) cm
Total length, shoulder to hem: 30 (31, 32) inches / 76 (78.5, 81) cm
Sleeve length, underarm to cuff: 18 (18.5, 19) inches / 45.5 (47, 48) cm
Bell cuff circumference at widest: 24 (25, 26) inches / 61 (63.5, 66) cm
Upper arm circumference: 13 (14, 15) inches / 33 (35.5, 38) cm
Materials You’ll Need
Yarn
Approximately 1,200 (1,350, 1,500) yards / 1,097 (1,234, 1,372) meters of DK weight yarn (CYCA #3) in cream or off white.
Recommended Yarn Options
Lion Brand Yarns Comfy Cotton Blend (50% cotton, 50% polyester, 355 yards per 100g skein) in the Cream colorway. You’ll need 4 (4, 5) skeins. This yarn has excellent drape and stitch definition for the open mesh sections.
Paintbox Yarns Cotton DK (100% cotton, 273 yards per 100g skein) in Cream. You’ll need 5 (5, 6) skeins. This one has a slightly heavier hand that gives beautiful body to the chevron panels.
Drops Safran (70% cotton, 30% linen, 175 yards per 50g skein) in Off white. You’ll need 7 (8, 9) skeins. The linen content adds a natural texture that really enhances the handcrafted look.
Substitution Note: Choose a smooth DK or light worsted yarn with at least 50% natural fiber content. Cotton or cotton blend yarns work best for stitch definition and breathability. Avoid fuzzy or textured yarns because they will obscure the mesh and chevron pattern details.
Hooks
US size G-6 / 4.00 mm for the body and sleeves
US size F-5 / 3.75 mm for the ribbed waist band and cuff trim if you want a tighter finish
Notions
Gauge
Getting your gauge right is absolutely critical for this garment. A difference of even half a stitch per inch will result in a significantly different finished size.
With G-6 / 4.00 mm hook in mesh stitch pattern:
18 stitches x 20 rows = 4 inches / 10 cm (blocked)
With G-6 / 4.00 mm hook in chevron stitch pattern:
18 stitches x 16 rows = 4 inches / 10 cm (blocked)
Please work a swatch of at least 6 x 6 inches in both stitch patterns and block before measuring. I know swatching can feel tedious, but for a fitted garment like this, it really matters.
Abbreviations
Let me walk you through every abbreviation you’ll encounter in this crochet tutorial, with plain English definitions:
ch = chain (wrap yarn over hook and pull through loop)
sl st = slip stitch (insert hook, yarn over, pull through stitch and loop on hook in one motion)
sc = single crochet (insert hook, yarn over, pull up a loop, yarn over, pull through both loops)
hdc = half double crochet (yarn over, insert hook, pull up loop, yarn over, pull through all 3 loops)
dc = double crochet (yarn over, insert hook, pull up loop, yarn over, pull through 2 loops, yarn over, pull through remaining 2 loops)
tr = treble crochet (yarn over twice, insert hook, pull up loop, then yarn over and pull through 2 loops three times)
sk = skip
sp = space
st = stitch
sts = stitches
rnd = round
rep = repeat
pm = place marker
sm = slip marker
yo = yarn over
beg = beginning
rem = remaining
RS = right side
WS = wrong side
inc = increase (work 2 stitches into same stitch)
dec = decrease
tog = together
approx = approximately
BLO = back loop only
FLO = front loop only
Special Stitches for This Dress Pattern
Mesh Stitch (worked in the round, multiple of 2 stitches)
This creates the open, lacy panels you see in the bust, hip, and skirt areas.
Round setup: (dc, ch 1, sk 1 st) around, join with sl st to top of first dc.
Subsequent rounds: Ch 4 (counts as dc plus ch 1), sk first ch-1 sp, (dc in next dc, ch 1, sk ch-1 sp) around, join with sl st to 3rd ch of beg ch-4.
The ch-4 turning chain at the start of each round counts as 1 dc plus ch 1. The final join always goes into the 3rd chain of the starting ch-4.
Chevron Stitch (worked in the round, multiple of 12 stitches)
This creates the beautiful zigzag wave pattern in the banded sections and cuffs.
Round 1: Ch 3 (counts as dc). Work 1 dc in same st (half peak start). Work 1 dc each in next 4 sts. Work dc3tog over next 3 sts (valley). Work 1 dc each in next 4 sts. Work 3 dc in next st (full peak). Rep from (1 dc each in next 4 sts, dc3tog over next 3 sts, 1 dc each in next 4 sts, 3 dc in next st) around, ending last rep with 2 dc in same st as beg ch-3 (completing the half peak at start). Join with sl st to top of ch-3.
Repeat Round 1 for pattern. Your stitch count stays the same as the previous round.
DC3TOG (Double Crochet 3 Together)
This decrease creates the chevron valleys.
Yo, insert hook into next st, yo, pull up a loop, yo, pull through 2 loops (2 loops on hook). Yo, insert hook into next st, yo, pull up a loop, yo, pull through 2 loops (3 loops on hook). Yo, insert hook into next st, yo, pull up a loop, yo, pull through 2 loops (4 loops on hook). Yo, pull through all 4 loops. One dc3tog made.
Scallop Edge
(Sl st, ch 3, 4 dc, ch 3, sl st) all in same st or sp, sl st to next st. Rep around.
Picot
Ch 3, sl st into first ch made.
Open Mesh Top Stitch (for yoke section)
(Ch 3, sk 2 sts, sc in next st) around, joining as set.
Pattern Notes Before You Begin
1. The dress is constructed top down in the round. You’ll begin at the neckline, work through the yoke, divide for armholes, work the body, then pick up stitches for the sleeves.
2. Stitch markers are essential. Place markers at the 4 raglan points and move them up each round.
3. The body alternates between mesh stitch panels and chevron stitch panels. Each transition is clearly marked in the instructions.
4. The sleeves begin at the armhole and are worked downward, widening to the dramatic bell cuff.
5. All rounds begin with a turning chain as noted in each section. The turning chain counts as a stitch unless otherwise noted.
6. Blocking is mandatory. This dress will grow approximately 1 to 2 inches in length after wet blocking. The finished measurements account for blocked dimensions.
7. Stitch counts given at the end of each round reflect total stitches in the round, not counting chains of chain spaces unless otherwise noted.
8. For larger sizes M and L, wherever increases or foundation chain numbers differ, the M and L numbers follow in parentheses: S (M, L).
Step by Step Instructions
Yoke
The yoke is worked flat in rows then joined to work in the round. This allows for easier raglan shaping.
Foundation Row:
Ch 64 (68, 72). This forms the neckline.
Row 1 (RS):
Sc in 2nd ch from hook and in each ch across. Turn. (63, 67, 71 sc)
Place stitch markers at the following positions to mark raglan lines:
You now have 4 sections:
Row 2 (WS):
Ch 1, turn. Sc to 1 st before first marker, 3 sc in marked st, sm, sc across to 1 st before next marker, 3 sc in marked st, sm, rep across all 4 raglan points. Sc to end. Turn. (71, 75, 79 sc)
Row 3 (RS):
Ch 3 (counts as dc), dc in each st across, working 3 dc in each marked raglan st and moving markers up. Turn. (79, 83, 87 sts)
Row 4:
Ch 1, sc in each st across working 3 sc in each raglan marker st. Turn. (87, 91, 95 sts)
Row 5:
Ch 3, dc in each st across working 3 dc in each raglan marker st. Turn. (95, 99, 103 sts)
Row 6:
Ch 1, sc in each st across working 3 sc in each raglan marker st. Turn. (103, 107, 111 sts)
Row 7:
Ch 3, dc in each st across working 3 dc in each raglan marker st. Turn. (111, 115, 119 sts)
Row 8:
Ch 1, sc in each st across working 3 sc in each raglan marker st. Turn. (119, 123, 127 sts)
Row 9:
Ch 3, dc in each st across working 3 dc in each raglan marker st. Turn. (127, 131, 135 sts)
Row 10:
Ch 1, sc in each st across working 3 sc in each raglan marker st. Turn. (135, 139, 143 sts)
You now have approximately:
Total: 135 (139, 143) sts including raglan marker sts.
CHECKPOINT: Lay the yoke flat. It should measure approximately 6.5 (7, 7.5) inches / 16.5 (18, 19) cm from neckline to underarm. The neckline should measure approximately 14 (15, 16) inches / 35.5 (38, 40.5) cm across.
Dividing for Body and Sleeves
Row 11 (joining round):
Work across back sts to first marker. Place the left sleeve sts (29, 30, 30 sts) on a holder. Ch 4 for underarm. Skip sleeve sts. Work across front sts to next marker. Place right sleeve sts (29, 30, 30 sts) on holder. Ch 4 for underarm. Skip sleeve sts. Work across back sts to end. Do not turn. Join with sl st to beg of round, being careful not to twist.
Body stitch count at join:
We now standardize the count to the nearest multiple of 12 for chevron compatibility and multiple of 2 for mesh.
Adjusted Body Stitch Counts:
Body Section 1: Mesh Panel (Bust Area)
All sizes: Body worked in the round, right side facing.
Round 1 (Mesh setup):
Ch 4 (counts as dc plus ch 1). Sk first st. (Dc in next st, ch 1, sk 1 st) around. Join with sl st to 3rd ch of beg ch-4. (42, 48, 48 dc plus 42, 48, 48 ch-1 sps)
Round 2:
Ch 4. Sk first ch-1 sp. (Dc in next dc, ch 1, sk ch-1 sp) around. Join with sl st to 3rd ch of beg ch-4. (42, 48, 48 dc)
Rounds 3 through 8:
Repeat Round 2. Work 6 more rounds of mesh. (42, 48, 48 dc per round)
After Round 8 of mesh, the mesh panel measures approximately 3 inches / 7.5 cm.
Waist Shaping: Chevron Panel 1
Transition round:
Work 1 sc in each dc and 1 sc in each ch-1 sp around. Join with sl st to first sc. (84, 96, 96 sc)
Chevron Round 1:
Ch 3 (counts as dc). 1 dc in same st (half peak). 1 dc in each of next 4 sts. Dc3tog over next 3 sts. 1 dc in each of next 4 sts. 3 dc in next st. (Rep: 1 dc in each of next 4 sts, dc3tog over next 3 sts, 1 dc in each of next 4 sts, 3 dc in next st) 5 (6, 6) times. End with 1 dc in same st as beg ch-3. Join with sl st to top of ch-3. (84, 96, 96 sts)
Rounds 2 through 5 of Chevron Panel 1:
Repeat Chevron Round 1. (84, 96, 96 sts per round)
This chevron panel measures approximately 1.5 inches / 4 cm.
The waist shaping comes from the natural drawing in effect of the dc3tog valleys. The chevron stitch itself creates a slimmer visual silhouette at the waist without added decreases.
Body Section 2: Mesh Panel (Waist to Hip)
Transition inc round:
Sc in each of first 10 (12, 12) sts. 2 sc in next st. (Sc in next 10 (11, 11) sts, 2 sc in next st) 6 (7, 7) times. Sc to end. Join. (91, 104, 104 sc)
Round to even out to mesh multiple:
We also want a multiple of 12 for the next chevron section.
Even-out round for S:
Sc in each of first 23 sts. 2 sc in next st. (Sc in next 23 sts, 2 sc in next st) 3 times. Join. (96 sc)
Even-out round for M and L:
Sc in each of first 26 sts. 2 sc in next st. (Sc in next 26 sts, 2 sc in next st) 3 times. Join. (108 sc)
All sizes mesh panel hip counts:
Mesh Round 1:
Ch 4. Sk first st. (Dc in next st, ch 1, sk 1 st) around. Join to 3rd ch of beg ch-4. (48, 54, 54 dc)
Mesh Rounds 2 through 10:
Repeat Mesh Round 1. Work 9 more rounds. (48, 54, 54 dc per round)
This mesh panel measures approximately 4.5 inches / 11.5 cm.
CHECKPOINT: After completing the second mesh panel, your dress body (from underarm) should measure approximately 9 inches / 23 cm. Your hip circumference should measure approximately 36 (38, 40) inches / 91.5 (96.5, 101.5) cm.
Chevron Panel 2 (Hip to Skirt)
Transition round:
Sc in each dc and each ch-1 sp around. Join. (96, 108, 108 sc)
Chevron Round 1:
Ch 3 (counts as dc). 1 dc in same st. 1 dc in each of next 4 sts. Dc3tog over next 3 sts. 1 dc in each of next 4 sts. 3 dc in next st. (Rep: 1 dc in each of next 4 sts, dc3tog over next 3 sts, 1 dc in each of next 4 sts, 3 dc in next st) 6 (7, 7) times. End 1 dc in same as beg ch-3. Join. (96, 108, 108 sts)
Chevron Rounds 2 through 6:
Repeat Chevron Round 1. (96, 108, 108 sts)
This chevron panel measures approximately 2 inches / 5 cm.
Body Section 3: Mesh Panel (Skirt Upper)
Transition round:
Sc in each st around. Join. (96, 108, 108 sc)
Expansion inc round:
Sc in each of first 11 (12, 12) sts. 2 sc in next st. (Sc in next 11 (12, 12) sts, 2 sc in next st) 7 (8, 8) times. Join.
Inc adjustment round for S:
Sc in each of first 26 sts. 2 sc in next. (Sc in 26, 2 sc in next) 3 more times. Join. (108 sc)
Inc adjustment round for M and L:
Sc in each of first 39 sts. 2 sc in next. (Sc in 39, 2 sc in next) 2 more times. Join. (120 sc)
All sizes going forward:
Mesh Round 1:
Ch 4. Sk first st. (Dc in next st, ch 1, sk 1 st) around. Join to 3rd ch of beg ch-4. (54, 60, 60 dc)
Mesh Rounds 2 through 8:
Repeat. (54, 60, 60 dc per round)
This mesh panel measures approximately 3.5 inches / 9 cm.
Chevron Panel 3 (Skirt Lower)
Transition round:
Sc in each dc and each ch-1 sp around. Join. (108, 120, 120 sc)
Flare inc round:
2 sc in every 9th st around.
Chevron Round 1:
Ch 3. 1 dc in same st. 1 dc in each of next 4 sts. Dc3tog over next 3 sts. 1 dc in each of next 4 sts. 3 dc in next st. (Rep) 8 (9, 9) more times ending with 1 dc in same as beg ch-3. Join. (120, 132, 132 sts)
Chevron Rounds 2 through 8:
Repeat Chevron Round 1. (120, 132, 132 sts per round)
This chevron panel measures approximately 3 inches / 7.5 cm.
Skirt Hem: Final Mesh Panel
Transition round:
Sc in each st around. Join. (120, 132, 132 sc)
Mesh Round 1:
Ch 4. Sk first st. (Dc in next st, ch 1, sk 1 st) around. Join to 3rd ch of beg ch-4. (60, 66, 66 dc)
Mesh Rounds 2 through 6:
Repeat. (60, 66, 66 dc per round)
This final mesh panel measures approximately 2.5 inches / 6.5 cm.
Scallop Hem
Transition round:
Sc in each dc and each ch-1 sp around. Join. (120, 132, 132 sc)
Scallop Round:
Sl st in first st. Ch 3, 4 dc in same st, ch 3, sl st in same st (first scallop made). Sl st in each of next 2 sts. (Ch 3, 4 dc in next st, ch 3, sl st in same st, sl st in next 2 sts) around. Join with sl st to first sl st.
Fasten off. Weave in ends on body.
CHECKPOINT: After the hem scallop, total dress length from shoulder should measure approximately 30 (31, 32) inches / 76 (78.5, 81) cm blocked.
Sleeves (Make 2)
Return to held sleeve stitches. With RS facing, join yarn to first held sleeve st at underarm.
Sleeve stitch counts picked up from holder:
All sizes begin at 36 sts. Join with sl st. Pm at join.
Sleeve Section 1: Mesh
Round 1:
Ch 4. Sk first st. (Dc in next st, ch 1, sk 1 st) around. Join to 3rd ch of beg ch-4. (18 dc)
Rounds 2 through 6:
Repeat Round 1. (18 dc per round)
Sleeve mesh section 1 measures approximately 2.5 inches / 6.5 cm.
Sleeve Chevron Band 1
Transition round:
Sc in each dc and each ch-1 sp around. Join. (36 sc)
Chevron Round 1:
Ch 3. 1 dc in same st. 1 dc in each of next 4 sts. Dc3tog over next 3 sts. 1 dc in each of next 4 sts. 3 dc in next st. (1 dc in each of next 4 sts, dc3tog over next 3 sts, 1 dc in each of next 4 sts, 3 dc in next st) 1 more time. End 1 dc in same as beg ch-3. Join. (36 sts, 3 chevron repeats)
Chevron Rounds 2 through 4:
Repeat. (36 sts)
Chevron band 1 measures approximately 1.5 inches / 4 cm.
Sleeve Section 2: Mesh with Increases
Transition round:
Sc in each st around. Join. (36 sc)
We now begin widening the sleeve toward the bell shape. Work 2 increases per round at opposite sides (+2 sts per round) until you reach 72 sts.
Inc mesh rounds: Work mesh pattern as established, adding 1 inc (dc, ch 1, dc in same sp) at the marked increase point on each side of sleeve.
Work 18 rounds total, increasing from 36 sts to 72 sts:
Transition to sc round:
Sc in each dc and each ch-1 sp around. Join. (72 sc)
CHECKPOINT: Sleeve length from underarm to this point should measure approximately 12 (12.5, 13) inches / 30.5 (32, 33) cm. The sleeve circumference at this point should measure approximately 16 inches / 40.5 cm.
Bell Cuff: Chevron Expansion Section
Bell Expansion Round 1:
Sc in each of first 5 sts. 3 sc in next st. (Sc in 5 sts, 3 sc in next st) 11 times. Join. (96 sc)
Bell Chevron Round 1:
Ch 3. 1 dc in same st. 1 dc in each of next 4 sts. Dc3tog over next 3 sts. 1 dc in each of next 4 sts. 3 dc in next st. Continue in chevron pattern around for 8 chevron repeats. (96 sts)
Continue working chevron rounds until the bell cuff measures approximately 6 inches / 15 cm from the start of the bell section.
Fasten off. Weave in all ends.
Repeat for second sleeve.
Finishing
Blocking: Wet block your finished dress by soaking it in cool water for 15 to 20 minutes. Gently squeeze out excess water (do not wring). Lay flat on blocking mats and pin to measurements, paying special attention to the scalloped hem and bell cuffs. Allow to dry completely before removing pins.
Remember that this dress will grow 1 to 2 inches in length after blocking, so don’t panic if it seems slightly short before this step.
Weaving in ends: Take your time with this step. Weave ends through several stitches in the same color area, then double back to secure.
Tips for Success with This Crochet Pattern
Work your gauge swatch. I know I’ve said it before, but for a fitted garment, this step is essential.
Use plenty of stitch markers. They’re your best friends for this project, especially during the yoke construction.
Try it on as you go. After you’ve divided for the body and sleeves, slip the dress over your head periodically to check the fit.
Don’t rush the chevron sections. The rhythm of dc3tog valleys and 3 dc peaks takes a few rounds to feel natural, but once you get it, it becomes almost meditative.
Block aggressively. This yarn and stitch combination really blooms with wet blocking. Your finished dress will look so much more polished after this step.
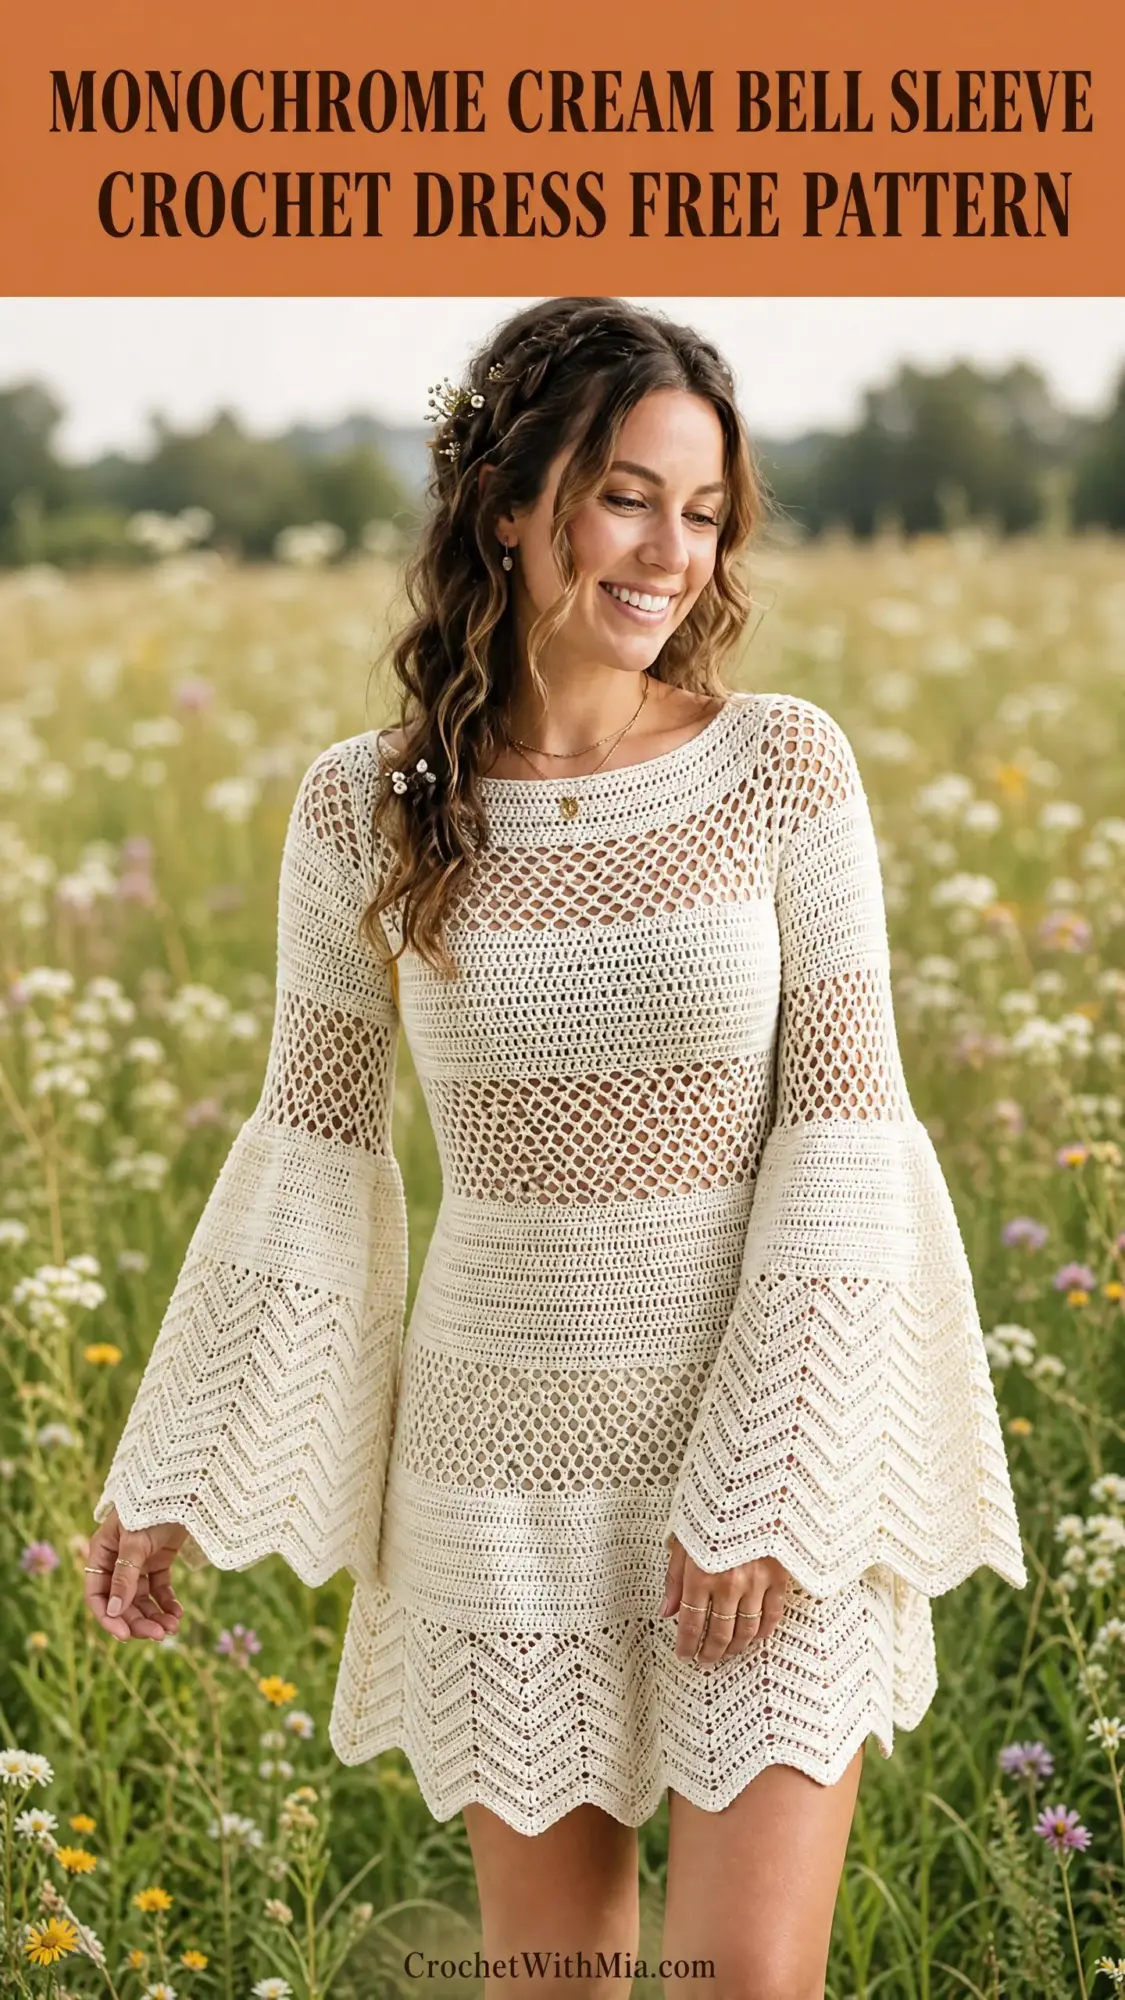
You Did It!
Thank you so much for choosing this pattern for your next crochet project. I truly hope you love making this dress as much as I loved designing it. There’s something so satisfying about creating a wearable garment with your own hands, especially one with these beautiful bohemian details.
If you make this cream bell sleeve crochet dress, I would absolutely love to see it! Tag me on Instagram or share in my Facebook group. Seeing your finished pieces genuinely makes my day.
If this pattern is calling your name, go ahead and save it to your Pinterest boards so you can find it when you’re ready to start. And if you do make it, please pop back here and leave a comment. I love hearing how projects turn out and answering any questions along the way. Happy crocheting!