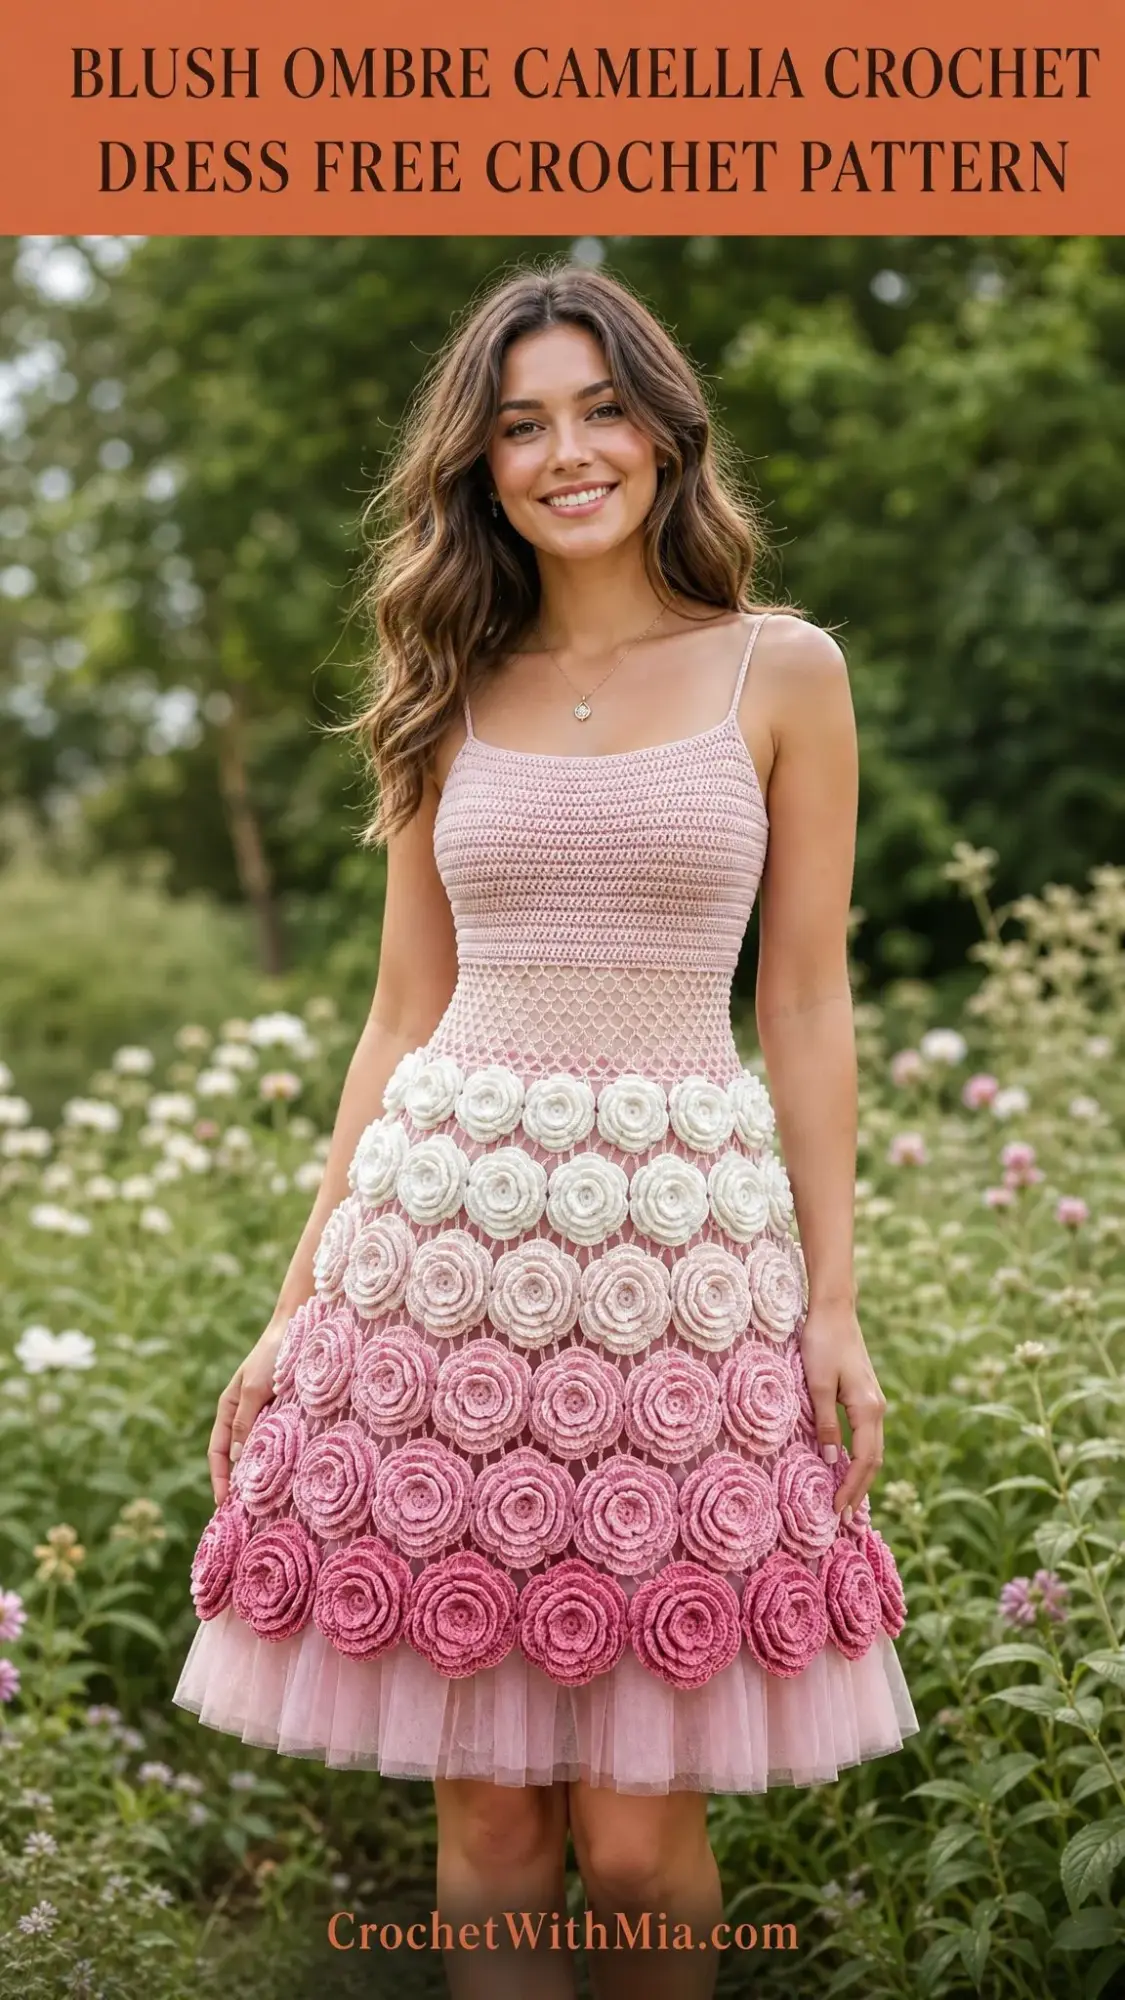
Alright, yarn lovers, it is time to dig into your stash and find those gorgeous cotton skeins you have been saving for something truly special. This Blush Ombre Camellia Crochet Dress is that project. The construction is fascinating, combining a fitted camisole bodice worked in joined rounds, a delicate diamond mesh midsection, and 78 individually crocheted camellia roses sewn in ombre rows onto a tulle underskirt. I will be honest with you: this is an advanced beginner to intermediate project that requires patience, especially when making all those roses. But the result? Absolutely breathtaking.
Get the Ad-Free PDF Pattern
You can find the free pattern below, or you can purchase the ad-free printable PDF from my shop.
Get the Printable PDF →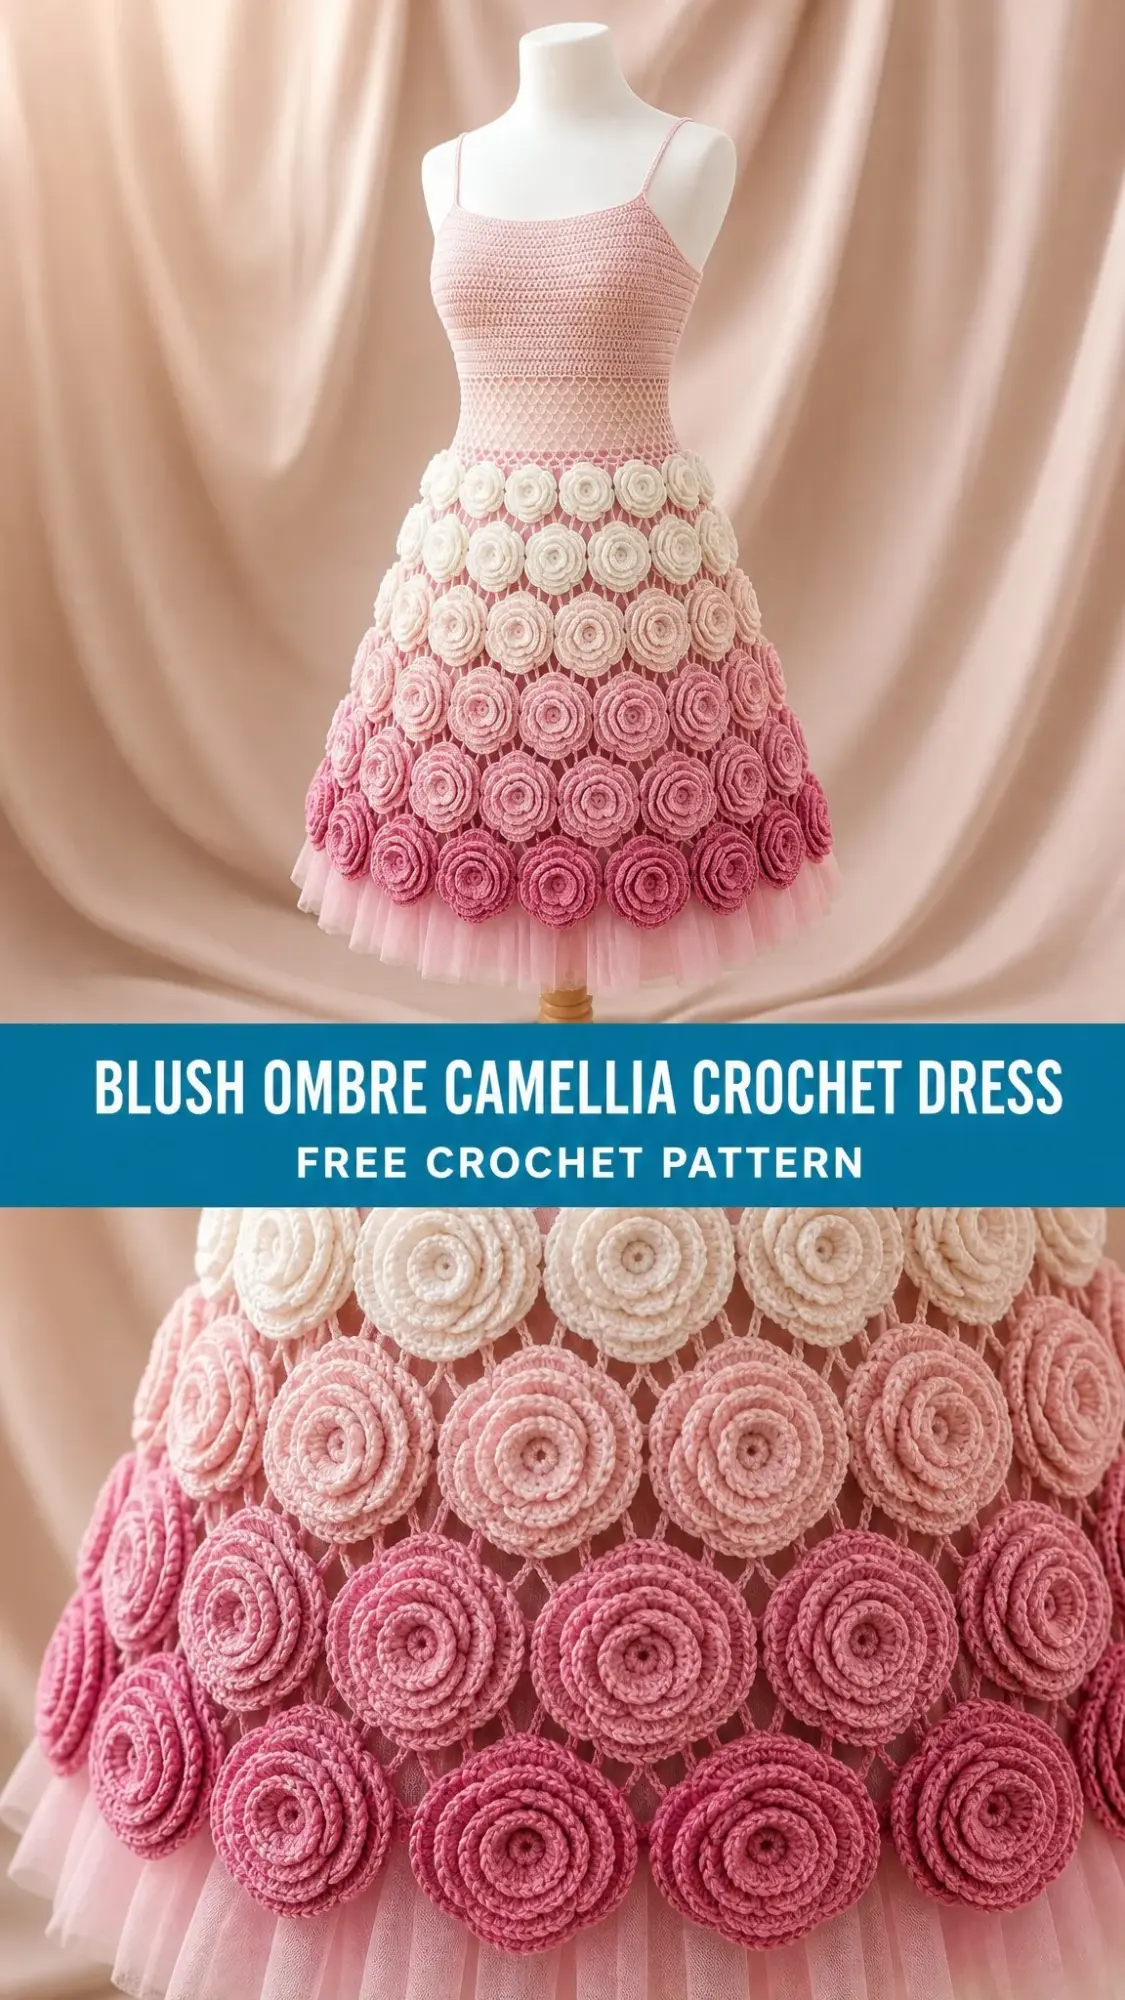
About This Stunning Crochet Dress Pattern
This dress is a showstopper. The design features a close-fitting bodice that hugs the bust and narrows at the waist through simple decreases. Below the waist, an open diamond mesh section creates an airy, romantic transition before the skirt begins. The real magic happens with the camellia roses, which are crocheted as long shell strips and then rolled into dimensional flowers. These roses are arranged in five ombre rows, transitioning from ivory at the top through blush, light pink, and medium rose pink, ending with deep pink at the hem.
The finished dress measures approximately 32 inches around the bust, 28.5 inches at the waist, and 31 to 32 inches in total length not including the straps. It is designed for 0 to 2 inches of negative ease at the bust, so it fits best for a 32 to 34 inch bust measurement.
You should be comfortable with joined rounds, maintaining steady gauge, simple decreases, chain loop mesh, crocheting multiple motifs, and hand sewing applique pieces securely. Plan for 32 to 45 hours of work depending on your rose-making speed and how detailed you want your finishing.
Materials You Will Need
Yarn: Fingering to light sport weight cotton or cotton-bamboo blend, approximately 1,650 to 1,950 yards total. Use firm, smooth yarn so the bodice holds its shape and the roses keep crisp edges.
Here is the color breakdown:
| Color | Yardage |
|---|---|
| Ivory/cream | 360 yards |
| Blush | 420 yards |
| Light pink | 380 yards |
| Medium rose pink | 380 yards |
| Deep pink | 300 yards |
| Extra for swatch/seaming | 150 yards |
Yarn suggestions: Scheepjes Catona, Hobbii Rainbow Cotton 8/4, or Paintbox Cotton 4 Ply work beautifully. You can substitute any smooth cotton or cotton blend that matches gauge and creates roses about 2.75 inches across.
Hooks: US C/2.75 mm for the bodice. US D/3.25 mm for roses if needed to match motif size.
Other supplies: Removable stitch markers, tapestry needle, sewing needle and matching thread, 1.5 to 2 yards of soft blush tulle, 1/4 inch elastic for waist support, optional lining fabric, measuring tape, and pins.
Gauge
Getting gauge right is essential for this fitted dress.
| Area | Gauge |
|---|---|
| Bodice single crochet (sc) | 18 sc and 20 rounds = 4 inches |
| Diamond mesh | 8 ch-5 loops and 10 rounds = 4 inches |
| Rose motif | One finished rose = 2.75 inches across |
Please swatch and match gauge before starting. Individual results may vary depending on your yarn, tension, hook size, and finishing technique. You may need to make small adjustments to achieve the closest possible result to the finished project shown.
Abbreviations (US Terms)
Let me define every abbreviation you will encounter. This pattern uses US crochet terminology.
Single crochet (sc): Insert hook in stitch, yarn over and pull up a loop, yarn over and draw through both loops on hook. This creates a short, dense stitch.
Double crochet (dc): Yarn over, insert hook in stitch, yarn over and pull up a loop, yarn over and draw through 2 loops, yarn over and draw through remaining 2 loops. This creates a taller stitch.
Chain (ch): Yarn over and pull through loop on hook. For example, "ch 5" means yarn over and pull through five times.
Slip stitch (sl st): Insert hook in stitch, yarn over and pull through both the stitch and the loop on hook in one motion.
Single crochet two together (sc2tog): Insert hook in next stitch, yarn over and pull up a loop. Insert hook in following stitch, yarn over and pull up a loop. Yarn over and draw through all 3 loops on hook. One stitch decreased.
Magic ring (MR): An adjustable starting loop for working in the round.
Skip (sk): Pass over the indicated stitch without working into it.
Space (sp): The gap created by chain stitches.
Back loop only (BLO): Work into only the back loop of the stitch.
Front loop only (FLO): Work into only the front loop of the stitch.
UK note: This pattern uses US terms. US sc equals UK dc. US dc equals UK tr.
Special Techniques
Invisible Join
This technique creates a seamless finish at the end of rounds. Cut yarn, pull tail through last stitch, thread tail on needle, insert under both loops of the first stitch of the round, then back down into the center of the last stitch. Tighten gently to imitate a stitch top.
Diamond Mesh Loop
Work ch 5, skip the instructed stitches or previous loop, then sc in the next stitch or ch-5 space. Keep all loops relaxed and even. Tight mesh will shorten the torso and distort the rose rows.
Camellia Rose Strip
A long shell strip is rolled into a round camellia. Keep the starting end tight for the rose center and let the outer shells open gently. Sew through the base several times so the rose stays flat.
Bodice Instructions
Work in joined rounds. The ch 1 at the beginning of a sc round does not count as a stitch. Join each round with a sl st to the first sc. Place a marker at the beginning of round and at each quarter point.
| Round | Instruction | Stitch Count |
|---|---|---|
| Foundation | Ch 145, taking care not to twist. Join with sl st to first ch. | 144 base ch |
| 1 | Ch 1, sc in each ch around, join. | 144 sc |
| 2-20 | Ch 1, sc in each st around, join. | 144 sc |
| 21 | Ch 1, [sc in next 34 sts, sc2tog] 4 times, join. | 140 sc |
| 22 | Ch 1, sc in each st around, join. | 140 sc |
| 23 | Ch 1, [sc in next 33 sts, sc2tog] 4 times, join. | 136 sc |
| 24 | Ch 1, sc in each st around, join. | 136 sc |
| 25 | Ch 1, [sc in next 32 sts, sc2tog] 4 times, join. | 132 sc |
| 26 | Ch 1, sc in each st around, join. | 132 sc |
| 27 | Ch 1, [sc in next 31 sts, sc2tog] 4 times, join. | 128 sc |
| 28 | Ch 1, sc in each st around, join. Do not fasten off. | 128 sc |
Checkpoint: Your bodice should measure about 32 inches around at the bust edge, 28.5 inches at the waist, and 5.5 to 5.75 inches tall.
Top Edging and Straps
Join yarn at upper back. Work 1 round of sc evenly around the top edge, placing 1 sc in each foundation chain. Fasten off with invisible join.
For each strap, join at front strap marker, ch 74, sl st to matching back marker, then turn and sl st in each ch back to front. Repeat for second strap. Adjust strap length before weaving ends. Try the dress on if possible to get the perfect length.
Diamond Mesh Midsection
The mesh is worked from the waist edge downward. The 128 stitch waist divides into 32 chain loop repeats.
| Round | Instruction | Count |
|---|---|---|
| 1 | Ch 1, [ch 5, sk 3 sts, sc in next st] 32 times, join with sl st into first ch-5 sp. | 32 loops |
| 2 | Ch 1, sc in same ch-5 sp, [ch 5, sc in next ch-5 sp] 31 times, ch 5, join to first sc. | 32 loops |
| 3-7 | Rep Round 2. | 32 loops |
| 8 | Ch 1, [sc in next ch-5 sp, ch 3] 32 times, join. This creates a firmer lower edge. | 32 ch-3 sps |
| 9 | Ch 1, 4 sc in each ch-3 sp around, join. | 128 sc |
Checkpoint: Mesh panel should measure about 3 inches tall. Waist edge remains 28.5 inches around.
Waist Support
Cut elastic to fit the waist comfortably. Sew the elastic into a ring. On the inside of the dress, whipstitch the elastic just above the mesh seam, catching only the backs of stitches so the thread does not show on the outside.
Tulle Underskirt
Cut 2 to 3 tulle layers, each 24 inches long. Gather the upper edge to match the waist. Sew the gathered tulle to the inside waist/mesh seam. Trim the hem after the roses are attached.
Camellia Rose Motif
Make 78 roses total: 26 ivory/cream, 16 light pink, 18 medium rose pink, and 18 deep pink. Finished rose measures about 2.75 inches across. Use the same hook for all roses unless one color blocks larger or smaller.
| Step | Instruction | Count |
|---|---|---|
| 1 | Ch 73. | 73 ch |
| 2 | Sc in 2nd ch from hook and in each ch across. Turn. | 72 sc |
| 3 | Ch 3, 2 dc in first sc, [sk next sc, 3 dc in next sc] 35 times, sk next sc, sl st in last sc. Fasten off leaving a long tail. | 36 shells |
| 4 | Roll from the first shell to form a tight center. Keep lower edge flat. Sew through the base from side to side multiple times. | 1 rose |
Rose Shaping Tips
Steam lightly before sewing if petals curl too much. For a flatter applique, tack each outer shell to the layer below. For a fuller 3D look, tack only the lower edge and allow the petal tops to lift.
Do not stress if your first few roses look a bit wonky. You will find your rhythm after the first dozen or so.
Ombre Placement Guide
| Row | Color | Roses | Placement |
|---|---|---|---|
| A | Ivory | 12 | Upper waist row |
| B | Ivory to blush | 14 | Slightly below Row A, offset halfway |
| C | Light pink | 16 | Mid skirt, offset |
| D | Medium rose pink | 18 | Lower skirt |
| E | Deep pink | 18 | Hem row, densest color |
Skirt Assembly Step by Step
Lay the dress flat over a dress form or padded surface. Pin all roses before sewing. Stagger each row so the roses nest between the roses above it. The upper rows sit closer together. The hem row may overlap the tulle edge slightly for a scalloped finish.
1. Mark center front, center back, and side points on the mesh/tulle skirt.
2. Pin Row A: 12 ivory roses evenly around the top of the skirt, about 0.75 inches below the mesh edge.
3. Pin Row B: 14 roses below Row A, offset between upper roses.
4. Pin Row C: 16 light pink roses, keeping spacing even and allowing the skirt to flare.
5. Pin Row D: 18 medium rose pink roses below Row C.
6. Pin Row E: 18 deep pink roses along the lower edge. Let the lower petals create the scalloped hem.
7. Sew each rose through the base only. Catch the crochet mesh and tulle together every few roses.
Checkpoint: When pinned, the skirt should flare smoothly from 33 inches around the upper rose row to about 50 inches around the lower rows. No row should pull tight or ripple sharply.
Size Customization
Bust/waist: Add or remove stitches at the foundation in multiples of 8. Every 8 stitches changes circumference by about 1.75 inches at gauge. Keep the waist count divisible by 8 for the mesh.
Length: Add bodice rounds before shaping for a longer torso. Add tulle length and an extra rose row for a longer skirt.
Rose count: For larger skirts, add 2 roses to each lower row. For smaller skirts, remove 2 roses from the lower two rows first. Always pin before sewing.
Straps: Ch more or fewer stitches, try the dress on, then sl st back along the chain.
Troubleshooting Common Issues
| Issue | Fix |
|---|---|
| Bodice too loose | Go down a hook size or remove 8 foundation stitches. |
| Bodice too tight | Go up a hook size or add 8 foundation stitches. |
| Mesh pulls in | Work chain loops more loosely or use a larger hook for mesh only. |
| Rose row ripples | Remove 2 roses from that row or overlap petals less. |
| Rose row gaps | Add 2 roses to that row or sew roses closer together. |
| Tulle visible unevenly | Trim hem after all roses are sewn and steam gently. |
Blocking and Finishing Your Crochet Dress
Steam the bodice lightly from the wrong side. Do not flatten the roses. Use steam above the surface and shape petals with your fingers. Weave in all ends securely. Add lining if the dress will be worn without a slip.
Care Instructions
Hand wash cold with mild detergent. Press water out in a towel but do not wring. Dry flat on a towel or dress form. Reshape roses while damp. Store flat or lightly hung with support at the waist so the skirt does not stretch.
Left-Handed Crocheters
Work the instructions as written. Your rounds will travel in the opposite direction, but shaping, motif count, and placement remain the same. For the ombre skirt, pin all roses first, then sew so the visual direction of the rows stays balanced.
Thank you so much for choosing this Blush Ombre Camellia Crochet Dress pattern for your next project. I know it is a big undertaking, but I truly believe you can do it. Take your time with those roses, enjoy the process, and you will have an absolutely stunning piece to show for your work.
I would love to see your finished dress! Tag me on Instagram or share in our Facebook group so I can admire your beautiful creation.
If you found this crochet tutorial helpful, please save it to your Pinterest boards so you can find it easily when you are ready to start. And if you make this dress, I would absolutely love to hear about it in the comments below. Your photos and feedback mean the world to me!
Want a Quick & Easy Printable Version?
Get a clean, beautifully formatted PDF of this pattern — easy to follow step by step, ready to print or save on any device. No scrolling, no distractions, just the pattern.
Get the Printable PDF →