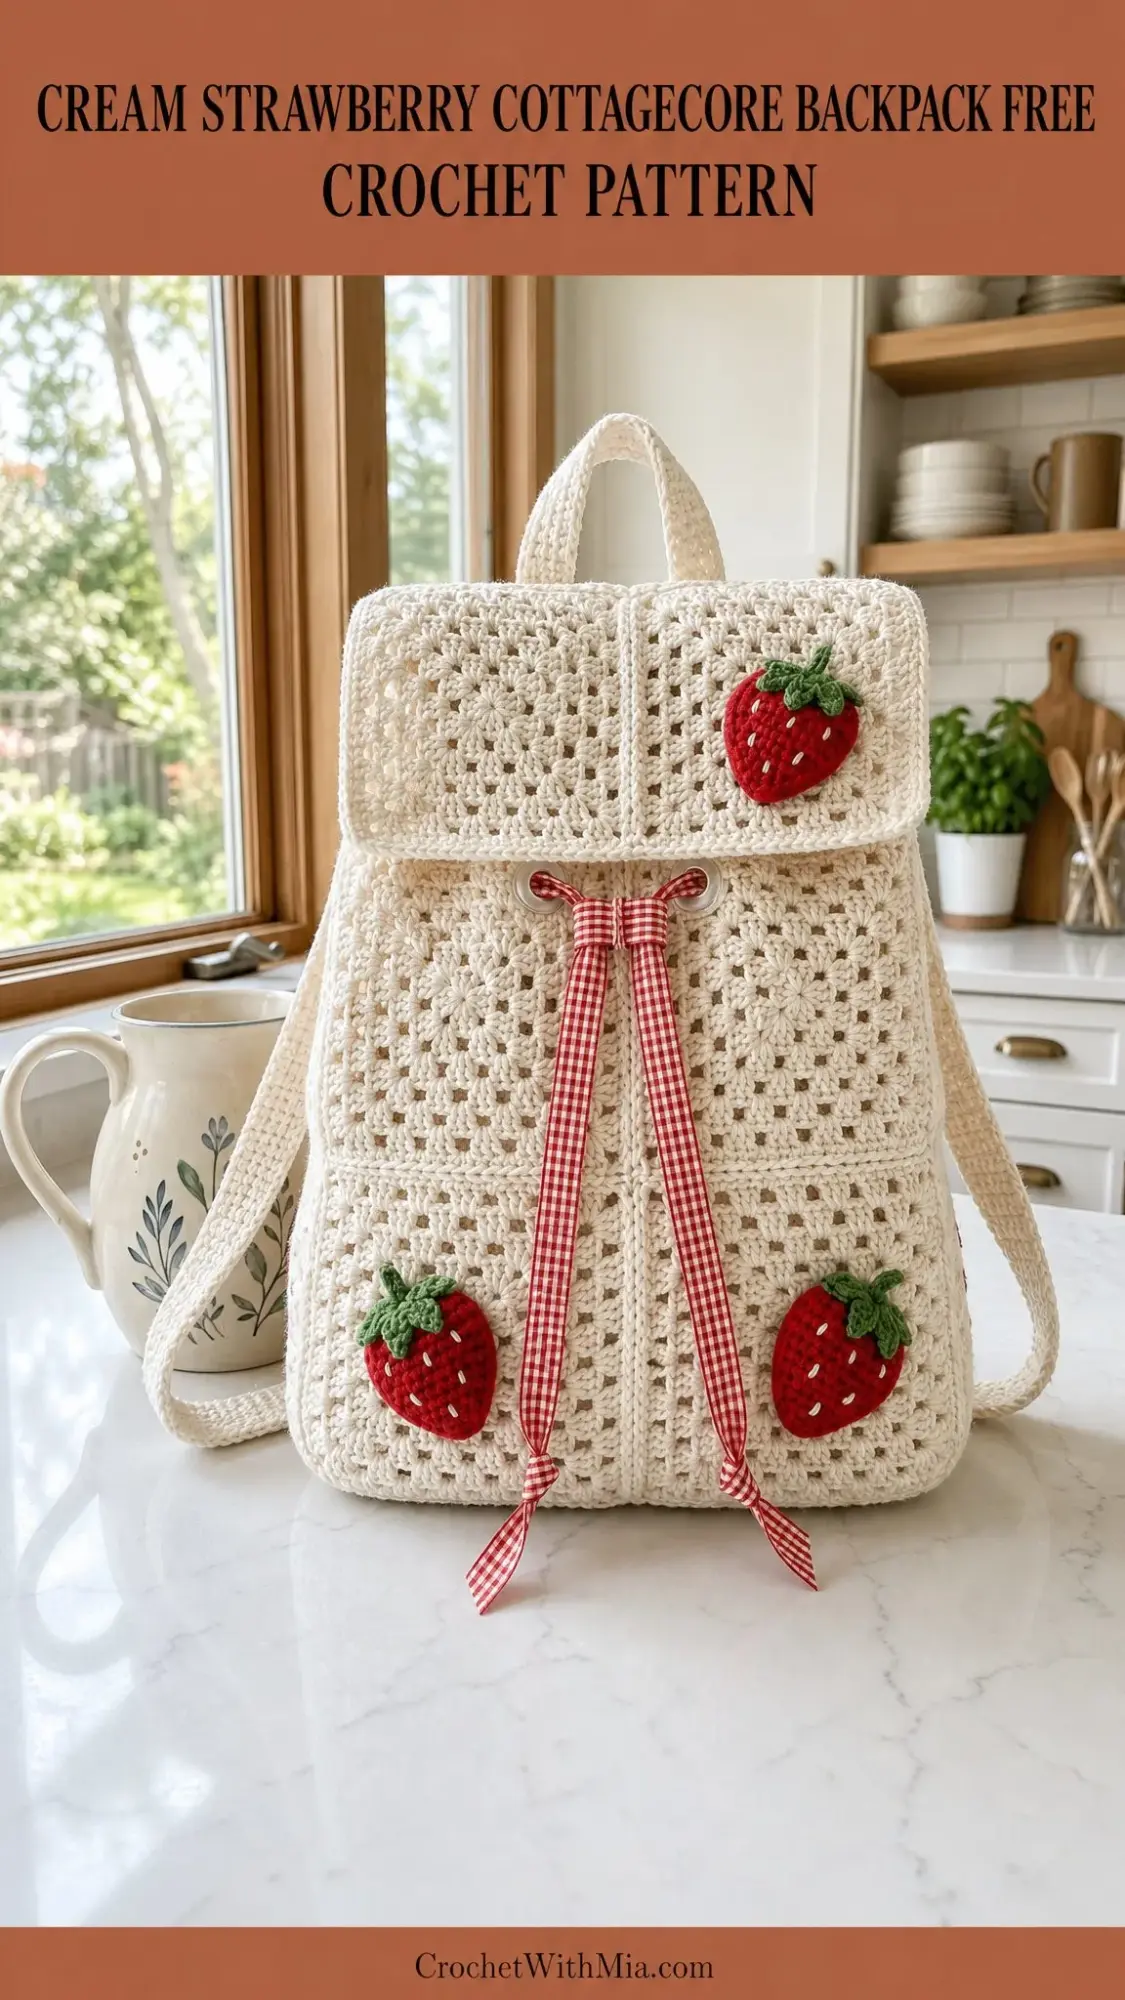
When I sat down to design this backpack, I had a very specific vision in mind. I wanted something that felt like a warm summer afternoon in a cottage garden. Soft cream yarn, sweet strawberry appliques, a gingham ribbon bow, and that classic granny texture I love so much.
Get the Ad-Free PDF Pattern
You can find the free pattern below, or you can purchase the ad-free printable PDF from my shop.
Get the Printable PDF →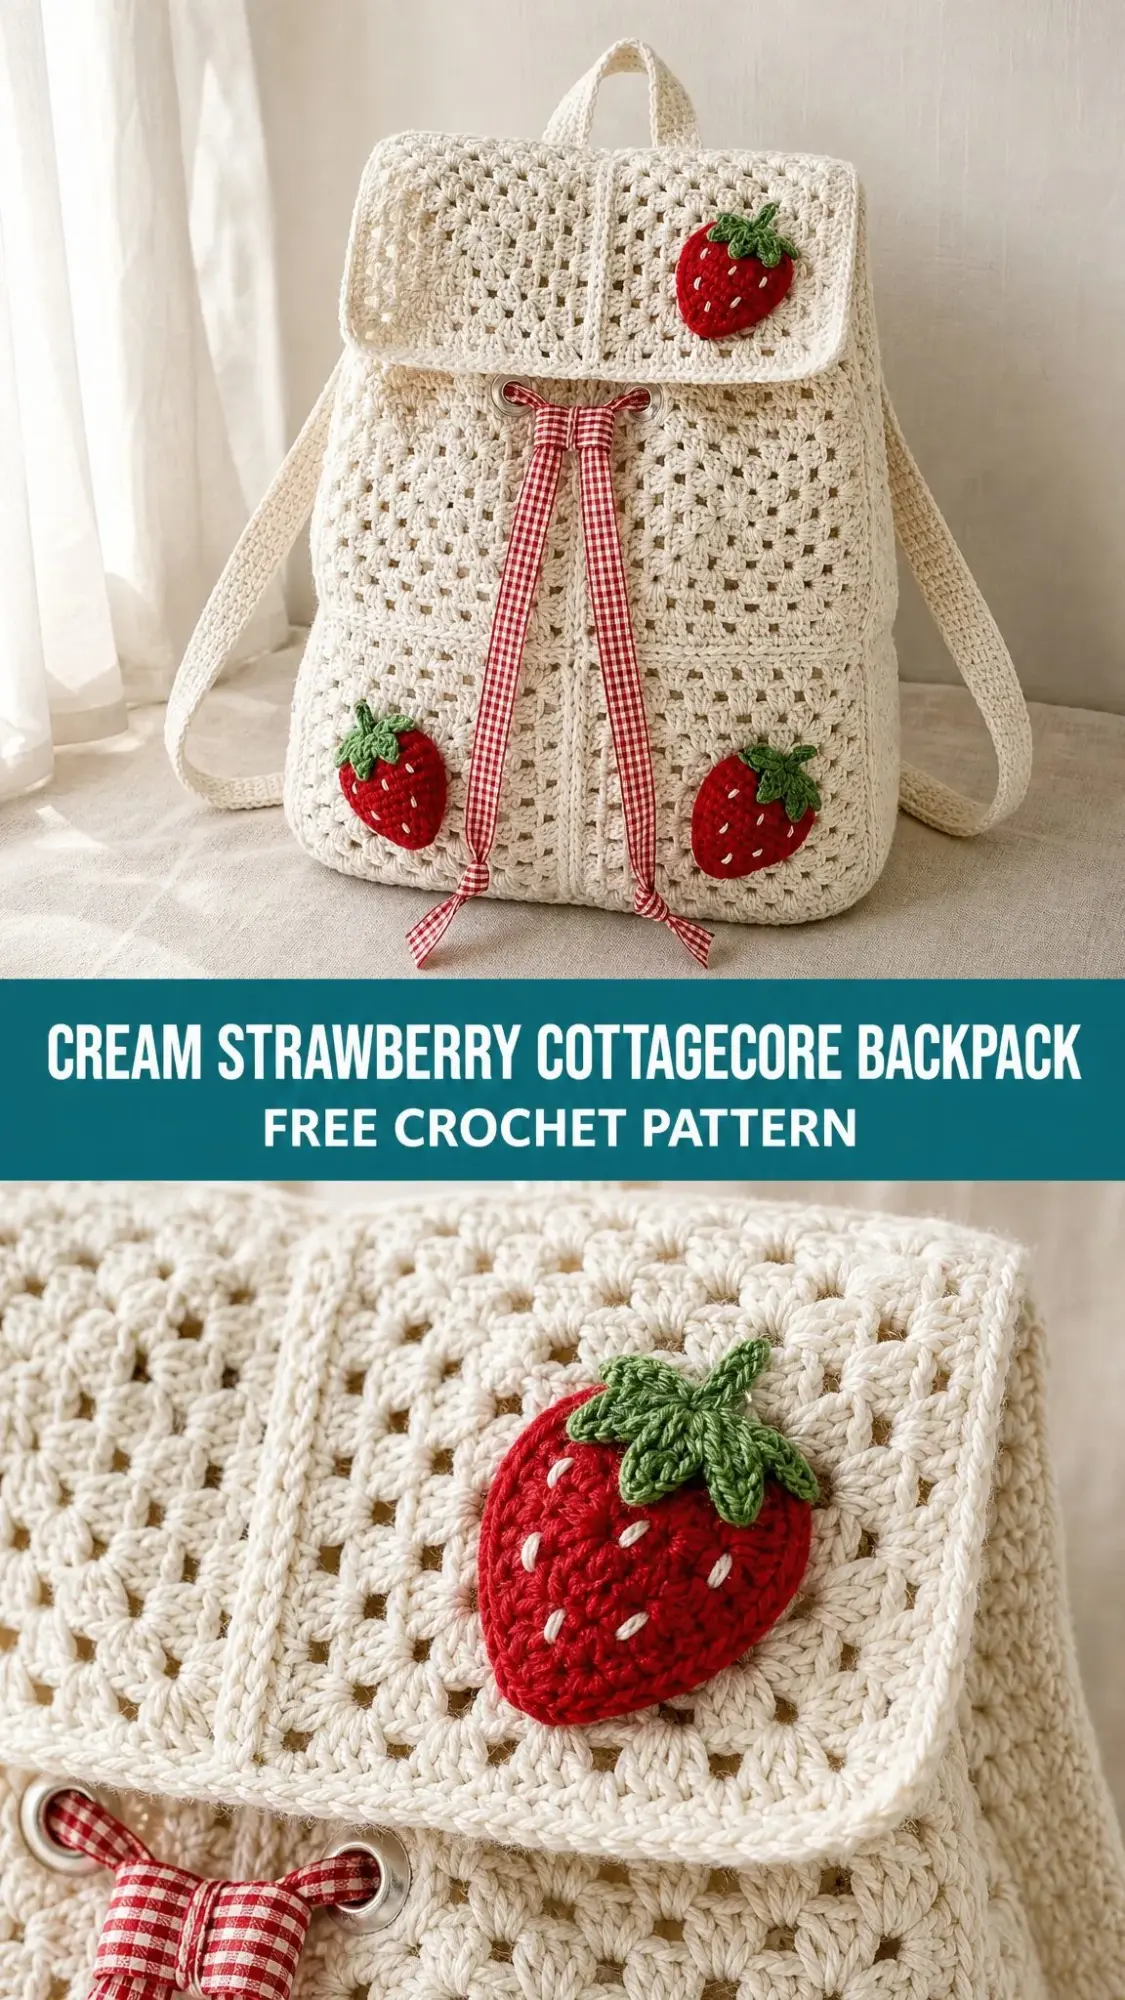
The goal was to create a bag that looked intricate but was actually built from simple flat panels. No complicated shaping, no confusing increases in the round, just straightforward rectangles and a few adorable strawberries sewn on at the end. I wanted confident beginners to feel like they could tackle this project and finish with something truly beautiful.
I am SO pleased with how it turned out! The granny stitch texture gives it that vintage handmade charm, the strawberries add a playful pop of color, and the ribbon drawstring ties the whole cottagecore aesthetic together perfectly.
About This Crochet Backpack Pattern
This Cream Strawberry Cottagecore Backpack is a soft, structured bag worked entirely in flat panels using a granny texture stitch. You will make five main panels, which are the front, back, two sides, and bottom. Then you will add a rounded flap, a top handle, adjustable shoulder straps, and three sweet strawberry appliques.
The finished backpack measures approximately 11 inches (28 cm) tall, 9.5 inches (24 cm) wide, and 3.75 inches (9.5 cm) deep. This does not include the handle or shoulder straps. It is the perfect size for daily essentials, a picnic outing, or a farmer’s market trip.
Time estimate: Expect about 10 to 14 relaxed hours of crocheting from start to finish.
Skill level: Confident beginner to intermediate. If you can work basic stitches, follow a simple repeat, and sew pieces together, you can absolutely make this backpack.
Materials You Will Need
Before you start, gather everything on this list. Having all your supplies ready makes the process so much smoother.
Yarn:
Recommended Yarns:
Choose a smooth worsted cotton or cotton blend that creates a firm fabric. If your swatch feels floppy, go down a hook size or plan to add a fabric lining.
Hook:
Notions:
Gauge
Getting gauge right matters for this project because all your panels need to fit together during assembly.
Granny texture gauge: 16 double crochet (dc) stitches and 9 rows = 4 inches (10 cm) after light blocking.
Flat single crochet strap gauge: 17 single crochet (sc) stitches and 12 rows = 4 inches (10 cm).
Swatch at least 5 inches (13 cm) square in the granny texture pattern. Block lightly, let it dry, then measure the center. Match both stitch gauge and row gauge before you begin the main panels.
Stitch Guide and Abbreviations
This pattern uses US crochet terminology. If you typically work from UK patterns, remember that US single crochet equals UK double crochet, and US double crochet equals UK treble crochet.
Special Stitches
Granny Texture Row: Chain 3 (ch 3), turn. Double crochet (dc) in the next stitch. Skip the next 2 stitches, work 3 dc in the next stitch. Repeat from to across until you reach the last 2 stitches. Work 1 dc in each of the last 2 stitches. On the following row, work each 3-dc group into the open space created by the skipped stitches below. Always keep 2 dc at each edge.
sc2tog (single crochet decrease): Insert your hook into the next stitch, yarn over, pull up a loop. Insert your hook into the following stitch, yarn over, pull up a loop. Yarn over and pull through all 3 loops on your hook.
Clean Border Corners: Work 3 sc in each corner stitch to turn the corner smoothly without puckering.
Pattern Instructions
Front Panel (Make 1)
Foundation: Ch 38.
Row 1: Sc in the 2nd ch from the hook and in each ch across. (37 sc)
Rows 2 through 24: Work the granny texture row as described above. (37 dc each row)
Border: Ch 1. Work 1 sc in each stitch across the top and bottom edges. Work 1 sc in each row-end along the sides. Work 3 sc in each corner. Join with a sl st. (130 sc total)
Checkpoint: Your panel should measure approximately 9.25 inches (23.5 cm) wide and 10.75 inches (27.5 cm) tall before seaming.
Back Panel (Make 1)
Work exactly the same as the Front Panel. You will have 37 stitches per row and a 130 sc border.
Before moving on, mark the top center 10 stitches. This is where you will attach the handle later. Also mark the lower left and right corners for strap placement.
Side Panels (Make 2)
Foundation: Ch 14.
Row 1: Sc in the 2nd ch from the hook and in each ch across. (13 sc)
Rows 2 through 24: Ch 3, turn. Dc in the next stitch. Skip the next 2 stitches, 3 dc in the next stitch. Repeat 3 times total. Dc in each of the last 2 stitches. (13 dc)
Border: Work the border the same as for the main panels. (82 sc total)
Checkpoint: Each side panel should measure approximately 3.25 inches (8 cm) wide and 10.75 inches (27.5 cm) tall.
Bottom Panel (Make 1)
Foundation: Ch 38.
Row 1: Sc in the 2nd ch from the hook and in each ch across. (37 sc)
Rows 2 through 7: Work the granny texture row. (37 dc each row)
Border: Work the border the same as for the main panels. (96 sc total)
Checkpoint: Your base should measure approximately 9.25 inches by 3.25 inches (23.5 cm by 8 cm) before seaming.
Rounded Flap (Make 1)
Foundation: Ch 38.
Row 1: Sc in the 2nd ch from the hook and in each ch across. (37 sc)
Rows 2 through 8: Work the granny texture row. (37 dc each row)
Border: Work 1 sc in each stitch and each row-end around the entire flap. Place 3 sc in each of the top corners and 3 sc in each of the bottom corners. Join with a sl st. (98 sc total)
Optional softer lower edge: On the final pass along the lower edge only, work sc, ch 1, skip 1 across before fastening off. This creates a more delicate, scalloped look.
Top Handle (Make 1)
Foundation: Ch 7.
Row 1: Sc in the 2nd ch from the hook and in each ch across. (6 sc)
Rows 2 through 38: Ch 1, turn. Sc across. (6 sc)
When you attach the handle later, fold each short end under about 0.75 inches (2 cm) before sewing to the back panel.
Shoulder Straps (Make 2)
Foundation: Ch 7.
Row 1: Sc in the 2nd ch from the hook and in each ch across. (6 sc)
Rows 2 through 105: Ch 1, turn. Sc across. (6 sc)
Thread each strap through your strap adjusters or buckles. Fold the ends under and sew securely using doubled yarn. This keeps the hardware firmly attached even with regular use.
Strawberry Appliques
These little strawberries are my favorite part of the whole project. They are quick to make and add so much charm.
Flat Strawberry (Make 3)
With red yarn, ch 2.
Row 1: Work 3 sc in the 2nd ch from the hook. (3 sc)
Row 2: Ch 1, turn. Work 2 sc in each stitch across. (6 sc)
Row 3: Ch 1, turn. Sc in the next stitch, 2 sc in the next stitch. Repeat across. (9 sc)
Row 4: Ch 1, turn. Work 2 sc in the first stitch, sc in the next 7 stitches, 2 sc in the last stitch. (11 sc)
Row 5: Ch 1, turn. Work 2 sc in the first stitch, sc in the next 9 stitches, 2 sc in the last stitch. (13 sc)
Row 6: Ch 1, turn. Sc across. (13 sc)
Row 7: Ch 1, turn. Sc2tog, sc in the next 9 stitches, sc2tog. (11 sc)
Row 8: Ch 1, turn. Sc2tog, sc in the next 7 stitches, sc2tog. (9 sc)
Row 9: Ch 1, turn. Sc2tog, sc in the next 5 stitches, sc2tog. (7 sc)
Border: Sc evenly around the entire strawberry, placing 2 sc at the lower point to create a nice rounded tip. Fasten off, leaving a long tail for sewing.
Leaf Crown (Make 3)
With green yarn, join at the wide top edge of one strawberry.
Ch 5. Sl st in the 2nd ch from the hook. Sc in the next ch. Hdc in the next ch. Dc in the next ch. Sl st into the strawberry top. Repeat this sequence 5 times total to create 5 little leaves.
Fasten off and weave the ends to the back of the strawberry.
Seeds
With white embroidery thread, stitch short vertical dashes across each berry. Space them in staggered rows to mimic real strawberry seeds. This detail really brings the appliques to life.
Assembly
Take your time with this section. Good assembly makes all the difference in how professional your finished backpack looks.
Step 1: Block all panels to the listed measurements. Let them dry completely before seaming.
Step 2: With wrong sides together, seam one side panel to the left edge of the front panel using whipstitch through the inner border loops. Repeat for the right side.
Step 3: Seam the back panel to the open side panel edges. You should now have a tube shape.
Step 4: Pin the bottom panel inside the lower opening. Match all four corners first, then seam around all four sides.
Step 5: Center the flap along the top back edge with the right side facing out. Sew through the flap border and the back panel top border only.
Step 6: Sew the handle ends to the back top edge, spacing them about 2 inches (5 cm) apart.
Step 7: Attach the upper ends of the shoulder straps about 1 inch (2.5 cm) below the top edge of the back panel. Attach the lower ends at the back lower corners through your hardware.
Step 8: Install two metal eyelets on the upper front panel. Position them approximately 1.25 inches (3 cm) apart and about 0.5 inches (1.3 cm) below the flap edge. Thread your gingham ribbon through both eyelets and tie a bow.
Step 9: Sew your strawberries in place. Position one on the upper right corner of the flap, one on the lower left of the front panel, and one on the lower right of the front panel. Secure all edges so the appliques lie flat.
Assembly Checkpoints
Size Customization
Want to make your backpack bigger or smaller? Here is how to adjust:
Width: Add or remove foundation chains in multiples of 3. Make the same change to the front, back, flap, and bottom panels.
Height: Add or remove granny rows before the border. Each 2 rows changes the height by approximately 0.9 inches (2.2 cm).
Depth: Change the side panel and bottom panel width together. Keep both side panels identical.
Straps: Add or remove sc rows before the hardware to suit the wearer.
Finishing and Care
Finishing tips:
Care instructions:
Troubleshooting Common Issues
If your panel is too wide, try going down a hook size or removing 3 foundation chains.
If your panel is too tall, remove 2 granny rows from the front, back, and side panels.
If your fabric feels floppy, use a smaller hook, add a lining, or seam with firmer tension.
If your flap curls, block it flat and loosen the border stitches along the lower edge.
If your straps stretch with use, line the back of each strap with ribbon or cotton twill tape.
Notes for Left-Handed Crocheters
Work the same written rows from left to right as usual. During assembly, mirror the strawberry placement so the flap strawberry sits on the upper outer corner as shown when the backpack faces you.
I hope you love making this cottagecore backpack as much as I loved designing it. There is something so satisfying about watching those simple granny panels come together into a functional, beautiful bag.
If you make this pattern, I would absolutely love to see it! Save this page to your Pinterest boards so you can find it easily when you are ready to start. And please drop a comment below with photos of your finished backpack. Seeing your creations truly makes my day!
Want a Quick & Easy Printable Version?
Get a clean, beautifully formatted PDF of this pattern — easy to follow step by step, ready to print or save on any device. No scrolling, no distractions, just the pattern.
Get the Printable PDF →