I have been dreaming up this little purse for months now. My goal was to create something structured enough to actually use, soft enough to feel handmade, and stylish enough to carry anywhere from brunch to a weekend market. I wanted braided handles that look impressive but are surprisingly simple to make, plus those adorable pennant flags that give it all the boho charm.
Get the Ad-Free PDF Pattern
You can find the free pattern below, or you can purchase the ad-free printable PDF from my shop.
Get the Printable PDF →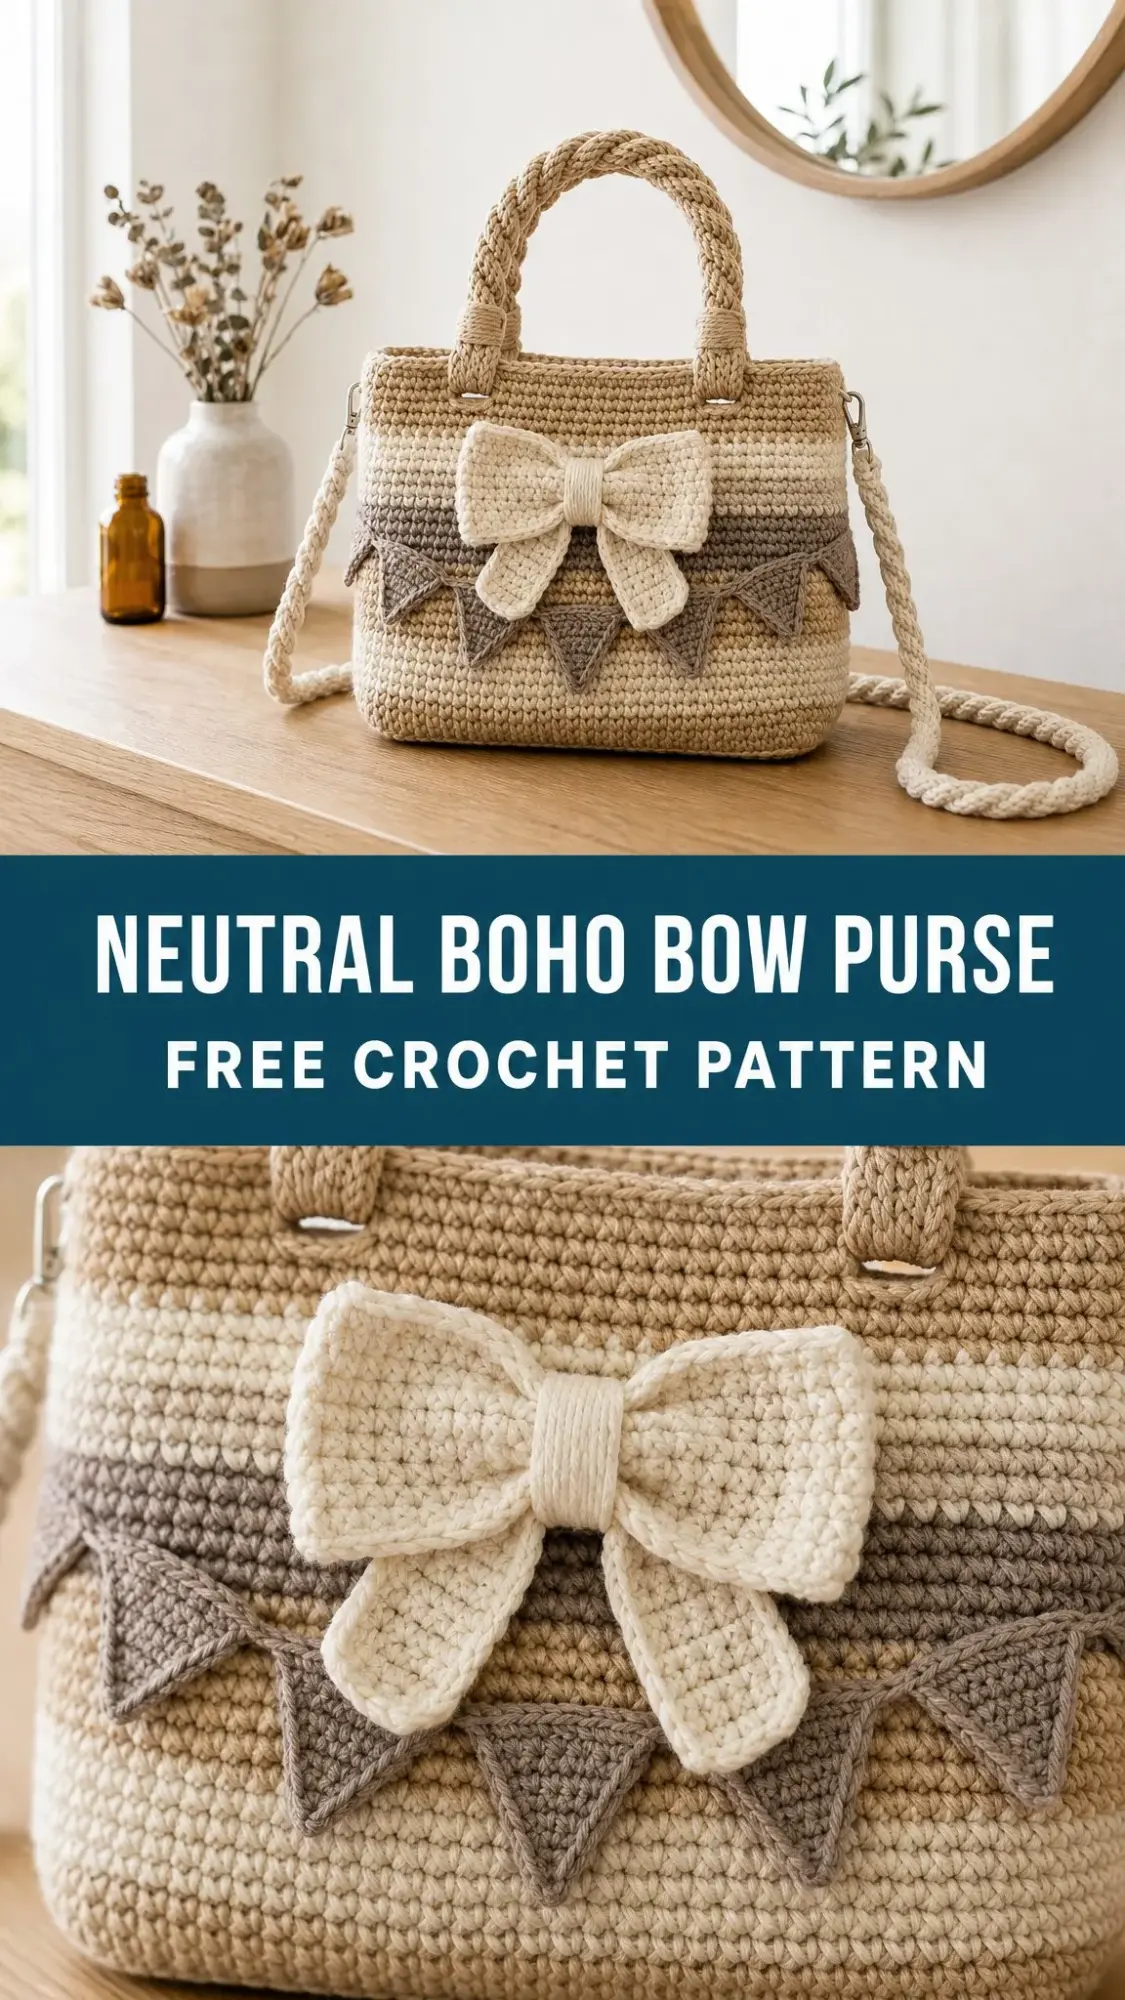
The stripe pattern came together after testing about a dozen color combinations. These neutral tones work with everything in my closet, which was important to me. I also made sure the construction stays straightforward, even though the finished piece looks like something from a boutique.
I am SO pleased with how this turned out. Every time I pick it up, I smile a little. If you love a project that feels special but does not require advanced skills, this one is for you.
About This Crochet Pattern
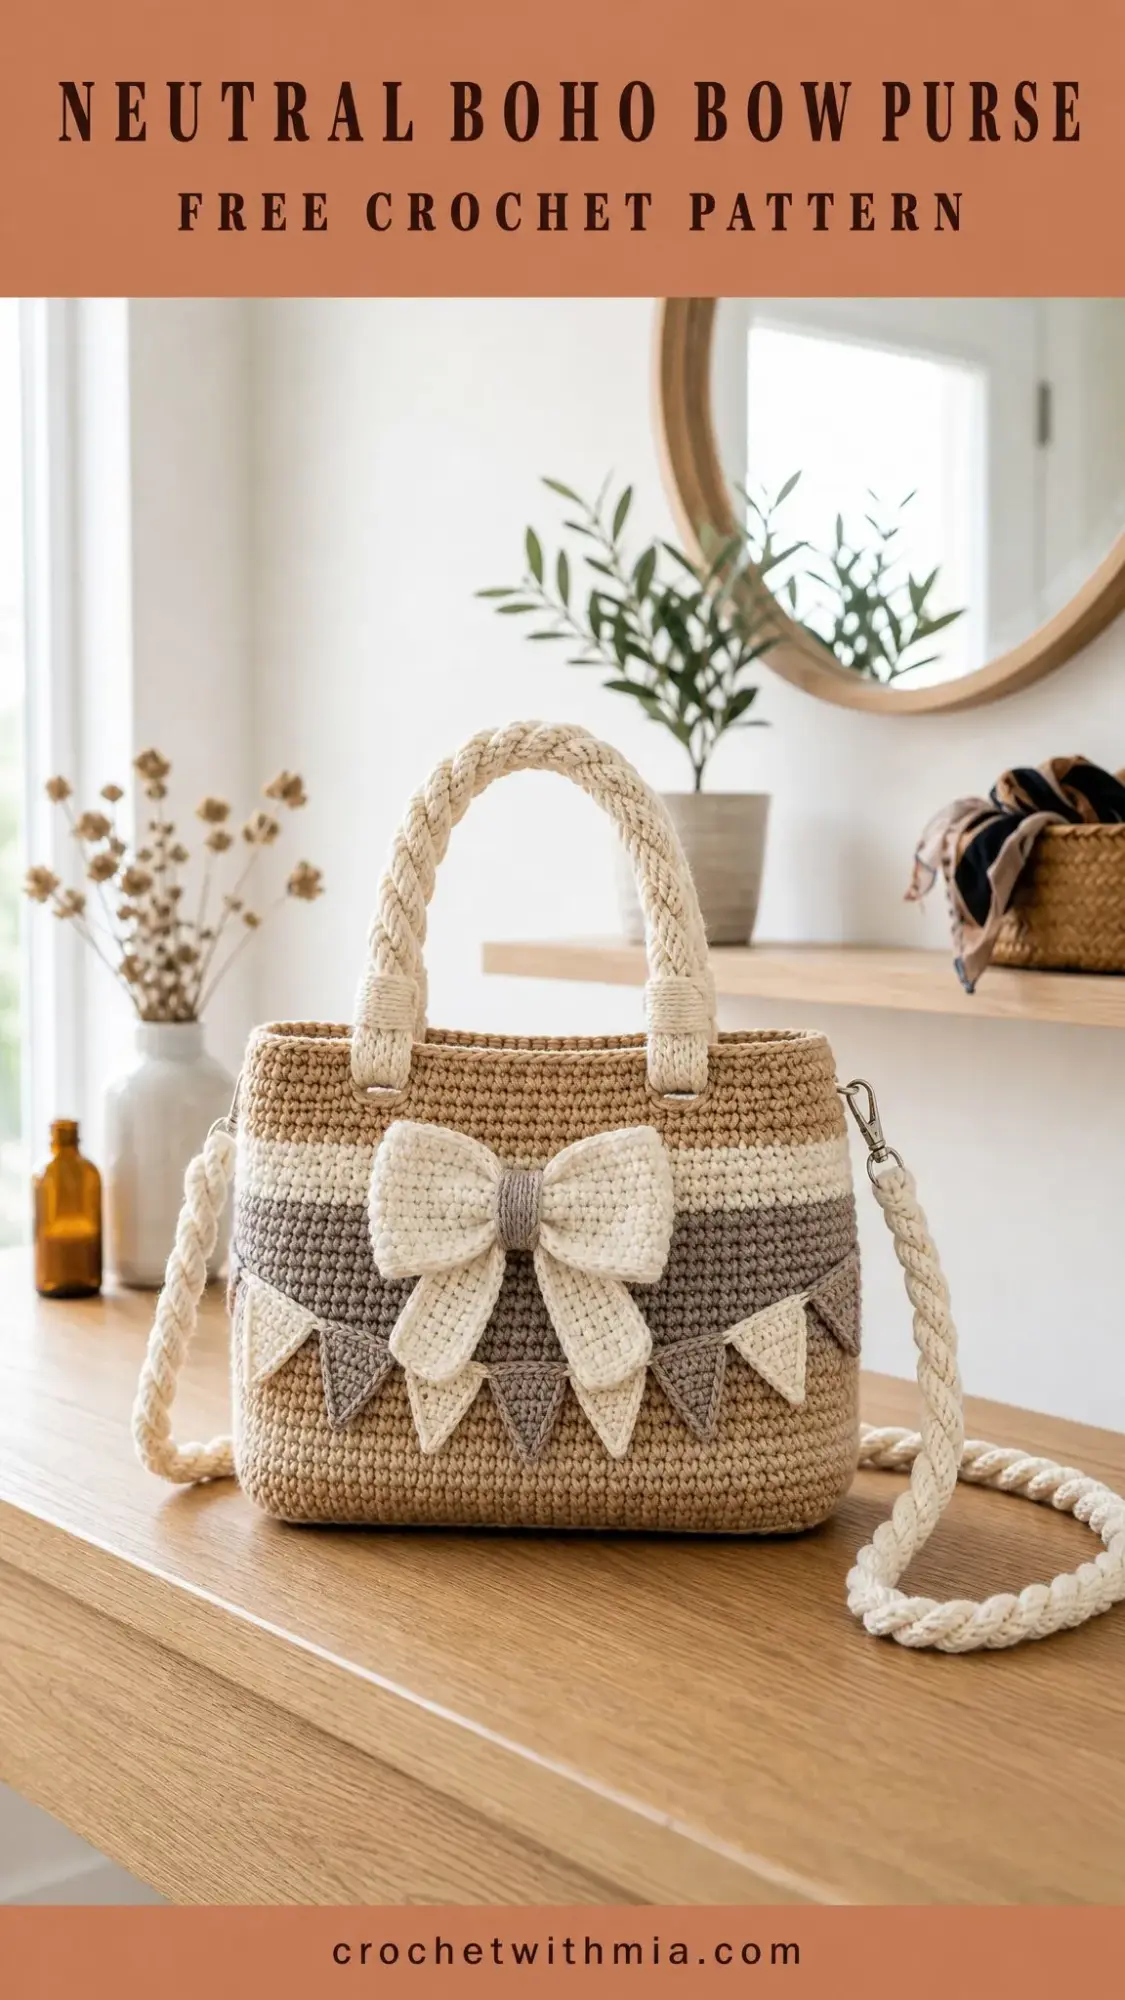
This structured mini purse features soft neutral stripes, braided top handles, a detachable shoulder strap, a large decorative bow, and a playful pennant garland across the front. The whole thing is worked in firm single crochet (sc) stitches, which creates that lovely woven texture you see in the photos.
The construction is smarter than it looks. You will make one long body panel that becomes the front, base, and back all in one piece. Two slim side panels add depth. Then you seam everything into a box shape, add the handles, and sew on the embellishments. No complicated shaping or confusing assembly required.
Finished Dimensions: 10.25 inches wide x 7.5 inches tall x 2.25 inches deep (26 x 19 x 5.5 cm), not including handles or shoulder strap.
Skill Level: Confident beginner to easy intermediate. If you can single crochet, decrease, and sew pieces together, you can absolutely make this purse.
Materials You Will Need
Gathering your supplies before you start makes the whole process smoother. Here is everything you need:
Yarn:
Worsted weight or aran cotton yarn, category 4, approximately 360 yards (329 meters) total.
Suggested Yarns: Lion Brand 24/7 Cotton, Paintbox Cotton Aran, or WeCrochet Dishie. Any firm, smooth cotton that matches gauge will work beautifully.
Hook:
US H/8 (5 mm) crochet hook, or size needed to achieve gauge.
Notions:
Optional Hardware:
Gauge
Swatch before starting. This matters for a structured project like a purse.
14 sc x 16 rows = 4 inches (10 cm) in firm single crochet, blocked flat.
The fabric should feel dense enough to hold its shape on its own. If your swatch is floppy, go down a hook size. If it is too stiff to fold easily, go up a hook size.
Checkpoint: Your body panel should measure about 10.25 inches (26 cm) wide after Row 1.
Abbreviations and Stitch Guide
Let me walk you through every abbreviation you will see in this pattern:
Special Stitches
sc2tog (single crochet 2 together):
Insert hook in next stitch, yarn over and pull up a loop. Insert hook in the following stitch, yarn over and pull up a loop. Yarn over and pull through all 3 loops on hook. You have decreased by one stitch.
Surface slip stitch line:
With yarn held on the wrong side, insert hook from front to back through the fabric, pull up a loop, insert hook into the next horizontal space, yarn over, pull through the fabric and the loop on hook. Keep your stitches relaxed so the fabric does not pucker.
Crochet cord:
Chain the required length. Working into the back bumps of the chain, slip stitch in the 2nd chain from hook and each chain across. For a thicker rope, make 3 cords and braid them together.
Main Body Panel Instructions
This panel becomes the front, base, and back of your purse all in one piece. You will work flat, turning at the end of each row.
Setup: With Color A, ch 37.
Row 1: Sc in 2nd ch from hook and each ch across. Turn. (36 sc)
Continue in single crochet throughout. Chain 1 to turn at the beginning of each row. This turning chain does NOT count as a stitch.
Color Stripe Sequence
Follow this chart exactly for the stripe pattern:
| Rows | Color | Stitches |
|---|---|---|
| 1-7 | A (oatmeal) | 36 sc each row |
| 8-12 | B (camel) | 36 sc each row |
| 13-16 | D (taupe) | 36 sc each row |
| 17-23 | C (cream) | 36 sc each row |
| 24-28 | B (camel) | 36 sc each row |
| 29-34 | B (camel, base fold) | 36 sc each row |
| 35-41 | A (oatmeal) | 36 sc each row |
| 42-46 | B (camel) | 36 sc each row |
| 47-50 | D (taupe) | 36 sc each row |
| 51-57 | C (cream) | 36 sc each row |
| 58-62 | B (camel) | 36 sc each row |
Body Checkpoint: After Row 62, your panel should measure approximately 10.25 inches wide x 15.5 inches long (26 x 39.5 cm). Rows 1 through 28 form the front, Rows 29 through 34 form the base, and Rows 35 through 62 form the back.
Optional Top Edging
With Color B, work 1 row of sc evenly across each short top edge of the panel: 36 sc across front top and 36 sc across back top. Fasten off.
This creates a cleaner finished edge along the top opening of your purse.
Side Panels
Make 2 identical panels.
With Color B, ch 9.
Row 1: Sc in 2nd ch from hook and each ch across. Turn. (8 sc)
Rows 2-28: Ch 1, sc in each st across. Turn. (8 sc)
Fasten off, leaving a long tail for seaming.
Side Checkpoint: Each side panel should measure about 2.25 inches wide x 7.5 inches tall (5.5 x 19 cm).
Assembling the Purse
Now comes the satisfying part where everything comes together.
Step 1: Place your body panel wrong side up on a flat surface.
Step 2: Fold the panel so Rows 29 through 34 sit as the base. Rows 1 through 28 will rise up as the front, and Rows 35 through 62 will rise up as the back.
Step 3: Pin one side panel between the front and back edges, aligning its lower edge with the base fold.
Step 4: Using whipstitch or mattress stitch, sew through both loops along the front side, base side, and back side. Take your time here for neat, even seams.
Step 5: Repeat for the second side panel.
Step 6: Turn the purse right side out and gently square the corners. You can poke a pencil eraser or chopstick into the corners to get them crisp.
Top Edge and Closure
Work 1 round of sc evenly around the top opening: 36 sc across front, 8 sc across side, 36 sc across back, 8 sc across side. Join with sl st. (88 sc)
Add a second round if you want a sturdier rim.
Closure Options: Sew in a small fabric lining with a zipper, or attach a magnetic snap at the center top. I recommend adding a lining if your purse will carry keys, cards, or cosmetics. It protects the inside of your crochet work and keeps small items from poking through the stitches.
Braided Top Handles
Make 2 handles.
Step 1: Make 3 crochet cords, each 15 inches (38 cm) long, in Color B.
Step 2: Braid the 3 cords together without stretching them. Your finished braid should measure about 11 inches (28 cm).
Step 3: Wrap each end with 10 to 12 tight turns of Color B yarn, then sew the wraps firmly to secure them in place. This creates those polished wrapped ends you see in the photos.
Step 4: Attach the handle ends to the top rim about 2.25 inches (5.5 cm) in from each side seam.
Step 5: Repeat for the back handle.
Handle Placement Checkpoint: There should be about 5.75 inches (14.5 cm) between the inner handle bases on each side of the purse.
Detachable Shoulder Strap
Make 3 crochet cords, each 56 inches (142 cm) long, in Color C. Braid them together to approximately 42 inches (107 cm).
Knot or wrap the ends around lobster clasps. Clip the clasps to the side rings.
Side Rings: Sew one ring securely to each upper side seam. Stitch through several rows of the side panel and rim so the ring can hold the weight of the purse when loaded.
Large Bow
The bow is worked in two pieces and assembled.
Bow Rectangle:
With Color C, ch 17.
Row 1: Sc in 2nd ch from hook and each ch across. Turn. (16 sc)
Rows 2-8: Ch 1, sc in each st across. (16 sc)
Fasten off. Weave in ends.
Bow Center Band:
With Color C, ch 7.
Row 1: Sc in 2nd ch from hook and each ch across. Turn. (6 sc)
Rows 2-5: Ch 1, sc in each st across. (6 sc)
Fasten off with a long tail.
Assembly: Pinch the bow rectangle at the center to create the bow shape. Wrap the center band around the pinched middle and sew the band closed on the back. Sew the finished bow to the front center of your purse over Rows 18 through 25.
Pennant Garland
Make 5 pennants.
With Color D, ch 8.
Row 1: Sc in 2nd ch from hook and each ch across. Turn. (7 sc)
Row 2: Ch 1, sc2tog, sc in next 3 sts, sc2tog. Turn. (5 sc)
Row 3: Ch 1, sc2tog, sc in next st, sc2tog. Turn. (3 sc)
Row 4: Ch 1, sc3tog by drawing up loops in all 3 sts, yarn over and pull through all loops. Fasten off. (1 st)
Garland Cord:
With Color D, ch 45. Sew or surface slip stitch the cord across the front of your purse over Rows 13 through 16, letting it dip gently at the center.
Sew all 5 pennants evenly along the cord, about 0.5 inches (1.25 cm) apart.
Placement Tip: Center the bow first. Place one pennant at the center under the bow, then add two pennants to each side so the garland fills most of the front without wrapping around the side seams.
Finishing Your Purse
Almost done! These final steps make a big difference.
Care Instructions
Spot clean your purse when possible. If the yarn label allows washing, hand wash gently in cool water, roll in a towel to remove moisture, reshape, and dry flat. Remove any hardware before washing if it is not washable.
Troubleshooting Common Issues
Fabric is floppy: Use a smaller hook, choose a firmer cotton yarn, or add lining and interfacing for structure.
Top edge pulls inward: Work the rim round more loosely or add one extra sc at each side seam corner.
Garland puckers the fabric: Redo your surface stitches more loosely. The cord should float on the fabric, not pull it tight.
Bow looks flat: Pinch the center more tightly and tack the bow corners lightly to hold the dimensional shape.
Purse is taller or shorter than expected: Match your row gauge, or adjust by adding or removing the same number of rows from both the front and back sections.
Customization Options
Width: Add or subtract stitches in multiples of 2. At gauge, every 4 stitches changes width by about 1.1 inches (2.8 cm).
Height: Add or remove the same number of rows from the front and back sections.
Depth: Change your side panel width. Adding 2 stitches to the side panel gives you about 0.6 inches (1.5 cm) more depth.
Strap Length: Braid your cords longer than you think you need, try the strap on, then trim and wrap the ends after fitting.
Left-Handed Crocheters
Left-handed makers can follow the same row counts and measurements without any changes. Your seam direction and decorative placement will mirror naturally. I recommend pinning the bow and pennants before sewing so you can check that your finished front looks balanced.
I hope you absolutely love making this purse as much as I loved designing it. It is one of those projects that looks so much fancier than the effort required, which is my favorite kind of crochet.
If this pattern is calling your name, save it to your Pinterest boards so you can find it when you are ready to start. And please leave a comment below if you make one. I would love to hear which colors you choose and see your finished purses!
Want a Quick & Easy Printable Version?
Get a clean, beautifully formatted PDF of this pattern — easy to follow step by step, ready to print or save on any device. No scrolling, no distractions, just the pattern.
Get the Printable PDF →