
When I started designing this top, I had one vision in my head: a wearable piece of art that would make people stop and ask, "Wait, you made that?" I wanted delicate lace wings that actually looked like dragonfly wings, an ombre color flow that mimicked the ocean depths, and a construction that would challenge me just enough to keep things interesting. After countless sketches and a few frogged attempts, I finally nailed it. I am SO pleased with how it turned out!
Get the Ad-Free PDF Pattern
You can find the free pattern below, or you can purchase the ad-free printable PDF from my shop.
Get the Printable PDF →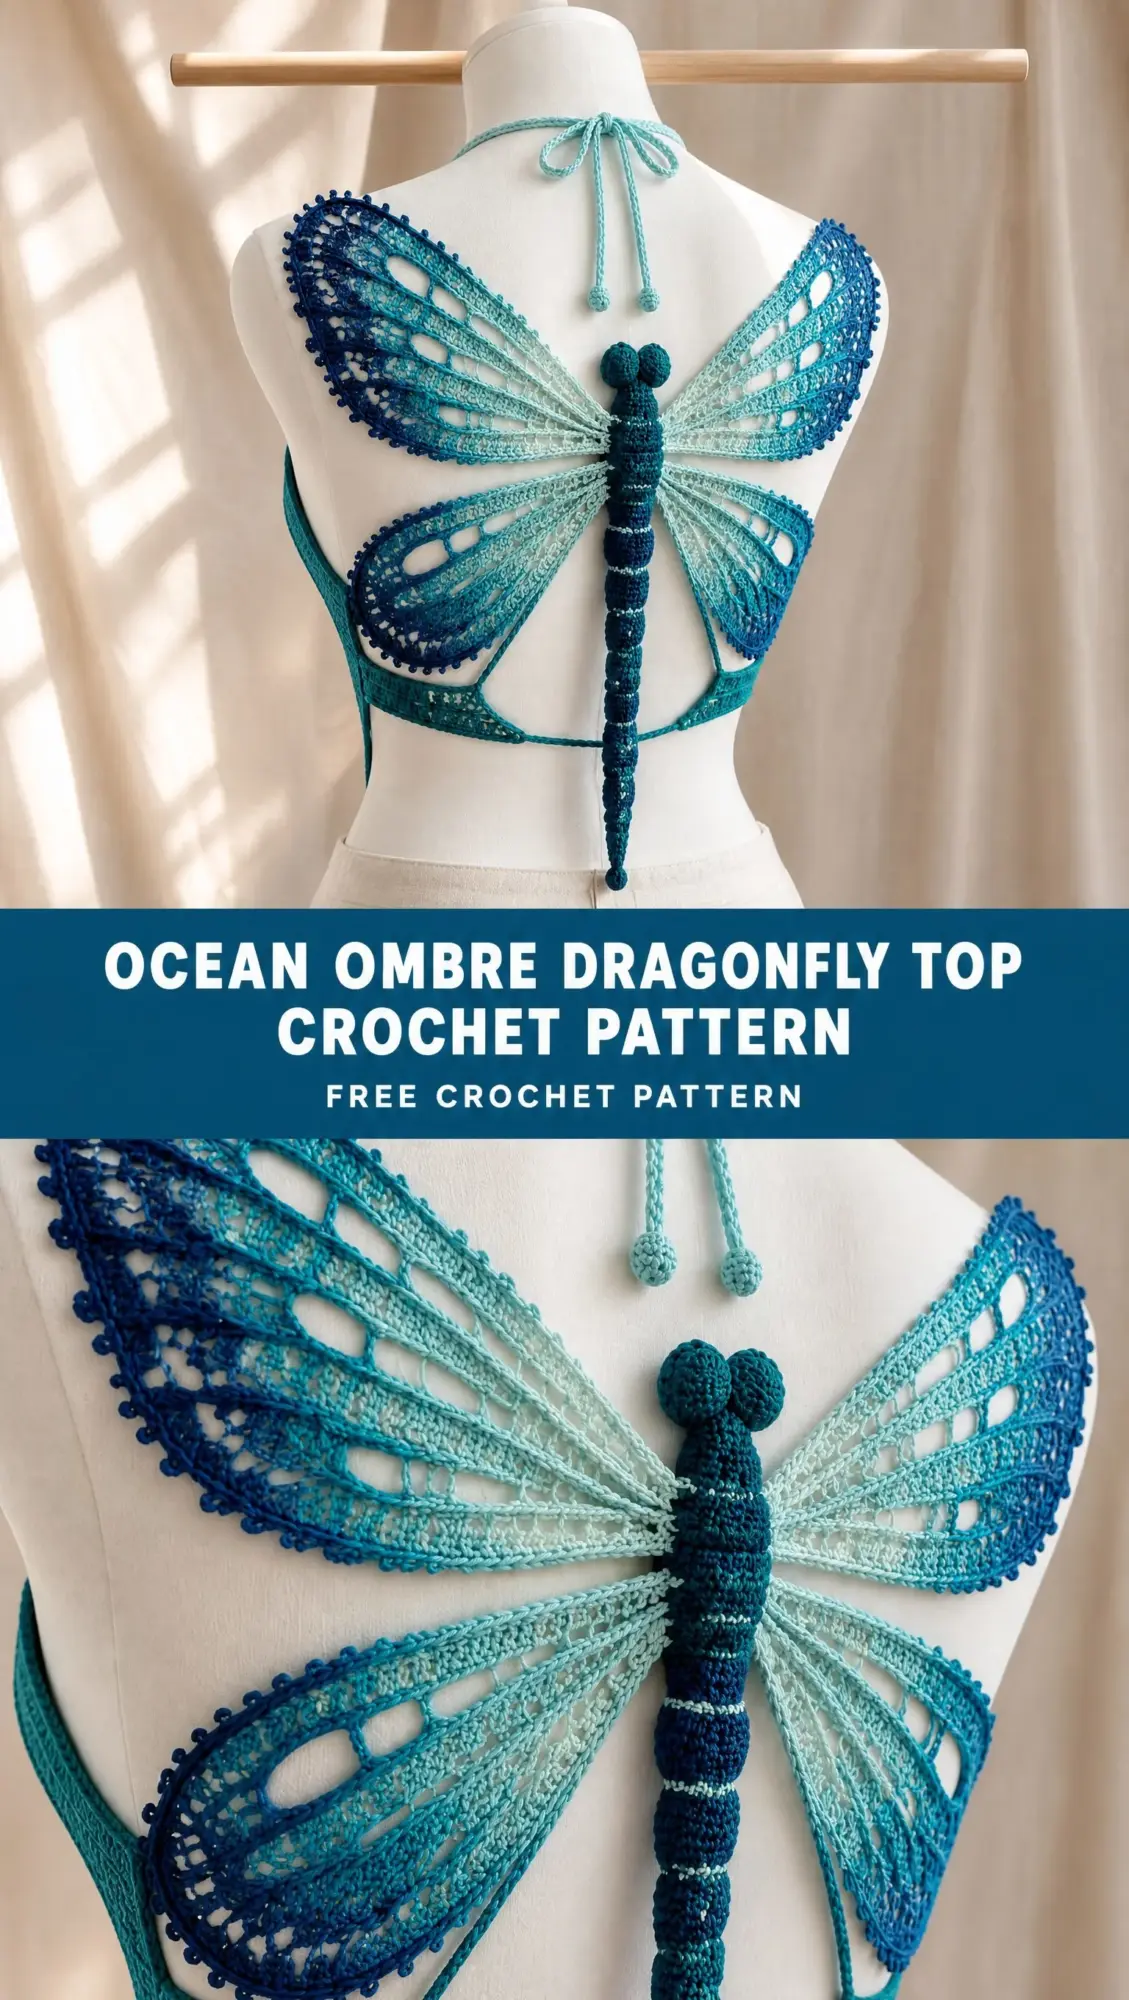
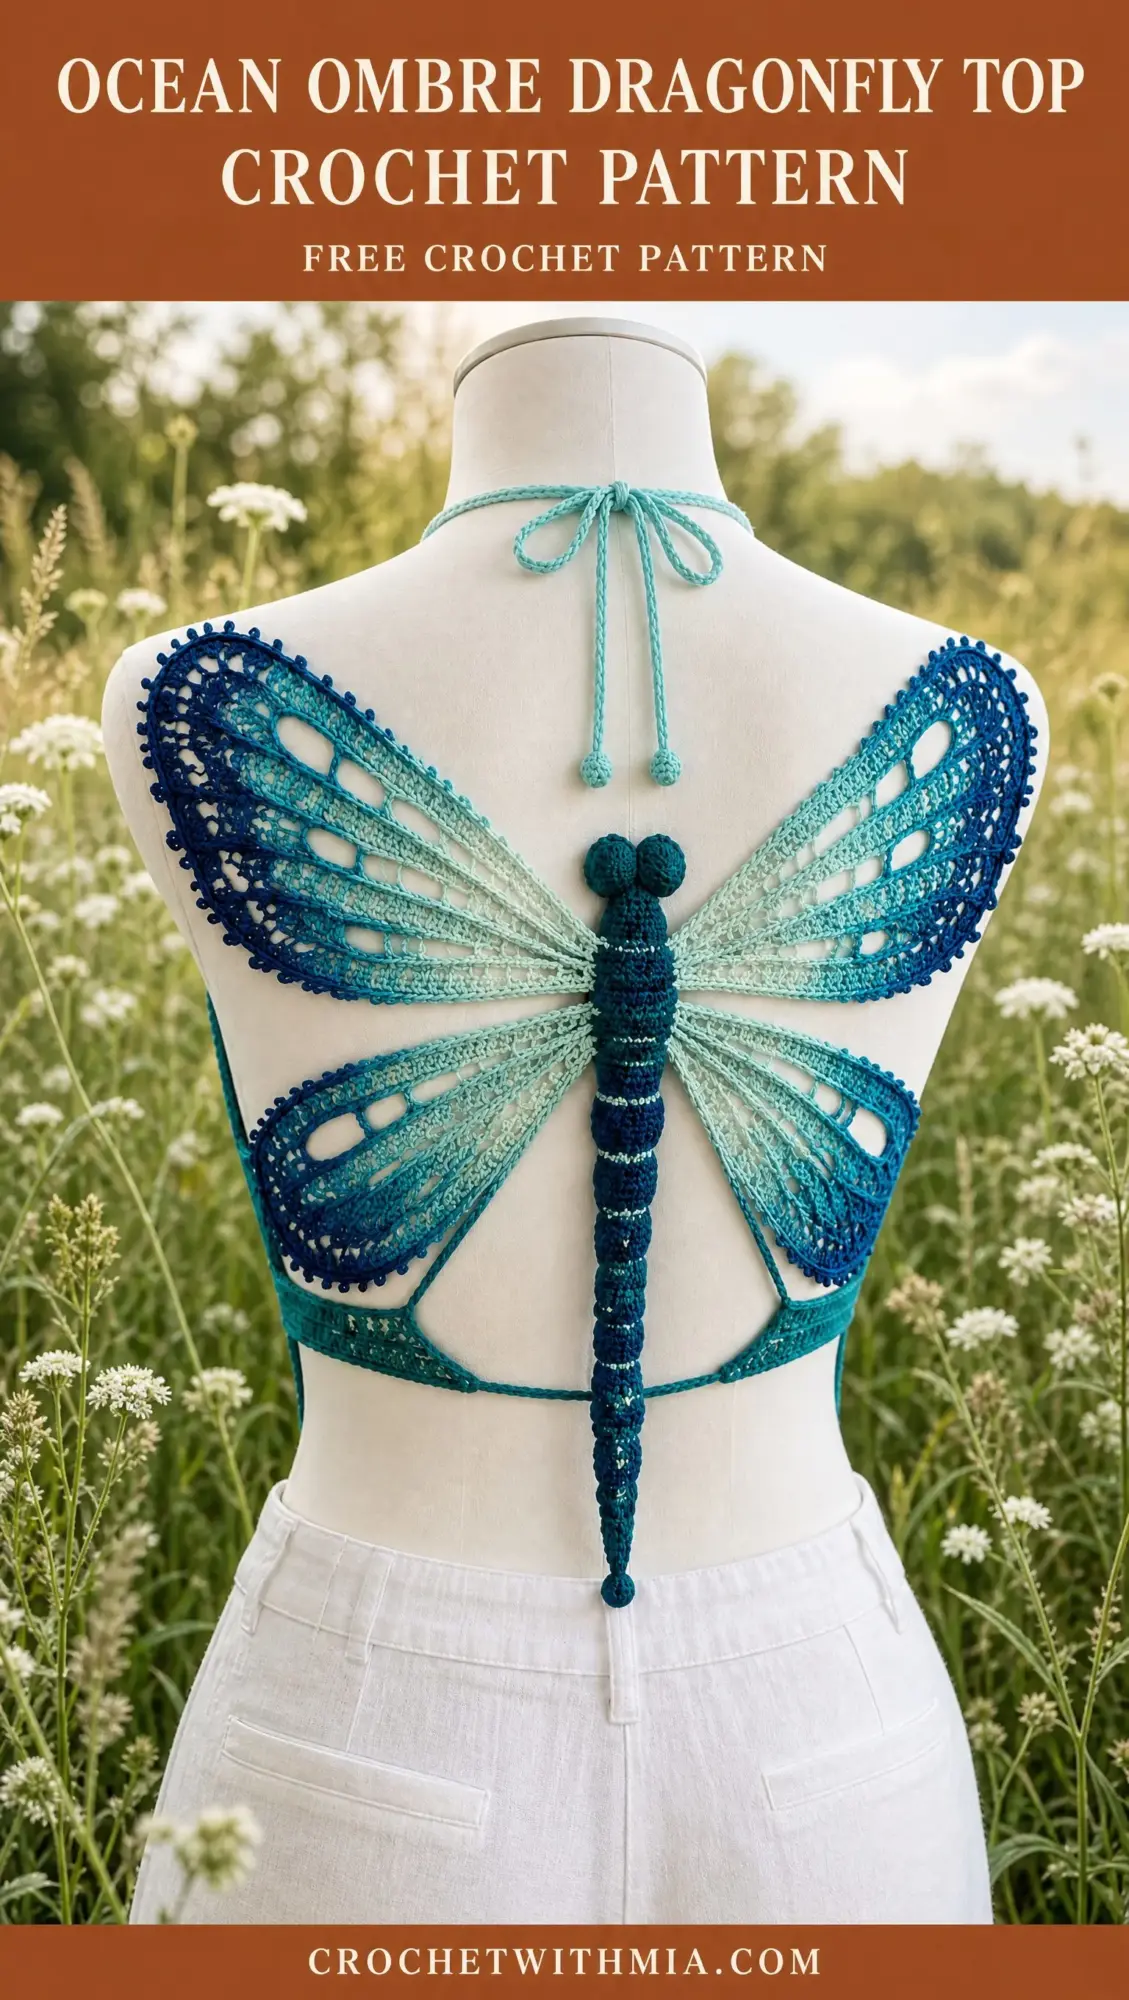
This open-back crop top features a stunning four-wing dragonfly motif that spans across your back like you’re ready to take flight. The ocean ombre palette transitions from pale aqua through turquoise to deep ocean blue, creating that gorgeous gradient effect that makes handmade pieces look incredibly sophisticated.
Fair warning: this is not a beginner project. But if you’re comfortable with lace construction, color changes, and joining shaped motifs, you’re absolutely ready for this. Let me walk you through every single step.
About This Crochet Pattern
This Ocean Ombre Dragonfly Top crochet pattern creates a fitted crop top with adjustable neck cords and side ties. The star of the show is obviously the dragonfly, with its four lace wings radiating from a raised, segmented body that runs vertically down your back.
The finished measurements are:
The adjustability comes from the neck cords and side ties, so you have wiggle room within that size range. If you need to size up or down significantly, you can adjust your foundation chain and wing dimensions accordingly.
Skill Level
This pattern is rated Intermediate to Advanced.
Why? Because you’ll be combining several techniques: lace construction with chain spaces, gradual color changes, shaped motifs that need to mirror each other, wet blocking, and joining multiple pieces together seamlessly. You should be comfortable with tall stitches, picots, increases, decreases, and working symmetrical pieces before diving in.
If that list made you nervous, don’t panic. I’ll explain everything as we go. But if you’ve never worked lace before, I’d recommend practicing on a simpler project first.
Materials You’ll Need
Yarn:
Fine cotton yarn in sport or fingering weight. You’ll need four colors in the ocean ombre palette:
Hook:
2.5 mm crochet hook
Notions:
Yarn Suggestions
The yarn you choose will dramatically affect your finished piece. Here are my top recommendations:
1. Mercerized cotton gives you crisp lace definition. The slight sheen catches the light beautifully on those wing details.
2. Bamboo-cotton blend offers a softer drape. This is lovely if you want the wings to flow more organically.
3. Premium cotton thread creates a delicate, luxury finish. Think heirloom quality.
Whatever you choose, make sure all four colors are from the same yarn line so they have consistent weight and texture.
Gauge
30 dc x 16 rows = 4 x 4 inches (10 x 10 cm) blocked.
Please, please check your gauge. With lace construction, being off by even a little bit will throw off your entire dragonfly wingspan and the fit of the top. Make a swatch, block it, then measure.
Abbreviations
Let me define every stitch abbreviation you’ll encounter:
Construction Overview
Before we start stitching, let me explain how this top comes together. Understanding the big picture will help you visualize each component’s purpose.
The top is built from five main elements:
1. Lower side bands
2. Four dragonfly wings (two upper, two lower)
3. Central raised dragonfly body
4. Neck and side ties
5. Blocking and finishing
You’ll work each piece separately, then join them together. The dragonfly sits on the center back, with the wings forming the main coverage across your shoulder blades.
Step-by-Step Pattern Instructions
Front and Side Band Base
This band sits at your underbust and wraps around your sides, providing the foundation that the wings will attach to.
Row 1: Chain (ch) a foundation chain matching half your underbust measurement. For a 32-inch underbust, this is approximately 48 chains. For a 38-inch underbust, approximately 57 chains.
Row 2: Work double crochet (dc) across the entire chain.
Row 3: Create open lace spaces by working: dc, ch 2, skip 2 stitches. Repeat this sequence across the row.
Rows 4-10: Continue alternating between solid dc rows and lace rows until your band reaches approximately 2.5 inches (6 cm) in height.
Fasten off and set aside. You’ll make two of these bands, one for each side.
Dragonfly Wing Construction
You’ll make four wings total: two upper wings and two lower wings. The upper wings are longer and narrower, while the lower wings are shorter and wider. This mimics actual dragonfly anatomy and creates that authentic silhouette.
Upper Wing (Make 2)
With pale aqua yarn, ch 18.
Row 1: Work dc into each chain across.
Row 2: Increase along both edges to create an elongated oval shape. Work 2 dc in the first stitch, dc across to the last stitch, work 2 dc in the last stitch.
Row 3: Add chain openings between tall stitch ribs. Work dc, ch 2, skip 2, and repeat across while maintaining your increases at the edges.
Rows 4-8: This is where the magic happens. Change colors gradually through these rows:
Create long radial ribs using treble crochet (tr) stitches separated by chain spaces. These ribs mimic the veining pattern you see in real dragonfly wings.
Edge Finishing: Work a scalloped picot edging around the entire wing. For each scallop, work (sc, hdc, dc, picot, dc, hdc, sc) into the edge stitches, spacing them evenly.
Lower Wing (Make 2)
Follow the same method as the upper wings, but with these modifications:
The lower wings should look like a rounder, more compact version of the upper wings.
Wing Joining
This step requires patience and attention to symmetry.
Place all four wings on your blocking mat, arranging them symmetrically around where the center back will be. The upper wings should angle slightly upward and outward, while the lower wings angle slightly downward and outward.
Join the inner edges using slip stitches and matching yarn. Work carefully to keep your tension even. Leave the open lace spaces visible between joins, as this maintains the delicate, airy appearance of the wings.
Dragonfly Body
The body consists of three sections: head, thorax, and tail. Each is worked separately, then attached.
Head
Make a small rounded circle:
Start with a magic ring, work 6 sc into the ring.
Round 2: Increase evenly to 18 sc (work 2 sc in each stitch around).
Rounds 3-5: Work 3 rounds even with no increases.
Stuff lightly with a small amount of yarn scraps or fiberfill. You want just enough to give it dimension without making it bulky.
Thorax
Work an oval tube in dark teal:
Start with 6 sc in a magic ring.
Round 2: Increase to 12 sc.
Rounds 3-12: Work 10 rounds even.
Add horizontal raised bands using surface slip stitches. These create the segmented appearance that makes the body look realistic. Work 3-4 bands evenly spaced along the thorax.
Tail
Continue downward from the thorax:
Decrease gradually every few rounds to form a long tapered tail. Work approximately 15-20 rounds, decreasing by 2 stitches every 4-5 rounds until you’re down to 6 stitches.
Finish with a rounded tip by decreasing to close.
Assembly: Attach the completed body vertically over the wing join, with the head at the top between the upper wings and the tail extending down past the lower wings.
Neck Cord
Attach pale aqua yarn at the shoulder points (where the upper wings meet the side bands).
Chain approximately 35-45 stitches, depending on how long you want your neck ties.
Slip stitch back along the chain for added strength and a more polished appearance.
Repeat on the other shoulder. These cords will tie into a small bow at the back of your neck.
Side Finishing
Add teal side bands connecting the wing edges to the lower hem of the side bands.
Work compact dc rows for stability. These sections take the most stress when wearing the top, so you want them sturdy.
Add picot edging along all exposed edges for a cohesive look.
Blocking
Blocking is non-negotiable for this project. Your wings will not look right without it.
Wet block the entire top flat on blocking mats. Gently stretch the wings into symmetrical dragonfly shapes, being careful to match the left and right sides as closely as possible.
Pin the scallops evenly around each wing edge. Pin the body straight and centered.
Allow to dry completely before removing pins. This might take 24-48 hours depending on your climate.
Finishing Touches
Once everything is dry:
Care Instructions
This delicate piece requires gentle care:
Troubleshooting Common Issues
Wings curling: Increase your blocking tension. Really stretch those wings out and pin firmly.
Body twisting: Add a few stabilizing stitches behind the motif, connecting it more securely to the wing join.
Loose lace: Your gauge might be off. Try using a smaller hook size for your wings, or accept that your top will have a slightly more open, airy look.
Final Thoughts on This Dragonfly Top Crochet Pattern
This Ocean Ombre Dragonfly Top crochet pattern is absolutely a labor of love. It takes time, patience, and attention to detail. But when you slip it on and catch a glimpse of those wings in the mirror? Worth every single stitch.
The ocean color palette works beautifully for summer, but you could easily adapt this to sunset tones, forest greens, or even monochromatic grays for a completely different vibe. Make it your own.
Thank you so much for trusting me with your crafting time. I genuinely hope you love making this as much as I loved designing it. When you finish yours, I would absolutely love to see it! Tag me on Instagram or share a photo in our Facebook group. Seeing your makes is honestly the best part of my job.
If this pattern is calling your name but you’re not quite ready to start today, go ahead and pin it to your Pinterest boards so you can find it later. And if you do make it, drop a comment below and tell me how it went. I read every single one!
Want a Quick & Easy Printable Version?
Get a clean, beautifully formatted PDF of this pattern — easy to follow step by step, ready to print or save on any device. No scrolling, no distractions, just the pattern.
Get the Printable PDF →