
Looking for a stunning handmade dress that will turn heads at summer gatherings? This fitted crochet sundress combines elegant construction with romantic floral details, making it perfect for special occasions, date nights, or any moment you want to feel absolutely beautiful.
Get the Ad-Free PDF Pattern
You can find the free pattern below, or you can purchase the ad-free printable PDF from my shop.
Get the Printable PDF →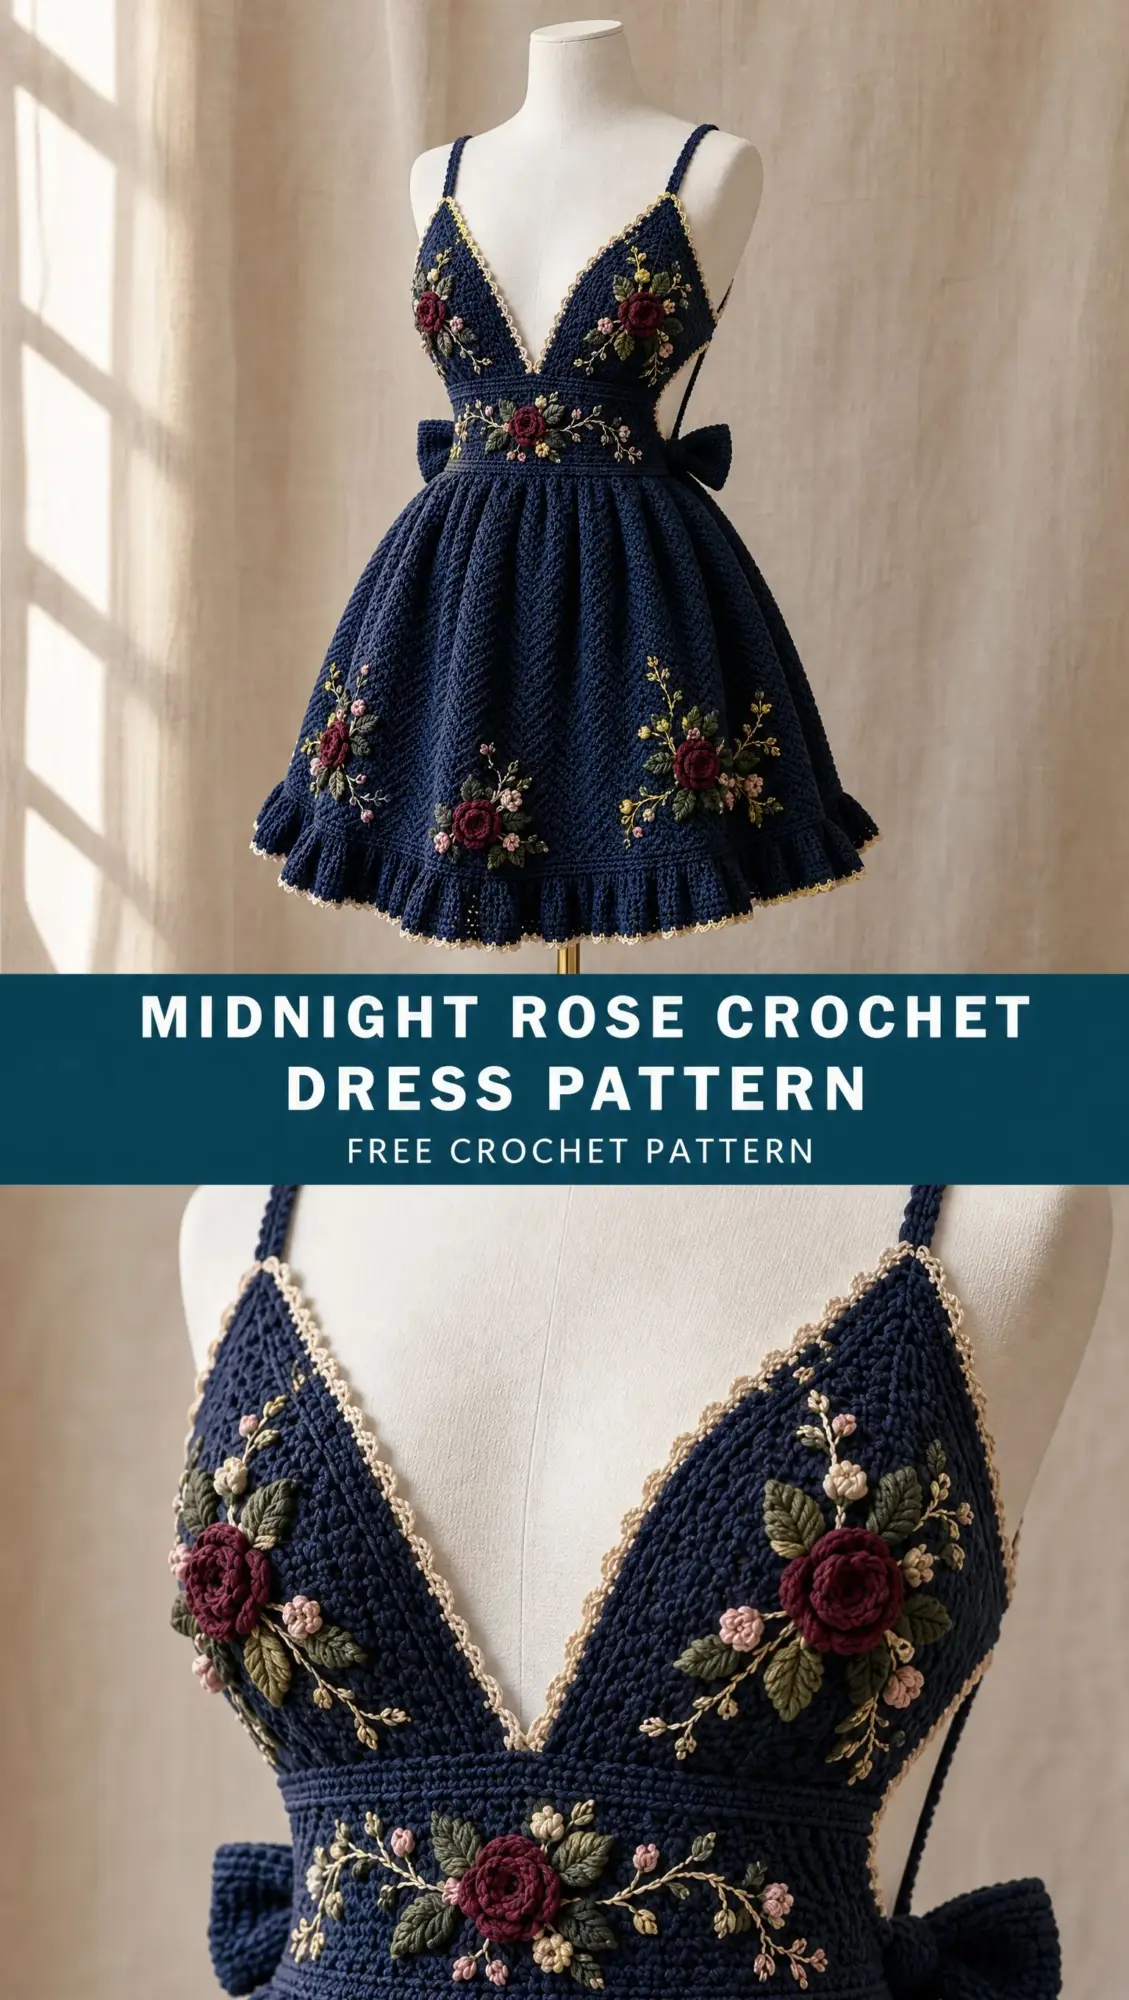
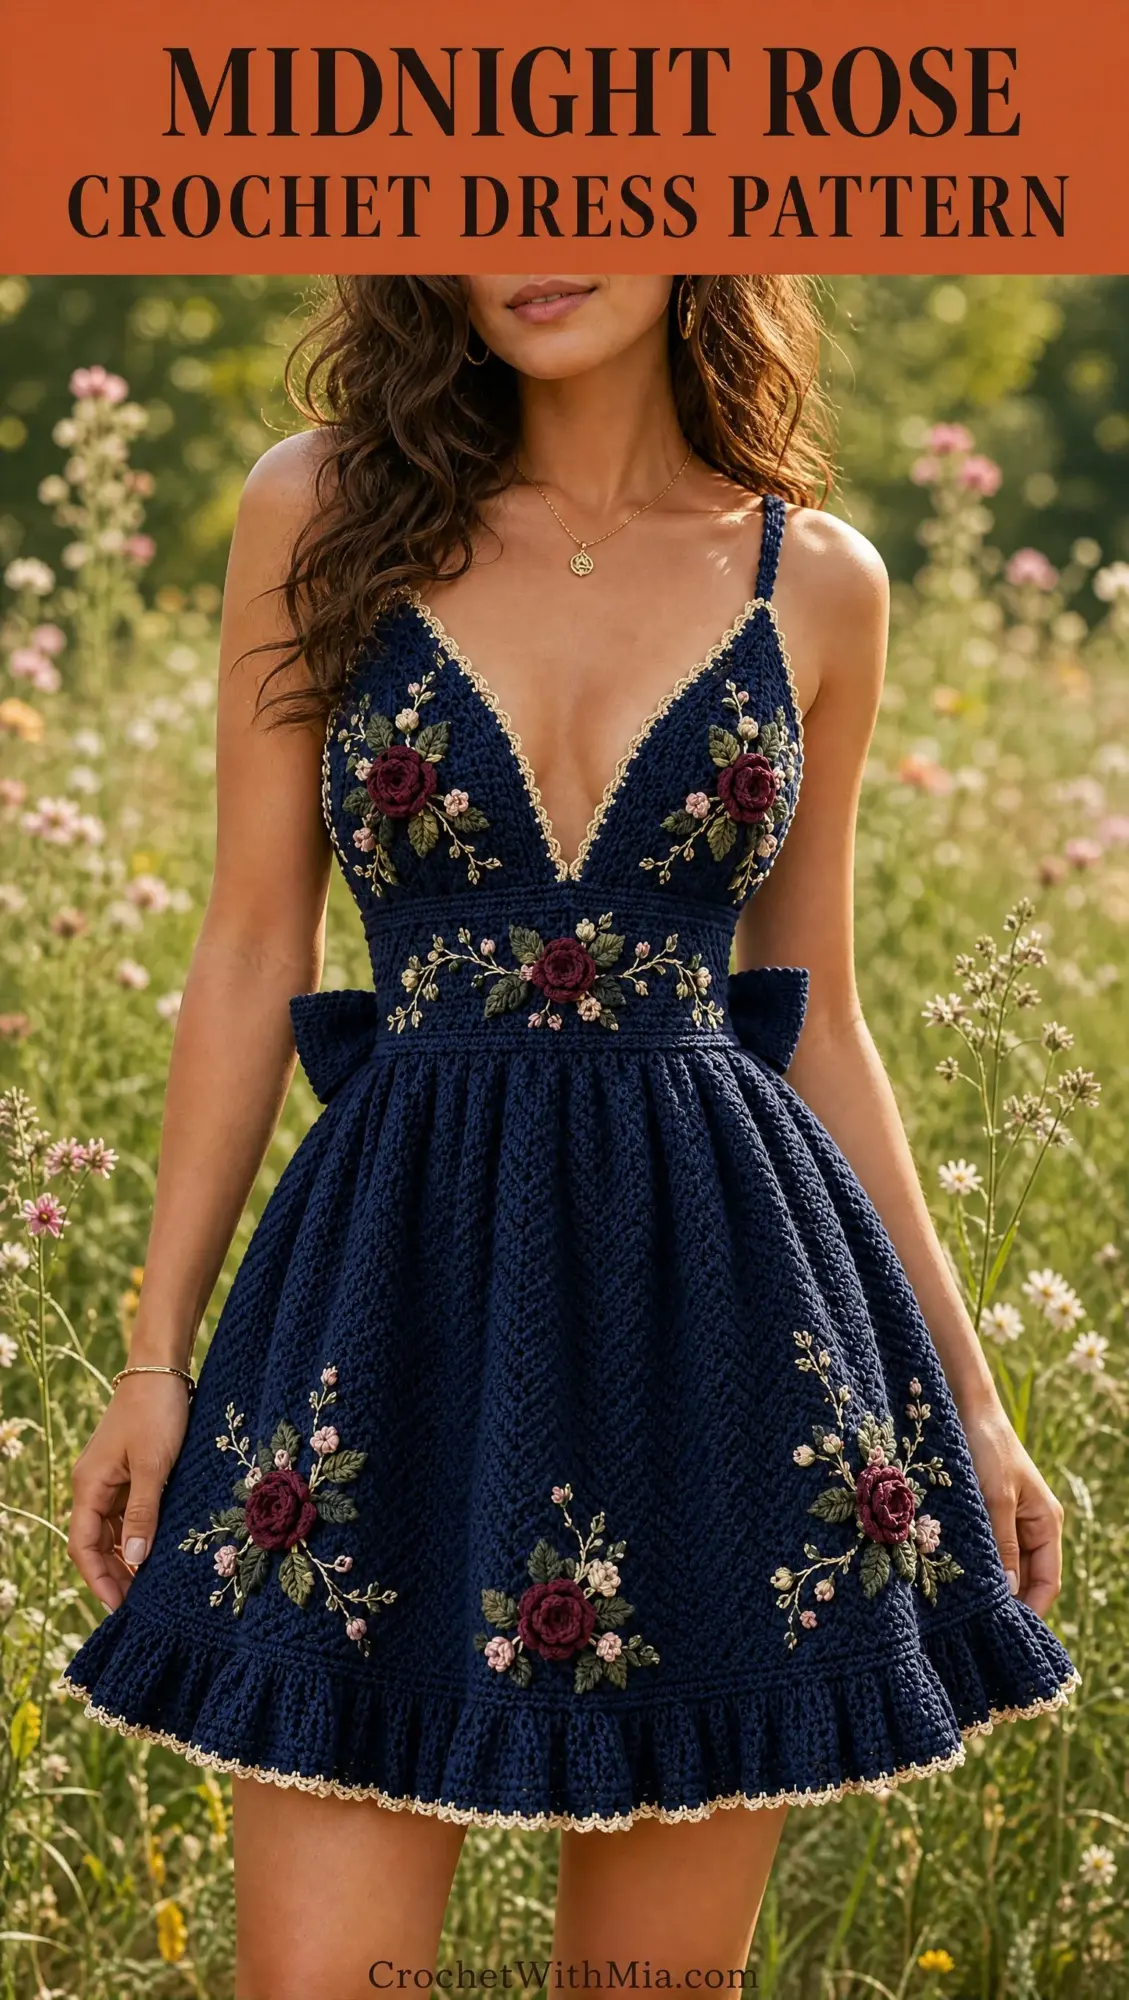
The Midnight Rose Crochet Dress features a deep V neckline with triangular cups, a structured waistband, and a gorgeous gathered skirt worked in herringbone half double crochet. The navy cotton fabric provides wonderful drape and opacity, while burgundy roses, blush pink buds, and sage green leaves add dimensional floral embellishments that elevate this piece from lovely to breathtaking.
Whether you are making this for yourself or as an unforgettable gift, the construction breaks down into manageable sections. You will work the cups first, then the straps, waistband, skirt, ruffle hem, and finally those beautiful flower appliqués. It is an advanced intermediate project, but I will walk you through every single step.
Why You Will Love This Crochet Dress Pattern
This is not your average crochet garment. The combination of fitted bodice shaping, textured herringbone stitchwork, and handcrafted floral details creates a dress that looks like it belongs in a boutique window. The midnight navy color is sophisticated and flattering on every skin tone, while the champagne picot edging adds a delicate feminine touch throughout.
The herringbone half double crochet (hhdc) stitch creates a beautiful diagonal texture that gives the skirt wonderful movement and visual interest. Unlike basic half double crochet, this stitch produces a denser, more opaque fabric. Perfect for a dress you want to wear without worrying about sheerness.
The raised roses and embroidered vines transform this from a simple sundress into a wearable work of art. Trust me, the extra time spent on those floral embellishments is absolutely worth it.
Materials You Will Need
Before you begin, gather all your supplies. Having everything ready makes the construction process so much smoother.
Yarn (Fine Cotton, DK Weight):
Tools:
The navy yarn is your main color and makes up the bodice, waistband, skirt, and ruffle. The champagne creates that gorgeous picot edging you see throughout. The burgundy, blush, and sage are for your beautiful floral embellishments.
Gauge
Getting your gauge right is essential for a fitted garment like this. Take the time to make a swatch before diving into the pattern.
20 half double crochet stitches x 14 rows = 4 x 4 inches (10 x 10 cm) in herringbone half double crochet after blocking.
If your swatch is too small, go up a hook size. If it is too large, go down a hook size. A fitted dress that does not fit is heartbreaking, so please do not skip this step.
Finished Size
This pattern is designed as an adult women’s fitted sundress.
Suggested Sample Measurements:
To adjust sizing: Change the number of cup rows for larger or smaller bust, add or remove waistband rounds for waist sizing, and modify skirt increases for hip circumference.
Skill Level
This crochet dress pattern is rated Advanced Intermediate. You should be comfortable with shaping, garment construction, color changes, surface embroidery, appliqué flowers, and careful finishing techniques.
If you have made fitted tops, bralettes, or skirts before, you are ready for this project. If this is your first garment, I would recommend practicing the individual techniques on smaller projects first.
Abbreviations
Let me define every stitch abbreviation you will encounter in this pattern:
Construction Overview
The dress is worked in seven sections:
1. Triangle cups
2. Shoulder straps
3. Waistband
4. Gathered skirt
5. Ruffle hem
6. Floral appliqués and embroidery
7. Bow and finishing
Working in sections makes this large project feel manageable. You can complete one section at a time and take breaks between. No need to rush.
Bodice Instructions
Left Cup
Using your 4.0 mm hook and midnight navy yarn:
Chain 28.
Row 1: Hdc in second chain from hook and across. (27 sts)
Row 2: Ch 1, turn. Work hdc across, decreasing one stitch at the neckline edge.
Repeat this shaping pattern until a triangular cup forms. Each row, you will decrease at the neckline edge to create that beautiful V shape.
Once your triangle is complete, continue edging with champagne picot trim along the upper edge.
Right Cup
Work as a mirror image of the left cup. This means you will decrease on the opposite edge to create the matching V neckline when the cups are joined.
Join Cups
Place both cups together with the center V point aligned. The deepest point of each triangle should meet in the middle.
Join using invisible slip stitches. Take your time here because this seam will be visible from the front.
Work 2 to 3 rounds of hdc around the lower cup edge to create a firm base. This gives the waistband something sturdy to attach to.
Shoulder Straps
Attach yarn at the outer corner of each cup.
Chain until strap measures approximately 12 to 14 inches. The exact length depends on your torso measurement, so try it on as you go.
Work rows of hdc until strap width is 1 inch. This creates a flat, comfortable strap that will not dig into your shoulders.
Attach securely to the back neckline with reinforced stitching. You want these straps to hold the bodice up all day without stretching.
Waistband
Work rounds of hdc around the bodice base.
Create a fitted band approximately 3 inches tall. This is where the dress cinches in at your natural waist.
Add shaping decreases if needed for a sculpted waist. If you want a more dramatic hourglass shape, decrease evenly around the middle rounds of the waistband.
Finish the top and bottom edges with champagne picot edging for that beautiful cohesive look.
Skirt Pattern
Join yarn beneath the waistband.
Round 1: Work hdc evenly around, increasing every 6 to 8 stitches. This starts building the fullness for the gathered skirt.
Continue in rounds.
Herringbone Texture
Now we switch to the herringbone half double crochet stitch. This creates that gorgeous diagonal texture visible in the finished dress.
To work herringbone half double crochet (hhdc):
1. Yarn over
2. Insert hook into the next stitch
3. Pull through the stitch
4. Pull the first loop through the second loop on your hook
5. Yarn over and complete the remaining loop
Repeat around for each round.
This stitch feels a bit awkward at first, but once you get the rhythm, it works up beautifully. The texture is denser than regular hdc, which is why the skirt has such nice opacity.
Increase gradually every few rounds until the skirt has a full gathered shape. The pattern calls for increasing about every 6 to 8 stitches, but you can adjust based on how full you want your skirt.
Continue until the skirt reaches above knee length. Try the dress on periodically to check your preferred length.
Ruffle Hem
The ruffle hem adds movement and femininity to the finished dress.
Round 1: Increase around the lower edge evenly. This creates the extra fabric needed for the ruffle to have body.
Round 2: Work double crochet shells:
Repeat this shell pattern around the entire hem.
Add champagne picot border along the very bottom edge to match the bodice and waistband trim.
Flower Embellishments
These dimensional flowers are what make the Midnight Rose Crochet Dress truly special. Take your time with these details.
Raised Rose
Using burgundy yarn:
Make a small spiral center with single crochet (sc) stitches. Work into a magic ring and increase to create a flat circle.
Work layered petals around the center using double crochet (dc) and treble crochet stitches. Each layer of petals should be slightly larger than the previous one to create that beautiful rose shape.
Sew the finished roses securely onto the cups, waistband, and skirt using your yarn needle. Place them according to your preference, using the reference images as a guide.
Buds
Using blush pink yarn:
Create small puff style buds. These are simpler than the full roses and add delicate color variation to your floral clusters.
Attach near the roses to create natural looking arrangements.
Leaves
Using deep sage green yarn:
Crochet small pointed leaves using chains and single crochet stitches. The basic technique is to chain, then work sc down one side, 3 sc in the tip to turn, and sc back up the other side.
Attach around floral clusters to frame the roses and buds.
Embroidery
Using champagne yarn:
Add thin vine lines, curved stems, and tiny decorative stitches between selected flowers. This surface embroidery connects your floral clusters and adds that romantic trailing vine effect.
Use a simple chain stitch or backstitch to create the vines. Work directly on the surface of your finished fabric.
Back Waist Bow
The bow adds a beautiful finishing touch at the back of the dress.
Using midnight navy yarn:
Chain a wide ribbon section. Work rows of hdc until you reach your desired length for the bow tails.
Create two large loops and a center wrap. The loops should be proportional to the dress, roughly 4 to 5 inches each.
Attach behind the waistband with reinforced stitching. Make sure this is secure because the bow adds visual weight.
Finishing Your Crochet Dress
Almost done. These final steps make all the difference in how professional your dress looks.
Weave in all ends. With this many color changes and sections, you will have quite a few ends. Weave each one through at least 2 inches of stitches.
Block gently with steam or damp blocking. Lay the dress flat on blocking mats, shape it to the correct measurements, and let it dry completely. Blocking evens out your stitches and gives the fabric beautiful drape.
Sew optional lining if additional opacity is desired. A simple slip lining in a matching navy color works beautifully.
Check all joins for strength. Give each seam and attachment point a gentle tug to make sure everything is secure.
Troubleshooting Common Issues
If skirt feels too heavy: Reduce the number of increases or use a lighter weight cotton yarn.
If cups gape: Add additional shaping rows to create more coverage and structure.
If waist stretches: Reinforce the waistband with hidden elastic thread woven through the stitches.
Care Instructions
Your beautiful dress deserves gentle care to last for years.
Never wring or twist the fabric, and store flat or on a padded hanger to prevent stretching.
Pattern Notes and Tips
On the herringbone stitch: If you have never tried hhdc before, practice on a small swatch first. The motion becomes second nature quickly, but it does feel unusual the first few times.
On the floral placement: The reference images show floral clusters on both cups, the center waistband, and scattered around the skirt. Feel free to add more or fewer flowers based on your preference.
On sizing adjustments: This is a fitted garment, so taking accurate body measurements before you begin is crucial. When in doubt, go slightly larger. You can always take in seams, but letting them out is nearly impossible with crochet.
On yarn substitution: If you swap yarns, make sure to check your gauge carefully. Different cotton brands have different amounts of stretch and drape.
Final Thoughts on This Crochet Dress Pattern
The Midnight Rose Crochet Dress is a labor of love, but the finished result is absolutely stunning. Every section teaches you something new, from fitted bodice shaping to dimensional flower appliqués. When you slip this dress on for the first time, all those hours of work will feel completely worth it.
This pattern is for personal use only. Do not reproduce, resell, redistribute, or claim this pattern as your own. Finished items may be sold in small quantities with credit to the designer.
I hope you enjoy making this beautiful dress as much as I enjoyed designing it. If you found this crochet dress pattern helpful, save it to your Pinterest boards so you can find it easily when you are ready to start. And please leave a comment below if you make one. I would absolutely love to see your finished Midnight Rose dress.
Want a Quick & Easy Printable Version?
Get a clean, beautifully formatted PDF of this pattern — easy to follow step by step, ready to print or save on any device. No scrolling, no distractions, just the pattern.
Get the Printable PDF →