
You know that skein of fine cotton thread you’ve been saving for something special? This is its moment.
Get the Ad-Free PDF Pattern
You can find the free pattern below, or you can purchase the ad-free printable PDF from my shop.
Get the Printable PDF →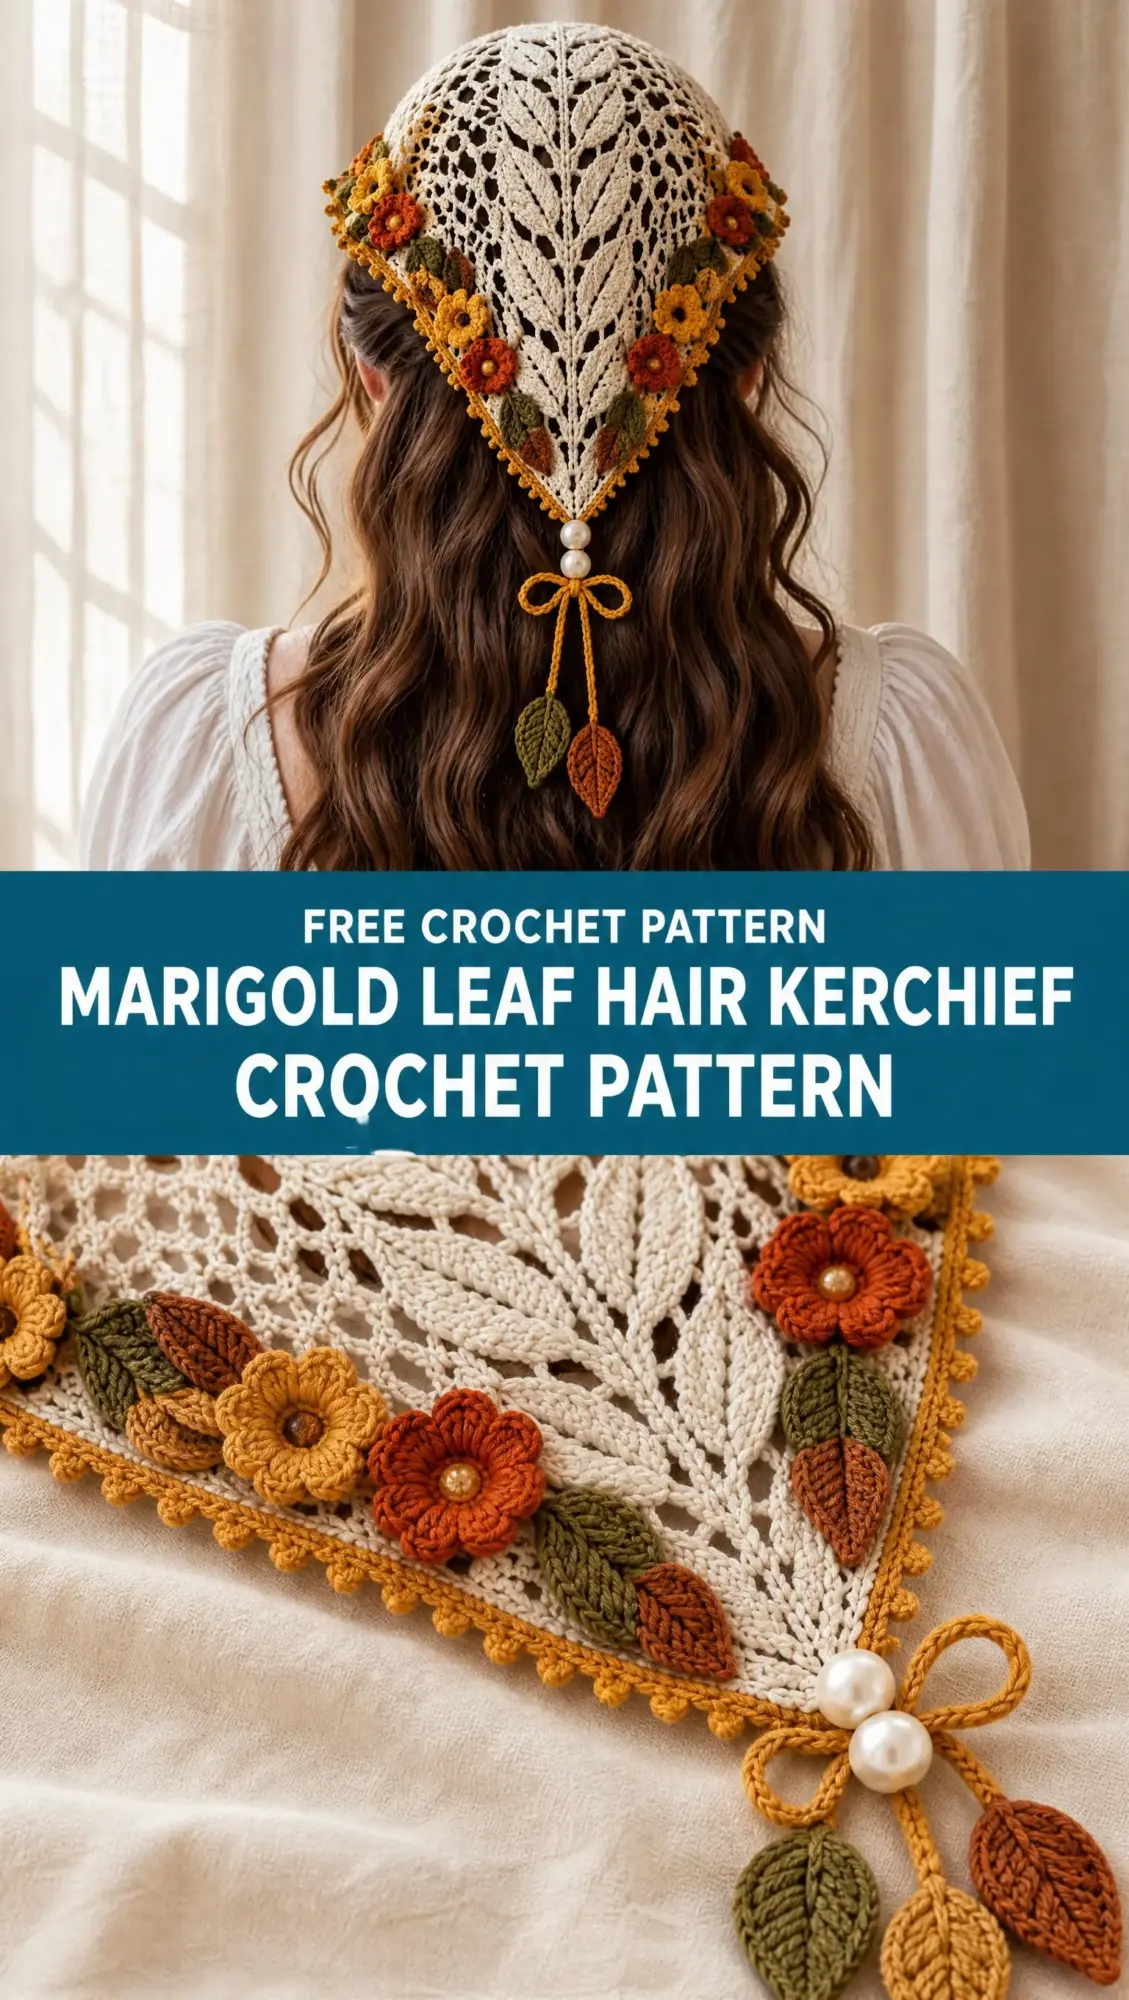
Dig into your stash and pull out those warm autumn colors because this triangular hair kerchief combines delicate leaf lace, layered marigold rosettes, and an airy mesh construction that looks far more complicated than it actually is. The center spine creates a beautiful botanical structure while the chain loop sections keep the whole piece light and breathable.
I’ll be honest with you. This is an intermediate level project. But if you can work basic stitches and follow a rhythm, you’ll find the repetitive nature of the leaf panel almost meditative once you get going.
About This Marigold Leaf Kerchief Pattern
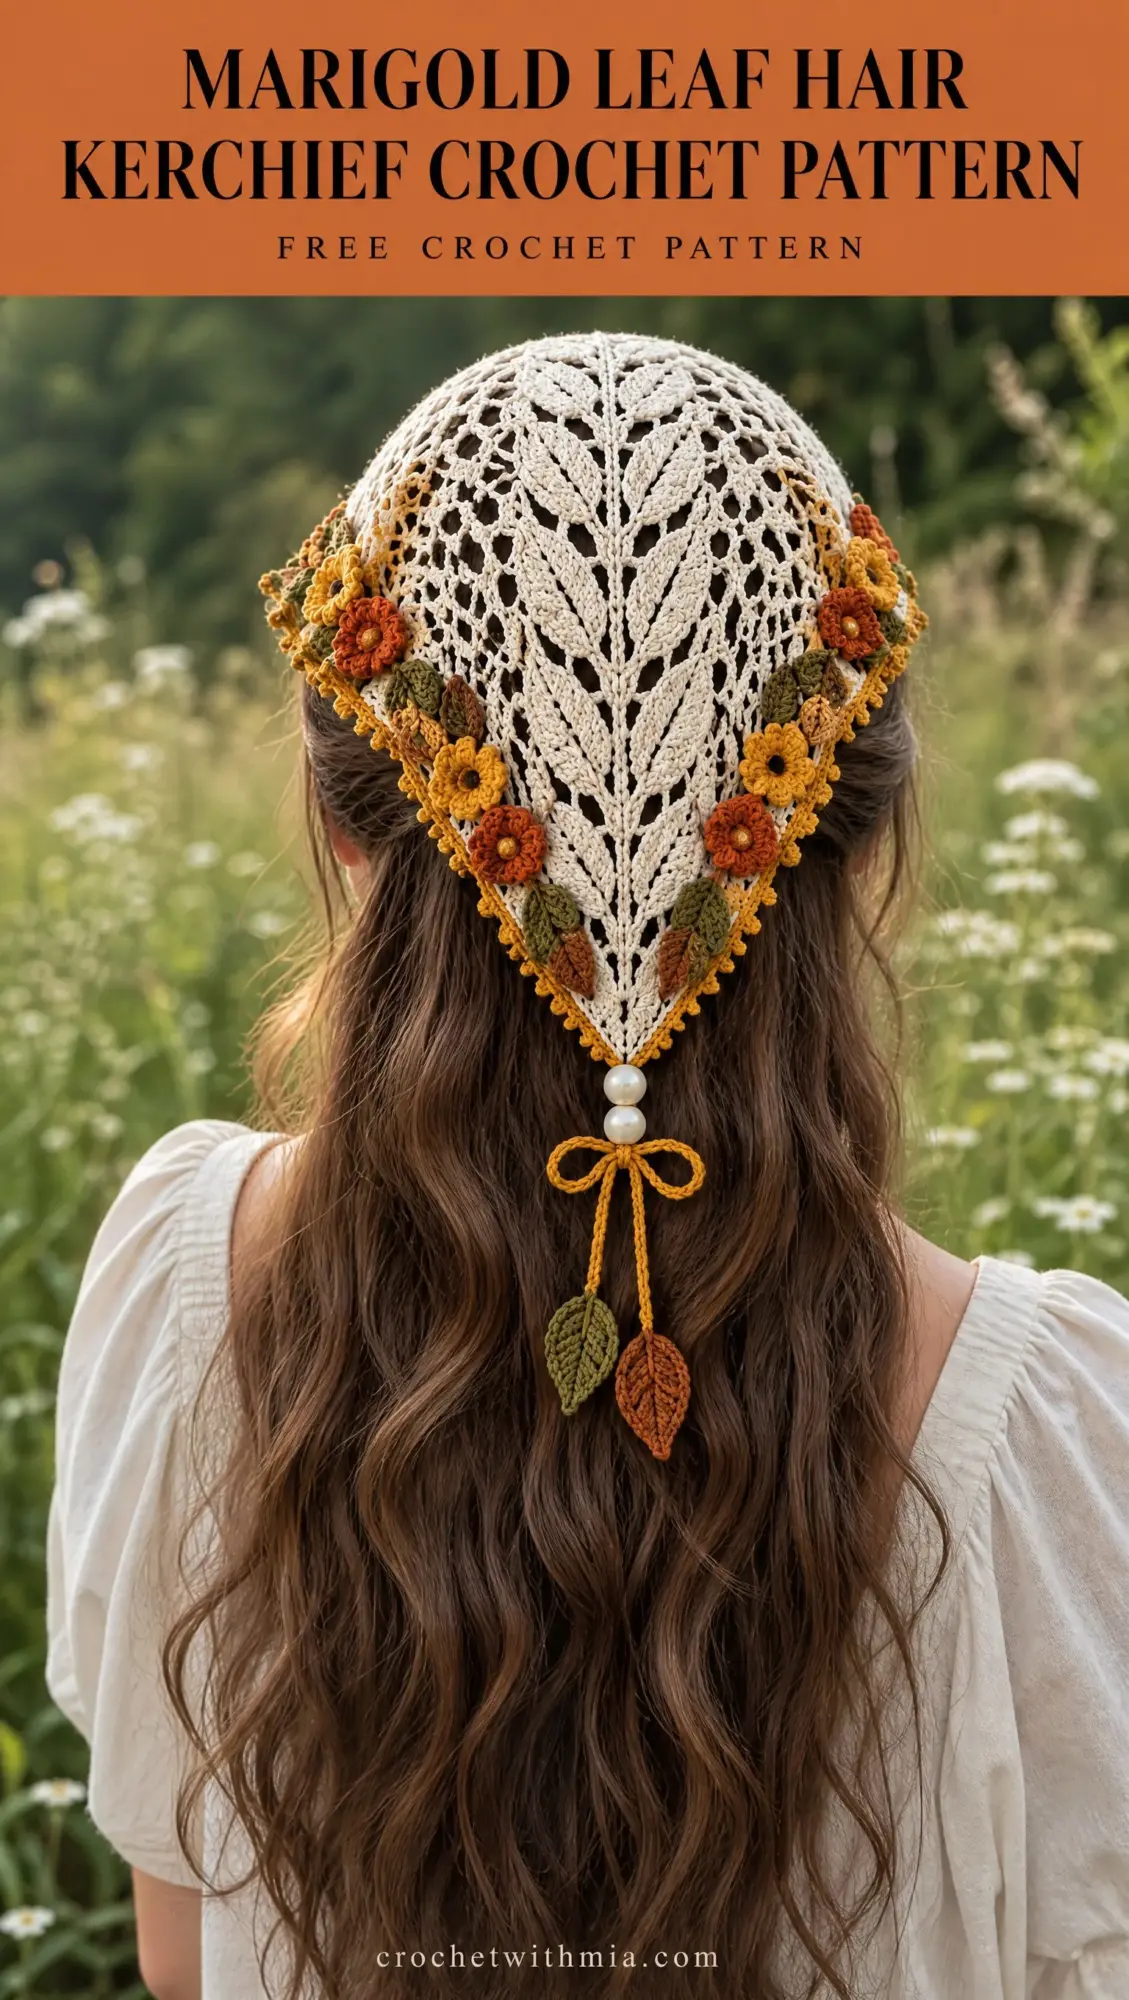
This warm cream triangular crochet hair kerchief features an open leaf lace center spine with branching tall stitch veins. The design includes airy chain loop mesh sections on either side, decorated with autumn marigold rosettes and pointed leaves along the diagonal borders. An ochre picot edge frames everything beautifully, and the piece finishes with a beaded pointed tie complete with leaf charms.
The finished kerchief measures approximately 45 cm wide across the crown edge and 42 cm deep from crown to tip. That’s roughly 18 inches wide and 16.5 inches deep for those working in imperial measurements. You can easily adjust the size by adding or removing mesh repeats as you work.
What makes this construction interesting is that you build from the bottom point upward. The center leaf panel goes first, then you expand the side mesh sections evenly on both sides. This approach gives you complete control over the final size and lets you check your progress against your head as you go.
Materials You’ll Need
Fine matte cotton crochet thread in size 10 or similar weight creates the crisp lace texture this pattern needs. Here’s your full shopping list:
Cotton Thread:
Hooks and Notions:
The smaller hook for the flowers and leaves helps create tighter, more defined shapes that stand out against the lacier main fabric.
Stitch Abbreviations and Definitions
Before we dive in, let’s make sure we’re speaking the same language. Here’s every abbreviation you’ll see in this pattern:
ch = chain (wrap yarn over hook, pull through loop)
sl st = slip stitch (insert hook, yarn over, pull through both loops at once)
sc = single crochet (insert hook, yarn over, pull up a loop, yarn over, pull through both loops)
hdc = half double crochet (yarn over, insert hook, pull up a loop, yarn over, pull through all three loops)
dc = double crochet (yarn over, insert hook, pull up a loop, yarn over, pull through two loops, yarn over, pull through remaining two loops)
tr = treble crochet (yarn over twice, insert hook, pull up a loop, then yarn over and pull through two loops three times)
sk = skip (miss the indicated stitch or space)
sp = space (the gap created by chain stitches)
picot = ch 3, sl st into first chain (creates a small decorative bump)
Kerchief Construction: Foundation and Center Panel
The kerchief builds from the lower point upward in a triangular shape. You’ll create the center leaf panel first, then expand the side mesh sections evenly.
Foundation
Row 1: With cream yarn and your 1.5 mm hook, ch 5. Join with sl st to form a ring.
Row 2: Ch 3, work 2 dc, ch 2, 3 dc into the ring.
Row 3: Turn. Ch 3, 2 dc into first space, ch 3, 3 dc into center point space, ch 3, 3 dc into last space.
Continue increasing at both outer edges and the center point as you work upward.
Leaf Lace Center Panel
This is where the magic happens. Repeat the following pattern elements while increasing each row:
Center vein: Work a tall stitch column using dc and tr. This creates the spine that runs straight up the middle of your kerchief.
Leaf branches: Create paired openings with ch spaces. These branch out from the center vein like real leaf veins.
Leaf motifs: Use 3 dc, ch 2, 3 dc groups separated by chain spaces. These clusters form the leafy texture throughout the center panel.
Symmetry is key. Always maintain the same pattern on both sides of the center spine. If you work a leaf motif on the right, mirror it on the left.
Continue building the center panel until the upper crown width reaches approximately 45 cm. You can measure by gently stretching the work and holding it up to a ruler or measuring tape.
Side Mesh Sections
Once your center panel reaches the desired width, it’s time to add the airy mesh sections that flank it.
Attach cream yarn at each side edge of your center panel. Work alternating rows to create the mesh texture:
Row A: Ch 5, sc into next opening. This creates the open chain loops.
Row B: Ch 3, 3 dc into each chain space, ch 2 between groups. This adds structure between the airy sections.
Repeat these two row types until your side panels match the height of the center panel. The mesh should flow naturally from the denser leaf lace center, creating a gradient from structured to open.
Upper Crown Curve
The wide upper edge needs a finished curve that will sit comfortably against your forehead. Work 3 rounds around this edge:
Round 1: Sc evenly across the entire upper edge. This creates a stable foundation.
Round 2: Hdc around. The half double crochet adds a bit of height and body.
Round 3: Decorative ochre picot edging. Switch to your ochre yarn for this final round.
Ochre Picot Border
Using ochre yarn, work sc around both diagonal edges of the kerchief. Every 5 stitches, add a picot:
Ch 3, sl st into first chain.
This creates a delicate scalloped edge in that warm golden ochre color. The picots frame the entire piece and give the flowers and leaves something pretty to nestle against.
Marigold Rosettes
Make 8 flowers total. These are worked with your smaller 1.25 mm hook for tighter, more defined petals.
Flower Center
With mustard yarn, make a magic ring.
Round 1: Work 8 sc into the ring. Pull the ring closed.
Round 2: Work petals by completing the following sequence in each stitch around: sc, hdc, 3 dc, hdc, sc.
You’ll have 8 petals when you finish this round.
Inner Petals
Add burnt orange inner petals with smaller repeats for layered color. Work these between or on top of the mustard petals to create that characteristic marigold depth. The burnt orange against the mustard mimics real marigold flowers perfectly.
Leaf Motifs
Make 10 leaves total. Use your 1.25 mm hook with either olive green or cinnamon brown yarn. Making some in each color gives you options for placement.
Ch 8.
Work along one side of the chain: sl st, sc, hdc, dc, tr, dc, hdc, sc.
Repeat on the opposite side of the chain to complete the leaf shape.
Add a center embroidered vein using a yarn needle and matching thread. This small detail makes each leaf look realistic and finished.
Assembly
Now comes the fun part. Putting it all together transforms your components into a wearable piece of art.
1. Place flowers evenly along both diagonal borders. Space them so they create a balanced frame around the kerchief.
2. Alternate olive and cinnamon leaves between the flowers. This color variation adds visual interest and depth.
3. Secure all ends invisibly. Weave in every tail thoroughly so nothing comes loose during wear.
4. Attach two ivory beads at the pointed tip. These add weight and elegance.
5. Crochet an ochre cord approximately 18 cm long using the instructions below.
6. Tie into a small bow below the beads.
7. Add two leaf charms (one olive, one cinnamon) to the hanging cord ends.
Cord Instructions
Ch 45.
Sl st back along the entire chain.
Attach one leaf to each end of the cord.
Finishing Your Kerchief
Proper finishing makes all the difference between a homemade look and a professional one.
Block the kerchief gently on a towel. Pin it out to the correct dimensions and let it dry completely.
Shape the crown curve naturally. Don’t force it into a rigid shape. The cotton will relax into a comfortable curve.
Steam lightly without flattening the lace. Hold your iron or steamer a few inches above the work rather than pressing directly onto it.
Check that all joins are secure and all ends are hidden before wearing.
Care Instructions
Your finished kerchief deserves proper care to keep it beautiful:
Hand wash in cool water with a gentle detergent. Avoid wringing or twisting.
Lay flat to dry on a clean towel, reshaping as needed.
Store folded to protect the floral appliques from crushing or snagging.
Pattern Notes and Tips
This pattern creates a lightweight autumn botanical accessory. The cotton thread keeps the lace crisp while allowing soft drape and comfortable wear against your hair and forehead.
For beginners stepping up to intermediate: Take your time with the leaf lace center panel. Count your stitches after each row to make sure you’re maintaining symmetry. It’s much easier to fix a mistake one row back than to unravel half your work.
Yarn substitution: If you can’t find size 10 cotton thread, look for any fine crochet cotton with similar weight. The matte finish is important for the botanical aesthetic, so avoid shiny or mercerized options.
Sizing adjustments: Add more mesh repeats for a larger kerchief or stop the center panel earlier for a smaller one. The modular construction makes customization straightforward.
Flower placement: Before sewing anything down, pin your flowers and leaves in place and try the kerchief on. Adjust until you’re happy with the arrangement, then stitch permanently.
This marigold leaf hair kerchief crochet pattern works beautifully for autumn weddings, outdoor festivals, or everyday bohemian style. The warm cream base coordinates with almost any outfit while the colorful flowers add just enough personality.
I hope you love making this kerchief as much as I loved designing it. The combination of delicate lacework and cheerful marigolds creates something truly special for the autumn season.
If you make one, I’d absolutely love to see it! Tag me on Instagram or share a photo in my Facebook group. Seeing your finished projects genuinely makes my day.
Don’t forget to save this pattern to your Pinterest boards so you can find it when you’re ready to start. And if you have any questions as you work through it, drop a comment below. I’m always happy to help!
Want a Quick & Easy Printable Version?
Get a clean, beautifully formatted PDF of this pattern — easy to follow step by step, ready to print or save on any device. No scrolling, no distractions, just the pattern.
Get the Printable PDF →