
I don’t know about you, but I have a serious weakness for dresses that look like they took forever to make but actually come together in logical, manageable stages. All the elegance with none of the chaos.
Get the Ad-Free PDF Pattern
You can find the free pattern below, or you can purchase the ad-free printable PDF from my shop.
Get the Printable PDF →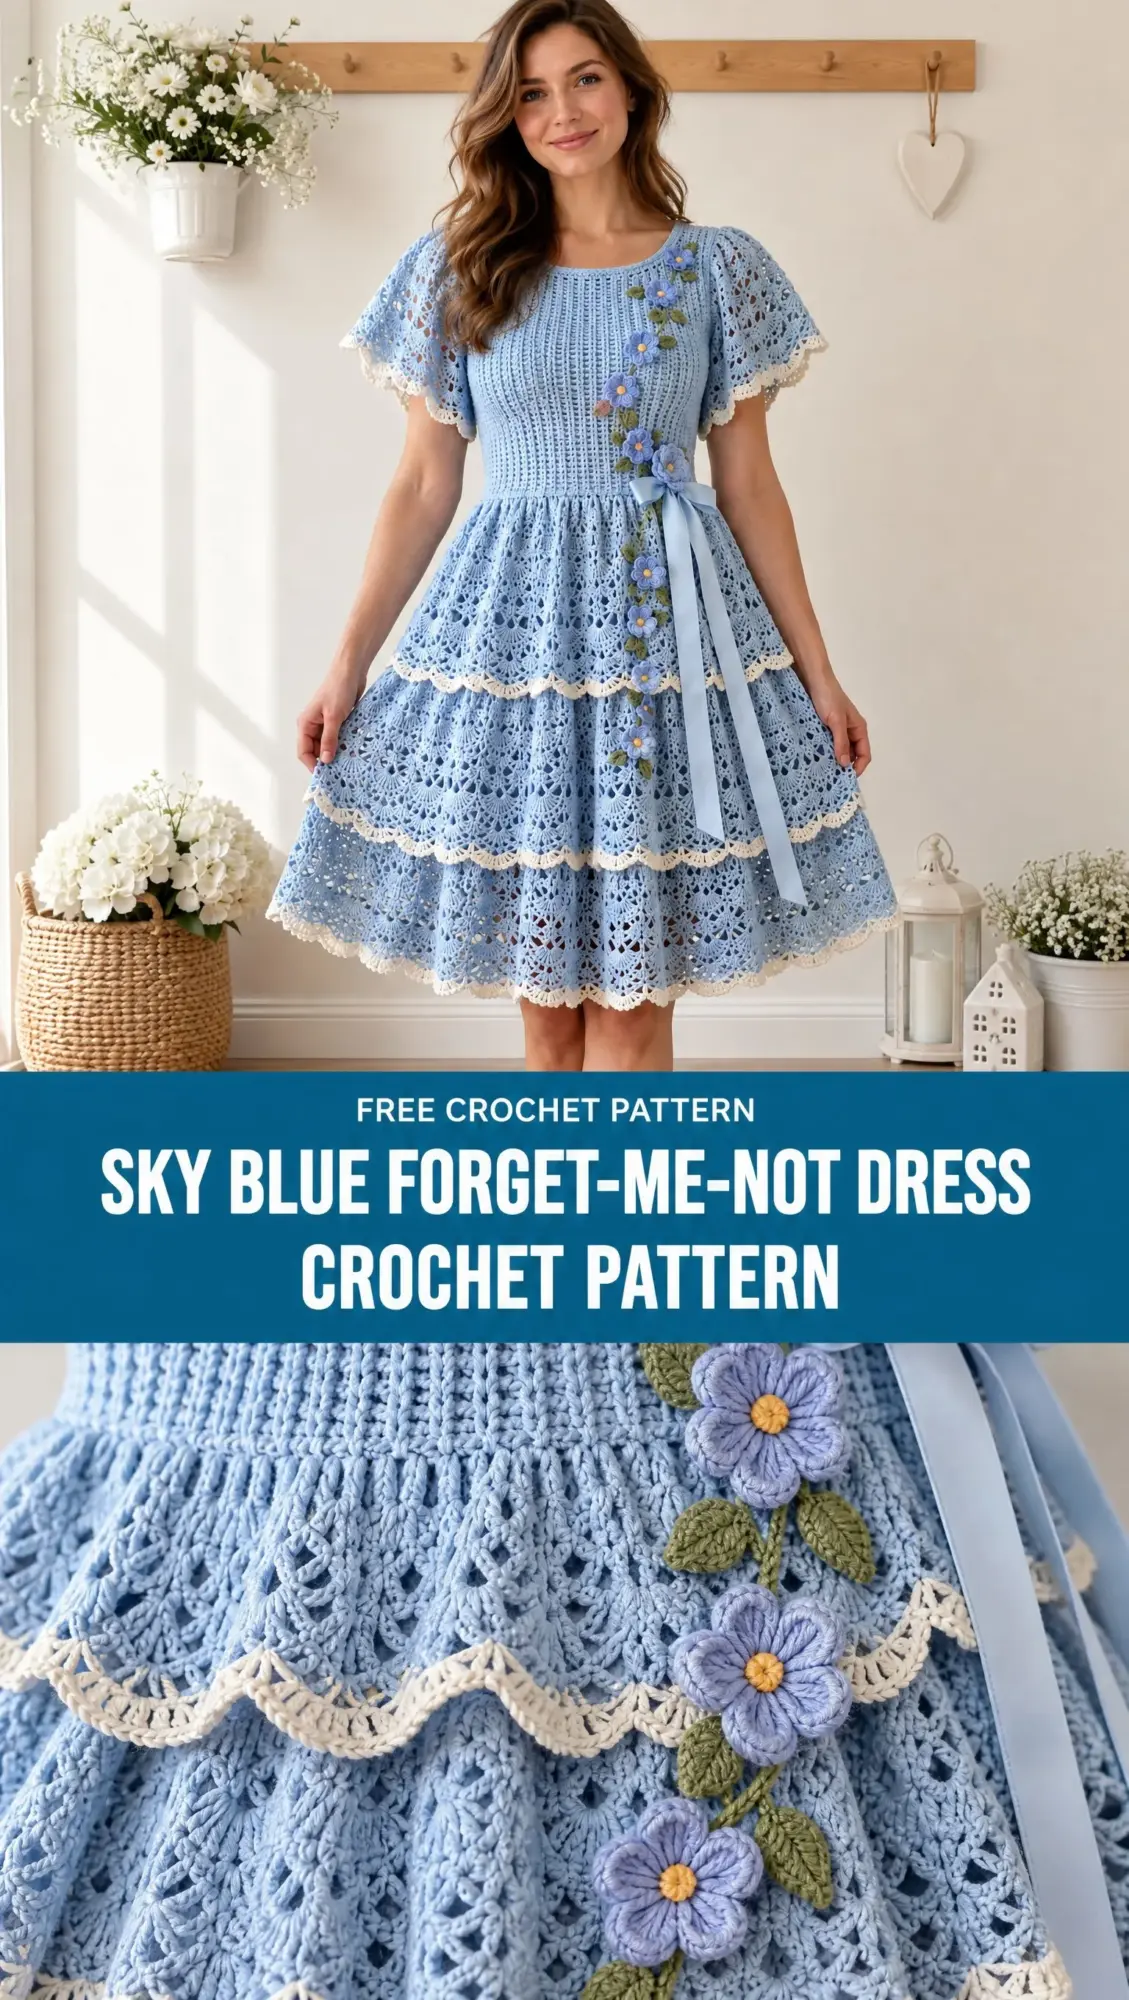
This Sky Blue Forget-Me-Not Dress is exactly that kind of project. The fitted bodice, those dreamy flutter sleeves, and a three-tier lace skirt scattered with tiny flower appliques? It looks like something from a garden party in a period drama. But the construction is surprisingly straightforward once you break it down.
If you’ve been wanting to make a real showstopper garment, something you’ll actually wear out the door and feel amazing in, this is your sign. Let’s walk through everything you need to know to bring this gorgeous dress to life.
About This Pattern
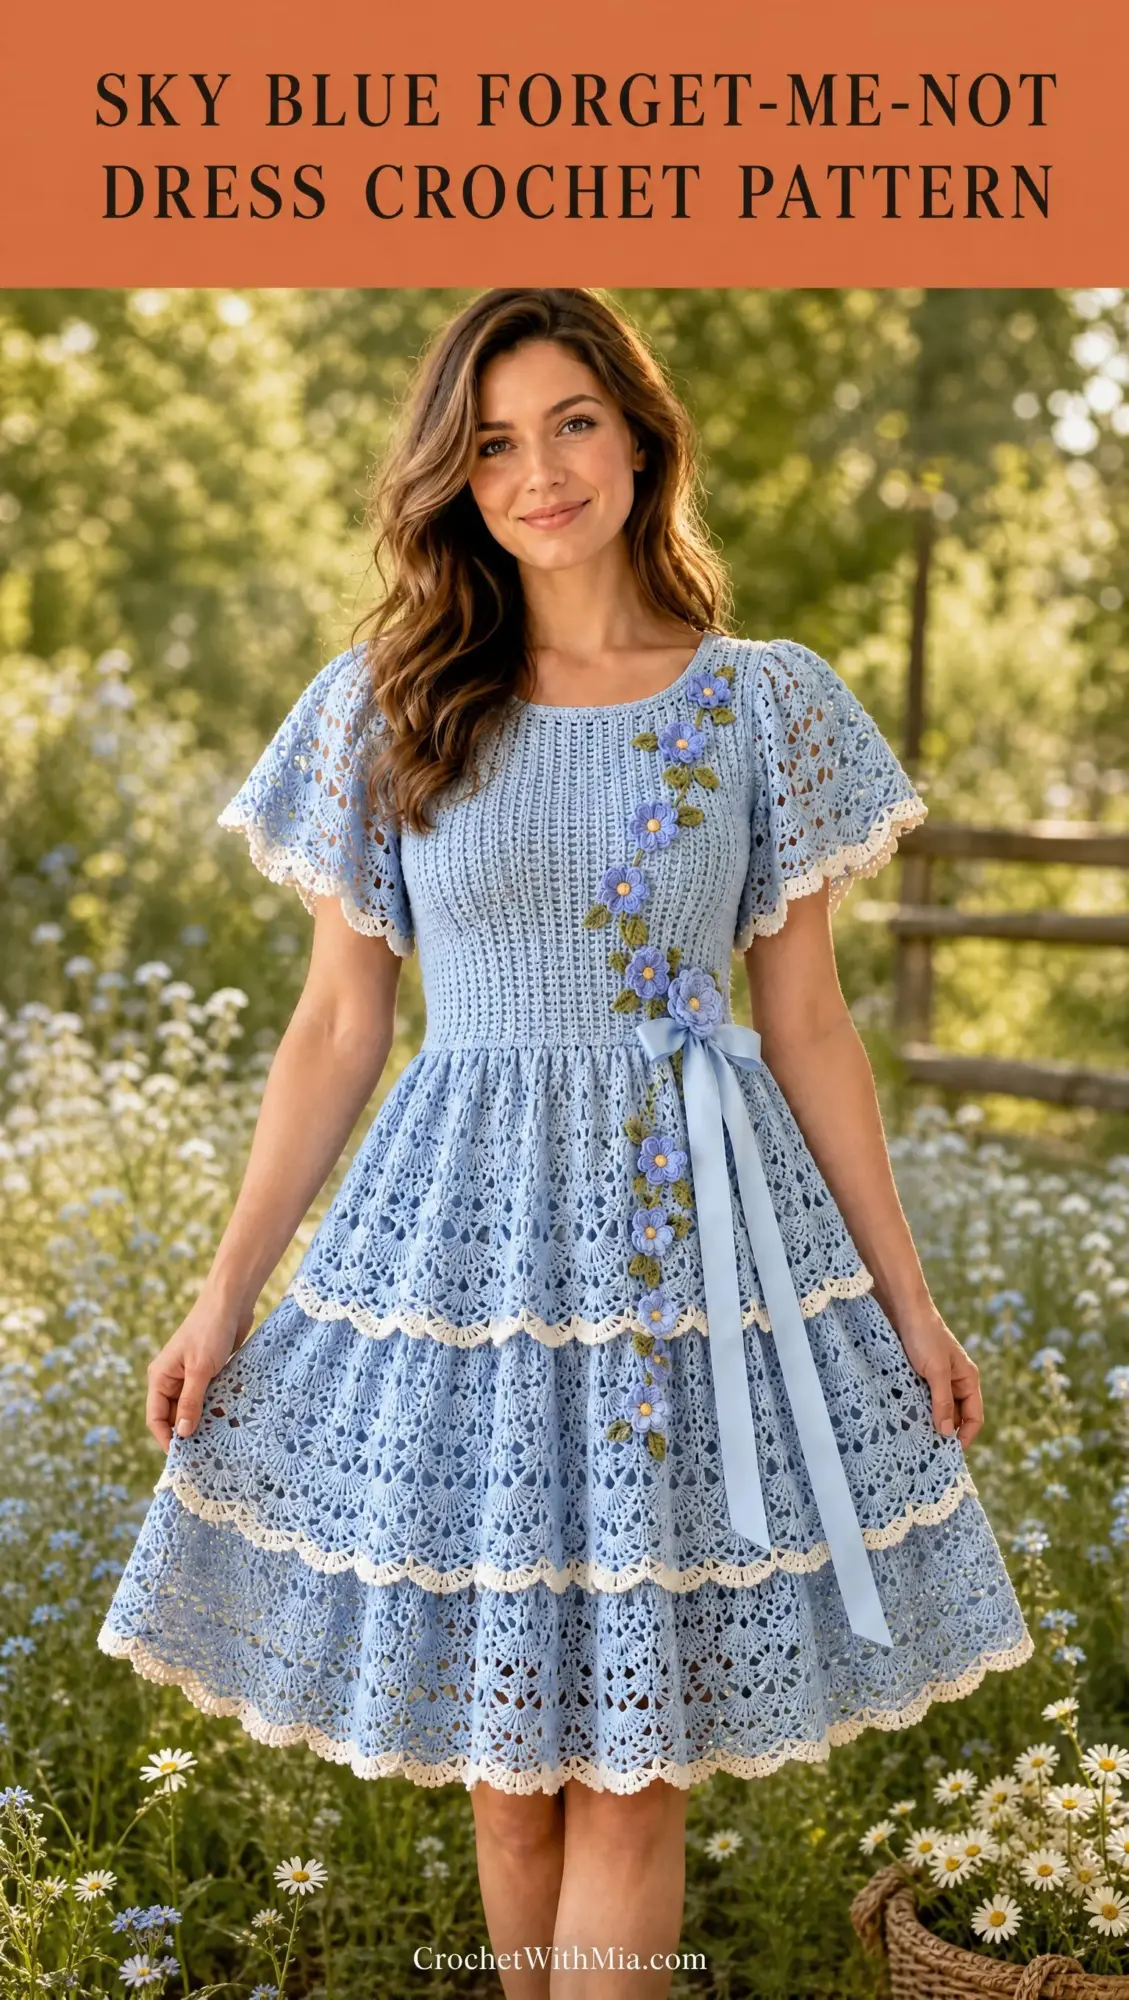
This crochet dress features a fitted sky-blue bodice, softly scalloped flutter sleeves, a defined waist, and a full three-tier lace skirt adorned with small forget-me-not flower appliques. The silhouette is polished and romantic, perfect for warm weather events, outdoor weddings, or anywhere you want to feel like the main character.
The construction method is top-down, which means you start at the neckline and work your way down. This approach lets you try the dress on as you go and make adjustments for a custom fit. The bodice uses raglan-style shaping worked in joined rounds, and the skirt tiers are attached directly at the waist, expanding through shell lace repeats.
Skill level: Intermediate
Sizes: XS, S, M, L, XL, 2XL, 3XL
This pattern is written in US crochet terminology.
Finished Measurements
Here’s what you’re working toward. The dress is designed with 2 to 5 cm (about 0.75 to 2 inches) of negative ease in the bodice, meaning it fits close to the body without distorting the stitches.
| Size | To Fit Bust | Finished Bust | Waist | Dress Length | Upper Arm |
|---|---|---|---|---|---|
| XS | 76–81 cm | 74 cm | 64 cm | 89 cm | 25 cm |
| S | 84–89 cm | 82 cm | 72 cm | 90 cm | 27 cm |
| M | 91–97 cm | 90 cm | 80 cm | 92 cm | 29 cm |
| L | 99–107 cm | 98 cm | 88 cm | 94 cm | 32 cm |
| XL | 109–117 cm | 106 cm | 98 cm | 96 cm | 35 cm |
| 2XL | 119–127 cm | 116 cm | 108 cm | 98 cm | 38 cm |
| 3XL | 130–137 cm | 126 cm | 118 cm | 100 cm | 41 cm |
Dress length is measured from top shoulder to lower scalloped hem and is easy to customize by adding or removing rows in the skirt tiers.
Materials You’ll Need
Main Yarn: DK weight or light worsted (#3), smooth cotton or cotton-bamboo blend, 115–130 meters per 50 grams, in sky blue.
Contrast Yarn: Small amounts of pale blue, white, golden yellow, and optional soft green for the forget-me-not flowers and leaves.
Main Hook: 4.0 mm, or whatever size you need to achieve gauge.
Motif Hook: 3.0–3.5 mm for firm, crisp flowers and leaves.
Notions: 8 stitch markers, tapestry needle, scissors, tape measure, blocking pins, optional thin elastic for waist support, and optional lightweight lining fabric.
Yarn Estimates by Size
| Size | Main Yarn Estimate |
|---|---|
| XS | 900–1000 g |
| S | 1000–1100 g |
| M | 1100–1200 g |
| L | 1200–1350 g |
| XL | 1350–1500 g |
| 2XL | 1500–1650 g |
| 3XL | 1650–1850 g |
Yardage varies with skirt length, fiber content, and your personal gauge. I always recommend buying one extra ball if matching a dye lot is important to you.
Gauge
Getting gauge right matters for garment fit, so please don’t skip this step.
Blocked gauge in double crochet: 18 dc × 9 rows = 10 × 10 cm (4 × 4 inches)
Shell-lace gauge: 4 shell repeats × 8 rows = approximately 10 × 10 cm (4 × 4 inches)
Always wash and block your swatch before deciding which size to make. Cotton yarn especially can behave differently after its first bath.
Abbreviations and Special Stitches
Let me walk you through every stitch abbreviation you’ll encounter. If you’re newer to garment making, take a moment to get comfortable with these before diving in.
| Abbreviation | Meaning |
|---|---|
| ch | chain |
| sl st | slip stitch |
| sc | single crochet |
| hdc | half double crochet |
| dc | double crochet |
| tr | treble crochet |
| st(s) | stitch(es) |
| sp | space |
| sk | skip |
| rep | repeat |
| RS / WS | right side / wrong side |
| inc | increase |
| pm | place marker |
Special Stitches Explained
V-st (V-stitch): Work (dc, ch 1, dc) all in the same stitch or space. This creates a small V-shaped cluster with a chain space in the middle.
5-dc shell: Work 5 dc all in the same stitch or chain space. This creates a fan-like shell that’s the foundation of the lace pattern.
Picot: Chain 3, then slip stitch in the first chain. This makes a tiny decorative bump along edges.
Linked waist round: Work hdc through the back loop only for a flatter, firmer band that helps define the waist.
Gather increase: Work 2 dc in one stitch at evenly distributed points. Avoid stacking increases directly above each other to keep the fabric smooth.
Fit Note Before You Begin
The bodice should fit close to your body but should not distort the stitches. If your measurements fall between sizes, use the larger neckline and yoke size, then reduce at the side seams or waist. For a looser, more relaxed fit, work one size larger and skip the waist elastic.
The Bodice: Neckline and Yoke
The yoke begins at the neckline and is worked in joined rounds. Four raglan markers divide the front, back, and both sleeves. Each raglan corner uses a V-stitch that creates the shaping.
Foundation Chain by Size
| Size | Foundation ch | Front | Sleeve | Back | Sleeve |
|---|---|---|---|---|---|
| XS | 88 | 28 | 16 | 28 | 16 |
| S | 96 | 30 | 18 | 30 | 18 |
| M | 104 | 32 | 20 | 32 | 20 |
| L | 112 | 34 | 22 | 34 | 22 |
| XL | 120 | 36 | 24 | 36 | 24 |
| 2XL | 128 | 38 | 26 | 38 | 26 |
| 3XL | 136 | 40 | 28 | 40 | 28 |
Yoke Instructions
Step 1: With main sky-blue yarn and 4.0 mm hook, chain the foundation number for your size. Join with a slip stitch, taking care not to twist. Round 1: Ch 1, sc in each ch around; join.
Step 2: Lay the neckline flat. Starting at center back, count stitches according to the division table above. Place a marker at each of the four division points. The marked stitch becomes the corner stitch.
Step 3 (Round 2 setup): Ch 3, dc in each st to first marker; in marked st work V-st, remove marker and place marker in the ch-1 space. Continue in dc, working V-st at each marked corner. Join with sl st to top of ch-3.
Step 4 (Rounds 3 onward): Ch 3, dc in each dc. In every marked ch-1 corner space work (dc, ch 1, dc), replacing marker in the new ch-1 space. Join each round.
Step 5: Continue yoke rounds until the measured raglan depth from neckline to underarm is approximately:
Try the dress on as you go if possible. This is the beauty of top-down construction.
Step 6: If your bust needs more room before the raglan reaches the target depth, add 1–2 plain increase rounds. If it reaches the depth early, stop increasing and work one round even, placing 1 dc in each corner ch-1 space.
Separating the Body and Sleeves
Step 1: Work in dc to the first raglan corner. Work 1 dc in the corner ch-1 space.
Step 2: Chain underarm stitches according to your size: XS 6, S 8, M 8, L 10, XL 12, 2XL 14, 3XL 16. Skip all sleeve stitches to the next raglan corner and work 1 dc in that corner space.
Step 3: Work across the back to the next corner; repeat the underarm chain and sleeve skip. Complete the front and join.
Step 4: Next round: work 1 dc in each dc and each underarm ch. Mark the center of each underarm; these become the side shaping points.
Fitted Bodice to Waist
Work the body in joined rounds. Use the side markers to keep shaping symmetrical. The standard bodice depth from underarm to waist is 18–22 cm depending on your torso length.
Target Stitch Counts
| Size | Approx. Body Sts After Separation | Target Waist Sts |
|---|---|---|
| XS | 132–140 | 116–120 |
| S | 144–152 | 128–132 |
| M | 156–164 | 140–144 |
| L | 172–180 | 156–160 |
| XL | 188–196 | 174–178 |
| 2XL | 204–214 | 192–196 |
| 3XL | 222–232 | 210–216 |
Bodice Shaping Instructions
Step 1 (Rounds 1–2): Dc evenly around with no shaping.
Step 2 (Decrease round): At each side marker, work dc2tog (double crochet two together) centered over the marker twice. That means one decrease just before the side marker and one just after it. This removes 4 stitches total per decrease round.
Step 3: Work 1–2 even rounds between decrease rounds. Repeat until you’re near the target waist count in the table, or until the bodice follows your torso without pulling.
Step 4: Continue even until the lower edge reaches your natural waist. For a longer torso, add rounds here rather than changing the skirt.
Step 5 (Waist band): Round 1: ch 1, hdc in each st; join. Rounds 2–4: ch 1, hdc in back loop only around; join. On the final round, work 1 sc in each st. Do not fasten off.
Optional Hidden Waist Elastic
For extra support, cut 6–10 mm elastic to comfortably circle your waist with a 2 cm overlap. Place it against the inside of the waist band and sew it with stretch stitches, or crochet the final waist-band round around the elastic without piercing it. Make sure the fabric can still stretch over your hips if the dress has no zipper.
The Three-Tier Skirt
The skirt is worked directly from the waist downward. Each tier uses shell lace and ends in a scallop. The next tier joins behind the previous one so the flounces overlap cleanly.
Tier 1: Upper Skirt
Step 1 (Increase round): Ch 3. Work dc around while increasing evenly to approximately 1.30 times your waist stitch count. Round the total to a multiple of 6. Join.
Step 2 (Lace setup): Ch 1, sc in first st, ch 3, sk 2 sts, sc in next st; repeat from around. Adjust the last repeat by skipping 1 or 3 stitches if needed so the round closes smoothly.
Step 3 (Shell round): Sl st into first ch-3 space, ch 3, work 4 dc in same space, sc in next ch-3 space; *5 dc in next ch-3 space, sc in next space; repeat around.
Step 4 (Open round): Ch 5, sc in center dc of next shell, *ch 5, sc in center dc of next shell; repeat around.
Step 5: Repeat the Shell round and Open round 3 more times, or until Tier 1 measures 14–16 cm.
Step 6 (Edging): In each ch-5 space work (sc, hdc, 3 dc, picot, 3 dc, hdc, sc). Fasten off.
Tier 2: Middle Skirt
Step 1: Turn the dress inside out. Join yarn to the first skirt increase round at the waist-side base of Tier 1, working into the unused back strand/underside of that round.
Step 2 (Foundation round): Work dc around while increasing evenly to 1.20 times the Tier 1 foundation count; round to a multiple of 6.
Step 3: Work the same lace setup, Shell round, and Open round sequence as Tier 1.
Step 4: Continue for 18–20 cm, making one additional expansion round halfway through: in every third ch-5 space work ch 6 instead of ch 5. On the following shell round, maintain one shell per chain space.
Step 5: Finish with the same scalloped picot edging.
Tier 3: Lower Skirt
Step 1: Join yarn behind Tier 2 at its foundation round, again using the underside strand so the join is hidden.
Step 2 (Foundation round): Increase evenly to 1.15 times Tier 2 foundation count, rounded to a multiple of 6.
Step 3: Work the lace setup and alternating shell/open rounds for 22–26 cm, or to your preferred finished dress length.
Step 4: For extra sweep, on the final two open rounds use ch 6 instead of ch 5 every other repeat.
Step 5: Finish with the scalloped picot edging. Steam or wet block the three tiers so the scallops open and overlap evenly.
Flutter Sleeves
The sleeves are worked directly around each armhole. They’re intentionally short and flared. If you prefer a cap sleeve, stop after Round 3 and work the edging.
Round 1: With RS facing, join yarn at center underarm. Ch 3, dc evenly around the armhole, placing 1 dc into each yoke stitch and 1 dc in each underarm chain. Join.
Round 2: Ch 3, dc around, increasing 1 dc in every 6th stitch. Join.
Round 3: Ch 1, sc in first st, *ch 3, sk 2 sts, sc in next st; repeat around.
Round 4: Sl st into first ch-3 space, ch 3, 4 dc in same space, sc in next ch-3 space; *5 dc in next space, sc in next space; repeat around.
Round 5: Ch 5, sc in center dc of next shell; repeat around.
Round 6: Work 7 dc in each ch-5 space with sc between spaces for a fuller flutter.
Edging: *Sc in next dc, picot, sc in next dc; repeat selectively across each shell so the picots are spaced rather than crowded. Fasten off. Repeat for second sleeve.
Forget-Me-Not Flowers and Leaves
Make 13–21 flowers depending on your size and desired density. For the classic look, use pale blue petals with golden yellow centers. Make some white flowers with blue edging for variation.
Small Five-Petal Flower
Step 1: With yellow yarn and 3.0–3.5 mm hook, make a magic ring. Work 5 sc into ring; join. Fasten off yellow.
Step 2: Join pale blue yarn in any sc. Ch 2, work 2 dc in same sc, ch 2, sl st in same sc; repeat from in each of the 5 sc. You now have 5 rounded petals.
Step 3 (Optional definition): With a slightly deeper blue, surface-sl-st loosely around the outer edge of each petal. Do not pull tight.
Step 4: Leave a 20 cm tail for sewing.
Small Leaf
With soft green, ch 7. Starting in second ch from hook work: sl st, sc, hdc, dc, hdc, 3 sc in last ch. Working down opposite side of chain: hdc, dc, hdc, sc, sl st. Fasten off with a sewing tail. Make 8–14 leaves.
Flower Placement
Primary garland: Place 7–11 flowers diagonally from the left shoulder toward the right waist, or mirror the direction if you prefer.
Leaves: Nestle 1–2 leaves between every second or third flower. Keep the motifs slightly irregular so the line looks botanical rather than geometric.
Middle skirt: Place 3–5 small flower clusters across the front only, spaced at least 8–12 cm apart.
Sewing tips: Use matching sewing thread or the yarn tails. Sew through the flower center and lightly tack two petal edges. Do not stitch every edge flat; a little lift looks more dimensional.
Neckline and Final Edging
Step 1: Join main yarn at center back neckline. Work 1 round of sc evenly around, easing over any slightly loose chain stitches.
Step 2: Next round: *sc in next 3 sts, picot; repeat around. If the neckline feels too open, replace every 6th group of 3 sc with sc2tog to draw it in slightly.
Step 3: Weave in all ends securely on the WS. Use duplicate-stitch weaving across at least 4–5 cm for slick cotton yarns.
Step 4: Wash gently in cool water with mild soap, roll in a towel, and lay flat. Pin the hem scallops and flutter sleeves into shape. Do not overstretch the fitted bodice.
Step 5: After blocking is fully dry, sew on flowers and leaves if you prefer the motifs to remain crisp and undistorted.
Size Customization and Fit Adjustments
| Area | How to Adjust |
|---|---|
| Bust | Add or remove yoke rounds before sleeve separation. Each increase round adds fabric to front, back, and sleeves. |
| Waist | Change the number or frequency of side decrease rounds. Keep decreases balanced at both sides. |
| Torso length | Add or remove even body rounds before the waist band. |
| Armhole | Use more or fewer underarm chains. Extra chains add bust and upper-arm room. |
| Skirt fullness | Change the first skirt increase factor from 1.30 to 1.20 for less fullness or up to 1.40 for more sweep. |
| Dress length | Add or remove complete Shell + Open round pairs in Tier 3. |
| Sleeve fullness | In Round 2, increase every 5th stitch for more flare or every 8th stitch for less. |
| Neck opening | Work one extra sc edging round with evenly spaced sc2tog decreases. |
Suggested Lining
Because the skirt lace is open, a simple lining or slip is recommended. A lightweight stretch lining is easiest to wear. Cut or buy a sleeveless slip that ends 2–5 cm above the crochet hem. Attach it only at the neckline and waist using loose hand stitches so the crochet can still stretch. Do not stitch the lining into the skirt tiers.
Finishing Checklist
Before you call this dress complete, run through this list:
Care Instructions
Hand wash or machine wash on a delicate cycle in cool water inside a mesh bag, following the yarn label. Reshape flat to dry. Avoid hanging the wet dress, as the skirt can lengthen under its own weight. Store folded. If the flowers flatten over time, reshape them with your fingers while damp and let them dry flat.
You’ve Got This
Making a fitted crochet dress with lace skirt tiers and floral appliques is absolutely an investment of time and love. But the result? A completely unique, handmade garment that fits your body and makes you feel incredible. Take it one section at a time, try it on often, and don’t rush the finishing.
Thank you so much for choosing this pattern. I genuinely hope you love every stitch of making this dress as much as I loved designing it. If you make one, I would absolutely love to see it. Tag me on Instagram or share a photo in my Facebook group.
If this pattern is calling your name, go ahead and save it to your Pinterest boards so you can find it when you’re ready to start. And if you do make the Sky Blue Forget-Me-Not Dress, please drop a comment below. I love hearing how your projects turn out, and your tips always help other makers too.
Want a Quick & Easy Printable Version?
Get a clean, beautifully formatted PDF of this pattern — easy to follow step by step, ready to print or save on any device. No scrolling, no distractions, just the pattern.
Get the Printable PDF →