
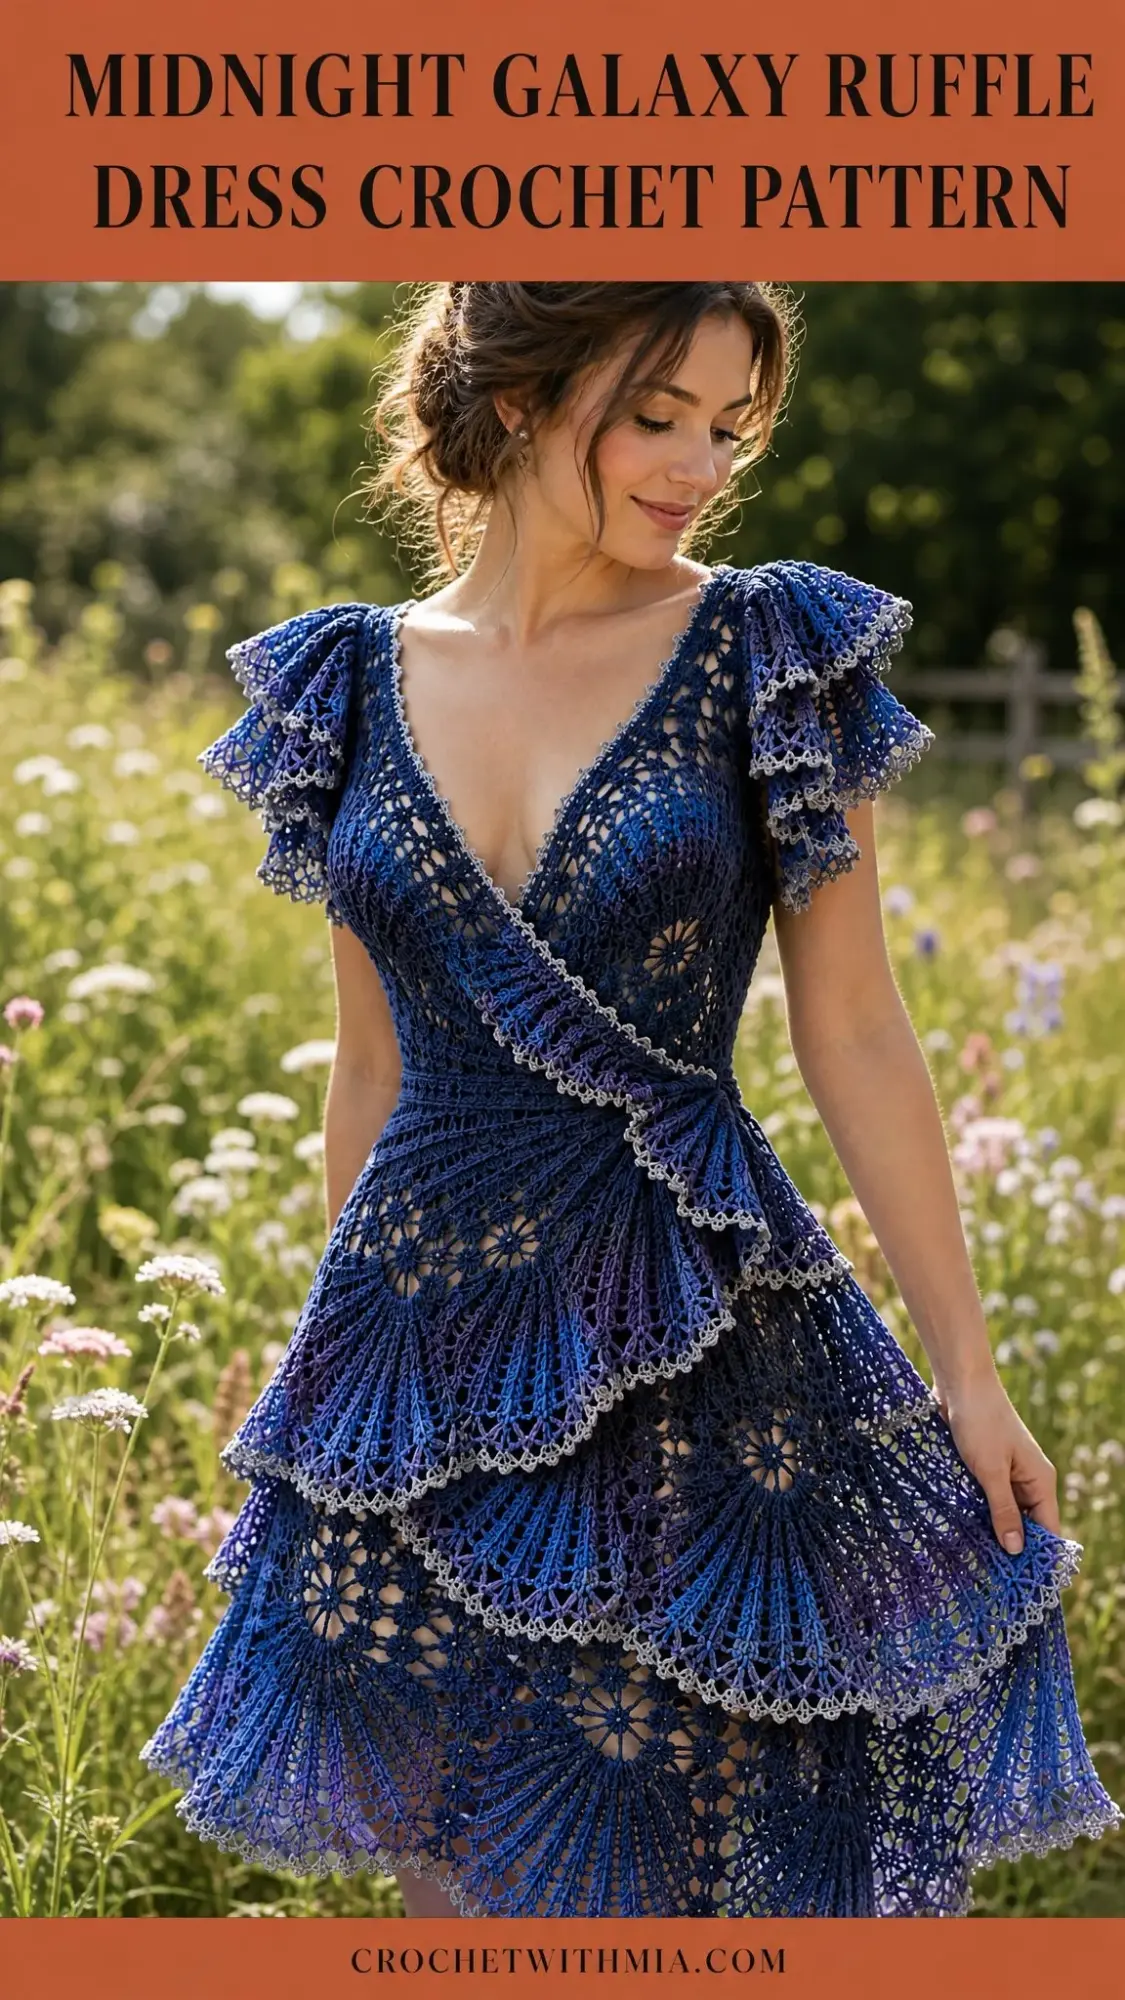
When I sat down to design this dress, I had one vision in my head. I wanted something dramatic, something that would make people stop and stare, something that captured the way colors swirl together in a night sky. I spent weeks perfecting the wrap bodice, figuring out how to make those shoulder ruffles cascade just right, and testing different ways to layer those three skirt tiers so they’d flow like actual stardust.
Get the Ad-Free PDF Pattern
You can find the free pattern below, or you can purchase the ad-free printable PDF from my shop.
Get the Printable PDF →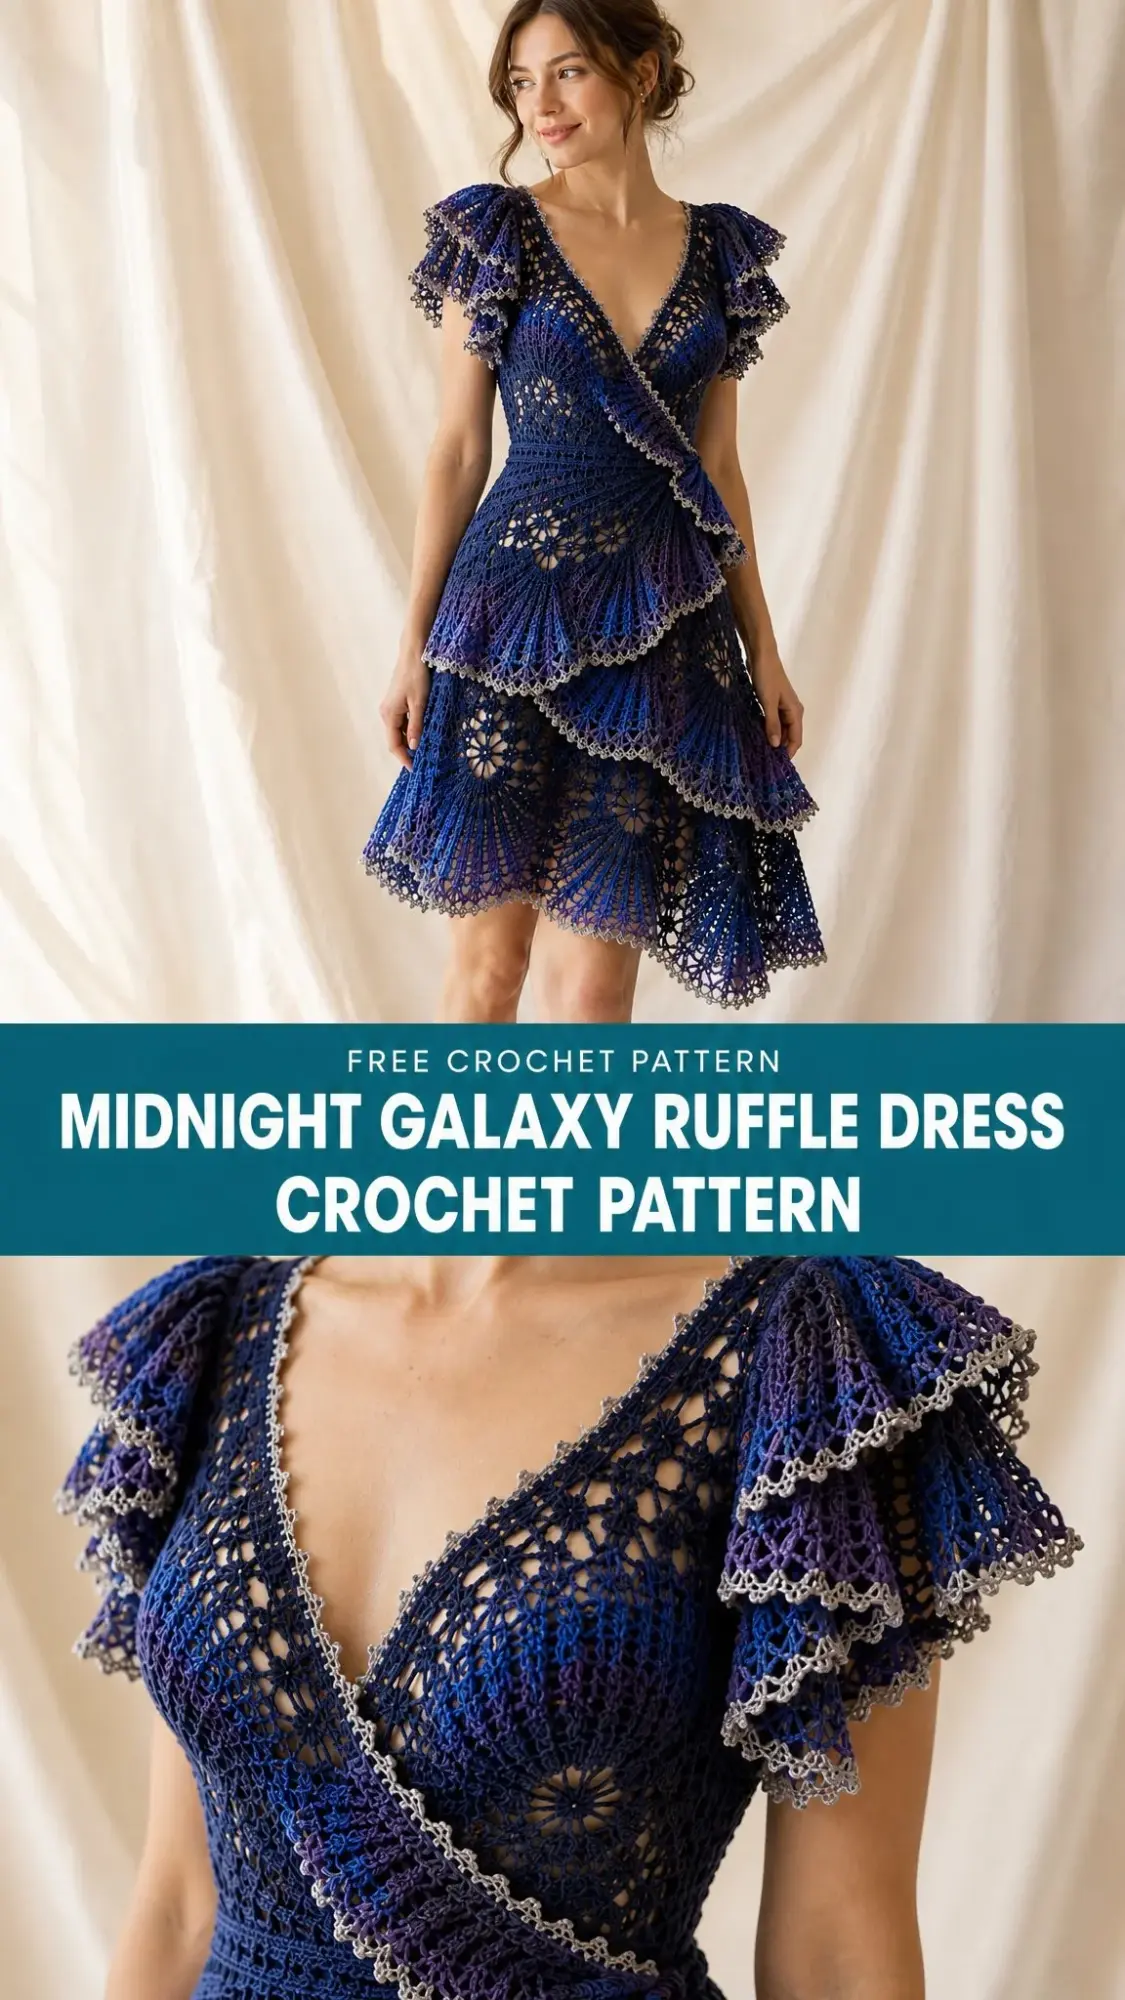
The color blending was the trickiest part. Deep midnight navy fading into violet, then indigo, then those pops of turquoise and lavender at the hem. It had to look effortless even though every transition was intentional. I wanted crocheters to feel like they were creating wearable art without needing a decade of experience to pull it off.
I am SO pleased with how this turned out. The fitted wrap bodice is flattering on every body type. The flutter ruffles add drama without overwhelming the silhouette. And those three lace skirt tiers? Pure magic when they catch the light. If you have been dreaming of making a statement piece that shows off your crochet skills, this Midnight Galaxy Ruffle Dress crochet pattern is exactly what you need.
About This Crochet Pattern
This is an advanced intermediate project, which means you should feel comfortable working in both rounds and rows before diving in. You will use increases and decreases for shaping, create lace motifs and fan stitches, join separate panels together, and add decorative edging throughout. If those techniques sound familiar to you, even if you have not mastered them completely, you are ready for this challenge.
The dress is worked in sections. You will create the bodice panels first, then add the shoulder ruffles, shape the waist, build three cascading skirt tiers, and finish everything with neckline and hem details. This construction method makes the project feel manageable because you are completing one piece at a time rather than tackling the entire garment at once.
Finished sizes range from XS to XXL, with an approximate finished bust measurement of 32 to 48 inches (81 to 122 cm). The finished length falls between 34 and 38 inches (86 to 97 cm), hitting above the knee for that dramatic cocktail dress silhouette you see in the photos.
Materials You Will Need
Gather everything before you start so you will not have to pause mid-project. Here is your complete supply list pulled directly from the pattern:
Yarn: Fingering or sport weight cotton yarn in five colors
The yardage ranges account for different sizes. If you are making an XS, aim for the lower numbers. For XXL, stock up on the higher amounts. I always recommend buying a little extra because running out of a dye lot mid-project is heartbreaking.
Hook: 2.5 to 3.5 mm crochet hook depending on your gauge. Most crocheters find their sweet spot somewhere in the middle of this range, but your tension is unique to you.
Notions:
Gauge Information
Getting your gauge right matters enormously for a fitted garment like this. Work a swatch before starting the bodice.
Target gauge: 28 double crochet stitches by 14 rows equals 4 by 4 inches (10 by 10 cm) after blocking.
Notice that blocking is specified here. Lace and openwork fabric behaves completely differently before and after blocking. Make your swatch, wash it, pin it out, let it dry, then measure. If your swatch is too small, go up a hook size. Too large? Go down. This step feels tedious but saves you from making a dress that does not fit.
Abbreviations and Stitch Definitions
Let me walk you through every abbreviation used in this pattern so nothing catches you off guard.
ch stands for chain. This is your foundation stitch where you yarn over and pull through the loop on your hook.
sc means single crochet. Insert your hook, yarn over, pull up a loop, yarn over again, pull through both loops. This creates a short, dense stitch.
hdc is half double crochet. Yarn over before inserting your hook, pull up a loop so you have three loops, then yarn over and pull through all three at once. Slightly taller than single crochet.
dc stands for double crochet. Yarn over, insert hook, pull up a loop, yarn over and pull through two loops, yarn over and pull through the remaining two loops. This is your primary stitch for this pattern.
tr means treble crochet. Yarn over twice before inserting your hook, then work off two loops at a time until one remains. This creates a tall, elegant stitch.
sl st is slip stitch. Insert hook, yarn over, pull through both the stitch and the loop on your hook in one motion. Used for joining and moving across stitches.
sk means skip. Pass over the indicated number of stitches without working into them.
sp stands for space. This refers to the gap created by chain stitches in the previous row.
inc is increase. Work two or more stitches into the same stitch to add width.
dec means decrease. Work stitches together to reduce the stitch count.
rep stands for repeat. Work the indicated section again.
Special Stitches
Two decorative stitches give this dress its distinctive galaxy-inspired texture.
Galaxy Fan
This creates the dramatic fanned lace motifs throughout the skirt tiers. In the indicated space, work: double crochet, chain 2, double crochet, chain 2, double crochet, chain 2, double crochet. You are placing four double crochets separated by chain 2 spaces all in the same spot. The result fans out beautifully when blocked.
Open Mesh
This airy background stitch creates negative space between the Galaxy Fans. Work one double crochet, chain 1, skip 1 stitch, and repeat across. The alternating stitches and spaces create a delicate grid effect.
Picot Edge
This decorative finishing creates tiny points along edges. Chain 3, then slip stitch into the first chain you made. The result is a small bobble or point. You will use this in lavender along the shoulder ruffles and in the final hem border.
Step by Step Pattern Instructions
Bodice Back
Start with the back panel of your bodice.
1. Chain a foundation length that matches half your bust measurement. Calculate this using your gauge swatch.
2. Work rows of double crochet while maintaining a close fitted fabric. This means no chain spaces between stitches.
3. Add waist decreases every few rows to create shaping. This brings in the fabric where it should hug your natural waist.
4. Continue until you reach the underarm height. Measure against your body or a garment that fits you well.
5. Add neckline shaping and finish with edging along the top.
Bodice Front Panels
The front features a wrap design with two mirrored panels.
1. Create two wrap panels that mirror each other. One will overlap the other when worn.
2. Work solid stitches near the side seams for structure. This prevents the wrap from stretching out.
3. Add diagonal increases toward the neckline. This creates the angled wrap line you see in the photos.
4. Join the shoulder sections to the back bodice.
5. Leave the front opening for the wrap effect. This is not sewn closed.
Shoulder Ruffles
These dramatic flutter sleeves frame the face beautifully.
1. Attach your yarn along the arm openings of the joined bodice.
2. Work repeated fan stitches into each row, building outward from the armhole.
3. Increase every second repeat to create layered waves. This is what gives the ruffles their cascading effect.
4. Finish with lavender picot edging along the outer edge of each ruffle.
Waist Section
This section connects your bodice to the skirt.
1. Join the front and back bodice pieces at the sides if not already connected.
2. Add a fitted waist band using ribbed stitches. This creates the structured gathering visible in the photos.
3. Place markers for your skirt attachment points. Even spacing here ensures your tiers hang correctly.
Skirt Tier One
The first tier attaches directly to your waist section.
1. Begin working from the waist edge in rounds.
2. Work alternating mesh spaces and Galaxy Fans to create the lace pattern.
3. Increase evenly around each round to create gradual flare. The skirt should expand as it moves down.
4. Continue until you reach the first tier depth, approximately one third of your total skirt length.
Skirt Tier Two
This middle layer adds volume and color transition.
1. Attach your yarn beneath the first tier, working into the edge stitches.
2. Repeat the lace fan pattern established in tier one.
3. Increase more frequently than in tier one for a fuller silhouette. This tier should be noticeably wider at the hem.
4. Blend colors from violet into indigo as you work down. Change colors at row transitions for the smoothest gradient.
Skirt Tier Three
The final tier creates the dramatic hem.
1. Attach yarn at the second tier edge, just as you did for tier two.
2. Continue expanding the fan lace pattern with even more frequent increases.
3. Transition into turquoise and lavender yarns as you approach the hem.
4. Finish with a soft scalloped picot border all around the bottom edge.
Finishing Your Dress
Proper finishing transforms your work from handmade to professional.
Weave in all ends securely. With this many color changes, you will have quite a few tails. Take your time and weave each one through several stitches in the same color area.
Wet block the entire dress to open up the lace motifs. Fill a basin with cool water, submerge your dress, let it soak for 15 to 20 minutes, then gently squeeze out excess water without wringing.
Lay the dress flat on blocking mats. Pin out the skirt tiers to emphasize the scalloped edges. Shape each ruffle carefully. Allow everything to dry completely before unpinning.
Add a slip or lining if you want more opacity. The openwork lace is beautiful but sheer.
Check symmetry by laying the dress flat and comparing both sides. Reinforce any joins that feel weak with a few extra stitches.
Troubleshooting Common Issues
If your skirt curls at the edges: Your blocking time was not long enough. Re-wet and re-block, leaving it pinned for 24 to 48 hours.
If your bodice stretches out of shape: Use a smaller hook size for the bodice sections, or reinforce the side seams with a row of slip stitches.
If your lace openings look too large: Reduce your hook size by 0.25 to 0.5 mm for the skirt tiers.
Customization Options
Colors: The galaxy palette is stunning, but you can absolutely substitute any gradient you love. Sunset shades, ocean tones, or a monochromatic fade would all work beautifully with similar yarn weights.
Length: Want a longer or shorter dress? Adjust the number of rows in each skirt tier. Add rows for a midi length or remove rows for a shorter cocktail style.
Care Instructions
This cotton lace dress deserves gentle treatment. Hand wash in cool water using a mild detergent. Do not wring or twist. Lay flat on a towel and roll to remove excess water. Reshape and dry flat away from direct heat or sunlight. Store folded rather than hung to prevent stretching.
Final Thoughts on the Midnight Galaxy Ruffle Dress Crochet Pattern
You now have everything you need to create this stunning statement piece. The Midnight Galaxy Ruffle Dress crochet pattern combines classic lace techniques with modern silhouette shaping for a garment that looks far more complicated than it actually is. Yes, it takes time. Yes, it requires focus. But when you slip that finished dress over your head and see how beautifully those tiers cascade around you, every single stitch will feel worth it.
Take your time with the color transitions. Trust the blocking process. And most importantly, enjoy the journey of creating something truly extraordinary with your own two hands.
I would absolutely love to see your finished dress. Save this pattern to your Pinterest boards so you can find it whenever inspiration strikes, and please leave a comment below when you complete yours. Seeing your versions of my designs is honestly one of the best parts of sharing patterns, and I cannot wait to celebrate your gorgeous galaxy dress with you.
Want a Quick & Easy Printable Version?
Get a clean, beautifully formatted PDF of this pattern — easy to follow step by step, ready to print or save on any device. No scrolling, no distractions, just the pattern.
Get the Printable PDF →