
Last winter, I found myself standing in my closet, staring at a pile of sweaters that all felt wrong. Too thin, too scratchy, too boring. I wanted something that felt like wearing a cloud. Something cozy enough for movie nights but cute enough to wear out for coffee. Something in a color that would make the gray January days feel a little brighter.
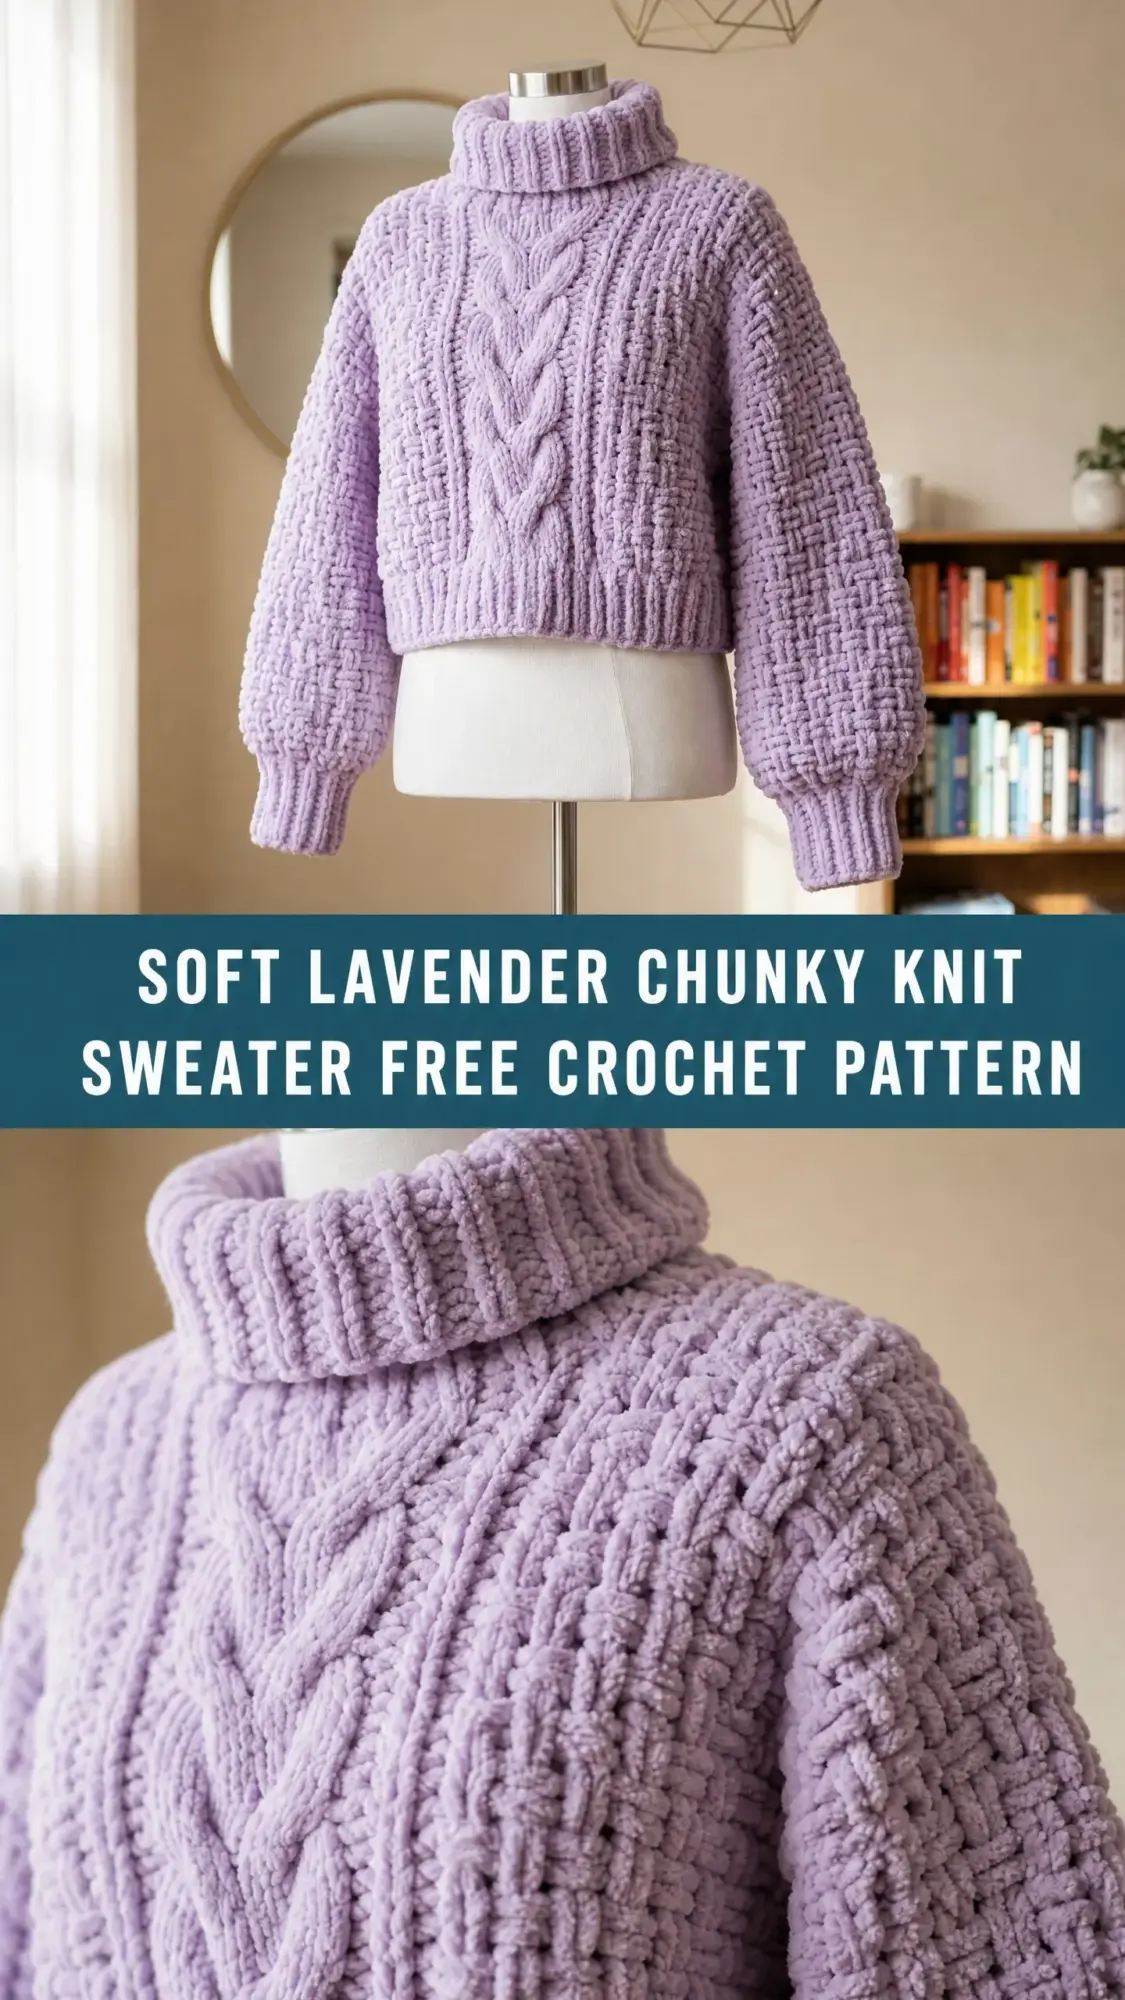
So I made this sweater. And honestly? I think I wear it at least three times a week now.
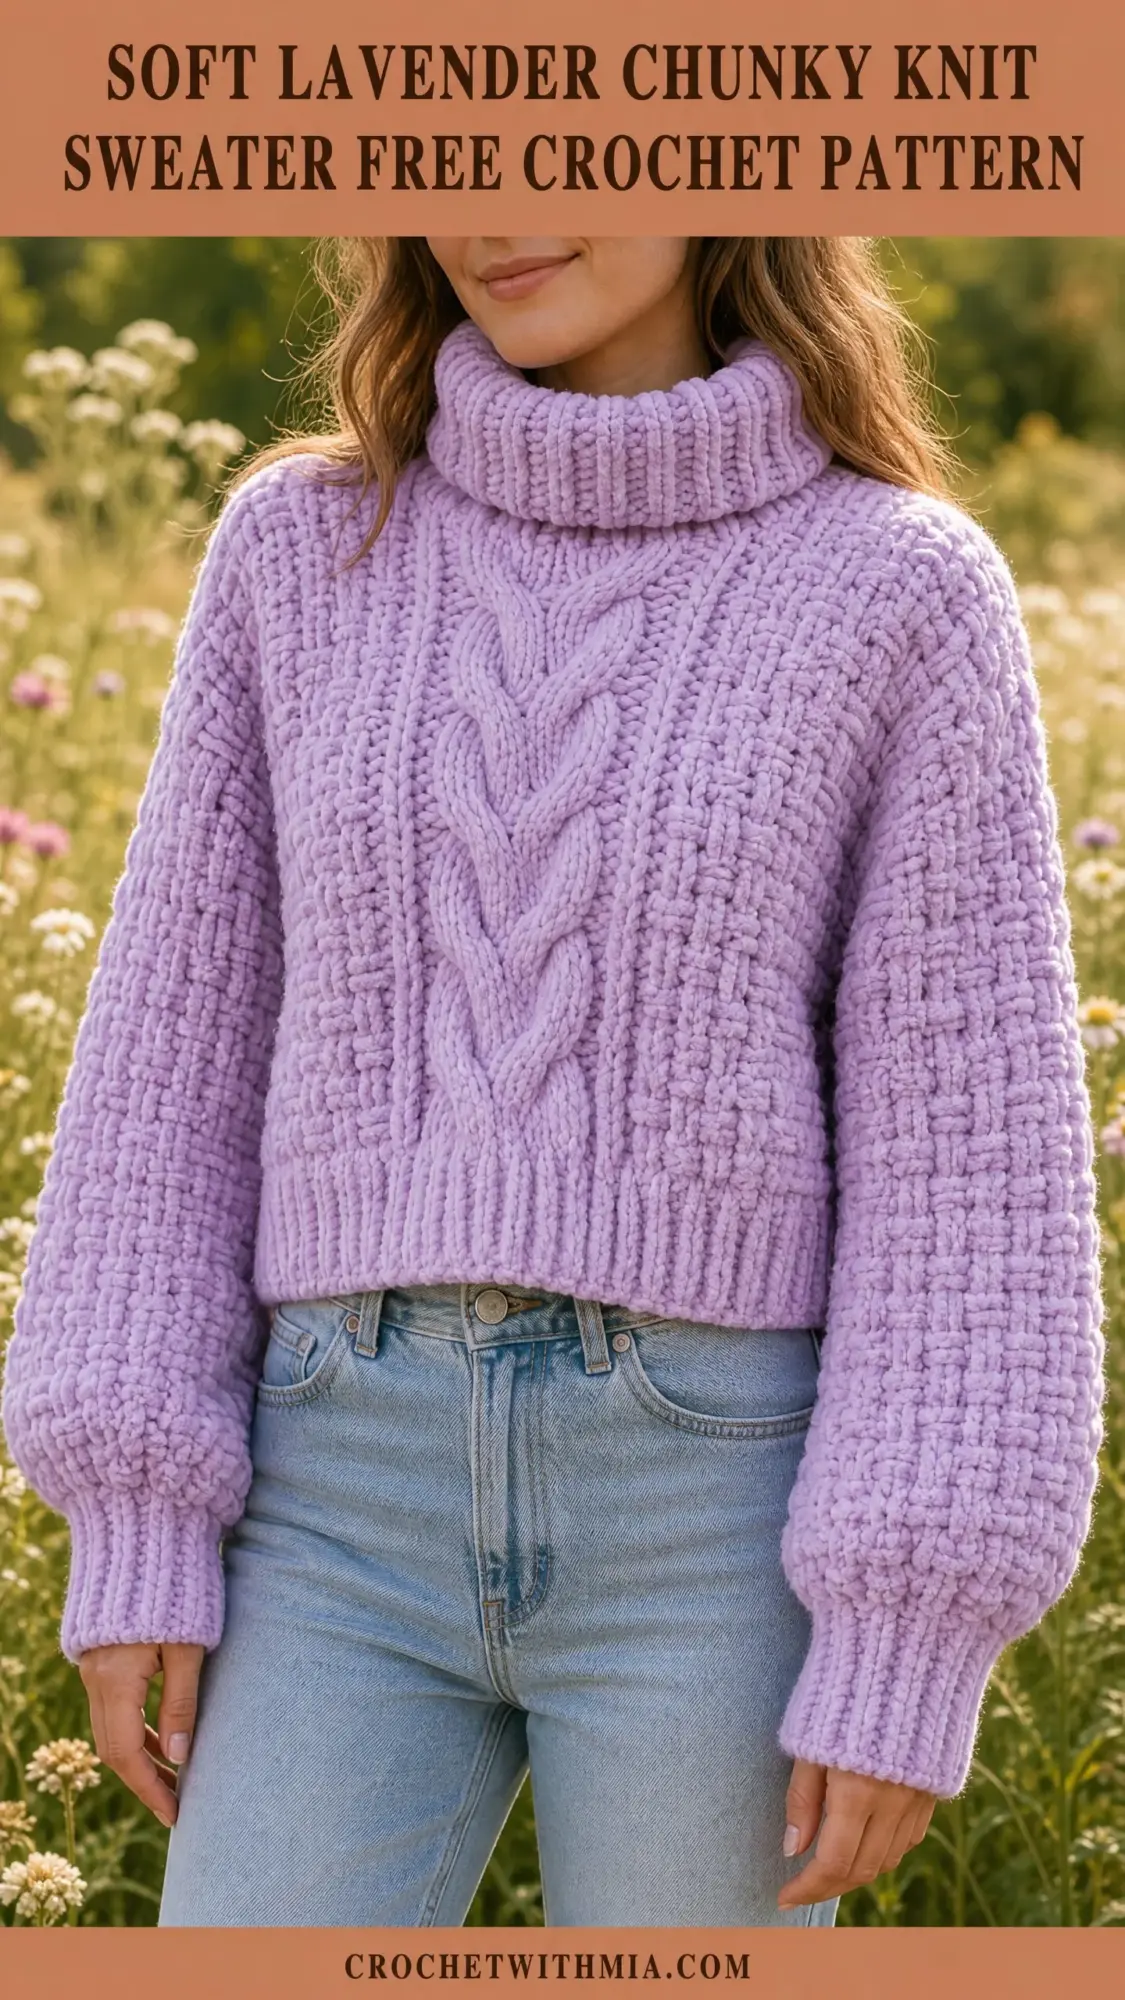
This soft lavender chunky turtleneck has become my go-to project recommendation for anyone ready to level up from scarves and blankets to wearable garments. The basket weave texture gives it that expensive boutique look, the mock cable panel down the front adds visual interest without any fussy cable needles, and the oversized cropped fit is ridiculously flattering. Plus, working with chunky chenille yarn means this project works up faster than you might expect.
Why You’ll Love This Crochet Sweater Pattern
This is not your grandmother’s crocheted sweater. The finished piece looks like something you would find in a trendy clothing store, with its boxy silhouette, voluminous sleeves, and thick folded turtleneck collar. The secret is in the stitch combination and the yarn choice.
The basket weave stitch creates that gorgeous woven texture you see covering the body and sleeves. It looks complicated but relies on just two techniques you might already know. The center front features a mock cable panel that mimics traditional knitted cables without any special tools. And the ribbed details at the hem, cuffs, and collar give the whole piece a polished, professional finish.
Because you are working with super bulky chenille yarn on a large hook, this sweater grows quickly under your hands. Most experienced crocheters complete it in 18 to 26 hours of working time.
Skill Level and What You Need to Know
I would call this pattern advanced beginner to intermediate. If you have completed at least two garment projects and feel comfortable with post stitches, you can absolutely tackle this sweater.
Here is what you should be familiar with before starting:
If post stitches are new to you, I recommend practicing on a small swatch first. Once you understand how to wrap your hook around the post of a stitch instead of working into the top loops, the rest clicks into place.
Materials and Tools
Yarn
You will need approximately 700 to 800 yards of chunky weight yarn (weight category 6 Super Bulky). Choose a chenille or chenille-blend yarn for that soft, velvety texture visible in the finished sweater.
Recommended yarn options:
Avoid fluffy mohair-type yarns. They will obscure the beautiful post stitch texture that makes this sweater special.
Hooks
Notions
Finished Measurements
This pattern is written for size Small/Medium with approximately 4 to 6 inches of positive ease for that relaxed, oversized fit.
Gauge (Do Not Skip This Step)
With your primary hook in basket weave stitch:
To check your gauge, chain 18. Work basket weave stitch for 14 rows. Block your swatch and let it dry completely. Measure the center 10 stitches and center 10 rows.
If your swatch is larger than stated, go down one hook size. If smaller, go up one hook size. Gauge is mandatory for garments. Trust me on this one. Taking 20 minutes to swatch will save you hours of frustration and yarn waste.
Abbreviations and Stitch Definitions
Before we dive into the pattern, let me define every abbreviation you will encounter:
Important note: Throughout this entire pattern, the turning chain of 2 does NOT count as a stitch. Always work your first dc into the first stitch at the base of the turning chain.
Special Stitches Explained
Basket Weave Stitch (BW)
This stitch creates the woven textured panels visible on the body sides, sleeves, and back. It alternates raised columns using front post and back post double crochets.
Set-up row (RS): Work dc across all stitches.
Row 1 (RS, BW): Ch 2, turn. (FPdc over next 2 sts, BPdc over next 2 sts) across to last st, dc in last st.
Row 2 (WS): Ch 2, turn. (BPdc over next 2 sts, FPdc over next 2 sts) across to last st, dc in last st.
Row 3 (RS): Ch 2, turn. (BPdc over next 2 sts, FPdc over next 2 sts) across to last st, dc in last st.
Row 4 (WS): Ch 2, turn. (FPdc over next 2 sts, BPdc over next 2 sts) across to last st, dc in last st.
Rows 1 through 4 form the pattern repeat. The weave switches direction every two rows, creating that characteristic woven grid texture.
Cable Panel (CP)
The center front features a mock cable column of 8 stitches. No cable needle is used. The effect comes from crossing FPdc stitches in a specific sequence.
Cable Panel Row A (RS): Skip next 2 sts, FPdc in 3rd and 4th sts, then FPdc back into the 2 skipped sts (working behind the first pair), FPdc in next 4 sts. (8 sts worked in CP)
Cable Panel Row B (WS): Work BPdc over each of the 8 CP sts.
Cable Panel Row C (RS): FPdc in each of the 8 CP sts (no crossing).
Cable Panel Row D (WS): BPdc in each of the 8 CP sts.
Rows A through D form the Cable Panel repeat. The cross occurs on Row A only, every 4th RS row.
Ribbing (RIB)
Row 1: Ch 2, turn. (FPdc in next st, BPdc in next st) across.
Repeat Row 1 for all ribbing sections.
Pattern Instructions
This sweater is worked flat in four separate pieces: Back, Front, Left Sleeve, and Right Sleeve. All pieces are seamed together at the end.
Back Panel
Hem Ribbing:
With smaller hook, ch 9.
Foundation Row: Sc in 2nd ch from hook and in each ch across. (8 sc)
Ribbing Row: Ch 1, turn. Sc in back loop only (BLO) of each sc across. (8 sc)
Repeat Ribbing Row until ribbing measures 21 inches / 53 cm. Do not fasten off. Rotate ribbing 90 degrees to work across the long edge.
Body Pickup Row (RS): With primary hook, ch 2. Work 52 dc evenly across the long edge of the ribbing. (52 dc)
Set-up Row 2 (WS): Ch 2, turn. Dc in each st across. (52 dc)
Begin Basket Weave:
Work BW Rows 1 through 4 across all 52 sts. Repeat BW Rows 1 through 4 until back body measures approximately 11 inches / 28 cm from the pickup row. End on a WS row.
Armhole Shaping:
Row 1 (RS): Sl st across first 5 sts, ch 2, work in BW pattern across to last 5 sts, leave last 5 sts unworked. (42 sts)
Row 2 (WS): Ch 2, turn. Dc2tog over first 2 sts, work in BW pattern to last 2 sts, dc2tog. (40 sts)
Row 3 (RS): Ch 2, turn. Dc2tog, work in BW pattern to last 2 sts, dc2tog. (38 sts)
Row 4 (WS): Ch 2, turn. Work even in BW pattern across. (38 sts)
Work even in BW pattern on 38 sts until armhole measures approximately 8 inches / 20 cm from the first armhole row. Fasten off.
Shoulder Shaping:
Rejoin yarn at right edge. Work across first 12 sts in pattern. Turn. Ch 2, turn. Work across 12 sts. Fasten off.
Skip center 14 sts (back neckline). Rejoin yarn at left shoulder section and work across final 12 sts. Fasten off.
Front Panel
Hem Ribbing:
Work identical to Back Hem Ribbing until ribbing measures 21 inches / 53 cm.
Body Pickup Row (RS): With primary hook, ch 2. Work 52 dc evenly across long edge. (52 dc)
Set-up Row 2 (WS): Ch 2, turn. Dc across. (52 dc)
The front is divided into three zones:
Place markers at st 22 and st 30 to mark Cable Panel boundaries.
Front Body Row 1 (RS, Cable Panel Row A):
Ch 2, turn. Work BW Row 1 pattern across first 22 sts. Work Cable Panel Row A across center 8 sts. Work BW Row 1 pattern across final 22 sts. (52 sts total)
Front Body Row 2 (WS, Cable Panel Row B):
Ch 2, turn. Work BW Row 2 across first 22 sts. BPdc across center 8 CP sts. Work BW Row 2 across final 22 sts. (52 sts)
Front Body Row 3 (RS, Cable Panel Row C):
Ch 2, turn. Work BW Row 3 across first 22 sts. FPdc across center 8 CP sts. Work BW Row 3 across final 22 sts. (52 sts)
Front Body Row 4 (WS, Cable Panel Row D):
Ch 2, turn. Work BW Row 4 across first 22 sts. BPdc across center 8 CP sts. Work BW Row 4 across final 22 sts. (52 sts)
Continue repeating Rows 1 through 4 until front body measures approximately 11 inches / 28 cm from pickup row. End on a WS row.
Armhole Shaping:
Work identical to Back armhole shaping, maintaining established pattern. End with 38 sts.
Work even on 38 sts in established pattern until armhole measures approximately 5.5 inches / 14 cm. End on WS row.
Front Neckline Shaping:
Row 1 (RS): Ch 2, turn. Work across first 14 sts in pattern. Turn, leaving remaining sts unworked. (14 sts)
Right Shoulder Continuation:
Row 2 (WS): Ch 2, turn. Dc2tog, work across. (13 sts)
Row 3 (RS): Ch 2, turn. Work across to last 2 sts, dc2tog. (12 sts)
Row 4 (WS): Ch 2, turn. Work even. (12 sts)
Work even on 12 sts until armhole measures 8 inches / 20 cm. Fasten off.
Skip center 10 sts. Rejoin yarn at left shoulder (last 14 sts).
Left Shoulder:
Row 1 (RS): Ch 2. Work across 14 sts. (14 sts)
Row 2 (WS): Ch 2, turn. Work across to last 2 sts, dc2tog. (13 sts)
Row 3 (RS): Ch 2, turn. Dc2tog, work across. (12 sts)
Row 4 (WS): Ch 2, turn. Work even. (12 sts)
Work even until armhole matches back armhole depth. Fasten off.
Sleeves (Make 2)
Cuff Ribbing:
With smaller hook, ch 9.
Foundation Row: Sc in 2nd ch from hook and in each ch across. (8 sc)
Ribbing Row: Ch 1, turn. Sc in BLO of each sc across. (8 sc)
Repeat until cuff ribbing measures 8 inches / 20 cm. Rotate 90 degrees.
Cuff Pickup Row (RS): With primary hook, ch 2. Work 20 dc evenly across long edge of cuff. (20 dc)
Set-up Row 2 (WS): Ch 2, turn. Dc across. (20 dc)
Sleeve Increase Section:
Begin BW pattern. Work 2 rows even. (20 sts)
Increase Row (RS): Ch 2, turn. 2 dc in first st, work BW pattern to last st, 2 dc in last st.
Work increase rows following this schedule, with 3 even rows between each:
Continue even on 42 sts until sleeve measures approximately 18 inches / 46 cm from cuff pickup row. End on WS row.
Sleeve Cap Shaping:
Row 1 (RS): Sl st across first 5 sts, ch 2, work in BW pattern to last 5 sts, leave unworked. (32 sts)
Rows 2 through 9: Ch 2, turn. Dc2tog, work in pattern to last 2 sts, dc2tog. (Decrease by 2 sts each row)
After Row 9, you should have 16 sts remaining. Fasten off.
Make second sleeve identically.
Assembly
Step 1: Seam both shoulder seams (12 sts each side) with RS together using mattress stitch.
Step 2: Pin each sleeve cap into the armhole opening, matching underarm bind-off points. Sew sleeve into armhole using mattress stitch.
Step 3: Sew side seam from hem to underarm, then continue down the sleeve from underarm to cuff in one continuous seam. Repeat on other side.
Turtleneck Collar
Join yarn at right shoulder seam on RS of neckline. Pick up and work dc evenly around entire neckline opening. (approximately 40 dc total)
Round 1: Sl st to first dc to join. Ch 2, (FPdc in next st, BPdc in next st) around. Sl st to first FPdc to join. (40 sts)
Work in ribbing for approximately 25 rounds until collar measures 10 inches / 25 cm unfolded. Fasten off and weave in ends.
The collar folds in half downward to produce the finished 5-inch turtleneck.
Finishing and Care
Block all pieces before seaming for best results. Soak in cool water with wool wash for 15 to 20 minutes. Press out water gently without wringing. Lay flat on blocking mats and pin to measurements. Allow to dry completely.
For care, machine wash cold on gentle cycle in a mesh bag. Tumble dry on low or lay flat to dry. Do not hang wet, as the weight will stretch the fabric.
Size Adjustments
To make size Large/XL (approximately 46 inch bust), add 8 stitches to both back and front pickup rows (60 sts each). Increase cuff pickup to 22 sts and work sleeve to 46 sts at underarm. The cable panel stays at 8 sts, and each BW zone becomes 26 sts.
To lengthen the body, add more even rows before armhole shaping. To lengthen sleeves, add even rows before cap shaping.
I hope this crochet sweater pattern becomes a new favorite in your wardrobe like it has in mine. If you make one, I would absolutely love to see it. Save this pattern to your Pinterest boards so you can find it when you are ready to start, and please drop a comment below to share your finished sweater or ask any questions along the way. Happy crocheting!