
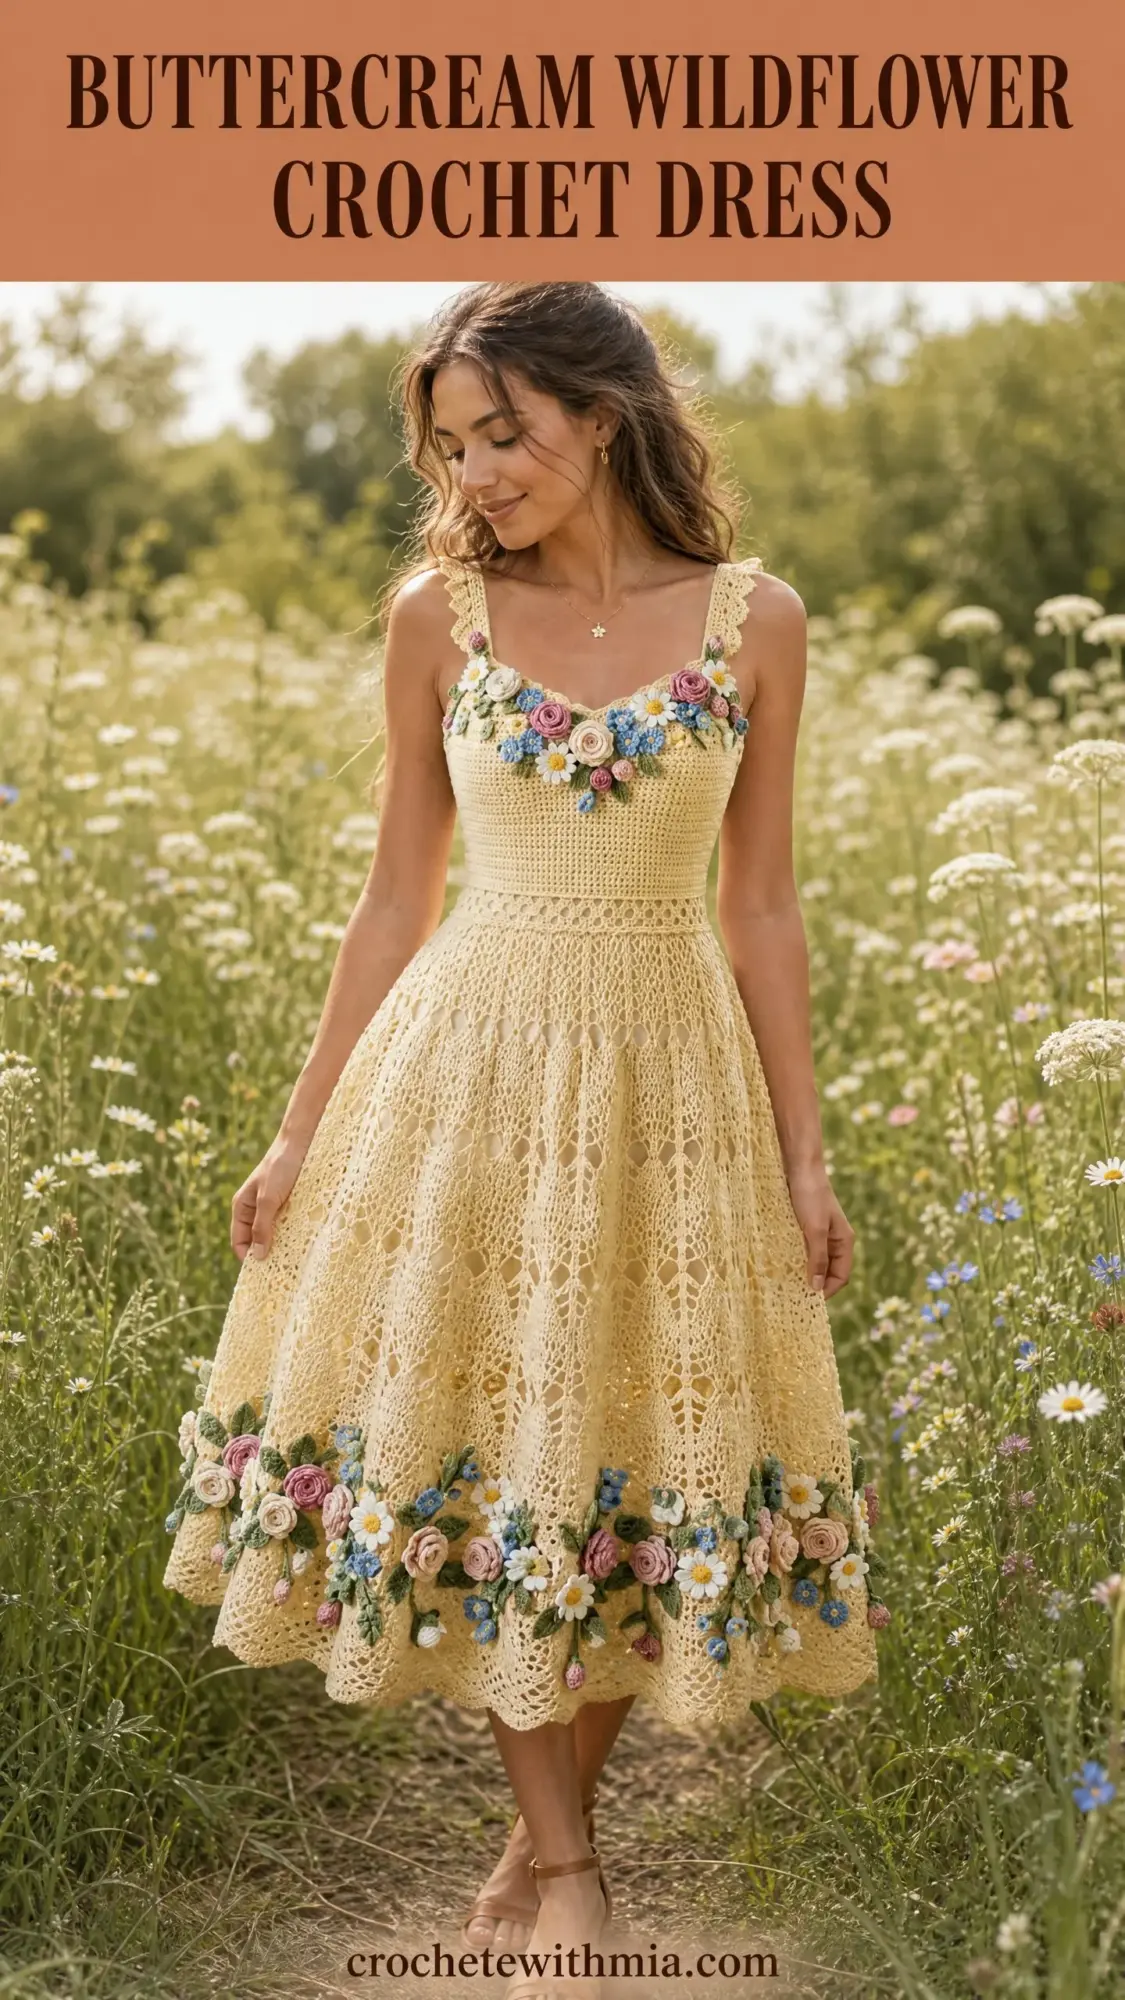
This is a butter yellow cotton sundress with a fitted bodice, lace diamond skirt, and three dimensional flower appliques. It uses single crochet for structure and an open lace repeat for movement. The skill level is advanced.
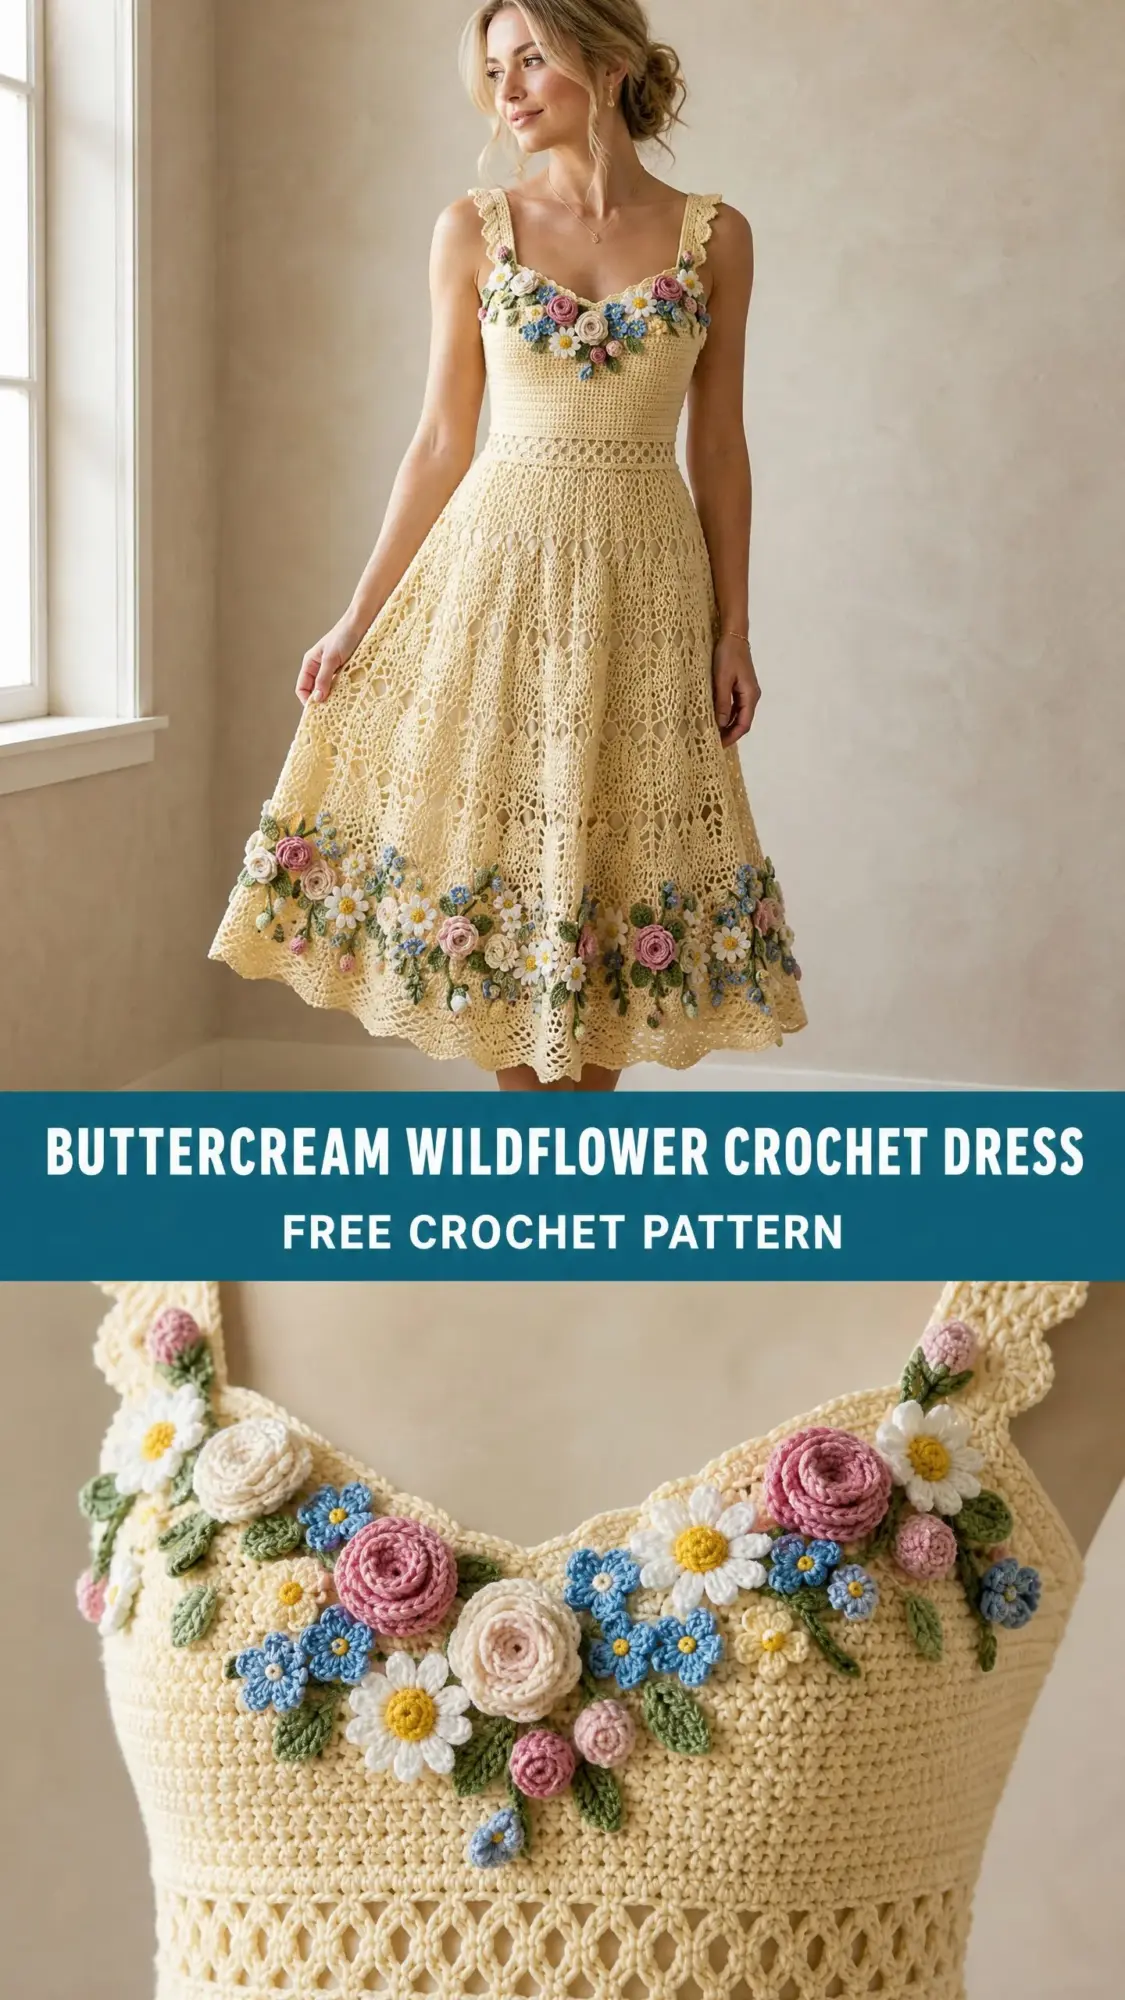
The dress works from the top down in joined rounds. You will create a sweetheart neckline, shape the waist with decreases, then transition into a flared A-line skirt. Roses, daisies, forget-me-nots, and leaves are made separately and sewn along the neckline and hem.
If you have completed at least one fitted garment before, you have the skills for this project. Expect 80 to 120 hours for the main dress, plus another 20 to 30 hours for all those beautiful flowers.
Why This Crochet Dress Pattern Stands Out
This is not your typical summer crochet project. The Buttercream Wildflower Crochet Dress combines precise garment construction with artistic floral embellishment. The result looks like something from a vintage garden party.
The bodice uses tight single crochet (sc) stitches for a smooth, supportive fit. The skirt opens up into a gorgeous diamond lace pattern that catches light and moves beautifully when you walk. And those flowers? Each one is a tiny sculpture you create separately and arrange however feels right to you.
I love that this design gives you creative control. You choose exactly where each rose sits. You decide how dense the flower border becomes. The pattern provides quantities and placement guidance, but the final arrangement is yours.
Finished Measurements
The pattern includes four sizes. All measurements are given as Small (Medium, Large, Extra Large).
Bust: 32 (36, 40, 44) inches / 81 (91, 102, 112) cm
Waist: 26 (30, 34, 38) inches / 66 (76, 86, 97) cm
Hip: 34 (38, 42, 46) inches / 86 (97, 107, 117) cm
Total Length (shoulder to hem): 42 (42.5, 43, 43.5) inches / 107 (108, 109, 110) cm
Bodice Length (underarm to waist): 6 (6, 6.5, 6.5) inches / 15 (15, 16.5, 16.5) cm
Skirt Length (waist to hem): 30 (30.5, 31, 31.5) inches / 76 (77, 79, 80) cm
Materials Needed
Yarn
Main Color (MC): Butter yellow cotton yarn, DK weight (CYCA 3), approximately 1,800 (2,000, 2,200, 2,400) yards / 1,646 (1,829, 2,012, 2,195) m
Flower Colors (all DK weight cotton):
Yarn Suggestions: Paintbox Yarns Simply DK in Buttercup makes an excellent main color. Scheepjes Catona works beautifully for the flowers because of its slight sheen and huge color range. Lion Brand 24/7 Cotton DK is another widely available option.
Avoid fuzzy or textured yarns. You need smooth cotton that shows off the lace pattern and dimensional flower details.
Hooks
Notions
Gauge
Getting gauge right is critical for a fitted garment like this. Please swatch before starting.
Bodice (sc, US D-3 hook): 22 sc x 26 rows = 4 inches / 10 cm, blocked
Skirt Lace Panel (US E-4 hook): 1 full lace repeat (14 sts wide) = approximately 2.5 inches / 6.35 cm; 4 rows of lace pattern = approximately 1 inch / 2.54 cm, blocked
Swatch in the round if possible. Cotton can grow significantly after washing and blocking, so measure your swatch after it dries completely.
Abbreviations
Here are all the abbreviations used in this crochet dress pattern. I am defining each one so you can reference this section anytime you get confused.
Special Stitches
These techniques appear throughout the pattern. Take time to practice them before starting.
Picot: Ch 3, sl st into first ch of ch-3. This creates a small decorative loop used on the straps and hem.
Shell: Work 5 dc into the same stitch or space. This is the foundation of the skirt lace pattern.
V-stitch (V-st): Work (dc, ch 2, dc) into the same stitch or space.
Beginning Shell (beg-shell): Ch 3, work 4 dc into same stitch or space to complete a 5-dc shell.
Pattern Instructions
Part 1: Front Bodice
The front bodice is worked flat in rows of sc to shape the sweetheart neckline.
Front Neckline Shaping (Right Cup)
With MC and D-3 hook, ch 21 (23, 26, 28).
Row 1 (RS): Sc in 2nd ch from hook and in each ch across. [20 (22, 25, 27) sc]
Row 2 (WS): Ch 1, turn. Sc across. [20 (22, 25, 27) sc]
Row 3: Ch 1, turn. Inc in first st, sc to last st, inc in last st. [22 (24, 27, 29) sc]
Row 4: Ch 1, turn. Sc across. [22 (24, 27, 29) sc]
Row 5: Ch 1, turn. Inc in first st, sc to last st, inc in last st. [24 (26, 29, 31) sc]
Row 6: Ch 1, turn. Sc across. [24 (26, 29, 31) sc]
Row 7: Ch 1, turn. Inc in first st, sc to last st, inc in last st. [26 (28, 31, 33) sc]
Row 8: Ch 1, turn. Sc across. [26 (28, 31, 33) sc]
Fasten off. Set aside right cup.
Front Neckline Shaping (Left Cup)
Work Rows 1 through 8 exactly as right cup. Do not fasten off.
Join Cups:
Row 9: Ch 1, turn. Sc across left cup [26 (28, 31, 33) sc], ch 4 for center V bridge, sc across right cup beginning at its first st. [56 (60, 66, 70) sc + 4 ch = 60 (64, 70, 74) working sts]
Row 10: Ch 1, turn. Sc across all sts and ch sts. [60 (64, 70, 74) sc]
Rows 11-12: Ch 1, turn. Sc across. [60 (64, 70, 74) sc]
Part 2: Back Bodice
With MC and D-3 hook, ch 61 (65, 71, 75).
Row 1 (RS): Sc in 2nd ch from hook and in each ch across. [60 (64, 70, 74) sc]
Rows 2 through 12: Ch 1, turn. Sc across each row. [60 (64, 70, 74) sc]
Part 3: Joining Bodice in the Round
With RS of front and back bodice both facing outward, place pieces together. The top edges become the underarms. Each piece should be 12 rows tall and 60 (64, 70, 74) sts wide.
Join MC to beginning of front bodice Row 12 with sl st. Do not turn.
Round 1 (join round): Sc across front [60 (64, 70, 74) sc], sc across back [60 (64, 70, 74) sc], join with sl st to first sc. [120 (128, 140, 148) sc]
Place a stitch marker at each side seam (at positions 60 and 120).
Part 4: Bodice Body
Rounds 2 through 6: Sc in each st around, join with sl st. [120 (128, 140, 148) sc each round]
Part 5: Waist Shaping Decrease
Round 7: [Sc to 2 sts before side marker, sc2tog, sc2tog after marker] twice. [116 (124, 136, 144) sc]
Round 8: Sc around. [116 (124, 136, 144) sc]
Round 9: [Sc to 2 sts before side marker, sc2tog, sc2tog after marker] twice. [112 (120, 132, 140) sc]
Round 10: Sc around. [112 (120, 132, 140) sc]
Round 11: [Sc to 2 sts before side marker, sc2tog, sc2tog after marker] twice. [108 (116, 128, 136) sc]
Round 12: Sc around. [108 (116, 128, 136) sc]
Round 13: [Sc to 2 sts before side marker, sc2tog, sc2tog after marker] twice. [104 (112, 124, 132) sc]
Round 14: Sc around. [104 (112, 124, 132) sc]
Part 6: Waist Band
Rounds 15 through 18: Working in BLO, sc in each st around, join with sl st. [104 (112, 124, 132) sc each round]
The BLO creates a subtle ridge that defines the waistband visually.
Part 7: Skirt Transition Round
Before beginning the lace, adjust the stitch count so it is divisible by 14 (the lace repeat width).
Transition Round:
Part 8: Skirt Lace Pattern
Switch to E-4 hook.
Skirt Lace Round 1:
Beg-shell in first st, [sk 2, sc in next, sk 2, shell in next, sk 2, sc in next, sk 2] rep around to complete 8 (8, 9, 10) repeats. Join with sl st.
Skirt Lace Round 2:
Ch 4 (counts as dc + ch 1). Dc in first ch-sp between beg-shell and sc. Ch 1. [Dc in sc, ch 3, sc in center (3rd) dc of shell, ch 3, dc in sc, ch 1, dc in sp between shells, ch 1] rep around. Join with sl st to 3rd ch of beg ch-4.
Skirt Lace Round 3:
Sl st to ch-1 sp, ch 3, dc 4 in same ch-1 sp. [Sc in ch-3 sp, ch 3, sc in next ch-3 sp, shell in ch-1 sp between dc clusters] rep around. Join with sl st.
Skirt Lace Round 4:
Ch 1. Sc in center dc of first shell. [Ch 3, dc in sc, ch 1, dc in next ch-3 sp, ch 1, dc in sc, ch 3, sc in center dc of shell] rep around. Join with sl st.
Skirt Lace Round 5:
Ch 1, sc in first st. [Ch 3, shell in ch-1 sp, ch 3, sc in next sc] rep around. Join with sl st.
Rounds 6-8: Repeat Rounds 2, 3, and 4.
Rounds 1 through 8 form one complete diamond lace tier.
Skirt Increase Rounds:
After every 2 complete lace tiers (every 16 rounds), work an increase round using D-3 hook:
Increase Round 1 (after 16 lace rounds):
Increase Round 2 (after 32 lace rounds):
Increase Round 3 (after 48 lace rounds):
Continue working 3 complete lace tiers with increase rounds between them.
Part 9: Hem Border
Switch to D-3 hook.
Hem Transition Round: Sc in each st around. [154 (154, 168, 182) sc]
Hem Scallop Round 1: Ch 1. [Sc in next 2 sts, sk 2, shell (5 dc) in next st, sk 2] rep around. Join with sl st. [22 (22, 24, 26) shells]
Hem Scallop Round 2: Sl st to center dc of first shell. Ch 1. Sc in same st. [Ch 3, sc in center dc of next shell] rep around. Join with sl st.
Hem Scallop Round 3: Sl st into first ch-3 sp. Ch 1. [Sc, hdc, dc, picot, dc, hdc, sc] in each ch-3 sp around. Join with sl st. Fasten off.
Part 10: Straps (Make 2)
With MC and D-3 hook, ch 121 (121, 125, 125).
Row 1: Sc in 2nd ch from hook and each ch across. [120 (120, 124, 124) sc]
Row 2: Ch 1, turn. Sc across. [120 (120, 124, 124) sc]
Picot Edging (both long edges): Join MC at corner. [Sc in next st, sk 1, picot, sk 1] rep across. Fasten off.
Sew straps to inside of bodice at front sweetheart corners and back bodice top corners. Straps should span approximately 9 (9, 9.5, 9.5) inches over the shoulder.
Part 11: Flower Appliques
Make all flowers separately using these instructions.
Small Rose:
Row 1: With flower color, ch 31. Sc in 2nd ch from hook and each ch across. [30 sc]
Row 2: Ch 1, turn. [Inc] across. [60 sc]
Row 3: Ch 3 (counts as dc), turn. Dc in same st. [Sk 1 st, (dc, ch 1, dc) in next st] rep across.
Fasten off leaving long tail. Roll strip into spiral rose shape with Row 3 facing out. Sew base together as you roll.
Large Rose (for hem):
Row 1: Ch 51. Sc in 2nd ch from hook and each ch across. [50 sc]
Row 2: Ch 1, turn. [Inc] across. [100 sc]
Row 3: Ch 3, turn. Dc in same st. [Sk 1, (dc, ch 1, dc) in next] rep across.
Roll and seam same as small rose.
Daisy:
With Color C: MR, ch 1, work 6 sc into ring, pull ring closed, join with sl st. [6 sc]
Round 2: For each of 6 petals: sl st into next sc, ch 8, tr into 4th ch from hook, dc in next ch, hdc in next ch, sc in next ch, sl st into last ch, sl st into base sc. Rep for each st. Fasten off. Sew yellow French knot or bobble to center.
Forget-me-not Cluster:
With Color D: MR, ch 2, work 5 hdc into ring, pull ring closed, join with sl st. [5 hdc] Fasten off. Work 3 to 5 together in clusters.
Leaf:
With Color E: Ch 10. Sl st in 2nd ch from hook, sc in next, hdc in next, dc in next 3, hdc in next, sc in next, sl st in last, ch 1. Working along opposite side: sc in next, hdc in next, dc in next 3, hdc in next, sc in next, sl st in last. Join with sl st. Fasten off.
Flower Quantities:
Neckline: 5 small roses, 4 daisies, 3 forget-me-not clusters, 8 leaves
Hem Border (Size S): 10 large roses, 14 small roses, 18 daisies, 12 forget-me-not clusters, 20 leaves
Hem Border (Size M): 11 large roses, 16 small roses, 20 daisies, 14 clusters, 22 leaves
Hem Border (Size L): 12 large roses, 18 small roses, 22 daisies, 16 clusters, 24 leaves
Hem Border (Size XL): 14 large roses, 20 small roses, 24 daisies, 18 clusters, 26 leaves
Pin all flowers before sewing. Arrange roses first, fill with daisies and forget-me-nots, tuck leaves underneath. Sew through bases only using matching thread.
Part 12: Back Seam and Finishing
Seam the back bodice closed using slip stitch seam or mattress stitch through the edge stitches. This creates a center back seam from neckline to waist.
Block the entire dress on a flat surface or dress form. Pin lace sections open to show the diamond pattern. Allow to dry completely before wearing.
This dress is designed to be worn over a slip or lining in a matching color.
Tips for Success
Check your gauge obsessively. This is a fitted garment. A small gauge difference multiplied across hundreds of stitches creates major sizing problems.
Block your swatch after washing. Cotton grows. You need to know how much yours stretches before committing to a size.
Make all flowers before attaching any. You want to see your full collection laid out so you can create a balanced arrangement.
Take photos during flower placement. Before sewing anything, snap a picture. Step back. Look at it on your phone screen. This helps you spot gaps or awkward clustering.
Use the recommended lining. The lace skirt is open and airy. A slip underneath makes the dress appropriate for more occasions and prevents any sheerness concerns.
Final Thoughts on This Wildflower Crochet Dress Pattern
This crochet dress pattern is a true labor of love. The hours add up, but so does the satisfaction of watching something this beautiful take shape in your hands. Every rose you roll, every daisy petal you shape, every round of diamond lace brings you closer to a one of a kind wearable art piece.
The butter yellow base provides the perfect canvas for those soft pastel flowers. When you finally slip this dress over a simple lining and see it on, the weight of all those hours transforms into pure joy. This is the kind of project you remember making.
Thank you so much for choosing this pattern. I hope the construction process brings you as much happiness as wearing the finished dress will. If you make one, I would absolutely love to see it. Tag me on Instagram or share in my Facebook group. Seeing your creativity is the best part of what I do.
Save this Buttercream Wildflower Crochet Dress pattern to your Pinterest boards so you can find it when you are ready to start. And please drop a comment below if you make one. I want to hear how it goes and cheer you on!