
Looking for a unique handmade gift that will genuinely wow someone? This butterfly-shaped crossbody bag delivers serious impact. The gradient blue wings shift from deep royal at the edges through sky blue to soft white at the center, creating an eye-catching ombre effect that looks far more complicated than it actually is.
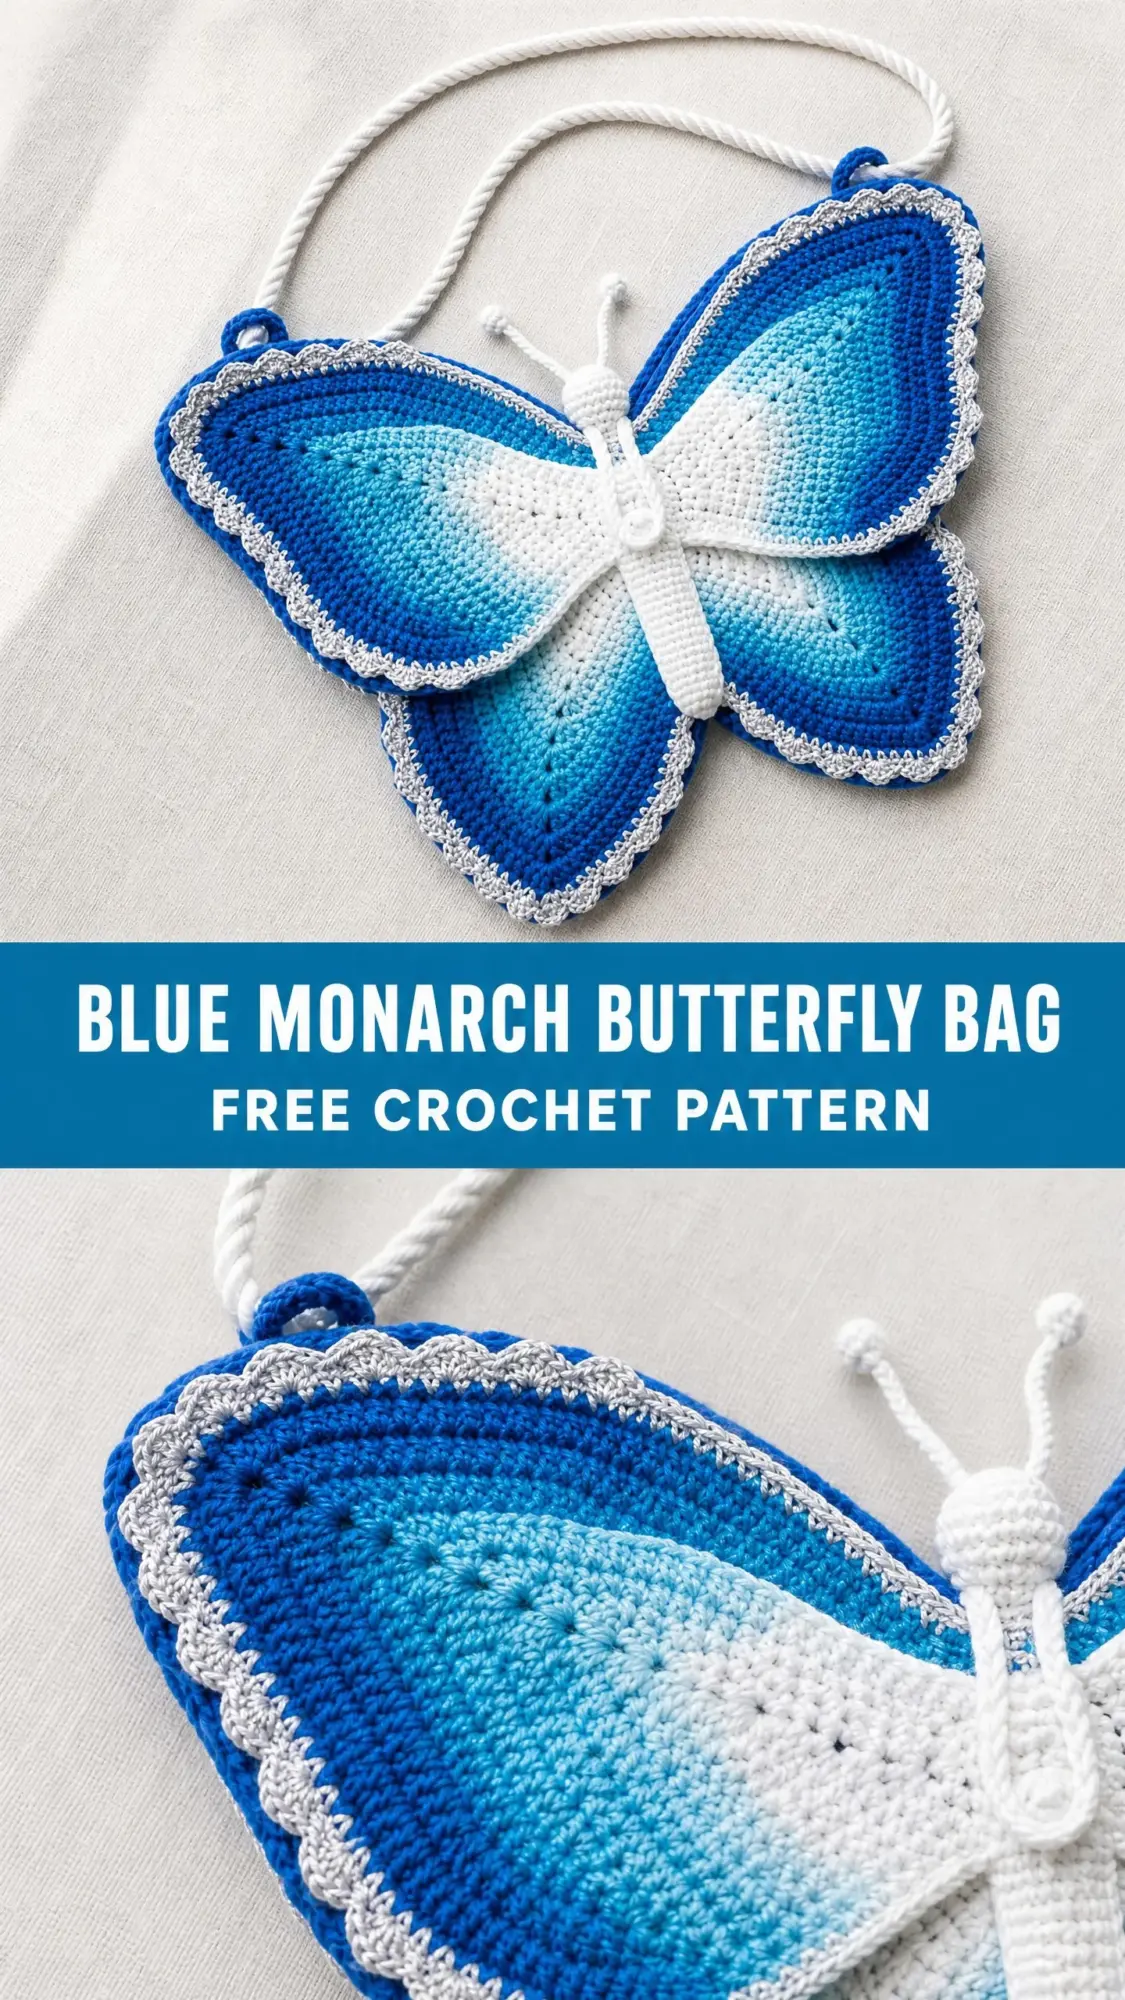
This pattern uses mostly single crochet worked in continuous rounds, so if you can crochet a basic oval and follow stitch counts carefully, you can absolutely make this bag. The construction breaks down into manageable pieces: two flat wing panels, a stuffed body tube, tiny antennae, and a simple strap attachment. Each component is straightforward on its own.
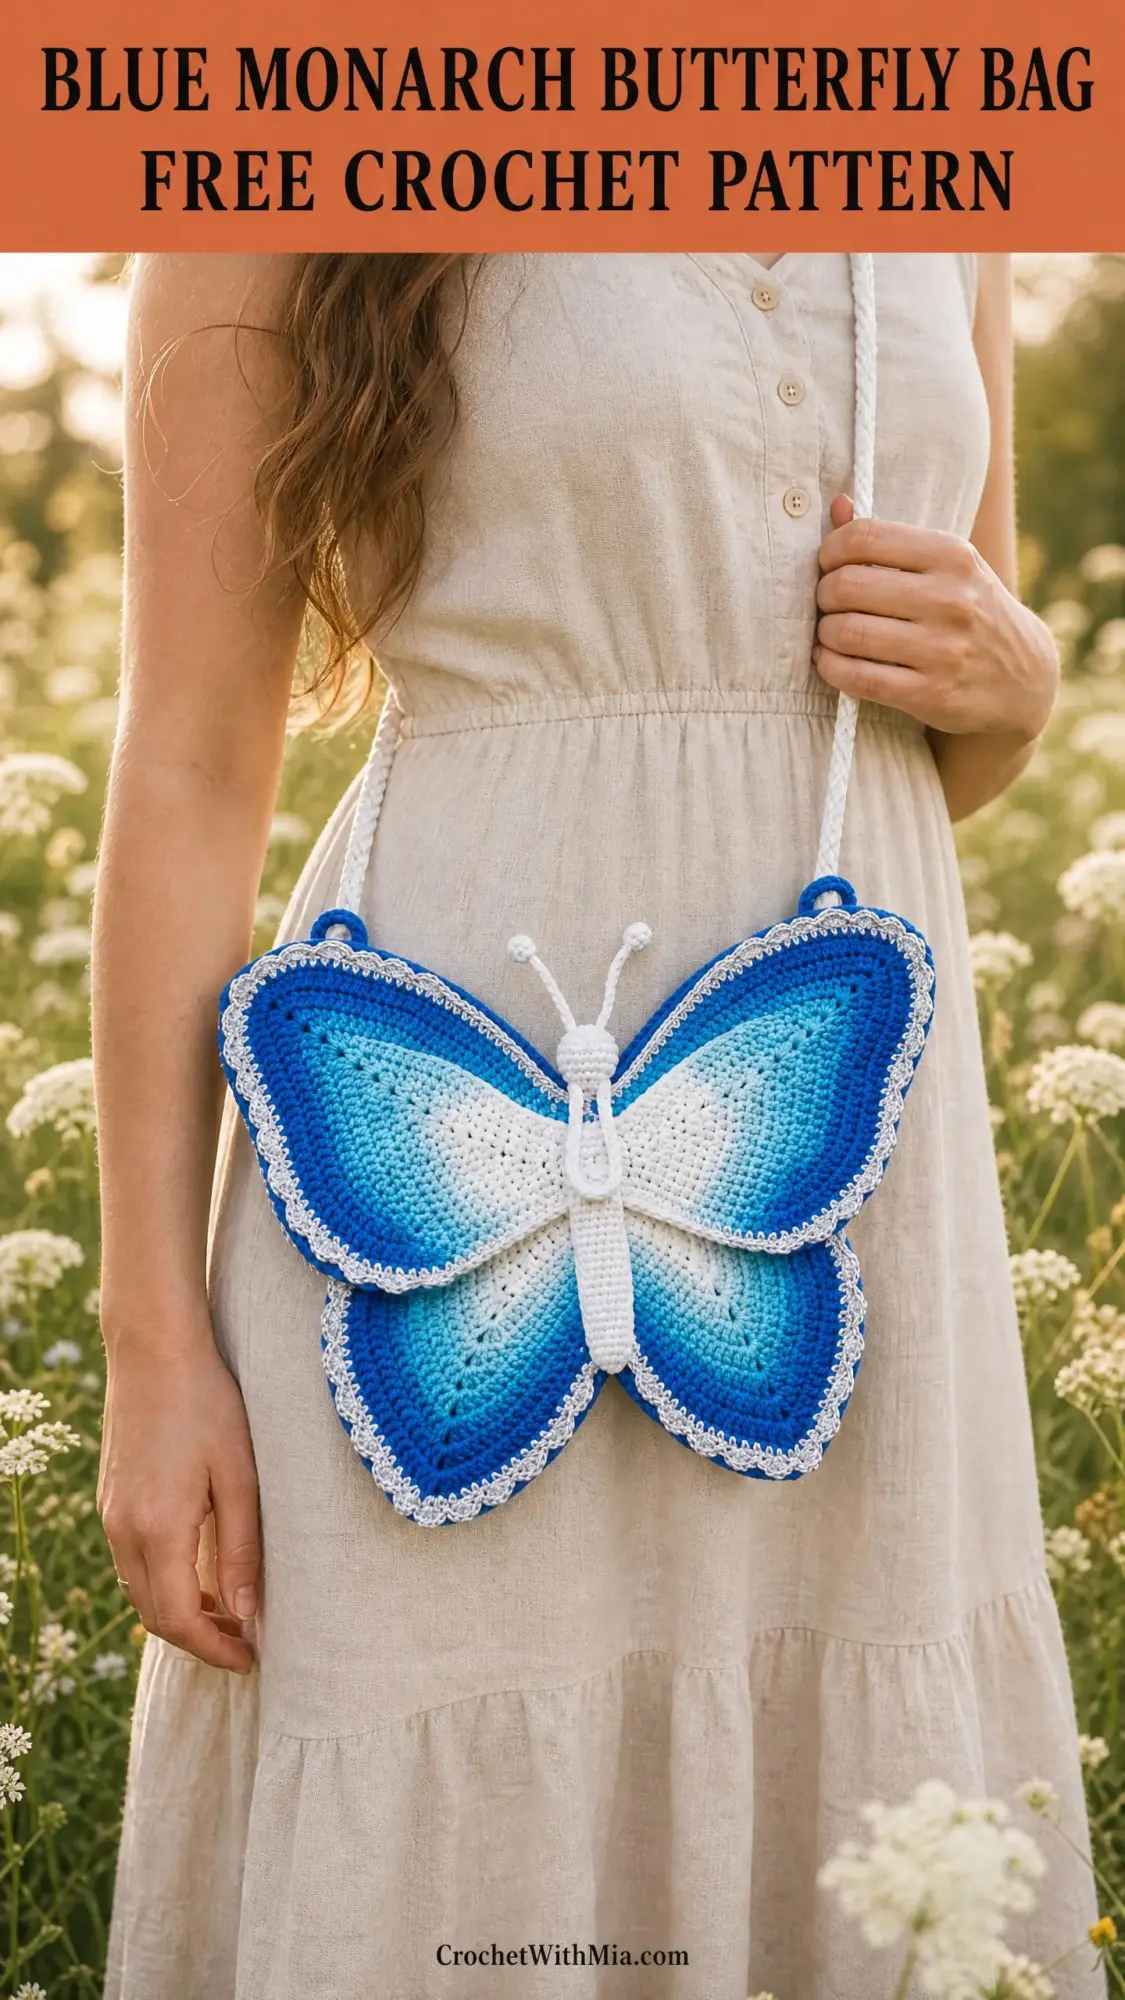
The finished bag measures approximately 13 inches wide by 10 inches tall, making it perfect for carrying essentials like a phone, wallet, keys, and lipstick. It works up as a fantastic birthday gift, a special treat for yourself, or even a memorable accessory for a nature-loving teen. Let me walk you through everything you need to bring this beautiful butterfly to life.
Why You Will Love This Butterfly Bag Crochet Pattern
This is not your average bag project. The butterfly silhouette comes from strategic shaping with increases at four wing tip points and decreases at two notch points between the upper and lower wings. The result is a structured, recognizable shape that holds its form beautifully without any internal stiffening.
The ombre color gradient creates visual depth and mimics the natural coloring of a blue morpho butterfly. You will work through four shades of blue and white, changing colors at specific rounds to achieve that smooth transition. The scalloped silver-white border adds a delicate finishing touch around all the wing edges.
Best of all, both the front and back panels are worked identically, so once you master the first wing panel, the second one goes much faster.
Skill Level
This pattern is rated intermediate. You should be comfortable with working in continuous rounds without joining, reading stitch counts carefully, making increases and decreases in the same round, and seaming pieces together. If you have made amigurumi or shaped flat motifs before, you will handle this well.
Complete beginners may find the multi-panel construction and gradient color changes challenging. However, I have broken down every step clearly, so an ambitious beginner who takes their time can definitely succeed.
Time Estimate
Plan for 14 to 20 hours total across all components. The wing panels account for most of the work at roughly 10 to 14 hours. The body tube, antennae, border, and finishing take another 4 to 6 hours. This is a satisfying weekend project if you have dedicated crochet time, or a lovely week-long make if you work in shorter sessions.
Finished Measurements
The completed butterfly bag measures approximately 13 inches wide by 10 inches tall (33 cm by 25.5 cm), not including the strap. The butterfly body center runs about 1.5 inches wide by 7 inches tall (4 cm by 18 cm). The strap provides an approximately 48 inch (122 cm) total drop, which is adjustable based on your preference.
Materials Needed for This Crochet Tutorial
Yarn
You will need five colors of worsted weight yarn:
Yarn Suggestions
Lion Brand Vanna’s Choice works beautifully for this project. Try Linen for the white, Colonial Blue for the darkest blue, Dusty Blue for the medium shade, and Baby Blue for the lightest blue. This affordable acrylic holds stitch definition well and is machine washable.
Drops Paris (100% cotton, worsted weight) is another excellent choice. Cotton creates a firmer fabric that holds the butterfly shape without any additional structure. The finished bag has beautiful stitch definition.
For Color E, look for yarn with a slight metallic sheen. You can also hold white DK weight yarn together with a strand of silver thread for that subtle sparkle.
Hooks
Notions
Gauge
18 single crochet by 20 rows = 4 inches by 4 inches (10 cm by 10 cm) worked in continuous rounds using the G-6 (4.0 mm) hook, blocked.
Gauge matters here. If your stitches are looser, your bag will be larger and the gradient color placement will shift. Tighter gauge means a smaller bag. Make a quick swatch and adjust your hook size before starting the wings.
Abbreviations and Stitch Definitions
Here are all the abbreviations used in this step by step crochet pattern:
Special Stitches
Invisible Decrease (inv-dec)
This creates a neater decrease line than a standard sc2tog. Insert hook through the front loop only of the next stitch, then through the front loop only of the following stitch. Yarn over and pull through both front loops (2 loops on hook). Yarn over and pull through remaining 2 loops. This counts as 1 stitch.
Bobble (for antennae tips)
Yarn over, insert hook in indicated stitch, yarn over, pull up a loop (3 loops on hook). Yarn over, insert hook in same stitch, yarn over, pull up a loop (5 loops on hook). Yarn over, insert hook in same stitch, yarn over, pull up a loop (7 loops on hook). Yarn over, pull through all 7 loops on hook. Chain 1 to close. This creates one bobble.
Picot Scallop Border Stitch
Worked across existing edge stitches: sl st in next st, ch 3, sl st in first ch of ch-3 (picot made), sl st in same st as first sl st, sl st in next st. This unit uses 2 edge stitches.
Rope Attachment Ring
Using Color E and the G-6 hook, make a magic circle. Work 8 sc into the ring. Pull tail to close. Sl st into first sc. Fasten off leaving an 8-inch tail for sewing. Make 2.
Pattern Notes Before You Begin
1. The wings are worked in continuous rounds with no joining slip stitch at the end of rounds and no turning. Use a stitch marker to mark the first stitch of each round and move it up as you work.
2. Each wing panel (front and back) is crocheted as one connected flat butterfly silhouette. You will make two identical panels.
3. For color changes, switch to the new color on the last yarn-over of the final stitch before the new color begins. Cut and rejoin colors rather than carrying them to keep tension even.
4. The gradient color sequence for both panels is:
5. The bag opening is at the top center between the upper wings, behind the butterfly body.
How to Crochet the Front Wing Panel
The front wing panel is worked in one piece as a flat butterfly silhouette, starting at the center body line and working outward. It includes four wing lobes connected at the center.
Foundation
Using Color D and G-6 hook, chain 14.
Round 1: Starting in the 2nd chain from hook, sc 12 across the chain. Work 3 sc in the last chain (bottom of oval). Working back along the opposite side of the foundation chain, sc 11. Work 2 sc in the first chain (top of oval). Sl st to first sc to join this one time only. Place marker in first stitch of next round. (28 sc)
Round 2: Inc in first st, sc 11, inc in next 3 sts, sc 11, inc in last 2 sts. (34 sc)
Round 3: Sc 1, inc, sc 11, (inc, sc 1) 3 times, sc 11, inc, sc 1, inc. (40 sc)
Round 4: Sc 2, inc, sc 11, (sc 1, inc, sc 1) 3 times, sc 11, (inc, sc 2) twice, work last inc in same st as first of this round in marker. Move marker. (47 sc)
Marking Your Wing Points
After Round 4, you have a flat oval. Now identify and mark these positions:
Wing Shaping Rounds
Each of the following rounds maintains 4 increase points (at wing tips) and 2 decrease points (at notches).
Round 5: Using Color D, sc around, working inc at each of the 4 wing tip positions and inv-dec at each of the 2 notch positions. Additionally, work 1 inc every 5 sts along the four outer arcs between tip markers. (53 sc)
Round 6: Change to Color C. Sc around, inc at 4 wing tips, inv-dec at 2 notches, 4 additional inc on outer arcs. (59 sc)
Round 7: Sc around, inc at 4 wing tips, inv-dec at 2 notches, 4 additional inc on outer arcs. (65 sc)
Round 8: Sc around, inc at 4 wing tips, inv-dec at 2 notches, 4 additional inc on outer arcs. (71 sc)
Round 9: Sc around, inc at 4 wing tips, inv-dec at 2 notches, 4 additional inc on outer arcs. (77 sc)
Round 10: Sc around, inc at 4 wing tips, inv-dec at 2 notches, 4 additional inc on outer arcs. (83 sc)
Round 11: Change to Color B. Sc around, inc at 4 wing tips, inv-dec at 2 notches, 4 additional inc on outer arcs. (89 sc)
Round 12: Sc around, inc at 4 wing tips, inv-dec at 2 notches, 4 additional inc on outer arcs. (95 sc)
Round 13: Sc around, inc at 4 wing tips, inv-dec at 2 notches, 4 additional inc on outer arcs. (101 sc)
Round 14: Sc around, inc at 4 wing tips, inv-dec at 2 notches, 4 additional inc on outer arcs. (107 sc)
Round 15: Sc around, inc at 4 wing tips, inv-dec at 2 notches, 4 additional inc on outer arcs. (113 sc)
Round 16: Sc around, inc at 4 wing tips, inv-dec at 2 notches, 4 additional inc on outer arcs. (119 sc)
Round 17: Change to Color A. Sc around, inc at 4 wing tips, inv-dec at 2 notches, 4 additional inc on outer arcs. (125 sc)
Round 18: Sc around, inc at 4 wing tips, inv-dec at 2 notches, 4 additional inc on outer arcs. (131 sc)
Round 19: Sc around, inc at 4 wing tips, inv-dec at 2 notches, 4 additional inc on outer arcs. (137 sc)
Round 20: Sc around, inc at 4 wing tips, inv-dec at 2 notches, 4 additional inc on outer arcs. (143 sc)
Round 21: Sc around, inc at 4 wing tips, inv-dec at 2 notches, 2 additional inc on outer arcs only. (147 sc)
Round 22: Sc around, inc at 4 wing tips, inv-dec at 2 notches, 2 additional inc on outer arcs. (151 sc)
Round 23: Sc around, inc at 4 wing tips only, inv-dec at 2 notches, no additional arc increases. (153 sc)
Round 24: Sc around, inc at 4 wing tips only, inv-dec at 2 notches, no additional arc increases. (155 sc)
Do not fasten off. Cut Color A and join Color E for border.
Checkpoint
Your front panel should measure approximately 13 inches (33 cm) at its widest point and approximately 10 inches (25.5 cm) from top to bottom. The silhouette should show four distinct rounded wing lobes with clear inward notches between the upper and lower pairs.
Border (Front Panel)
Join Color E at any stitch along the outer edge. Work the Picot Scallop Border Stitch all the way around the outer perimeter, skipping the center top opening area between the two upper wings (approximately the top 2 inches of the center where the bag opens). At each of the 4 wing tips, work 3 sl sts followed by a picot, then 3 sl sts to navigate the tighter curve. Fasten off and weave in ends.
How to Crochet the Back Wing Panel
Work the back wing panel identically to the front wing panel following all rounds and instructions above, including the Color E border.
Installing the Magnetic Snap
Before joining the panels, install the magnetic snap. Center each half of the snap on the wrong side (inner face) of the top inner edge of the upper wing sections on both front and back panels. Position each snap approximately 0.5 inches below the top center opening edge and 0.5 inches in from the center line. Use sewing needle and thread to secure. Snap the panels together to confirm alignment before permanently securing.
Joining Front and Back Panels
Hold the front and back panels with wrong sides together (right sides facing out). Pin around the outer perimeter, matching wing shapes carefully.
Using Color A and the G-6 hook, join with a sl st through both thicknesses at any point on the outer edge away from the center top opening. Work sl st through both layers all the way around the perimeter. Do not close the top center opening. Fasten off and weave in ends.
After joining, the bag should have visible right-side texture on both faces, the scalloped border should lie flat, and the top center opening should be accessible.
How to Crochet the Butterfly Body Tube
Using Color D (White) and G-6 hook, make a magic circle.
Round 1: Work 6 sc into magic circle. Pull tail to close. (6 sc)
Round 2: Inc in each st around. (12 sc)
Round 3: (Sc 1, inc) 6 times. (18 sc)
Round 4: (Sc 2, inc) 6 times. (24 sc)
Round 5: Sc in each st around. (24 sc)
Round 6: Sc in each st around. (24 sc)
Round 7: (Sc 2, inv-dec) 6 times. (18 sc)
Round 8: Sc in each st around. (18 sc)
This completes the head/thorax section. Continue for the abdomen:
Round 9: (Sc 1, inc) 6 times. (24 sc)
Round 10: Sc in each st around. (24 sc)
Round 11: Sc in each st around. (24 sc)
Round 12: (Sc 2, inv-dec) 6 times. (18 sc)
Round 13: Sc in each st around. (18 sc)
Round 14: (Sc 1, inv-dec) 6 times. (12 sc)
Round 15: Sc in each st around. (12 sc)
Round 16: (Sc 2, inv-dec) 3 times. (9 sc)
Round 17: Sc in each st around. (9 sc)
Round 18: (Sc 1, inv-dec) 3 times. (6 sc)
Stuff lightly with polyester fiberfill through the open end before closing. Fasten off, leaving a long tail for sewing. Use the tail to close the 6 remaining stitches by weaving through each front loop and pulling closed. Knot securely.
How to Crochet the Antennae
Make 2.
Using Color D (White) and G-6 hook, chain 18.
Row 1: Starting in 2nd ch from hook, sl st across 16 chains. At the 17th chain (the final chain before the one worked in), work 1 bobble. Fasten off leaving a 10-inch tail for attachment.
Curl or lightly steam block the antenna chain into a gentle curve before attaching.
Assembly Instructions
Step 1: Block both wing panels before assembly (see Finishing section below).
Step 2: Install magnetic snap on inner faces of front and back upper wing panels before joining.
Step 3: Join front and back panels around perimeter with sl st through both layers in Color A, leaving center top opening free.
Step 4: Pin the butterfly body tube vertically centered along the front of the joined bag, with the larger rounded head end at the top and the narrowing tail at the bottom. Whipstitch the body tube to the front face along both long sides using Color D and a yarn needle. Do not sew through to the back panel.
Step 5: Attach the two antennae to the top of the body tube head section. Thread the tails through the top of the body tube and out through the inside top, then through both bag layers at the top center and knot securely on the inside. Position the antennae so they angle outward and upward, approximately 1 inch apart at the base.
Step 6: Sew the two strap attachment rings to the top outer edges of the upper wings on the front face. Position one ring near the top edge of each upper wing, approximately 1 inch in from the outer edge.
Step 7: Thread the strap through both rings. The strap rests across the back of the bag.
Finishing and Blocking
Wet blocking is strongly recommended. Soak each completed wing panel in cool water with a small drop of wool wash. Gently squeeze out excess water without wringing. Lay flat on blocking mats. Pin each wing lobe to shape, pulling the outer curves gently outward. Ensure the two notch indentations are pinched inward and pinned. Allow to dry completely.
For acrylic yarn only, steam blocking with a garment steamer held approximately 2 inches from the surface will also set the shape.
Weave in all yarn ends securely using a yarn needle, weaving through at least 2 inches in alternating directions.
Care Instructions
Hand wash in cool water with mild detergent. Reshape while damp and allow to air dry flat. Do not machine wash or tumble dry. Do not iron directly. Wipe the magnetic snap dry immediately after washing. Store flat or hanging by the strap.
Size Customization Tips
To make the bag larger: Work additional rounds in the main body of each wing section before the final Color A rounds, adding 6 stitches per round. Each additional round adds approximately 0.25 inches to the overall wingspan.
To make the bag smaller: Stop the wing expansion 3 to 4 rounds earlier, ending at approximately 143 stitches instead of 155.
To change yarn weight: Using DK weight yarn with a US size E-4 (3.5 mm) hook will produce a finer fabric and a slightly smaller finished bag at approximately 11 inches wide.
You Did It!
Thank you so much for choosing this butterfly bag crochet pattern. I truly hope you love making it as much as I loved designing it. There is something so satisfying about watching those gradient colors come together and seeing that butterfly shape emerge round by round.
If you make this bag, I would absolutely love to see your finished project! Tag me on Instagram or share a photo in my Facebook group. Your versions always inspire me and other makers in our community.
Go ahead and save this pattern to your Pinterest boards so you can find it easily when you are ready to start. And if you have any questions along the way, drop a comment below. I am always happy to help a fellow crocheter bring their project to life!