
Crochet swimwear scares a lot of people. I hear it all the time. "Isn’t that really advanced?" "Won’t it fall apart in water?" "I could never make something that fitted."
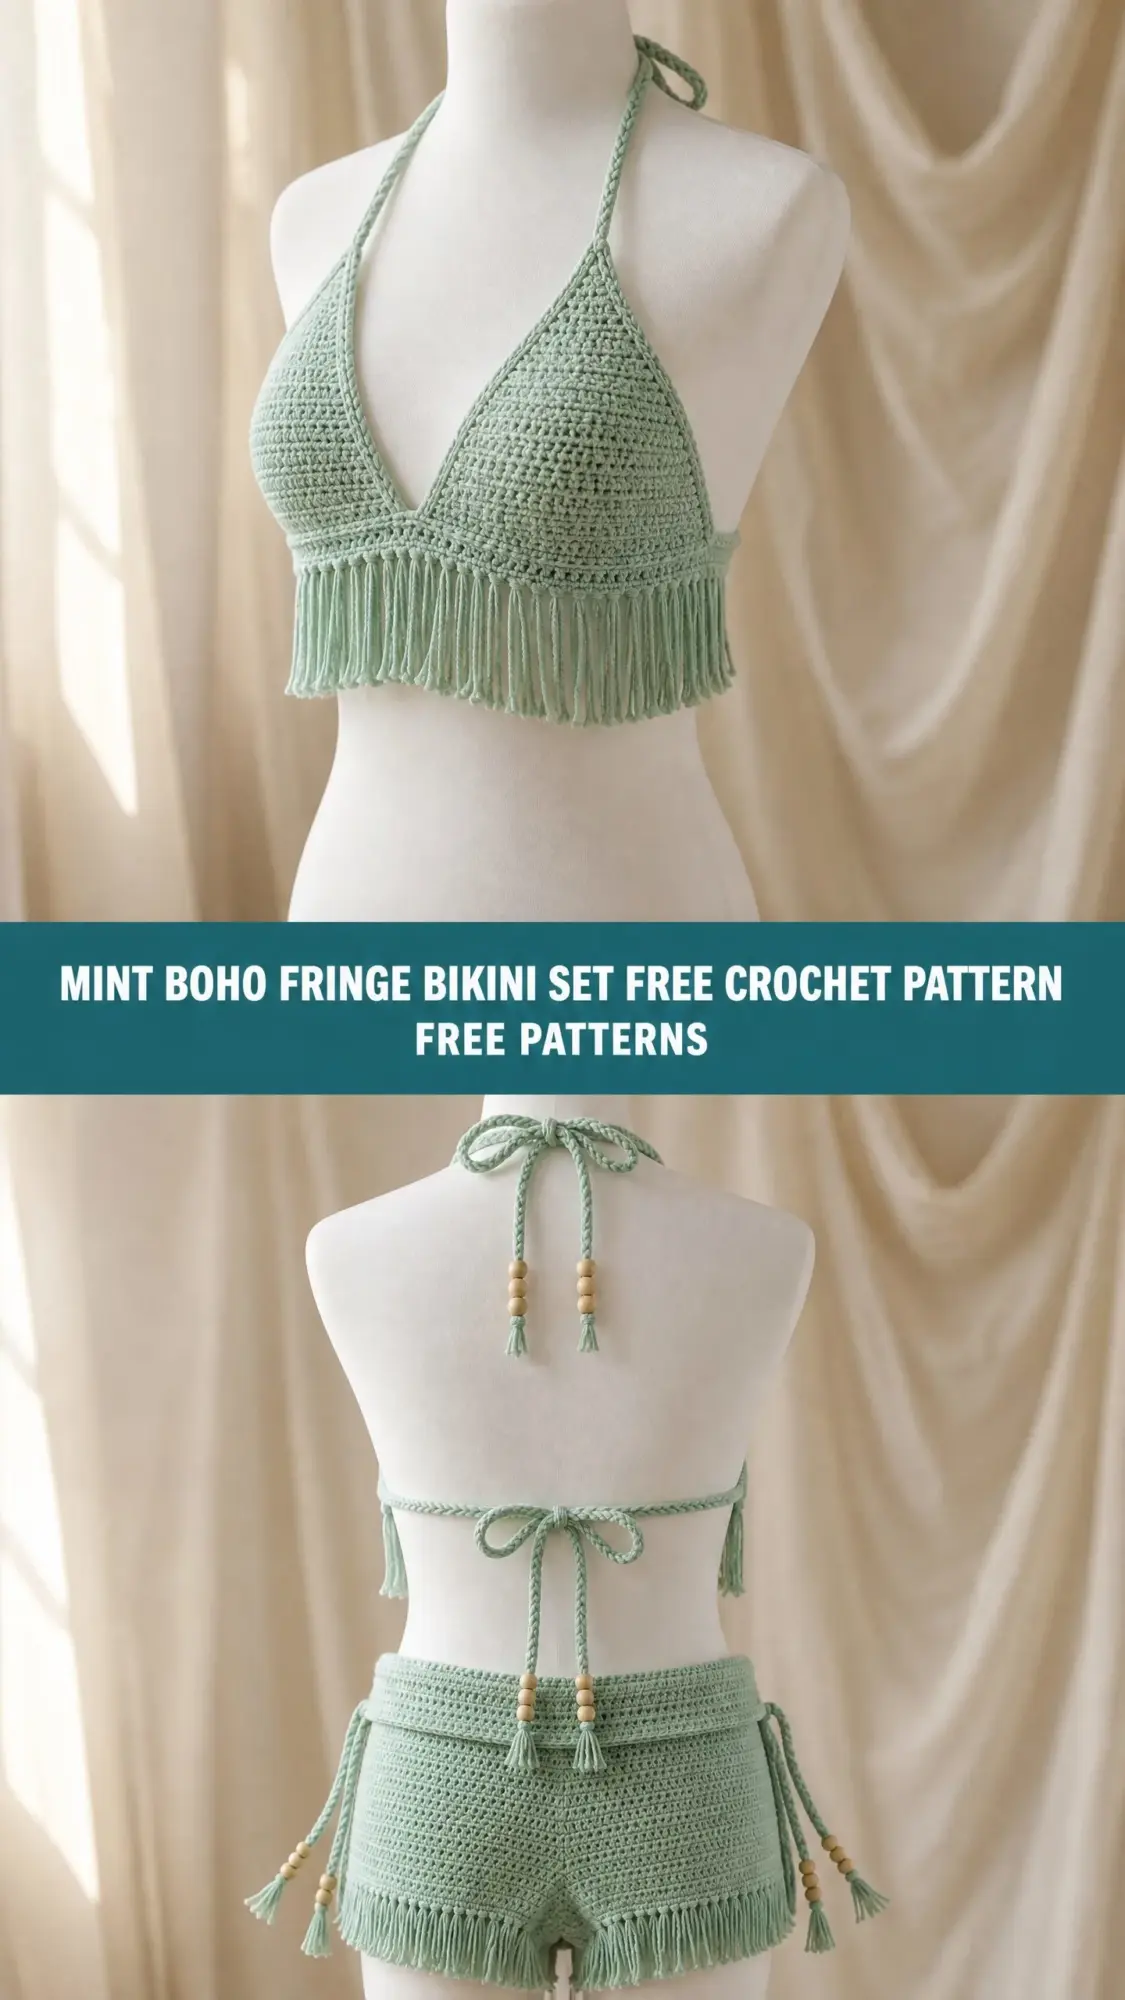
Here is the truth. This bikini set uses only two stitches. Single crochet and slip stitch. That is it. If you can work a basic rectangle, you can absolutely make this stunning boho beach set. The construction looks impressive, but I promise you it breaks down into very manageable pieces.
Whether you have been crocheting for years or just finished your first dishcloth, this pattern meets you where you are. I will walk you through every step, explain every technique, and give you the confidence to create something truly wearable. Let us bust that myth right now and get you started on your very own mint boho fringe bikini set.
About This Crochet Pattern
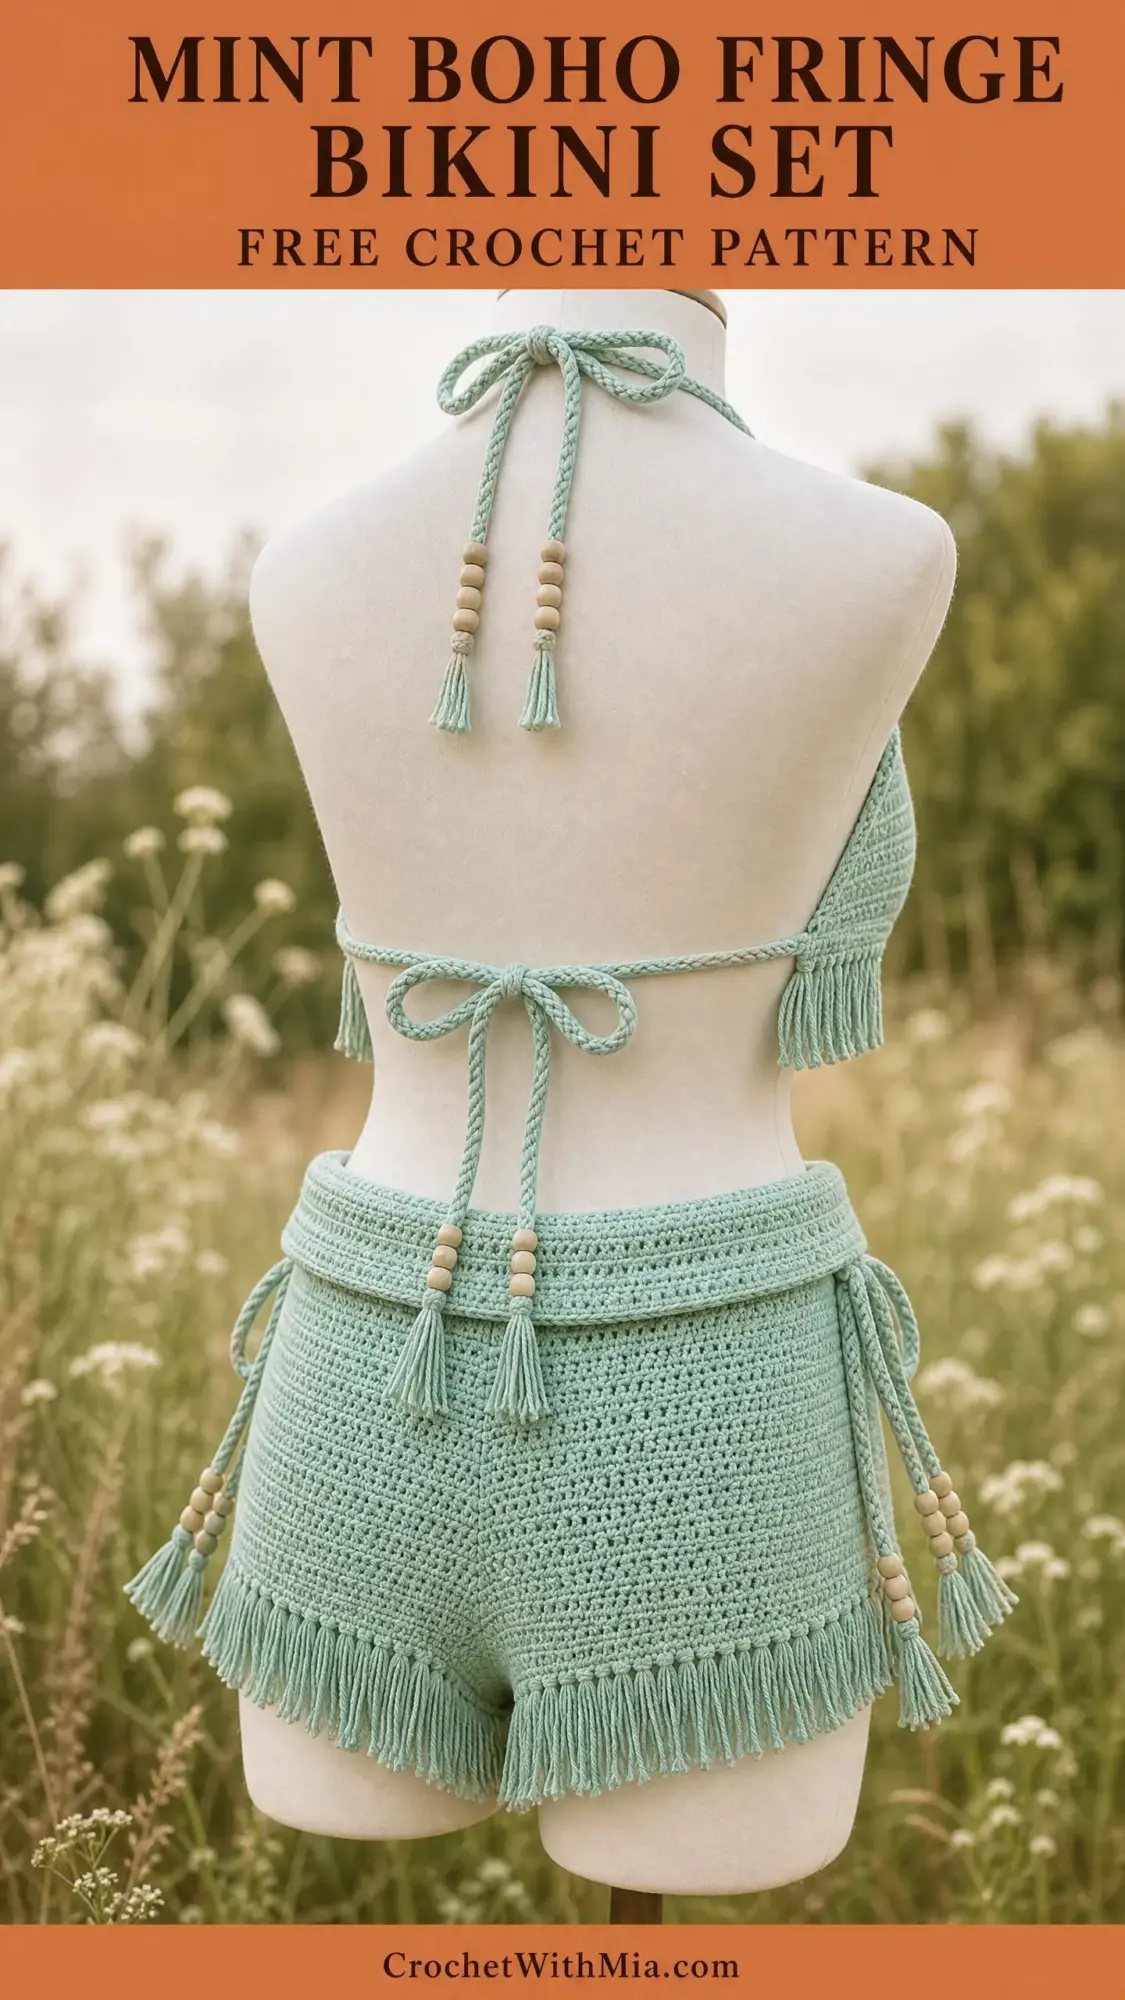
This two-piece boho bikini set features a halter bralette top and matching high-waist shorts. Both pieces are worked in a soft mint green cotton yarn that feels amazing against your skin. The top consists of two triangle cup panels joined at the center front with braided ties at the neck and back. The shorts are worked in the round from the waist down, featuring a folded ruffle waistband overlay, gorgeous fringe trim along the hem and waistband, and decorative wooden bead accents on braided side ties.
The overall vibe is festival-ready beach bohemian. Dense single crochet texture creates a sturdy fabric while long cut fringe and natural wood beads add that perfect boho touch. This is the kind of piece that turns heads at the pool or beach.
Skill Level
This pattern is rated intermediate. The stitch work itself is completely straightforward since you only use single crochet (sc) and slip stitch (sl st). However, the construction requires comfort with working in the round, shaping crotch gussets, attaching fringe, braiding cord ties, and finishing with wooden beads.
If you have completed at least two or three garment projects before, you will find this totally manageable. If you are newer to crochet, do not let that stop you. Take your time with each section and you will do great.
Time Estimate
Plan for approximately 12 to 18 hours total, depending on your finishing speed. The top takes roughly 3 to 4 hours. The shorts take 7 to 10 hours. Fringe cutting, attaching, and bead finishing add another 2 to 4 hours. This is a perfect weekend project if you have some dedicated crafting time.
Finished Measurements
The pattern is written for a size Small (US 2 to 4). Here are the finished measurements.
Top: approximately 10 inches wide at the band and 5 inches tall at the center triangle point.
Shorts: approximately 28 inches hip circumference (stretches to 34 inches), 10 inches in length from waist to hem before fringe, with a 3.5 inch inseam.
Size customization tips are included at the end of this crochet pattern.
Materials You Will Need
Yarn: approximately 400 yards of worsted weight (category 4) 100 percent cotton yarn in mint green. Cotton is essential for drape, wash performance, and comfort against skin.
Hook: US size G-6 / 4.0 mm crochet hook.
Notions:
Yarn Suggestions
Lion Brand 24/7 Cotton in Mint: a smooth, mercerized cotton that gives crisp stitch definition and holds color well. Widely available and machine washable.
Paintbox Yarns Simply DK Cotton (used at a slightly tighter gauge): a soft, matte cotton with excellent drape and a lovely range of sage and mint tones that match the pictured colorway closely.
WeCrochet CotLin in Seafoam: a linen-cotton blend that adds slight sheen and beautiful drape for a more elevated feel. Slightly more expensive but highly recommended for the finished look.
Substitution note: Choose a smooth, tightly plied 100 percent cotton or cotton-blend yarn. Avoid anything fuzzy or textured. The stitch definition is essential to the dense sc fabric and the fringe must lie cleanly. Check that your yarn achieves the stated gauge before beginning.
Gauge
18 sc x 22 rows = 4 inches worked flat in single crochet with a US G-6 / 4.0 mm hook, after blocking.
Always make a gauge swatch at least 5 inches by 5 inches, wash and block it as you will the finished piece, and measure before starting. Adjusting hook size is the easiest way to achieve correct gauge. Going up one hook size increases dimensions. Going down decreases them.
Abbreviations and Stitch Definitions
Before we dive into the step by step instructions, let me define every abbreviation you will encounter. I will use the full name first, then the abbreviation in parentheses, followed by a plain English definition.
Special Techniques
Braided Cord Tie
Cut 6 strands of yarn each measuring 3 times the desired finished tie length plus 6 inches extra for knotting. Hold all 6 strands together and fold in half. Knot at the fold to create a loop (this attaches to the garment). Divide the 12 working strands into 3 groups of 4. Braid tightly to desired length. Knot at the end. Thread wood beads onto individual strands as indicated in pattern and knot below each bead to secure.
Cut Fringe
Cut strands of yarn to the length specified in each section. Fold each bundle in half. Using a crochet hook, pull the folded loop through the designated stitch or chain space from front to back. Draw the cut ends through the folded loop and pull snug to form a lark’s head knot. Trim evenly after attaching all fringe.
Single Crochet Two Together (sc2tog)
This is your decrease stitch. Insert hook into next st, yarn over, pull up a loop (2 loops on hook). Insert hook into following st, yarn over, pull up a loop (3 loops on hook). Yarn over, draw through all 3 loops on hook. You have decreased by 1 stitch.
Important Pattern Notes
1. The top is worked flat in two identical triangle cup panels that are joined at the center front, then a band is worked across the bottom and ties are added.
2. The shorts are worked in joined rounds from the top waist edge downward, then split at the crotch to work each leg separately.
3. Fringe is added after all main construction is complete.
4. Wooden beads are threaded onto braided ties after braiding is complete.
5. All turning chains in this pattern count as zero stitches. Do not count the turning chain as a stitch.
6. RS faces outward throughout. When working flat, the RS row is the first row after the foundation chain.
7. When working the shorts in the round, do not turn. Join each round with a slip stitch.
8. Stitch counts appear in parentheses at the end of every row or round.
9. "Ch 1, turn" begins every flat row. This ch 1 does NOT count as a stitch.
Part One: Halter Bralette Top Crochet Pattern
Section 1A: Triangle Cup (Make 2)
Each cup is worked flat, beginning at the top point and increasing outward to form a wide triangle. Both cups are identical.
Foundation: Ch 3. Sl st to join into a ring. (Or work into the 3rd chain from hook if you prefer a flat top point.)
Row 1 (RS): Ch 1, work 3 sc into ring, turn. (3 sc)
Row 2: Ch 1, inc in first st, sc in next st, inc in last st, turn. (5 sc)
Row 3: Ch 1, inc in first st, sc in each st to last st, inc in last st, turn. (7 sc)
Row 4: Ch 1, inc in first st, sc in each st to last st, inc in last st, turn. (9 sc)
Row 5: Ch 1, inc in first st, sc in each st to last st, inc in last st, turn. (11 sc)
Row 6: Ch 1, inc in first st, sc in each st to last st, inc in last st, turn. (13 sc)
Row 7: Ch 1, inc in first st, sc in each st to last st, inc in last st, turn. (15 sc)
Row 8: Ch 1, inc in first st, sc in each st to last st, inc in last st, turn. (17 sc)
Row 9: Ch 1, inc in first st, sc in each st to last st, inc in last st, turn. (19 sc)
Row 10: Ch 1, inc in first st, sc in each st to last st, inc in last st, turn. (21 sc)
Row 11: Ch 1, inc in first st, sc in each st to last st, inc in last st, turn. (23 sc)
Row 12: Ch 1, inc in first st, sc in each st to last st, inc in last st, turn. (25 sc)
Row 13: Ch 1, inc in first st, sc in each st to last st, inc in last st, turn. (27 sc)
Rows 14-28: Ch 1, sc in each st across, turn. (27 sc)
Fasten off leaving a 12 inch tail for joining.
Checkpoint: Each completed cup should measure approximately 5 inches tall and 6 inches wide at the base.
Section 1B: Join Cups and Work Bottom Band
Hold both cups with RS facing you and bottom edges (Row 28) aligned. Place them side by side so the inner edge of each cup meets at center front.
Joining Row: Attach yarn at the outer bottom corner of the right cup. Ch 1, sc across the 27 sts of the right cup, then sc across the 27 sts of the left cup. (54 sc)
Band Row 1: Ch 1, turn, sc in each st across. (54 sc)
Band Row 2: Ch 1, turn, sc in each st across. (54 sc)
Do not fasten off. You will work the band ties directly from this row.
Section 1C: Back Band Ties
The back band consists of two braided cord ties that extend from each end of the band and wrap around the back to tie at center back, producing a bow.
At the end of Band Row 2, do not turn. Working along the short side edge of the band and continuing outward, ch 80 (this creates the tie length). Fasten off.
Rejoin yarn at the opposite short end of the band. Ch 80. Fasten off.
Each ch-80 tie measures approximately 18 inches and is sufficient to wrap to center back and form a bow. If you prefer a braided appearance rather than a chained tie, substitute the Braided Cord Tie method, attaching the knotted loop at each band end and braiding to the same length.
Section 1D: Neck Halter Tie
At the top point of each cup (the very beginning ring), attach a separate braided tie. Cut 6 strands each 72 inches long. Fold in half and attach at the ring of each cup. Braid each set of strands to approximately 16 inches. Thread 3 wood beads onto the tail strands of each tie, knotting below each bead. The two neck ties come together at the back of the neck and tie in a bow.
Alternatively, work a ch 90 directly from the ring of each cup, fasten off, and thread the two bead clusters onto the tail ends.
Section 1E: Top Fringe
The finished cups have a light fringe accent along the outer diagonal edges of each cup (the two angled sides, not the bottom band). Cut yarn strands 8 inches long. Working 2 strands per fringe bundle, attach fringe using the Cut Fringe method in every other row end along the side edges of each cup. This gives approximately 6 to 7 fringe bundles per side edge.
Trim fringe evenly to 3 inches after attaching all bundles.
Part Two: Boho Fringe Shorts Crochet Pattern
Section 2A: Waistband
The shorts begin with a foundation chain that forms the waist opening.
Foundation Chain: Ch 128. Being careful not to twist, sl st to the first ch to join into a ring.
Waistband Round 1 (RS): Ch 1, sc in each ch around, sl st to first sc to join. (128 sc)
Waistband Round 2: Ch 1, sc in each st around, sl st to first sc to join. (128 sc)
Waistband Round 3: Ch 1, sc in each st around, sl st to first sc to join. (128 sc)
Waistband Round 4: Ch 1, sc in each st around, sl st to first sc to join. (128 sc)
Checkpoint: After 4 rounds the waistband should measure approximately 0.75 inches in height.
Section 2B: Waistband Overlay Ruffle
The shorts feature a decorative folded overlay panel at the waistband that sits above the main shorts body.
Foundation: Ch 130.
Overlay Row 1 (RS): Sc in 2nd ch from hook and in each ch across. (129 sc)
Overlay Rows 2-6: Ch 1, turn, sc in each st across. (129 sc)
Fasten off.
To attach: Align the overlay strip around the outside of the completed waistband, with the RS of the overlay facing outward. Using sl st or whip stitch with a tapestry needle, stitch the bottom edge of the overlay to Round 2 of the waistband. Leave 2 inches unattached at the center back to allow for the back tie opening.
Section 2C: Side Ties on Waistband Overlay
At the side position on the overlay (approximately stitch 64 on each side), attach a braided tie as follows:
Cut 6 strands of yarn each measuring 60 inches. Fold in half and attach using a lark’s head knot. Braid to approximately 10 inches. Thread 3 to 4 wood beads onto the tail strands below the braid, knotting below each bead. Leave approximately 3 inches of loose tail below the last bead for additional tassel effect.
Attach one tie on each side of the shorts (2 ties total).
Section 2D: Center Back Waistband Tie
At the center back opening in the overlay, attach two braided ties (one on each side of the opening).
Cut 6 strands of yarn each measuring 50 inches. Fold in half and attach at the right edge of the center back opening. Braid to approximately 10 inches. Thread 2 wood beads below the braid, knotting to secure. Repeat for the left edge. The two ties meet and knot or bow at center back.
Section 2E: Shorts Body
Rejoin yarn to the top of the joined waistband at any point.
Body Rounds 1-22: Ch 1, sc in each st around, sl st to first sc to join. (128 sc)
Checkpoint: After Round 22, the body measures approximately 5.6 inches total height including waistband.
Section 2F: Crotch Shaping and Leg Split
Mark stitch 1 and stitch 65 with stitch markers. Stitches 1 through 64 are the front panel. Stitches 65 through 128 are the back panel.
FRONT PANEL:
Join yarn at stitch 1. Working flat, work across stitches 1 through 64.
Front Row 1 (RS): Ch 1, sc in each of 64 sts, turn. (64 sc)
Front Row 2: Ch 1, sc2tog, sc in each st to last 2 sts, sc2tog, turn. (62 sc)
Front Row 3: Ch 1, sc2tog, sc in each st to last 2 sts, sc2tog, turn. (60 sc)
Front Row 4: Ch 1, sc2tog, sc in each st to last 2 sts, sc2tog, turn. (58 sc)
Front Rows 5-8: Ch 1, sc in each st across, turn. (58 sc)
Fasten off.
BACK PANEL:
Join yarn at stitch 65. Working flat, work across stitches 65 through 128.
Back Row 1 (RS): Ch 1, sc in each of 64 sts, turn. (64 sc)
Back Row 2: Ch 1, sc2tog, sc in each st to last 2 sts, sc2tog, turn. (62 sc)
Back Row 3: Ch 1, sc2tog, sc in each st to last 2 sts, sc2tog, turn. (60 sc)
Back Row 4: Ch 1, sc2tog, sc in each st to last 2 sts, sc2tog, turn. (58 sc)
Back Rows 5-8: Ch 1, sc in each st across, turn. (58 sc)
Fasten off.
Section 2G: Join Crotch Seam
With RS facing out, hold the front and back crotch edges together. Using a tapestry needle and a length of yarn, whip stitch the inner crotch seam together, stitching approximately 2 inches inward from each inner corner. This creates the leg openings.
Section 2H: Shorts Hem Fringe
Cut yarn strands 14 inches long. Using 4 strands per bundle (folded to 7 inch finished length), attach one bundle in every stitch along the entire hem round using the Cut Fringe method. At 128 stitches around the hem, this requires approximately 128 bundles.
Trim all fringe evenly to 6 inches after attaching.
Section 2I: Waistband Overlay Fringe
Cut yarn strands 10 inches long. Using 3 strands per bundle (folded to 5 inch finished length), attach one bundle every 2 stitches along the bottom edge of the waistband overlay. This yields approximately 64 to 65 bundles.
Trim evenly to 4 inches after attaching.
Size Customization Tips
To size up the top: Add 2 additional increase rows to the cup before the even rows. Each 2-row increase adds approximately 0.4 inches in width and height. Extend the even rows by the same number to maintain proportional height.
To size up the shorts: Add stitches to the foundation chain in multiples of 2 (to keep shaping symmetric). Add 18 stitches to the chain for each additional 4 inches of hip circumference. Adjust the fringe count proportionally.
To lengthen the shorts: Add additional body rounds before the crotch split. Each 2 rounds adds approximately 0.4 inches of length.
To deepen the inseam: Add additional decrease rows in the crotch shaping section (up to 6 total instead of 3), then work even rows to the desired depth.
Finishing and Blocking
Weave in all ends securely with a tapestry needle, running each end through at least 1 inch of fabric in two directions before trimming.
To block: Soak the finished pieces in cool water for 10 minutes. Gently press out excess water in a clean towel without wringing. Lay flat on a blocking mat. Pin the shorts waistband to the stated circumference and the cup pieces to the stated dimensions. Allow to dry completely before removing pins. Cotton relaxes and gains beautiful drape after blocking.
Trim fringe one final time after blocking if needed for perfectly even ends.
You Did It!
Thank you so much for choosing this mint boho fringe bikini set crochet pattern. I truly hope you love making it as much as I loved designing it. This piece is such a showstopper, and you should feel incredibly proud when you finish.
If you make this bikini set, I would absolutely love to see your finished project! Tag me on Instagram or share a photo in my Facebook group. Nothing makes my day quite like seeing your beautiful creations come to life.
Save this crochet tutorial to your Pinterest boards so you can find it easily when you are ready to start. And please drop a comment below if you make this set. I would love to hear how it turned out and see what color you chose!