
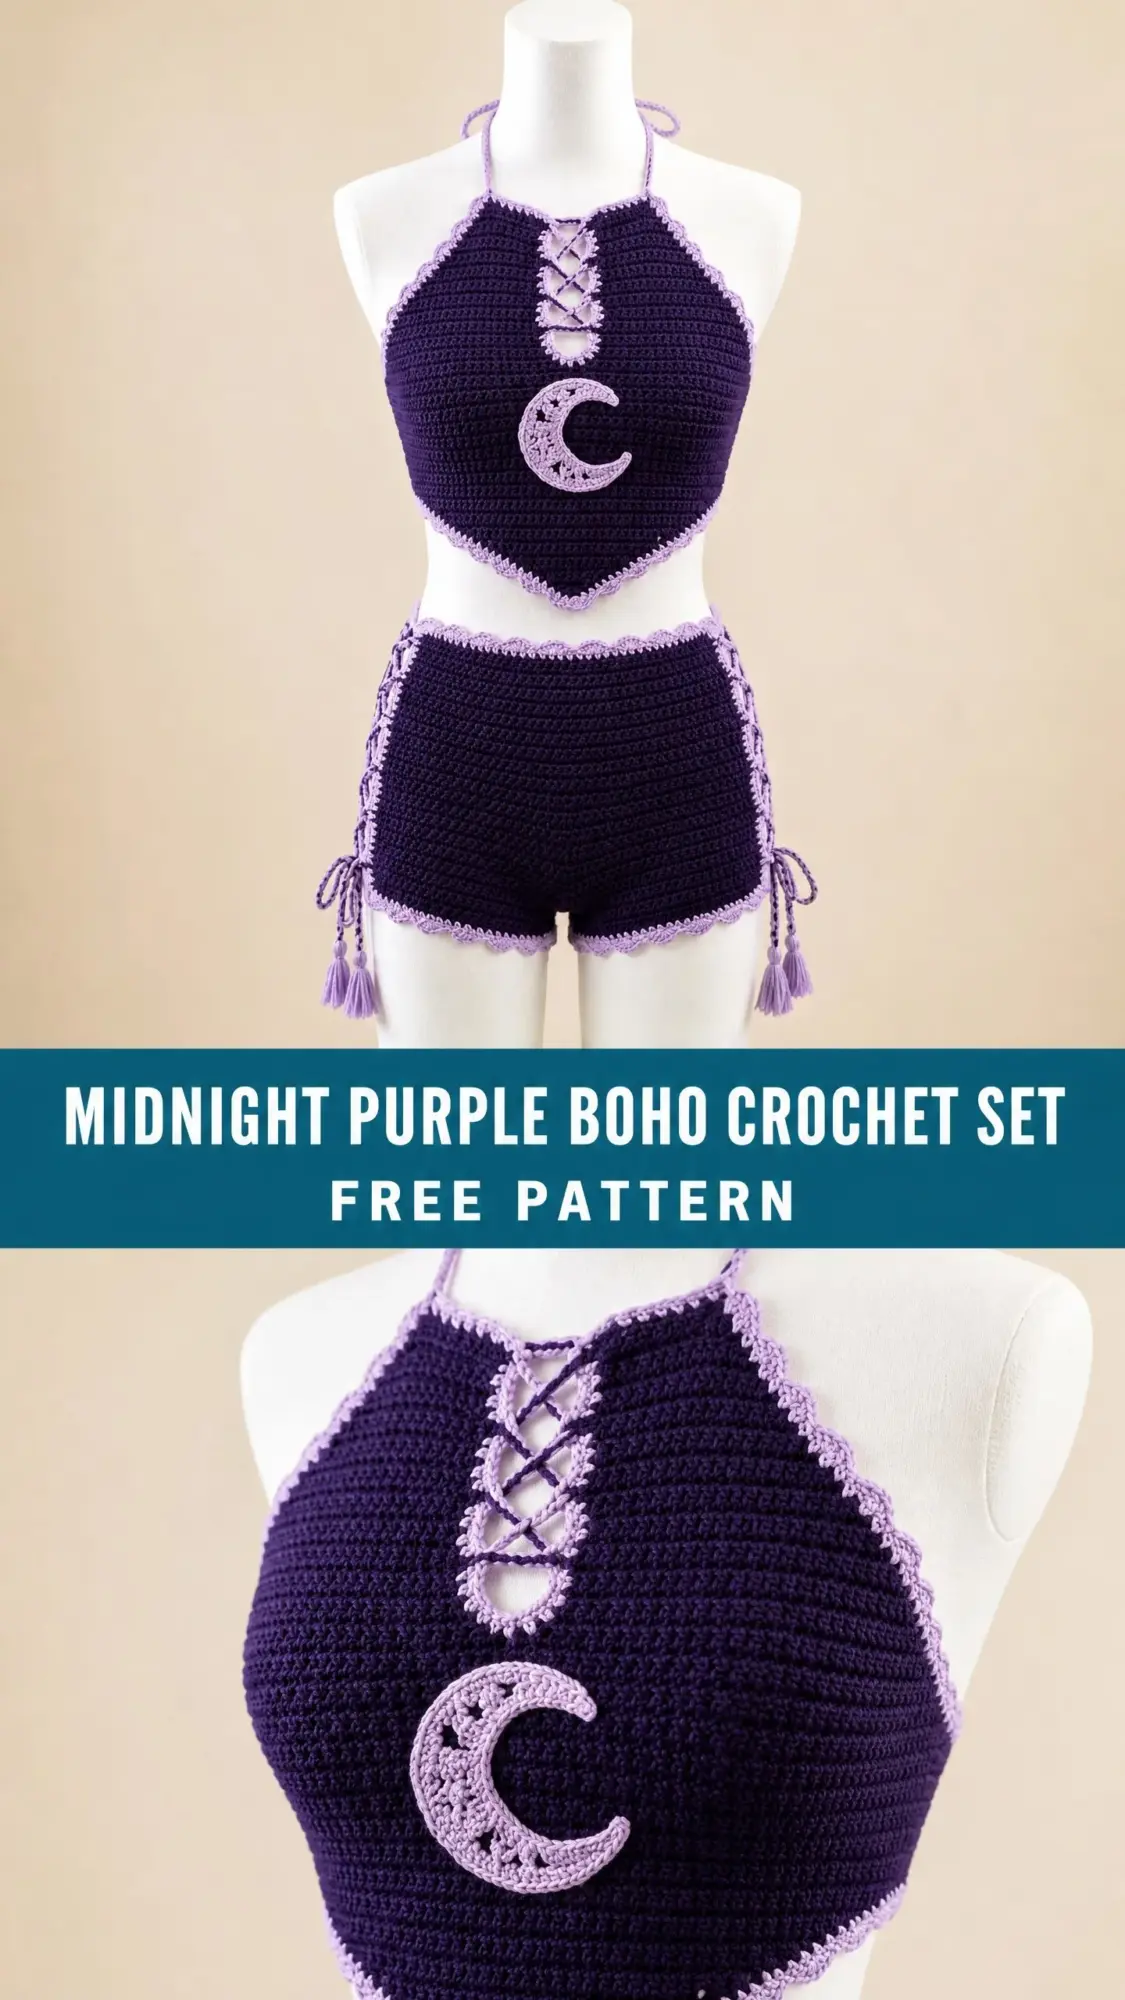
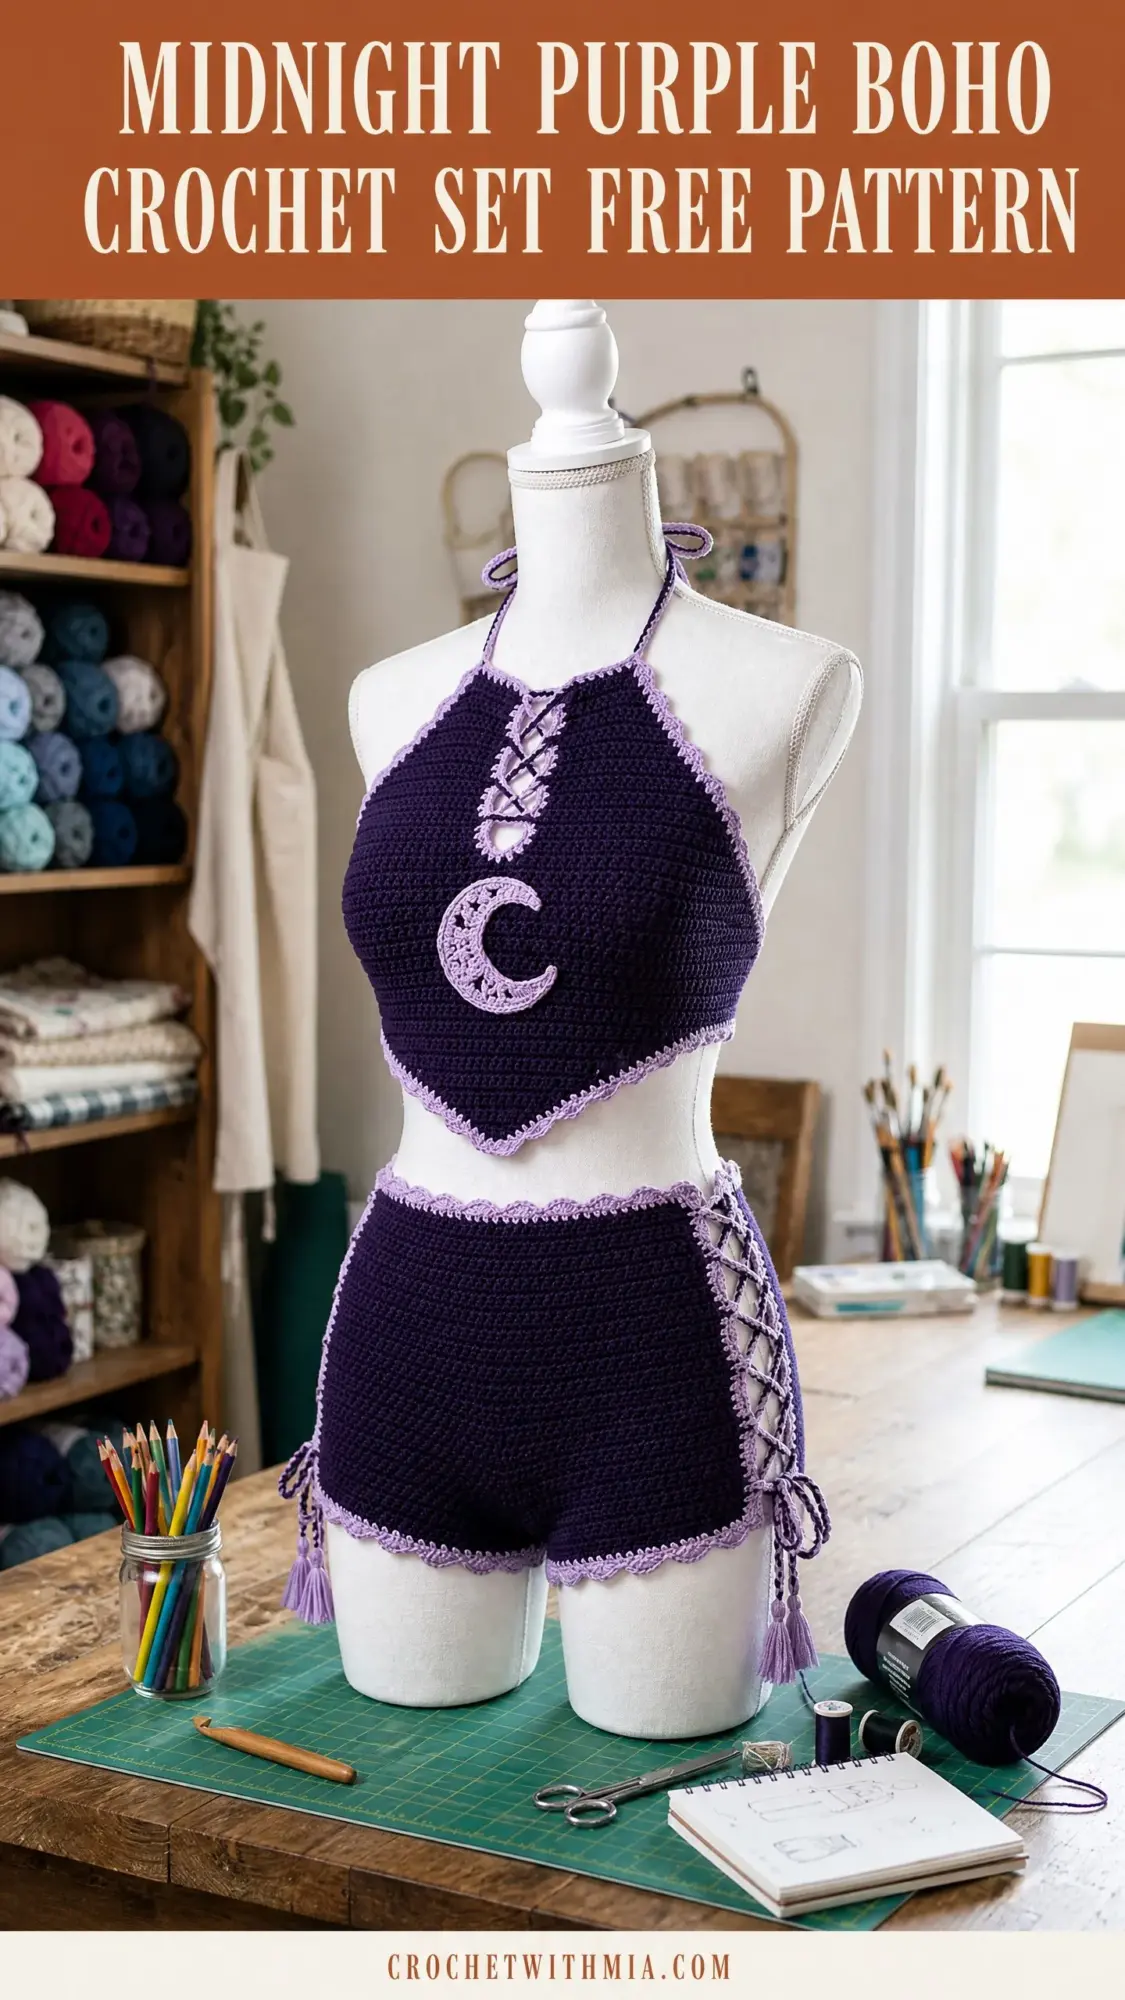
This is a two-piece crochet set. A halter crop top with a lace-up front and crescent moon applique. High-waist boy-short bottoms with side lace-up panels and tassel trim. Deep purple yarn with lavender accents throughout. Intermediate skill level required.
I am not going to sugarcoat this one. This project takes time and attention. You are looking at roughly 20 to 29 hours of work across both pieces. But the result? Absolutely stunning festival wear, beach cover-up, or statement loungewear that nobody else will have.
The construction uses single crochet throughout with decorative shell edging, eyelet rows for the lace-up details, and a separate crescent moon applique. If you have completed at least two garments before, you can absolutely handle this pattern.
About This Midnight Purple Boho Crochet Set Pattern
This coordinating set brings together everything I love about boho crochet fashion. The fitted halter top features a triangular silhouette created through diagonal decreases, a center lace-up panel with eyelets, and that gorgeous crescent moon detail sitting right at the chest. The lavender trim running along every edge ties the whole look together.
The boy-short bottoms sit at the high waist and feature side lace-up panels that run from just below the waistband to the leg openings. Tassels dangle from the lace-up cord ends and add movement and visual interest. The scalloped leg openings and waistband edging match the top perfectly.
Skill level: Intermediate to Advanced. You need comfort with working in rows and rounds, seaming, applique construction, decorative edging, and lace-up cord construction.
Time estimate:
Finished Measurements
This pattern fits size Small/Medium (US 4 to 8), designed for a 32 to 36 inch bust and 34 to 38 inch hip with approximately 26 to 29 inch waist.
Halter top measurements:
Boy-short bottoms measurements:
Materials Needed for This Crochet Set
Yarn:
Yarn suggestions:
Avoid novelty or textured yarn. The stitch detail and lace-up eyelets need a smooth strand to show properly and function correctly.
Hooks:
Notions:
Gauge
With MC and I/9 (5.5 mm) hook, in single crochet (sc):
Gauge swatch: Chain 22. Work single crochet in rows for 22 rows. Block lightly. Measure the center 4 inches. Adjust hook size up or down as needed.
I cannot stress this enough. Gauge is critical for this garment. A difference of even one stitch per 4 inches will significantly affect fit across the chest and hips. Please do not skip the gauge swatch.
Abbreviations and Stitch Definitions
Special Stitches and Techniques
Shell Stitch
Work 5 double crochet all into the same stitch or space. This creates a fan-shaped decorative shell. In the edging rounds, shells are separated by skip 2 stitches, sc 1, skip 2 stitches.
Scallop Edging
With CC, join yarn to edge. Work as follows across: sc 1, skip 2 stitches, shell (5 dc) into next stitch, skip 2 stitches. Repeat from beginning across. At corners, work sc 1 into corner stitch to keep edging flat.
Eyelet Row
Ch 1 (does not count as stitch), sc 1, (ch 2, sk 2 sts, sc 1) across. On the following row, work sc into each sc and 2 sc into each ch-2 sp to restore stitch count.
Lace-Up Cord Construction
With CC and H/8 hook, chain until cord reaches desired length (approximately 30 chains per inch of cord needed). Work 1 sl st back in each ch across to stiffen. Fasten off and weave ends. For a 24 inch cord, ch 200 and sl st back across.
Tassel Construction (make 10)
Cut 20 strands of CC yarn, each 8 inches long. Hold all strands together. Fold in half. Using a separate 10-inch strand, tie tightly around the folded loop point approximately 0.5 inch from the top, creating the tassel head. The tie strand will be used to attach the tassel to the garment. Trim the tassel ends to 3 inches below the tie.
Crescent Moon Applique
Outer circle: With CC and H/8 hook, make a magic ring, ch 2, work 12 dc into ring, sl st to first dc to join. (12 dc)
Round 2: Ch 2, work 2 dc in each st around, sl st to join. (24 dc)
Round 3: Ch 2, (dc in next st, 2 dc in next st) around, sl st to join. (36 dc)
Fasten off, leaving a long tail. Set aside.
Inner circle: With CC and H/8 hook, make a magic ring, ch 2, work 12 dc into ring, sl st to join. (12 dc)
Round 2: Ch 2, work 2 dc in each st around, sl st to join. (24 dc)
Fasten off, leaving a long tail.
Assembly: Align the smaller circle on top of the larger circle so that their edges overlap on one side only, creating the appearance of a crescent. The smaller circle should be positioned so the crescent shape faces left. With yarn needle and CC, whipstitch the inner circle to the outer circle only around the overlapping curved edge. The unattached arc of the outer circle forms the crescent shape.
Halter Top Front Panel Instructions
The front panel is worked from the bottom hem upward, with shaping on both sides creating the triangular halter silhouette.
Foundation: With MC and I/9 hook, ch 62.
Row 1 (RS): Sc in 2nd ch from hook and in each ch across. Turn. (61 sc)
Rows 2 through 6: Ch 1, sc in each st across. Turn. (61 sc)
These 6 rows form the lower body of the front panel. At this point the panel should measure approximately 1.5 inches tall from foundation.
Begin Side Shaping
Decrease 1 stitch at each end on every other row.
Row 7 (RS decrease row): Ch 1, sc2tog over first 2 sts, sc across to last 2 sts, sc2tog. Turn. (59 sc)
Row 8: Ch 1, sc in each st across. Turn. (59 sc)
Row 9: Ch 1, sc2tog, sc across to last 2 sts, sc2tog. Turn. (57 sc)
Row 10: Ch 1, sc in each st across. Turn. (57 sc)
Row 11: Ch 1, sc2tog, sc across to last 2 sts, sc2tog. Turn. (55 sc)
Row 12: Ch 1, sc in each st across. Turn. (55 sc)
Row 13: Ch 1, sc2tog, sc across to last 2 sts, sc2tog. Turn. (53 sc)
Row 14: Ch 1, sc in each st across. Turn. (53 sc)
Row 15: Ch 1, sc2tog, sc across to last 2 sts, sc2tog. Turn. (51 sc)
Row 16: Ch 1, sc in each st across. Turn. (51 sc)
Row 17: Ch 1, sc2tog, sc across to last 2 sts, sc2tog. Turn. (49 sc)
Row 18: Ch 1, sc in each st across. Turn. (49 sc)
The panel should now measure approximately 4 inches tall.
Accelerated Shaping for Upper Chest Triangle
Decrease 2 stitches at each end on every row.
Row 19: Ch 1, sc2tog, sc2tog, sc across to last 4 sts, sc2tog, sc2tog. Turn. (45 sc)
Row 20: Ch 1, sc2tog, sc2tog, sc across to last 4 sts, sc2tog, sc2tog. Turn. (41 sc)
Row 21: Ch 1, sc2tog, sc2tog, sc across to last 4 sts, sc2tog, sc2tog. Turn. (37 sc)
Row 22: Ch 1, sc2tog, sc2tog, sc across to last 4 sts, sc2tog, sc2tog. Turn. (33 sc)
Row 23: Ch 1, sc2tog, sc2tog, sc across to last 4 sts, sc2tog, sc2tog. Turn. (29 sc)
Row 24: Ch 1, sc2tog, sc2tog, sc across to last 4 sts, sc2tog, sc2tog. Turn. (25 sc)
Row 25: Ch 1, sc2tog, sc2tog, sc across to last 4 sts, sc2tog, sc2tog. Turn. (21 sc)
Row 26: Ch 1, sc2tog, sc2tog, sc across to last 4 sts, sc2tog, sc2tog. Turn. (17 sc)
Row 27: Ch 1, sc2tog, sc across to last 2 sts, sc2tog. Turn. (15 sc)
Row 28: Ch 1, sc in each st across. Turn. (15 sc)
These 15 stitches form the top center band where the lace-up panel will be applied.
Lace-Up Column
Row 29: Ch 1, sc 6, ch 2, sk 2, sc 7. Turn. (15 sts including ch-2 sp)
Row 30: Ch 1, sc 7, 2 sc in ch-2 sp, sc 6. Turn. (15 sc)
Row 31: Ch 1, sc 6, ch 2, sk 2, sc 7. Turn. (15 sts)
Row 32: Ch 1, sc 7, 2 sc in ch-2 sp, sc 6. Turn. (15 sc)
Row 33: Ch 1, sc 6, ch 2, sk 2, sc 7. Turn. (15 sts)
Row 34: Ch 1, sc 7, 2 sc in ch-2 sp, sc 6. Turn. (15 sc)
Row 35: Ch 1, sc 6, ch 2, sk 2, sc 7. Turn. (15 sts)
Row 36: Ch 1, sc 7, 2 sc in ch-2 sp, sc 6. Turn. (15 sc)
Fasten off MC, leaving a 12-inch tail for seaming.
Halter Top Neck Strap Instructions
With MC and I/9 hook, ch 5.
Row 1: Sc in 2nd ch from hook and in each ch across. Turn. (4 sc)
Rows 2 through 60: Ch 1, sc in each st across. Turn. (4 sc)
Continue until strap measures 15 inches. Set aside. With CC and H/8 hook, work a row of sl st along each long edge of the strap for contrast trim. Fasten off.
Make a second identical strap.
Attach each strap to the top outer corners of the front panel using whipstitch, angling inward so they converge at the neck.
Halter Top Back Panel Instructions
With MC and I/9 hook, ch 62.
Row 1 (RS): Sc in 2nd ch from hook and each ch across. Turn. (61 sc)
Rows 2 through 26: Ch 1, sc in each st across. Turn. (61 sc)
Fasten off, leaving a 12-inch tail for seaming.
Side seaming: With WS together, align front and back panels at side edges. Whipstitch or mattress stitch the side seams, leaving the top 2 inches of each side open for the armhole gap.
Halter Top Edging and Finishing
With CC and H/8 hook, join yarn at lower right corner of the front panel bottom edge.
Scallop Edging: Work across the bottom of the front panel: sc 1 in first st, sk 2 sts, shell (5 dc in next st), sk 2 sts, sc 1. Repeat across. Work 10 complete shell repeats. Repeat identically across the bottom of the back panel.
Moon applique placement: Position the completed crescent moon applique at the front center, approximately 1 to 2 inches above the lower hem. Whipstitch around the outer edge.
Lace-up cord: Make one cord approximately 24 inches long. Thread through the 8 eyelets in the lace-up column, weaving in an X-cross pattern from top to bottom.
Boy-Short Bottoms Back Panel Instructions
With MC and I/9 hook, ch 70.
Row 1 (RS): Sc in 2nd ch from hook and each ch across. Turn. (69 sc)
Rows 2 through 6: Ch 1, sc in each st across. Turn. (69 sc)
Row 7 (waistband eyelet): Ch 1, sc 2, (ch 1, sk 1, sc 3) across, ending sc 2. Turn. (69 sts)
Row 8: Ch 1, sc 2, (sc 1 in ch-sp, sc 3) across, ending sc 2. Turn. (69 sc)
Rows 9 through 28: Ch 1, sc in each st across. Turn. (69 sc)
Begin Crotch Shaping
Row 29: Ch 1, sc2tog, sc across to last 2 sts, sc2tog. Turn. (67 sc)
Row 30: Ch 1, sc2tog, sc across to last 2 sts, sc2tog. Turn. (65 sc)
Row 31: Ch 1, sc2tog, sc across to last 2 sts, sc2tog. Turn. (63 sc)
Row 32: Ch 1, sc2tog, sc across to last 2 sts, sc2tog. Turn. (61 sc)
Row 33: Ch 1, sc2tog, sc across to last 2 sts, sc2tog. Turn. (59 sc)
Row 34: Ch 1, sc2tog, sc across to last 2 sts, sc2tog. Turn. (57 sc)
Row 35: Ch 1, sc2tog, sc across to last 2 sts, sc2tog. Turn. (55 sc)
Row 36: Ch 1, sc2tog, sc across to last 2 sts, sc2tog. Turn. (53 sc)
Row 37: Ch 1, sc in each st across. Turn. (53 sc)
Fasten off, leaving a 14-inch tail for crotch seaming.
Boy-Short Bottoms Front Panel Instructions
With MC and I/9 hook, ch 70.
Row 1 (RS): Sc in 2nd ch from hook and each ch across. Turn. (69 sc)
Rows 2 through 6: Ch 1, sc in each st across. Turn. (69 sc)
Row 7 (waistband eyelet): Ch 1, sc 2, (ch 1, sk 1, sc 3) across, ending sc 2. Turn. (69 sts)
Row 8: Ch 1, sc 2, (sc in ch-sp, sc 3) across, ending sc 2. Turn. (69 sc)
Rows 9 through 30: Ch 1, sc in each st across. Turn. (69 sc)
Begin Crotch Shaping
Row 31: Ch 1, sc2tog, sc across to last 2 sts, sc2tog. Turn. (67 sc)
Row 32: Ch 1, sc2tog, sc across to last 2 sts, sc2tog. Turn. (65 sc)
Row 33: Ch 1, sc2tog, sc across to last 2 sts, sc2tog. Turn. (63 sc)
Row 34: Ch 1, sc2tog, sc across to last 2 sts, sc2tog. Turn. (61 sc)
Row 35: Ch 1, sc2tog, sc across to last 2 sts, sc2tog. Turn. (59 sc)
Row 36: Ch 1, sc in each st across. Turn. (59 sc)
Fasten off, leaving a 14-inch tail.
Shorts Side Lace-Up Panel Construction
With CC and H/8 hook, join yarn at the top corner of the right side edge of the front panel.
Row 1: Ch 1, work sc evenly along the side edge, approximately 1 sc per row end. For 36 rows, work 36 sc. Turn. (36 sc)
Row 2: Ch 1, sc 1, (ch 2, sk 2, sc 1) across. This creates 12 eyelet pairs. Turn. (36 sts)
Row 3: Ch 1, sc 1, (2 sc in ch-2 sp, sc 1) across. Turn. (36 sc)
Fasten off. Repeat on all 4 side edges.
Assembly: With WS facing, align front and back panels at sides. Whipstitch only the top 1.5 inches of the side seam together at the waistband. Leave the remainder open for the lace-up gap.
Shorts Crotch Seam and Leg Openings
Fold the shorts so front and back panels are aligned at the crotch edge. Whipstitch the crotch seam along the decrease-shaped edges, stopping 2 to 3 inches from each side edge.
Leg opening edging: With CC and H/8 hook, join at one leg opening. Work 1 round of sc evenly around to achieve exactly 30 sc, then work the shell edging: (sc 1, sk 2, 5 dc in next, sk 2) x 5. Sl st to first sc to join. Fasten off. Repeat for second leg opening.
Shorts Waistband Finishing
With CC and H/8 hook, join at the center back top edge.
Round 1: Work 1 sc in each st around the entire waistband. (138 sc) Sl st to first sc to join.
Round 2: Ch 1, sc in each st around. Sl st to join. (138 sc)
Round 3 (scallop edging): (Sc 1, sk 2, shell (5 dc) in next st, sk 2) around. Work 23 shells. Sl st to join. Fasten off.
Lace-Up Cord and Tassel Attachment
Make 2 cords, each approximately 20 inches long. Thread each cord through the eyelet panels on the shorts sides, weaving from top to bottom in a crisscross X pattern.
Tassel placement:
Size Customization Tips
To size up: Add 6 stitches to the foundation chain of both top panels and both shorts panels for each size up.
To size down: Remove 6 stitches per panel per size down from the foundation chain. You may also reduce the height of the shorts by working 4 fewer rows before beginning crotch shaping.
For a larger bust cup: After the accelerated shaping in rows 19 through 26 of the halter top front panel, work 2 additional even rows before continuing to the lace-up column.
Thank you so much for choosing this midnight purple boho crochet set pattern for your next project. I truly hope you love making it as much as I loved designing it. If you create this set, I would absolutely love to see your finished piece. Tag me on Instagram or share your photos in our Facebook group.
Save this pattern to your Pinterest boards so you can find it easily when you are ready to start. And please drop a comment below if you make this set. I read every single one and your photos make my day!