
This is a crochet amigurumi bat designed to look like a ripe orange. You will use single crochet, bobble stitches, and basic shaping techniques. The finished bat stands about 7 inches tall and spans 12 inches wide with wings fully extended.
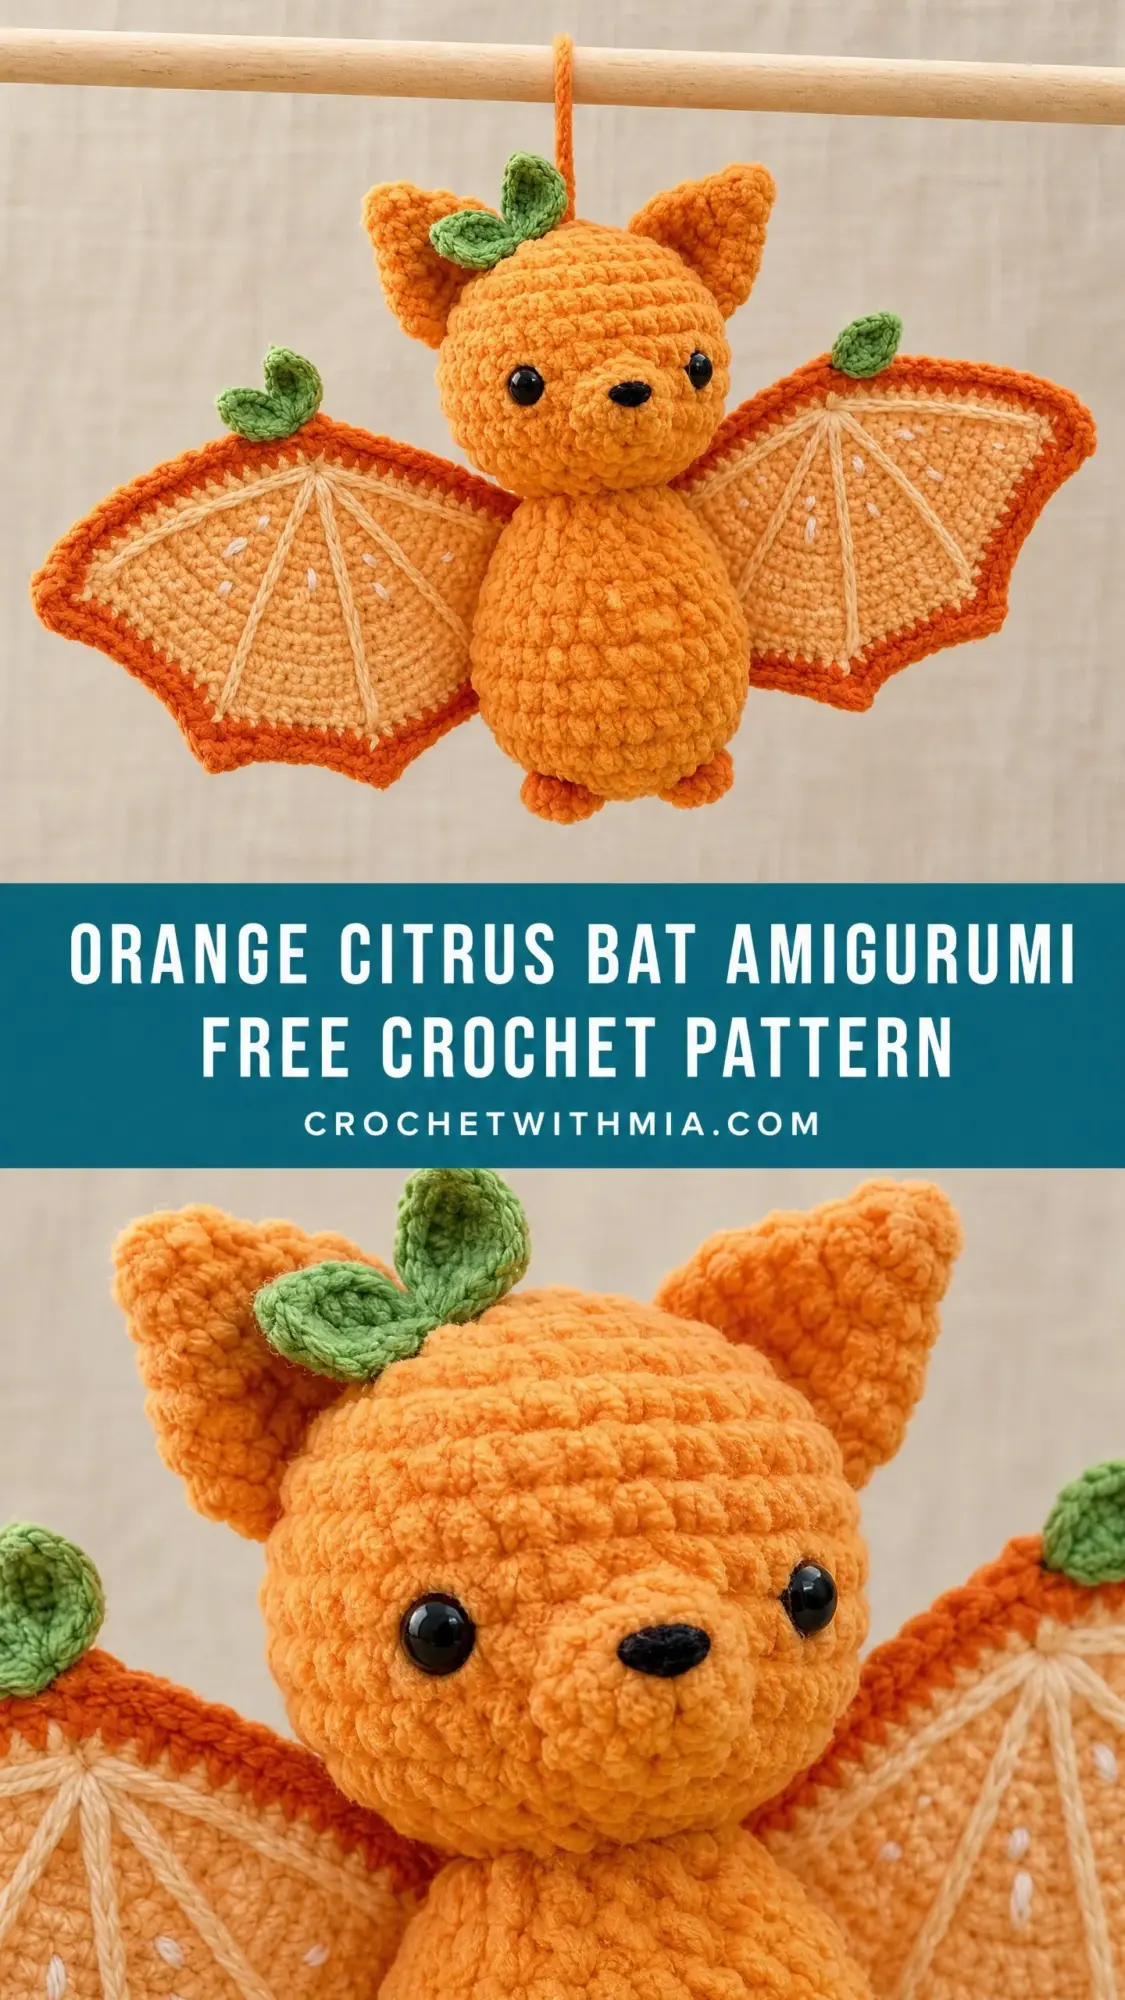
The body features a bumpy bobble texture that mimics orange peel. The wings are flat panels with embroidered lines radiating outward like the segments of a sliced citrus fruit. Little green leaves accent the top of the head and each wing tip.
I would call this an intermediate project. If you have completed a couple of amigurumi pieces before and feel comfortable working in continuous rounds, you can absolutely handle this one.
Why You Will Love This Pattern
This little bat combines two things that do not normally go together. Spooky bat silhouette meets cheerful citrus colors. The result is something unexpected and completely adorable.
The bobble stitch texture gives the body real dimension. Each little bump catches the light differently, creating that authentic orange peel look. The wings lie flat and feature surface embroidery that suggests juice sacs and membrane lines.
Every piece is worked separately and then assembled at the end. This approach makes the project portable. You can crochet the ears during your lunch break and tackle the wings over the weekend.
Finished Measurements
The completed bat measures approximately 7 inches tall by 12 inches wide with wings fully extended (18 cm by 30 cm). The body alone, without wings, measures about 5 inches tall by 3 inches wide (13 cm by 7.5 cm).
Materials You Will Need
Yarn (Worsted Weight):
Hook: US size G-6 / 4.0 mm crochet hook
Additional Supplies:
Yarn Suggestions
Any smooth worsted weight yarn will work beautifully here. Avoid fuzzy or fluffy yarns because they will obscure the bobble texture and make the wing embroidery harder to see.
Lion Brand Pound of Love in Gold (Color A), Tangerine (Color B), and Ivory (Color C) gives consistent tension and excellent stitch definition.
Paintbox Yarns Simply DK works if you prefer a finer texture. Drop down to a US E-4 / 3.5 mm hook and check your gauge.
We Are Knitters The Wool is a lovely choice if you prefer natural fiber. Just note that wool amigurumi must be hand-washed.
Gauge
With Color A and your G-6 / 4.0 mm hook, working single crochet (sc) in continuous rounds:
5 stitches = 1 inch / 2.5 cm
5 rows = 1 inch / 2.5 cm
To check your gauge, work a small swatch. Magic ring, 6 sc in ring. Round 2: 2 sc in each st (12). Round 3: (sc, 2 sc in next st) 6 times (18). Round 4: (sc in next 2 sts, 2 sc in next st) 6 times (24). Fasten off. Measure across the flat circle. It should be about 2 inches / 5 cm in diameter. Adjust your hook size if needed.
Gauge matters here for the overall size and proportion. Small variations will not break the construction, but they will change your finished dimensions.
Abbreviations and Stitch Definitions
Let me walk you through every abbreviation used in this pattern. I will define each one in plain English so there is no confusion.
Special Stitches
Bobble Stitch (Bob)
This stitch creates a raised bump on the right side of your fabric. It mimics the dimpled texture of orange peel.
Step 1: Insert your hook into the indicated stitch. Yarn over, pull up a loop, yarn over, pull through 2 loops. You now have 2 loops on your hook.
Step 2: Insert your hook into the same stitch again. Yarn over, pull up a loop, yarn over, pull through 2 loops. You now have 3 loops on your hook.
Step 3: Insert your hook into the same stitch one more time. Yarn over, pull up a loop, yarn over, pull through 2 loops. You now have 4 loops on your hook.
Step 4: Yarn over and pull through all 4 loops on your hook. One bobble complete.
The bobble will pop outward to the right side of your work. When working in continuous rounds, the right side faces outward naturally. Give each bobble a little push to make sure it pops to the outside.
Invisible Decrease (dec)
This decrease is less visible than a standard decrease because you only work through the front loops.
Step 1: Insert your hook through the front loop only of the next stitch.
Step 2: Without removing your hook, insert it through the front loop only of the following stitch.
Step 3: Yarn over and pull through both front loops. You now have 2 loops on your hook.
Step 4: Yarn over and pull through both loops. One decrease complete. This counts as 1 stitch.
Important Pattern Notes
Read these before you start. They will save you confusion later.
1. All pieces except the wings are worked in continuous rounds. You do not join at the end of each round. Use a stitch marker in the first stitch and move it up as you go.
2. The bobble texture appears throughout the body and head. The ears are plain single crochet so they stay thin and shapeable.
3. Wings are worked flat in rows with turning chains. You will add the embroidery after blocking.
4. Work through both loops unless the pattern specifically says BLO.
5. Leave long tails (at least 12 inches) when fastening off pieces that need to be sewn together. Use these tails for seaming.
6. Insert safety eyes before closing the head. This is crucial. Once the opening gets too small, you cannot attach them properly.
7. The head and body are worked as one continuous piece from top to bottom. No seaming required for the main torso.
8. Stuff as you go. Add fiberfill every few rounds while the opening is still large enough.
9. When switching colors on the wings, carry the unused color loosely along the edge or cut and rejoin. Do not carry colors across the open wing fabric.
Pattern Instructions
Head and Body
The head and body are worked as one piece from the top of the head downward. Use Color A and begin with a magic ring.
Rnd 1: 6 sc in MR. Pull ring closed. (6 sts)
Rnd 2: 2 sc in each st around. (12 sts)
Rnd 3: (sc in next st, inc) 6 times. (18 sts)
Rnd 4: (sc in next 2 sts, inc) 6 times. (24 sts)
Rnd 5: (sc in next 3 sts, inc) 6 times. (30 sts)
Rnd 6: (sc in next 4 sts, inc) 6 times. (36 sts)
Rnd 7: (sc in next 5 sts, inc) 6 times. (42 sts)
Rnd 8: (sc in next 2 sts, Bob in next st, sc in next 2 sts, inc) 7 times. (49 sts)
This round introduces the bobble pattern while increasing. Each 6-stitch repeat produces 7 stitches.
Rnd 9: (sc in next 3 sts, Bob in next st, sc in next 3 sts) 6 times, sc in last st. (49 sts)
Rnd 10: (sc in next 6 sts, inc) 7 times. (56 sts)
Rnd 11: (sc in next 2 sts, Bob in next st, sc in next 2 sts, Bob in next st, sc in next st) 8 times. (56 sts)
Rnd 12: sc in each st around. (56 sts)
Rnd 13: (sc in next 5 sts, Bob in next st, sc in next st) 8 times. (56 sts)
Rnd 14: sc in each st around. (56 sts)
Checkpoint: Your head should measure approximately 3 inches in diameter. Now is the time to attach the safety eyes between Rounds 9 and 10, about 10 to 12 stitches apart. Embroider the nose with black floss, making a small triangle or Y-shape centered below the eyes between Rounds 10 and 11.
Rnd 15: (sc in next 6 sts, dec) 7 times. (49 sts)
Rnd 16: (sc in next 5 sts, dec) 7 times. (42 sts)
Rnd 17: (sc in next 4 sts, dec) 7 times. (35 sts)
Rnd 18: (sc in next 3 sts, dec) 7 times. (28 sts)
Rnd 19: (sc in next 2 sts, dec) 7 times. (21 sts)
Add stuffing now. Fill the head firmly and evenly.
Neck Transition:
Rnd 20: (sc in next st, dec) 7 times. (14 sts)
Rnd 21: sc in each st around. (14 sts)
Begin Body:
Rnd 22: (sc in next st, inc) 7 times. (21 sts)
Rnd 23: (sc in next 2 sts, inc) 7 times. (28 sts)
Rnd 24: (sc in next 3 sts, inc) 7 times. (35 sts)
Rnd 25: (sc in next 4 sts, inc) 7 times. (42 sts)
Rnd 26: (Bob in next st, sc in next 2 sts) 14 times. (42 sts)
Rnd 27: sc in each st around. (42 sts)
Rnd 28: (sc in next 2 sts, Bob in next st) 14 times. (42 sts)
Rnd 29: sc in each st around. (42 sts)
Rnd 30: (Bob in next st, sc in next 2 sts) 14 times. (42 sts)
Rnd 31: sc in each st around. (42 sts)
Checkpoint: The body should now be at its widest point, about 2.5 inches in diameter. Add more stuffing. The body should feel very firm.
Rnd 32: (sc in next 5 sts, dec) 6 times. (36 sts)
Rnd 33: (sc in next 4 sts, dec) 6 times. (30 sts)
Rnd 34: (sc in next 3 sts, dec) 6 times. (24 sts)
Rnd 35: (sc in next 2 sts, dec) 6 times. (18 sts)
Rnd 36: (sc in next st, dec) 6 times. (12 sts)
Finish stuffing firmly.
Rnd 37: dec 6 times. (6 sts)
Fasten off, leaving a 6-inch tail. Thread the tail through the remaining 6 stitches, pull tight to close, and secure. Weave in the end.
Ears (Make 2)
Using Color A and MR.
Rnd 1: 6 sc in MR. (6 sts)
Rnd 2: (sc in next st, inc) 3 times. (9 sts)
Rnd 3: (sc in next 2 sts, inc) 3 times. (12 sts)
Rnd 4: (sc in next 3 sts, inc) 3 times. (15 sts)
Rnd 5: (sc in next 4 sts, inc) 3 times. (18 sts)
Rnd 6: sc in each st around. (18 sts)
Rnd 7: sc in each st around. (18 sts)
Do not stuff. Flatten the ear by pressing the opening together so both sides align. The ear forms a small rounded triangle. Join the two layers with 1 sl st at the center of the opening edge. Leave a long tail for sewing.
Fold the base of each ear slightly forward before attaching to give them dimension.
Legs and Feet (Make 2)
Using Color A and MR.
Rnd 1: 6 sc in MR. (6 sts)
Rnd 2: 2 sc in each st around. (12 sts)
Rnd 3: (sc in next st, inc) 6 times. (18 sts)
Rnd 4: sc in each st around. (18 sts)
This completes the foot pad. Now shape the leg upward.
Rnd 5: (sc in next st, dec) 6 times. (12 sts)
Rnd 6: sc in each st around. (12 sts)
Rnd 7: sc in each st around. (12 sts)
Rnd 8: sc in each st around. (12 sts)
Stuff lightly. The legs should sit flat and support the body.
Fasten off, leaving a long tail for sewing.
Arms (Make 2)
Using Color A and MR.
Rnd 1: 6 sc in MR. (6 sts)
Rnd 2: (sc in next st, inc) 3 times. (9 sts)
Rnd 3: sc in each st around. (9 sts)
Rnd 4: sc in each st around. (9 sts)
Rnd 5: (sc in next st, dec) 3 times. (6 sts)
Rnd 6: sc in each st around. (6 sts)
Rnd 7: sc in each st around. (6 sts)
Rnd 8: sc in each st around. (6 sts)
Stuff very lightly or not at all. Arms are small and narrow.
Fasten off, leaving a long tail for sewing.
Wings (Make 2)
Wings are worked flat in rows. They form wide, fan-shaped panels resembling orange slice cross-sections.
Using Color C, ch 4.
Row 1 (RS): sc in 2nd ch from hook, sc in next ch, 3 sc in last ch (this creates the rounded outer tip). Working back along the opposite side of the foundation chain: sc in next st, sc in last st, ch 1, turn. (7 sts)
Row 2 (WS): sc in first st, sc in next st, inc, sc in next st, inc, sc in next 2 sts, ch 1, turn. (9 sts)
Row 3 (RS): sc in first 2 sts, inc, sc in next 3 sts, inc, sc in next 2 sts, ch 1, turn. (11 sts)
Row 4 (WS): sc in first 3 sts, inc, sc in next 3 sts, inc, sc in next 3 sts, ch 1, turn. (13 sts)
Row 5 (RS): sc in first 3 sts, inc, sc in next 5 sts, inc, sc in next 3 sts, ch 1, turn. (15 sts)
Row 6 (WS): sc in first 4 sts, inc, sc in next 5 sts, inc, sc in next 4 sts, ch 1, turn. (17 sts)
Row 7 (RS): sc in first 4 sts, inc, sc in next 7 sts, inc, sc in next 4 sts, ch 1, turn. (19 sts)
Row 8 (WS): sc in first 5 sts, inc, sc in next 7 sts, inc, sc in next 5 sts, ch 1, turn. (21 sts)
Row 9 (RS): sc in first 5 sts, inc, sc in next 9 sts, inc, sc in next 5 sts, ch 1, turn. (23 sts)
Row 10 (WS): sc in first 6 sts, inc, sc in next 9 sts, inc, sc in next 6 sts, ch 1, turn. (25 sts)
Row 11 (RS): sc in first 6 sts, inc, sc in next 11 sts, inc, sc in next 6 sts, ch 1, turn. (27 sts)
Row 12 (WS): sc in first 7 sts, inc, sc in next 11 sts, inc, sc in next 7 sts, ch 1, turn. (29 sts)
Row 13 (RS): sc in first 7 sts, inc, sc in next 13 sts, inc, sc in next 7 sts, ch 1, turn. (31 sts)
Row 14 (WS): sc in first 8 sts, inc, sc in next 13 sts, inc, sc in next 8 sts, ch 1, turn. (33 sts)
Row 15 (RS): sc in first 8 sts, inc, sc in next 15 sts, inc, sc in next 8 sts, ch 1, turn. (35 sts)
Row 16 (WS): sc in first 9 sts, inc, sc in next 15 sts, inc, sc in next 9 sts, ch 1, turn. (37 sts)
Row 17 (RS): sc in first 9 sts, inc, sc in next 17 sts, inc, sc in next 9 sts, ch 1, turn. (39 sts)
Row 18 (WS): sc in each st across, ch 1, turn. (39 sts)
Do not fasten off. Begin the border.
Wing Border:
Drop Color C. Join Color B with sl st at the corner of Row 18.
Border Round 1: Working around the entire outer edge of the wing, sc evenly around the perimeter. Work approximately 2 sc per row end along the side edges and 1 sc per stitch along the top and bottom. At the outer tip point, work 3 sc into the corner to turn smoothly. When you reach the straight inner edge, work 1 row of sc along this edge too. Sl st to join if desired. Fasten off Color B.
Checkpoint: Each wing should measure approximately 5 inches wide and 4 inches tall. Wings should lie perfectly flat. If they curl, spray lightly with water and pin flat to dry.
Wing Embroidery
Using Color E (white) and a yarn needle, embroider the orange slice segment lines onto the inner face of each wing.
Embroider 6 to 7 straight lines per wing. Each line starts near the inner corner (attachment edge) and radiates outward toward the curved edge, like spokes on a wheel.
Between the radiating lines, near the outer edge, add 2 to 3 small dots or short horizontal dashes to suggest juice sacs.
Use simple straight stitches for all embroidery. Pull the yarn gently so stitches sit on top without puckering.
Leaves (Make 3)
Make one for the head and two for the wing tips. All three are identical.
Using Color D, ch 7.
Row 1 (RS): sc in 2nd ch from hook, sc in next 2 chs, 3 sc in next ch (center point of leaf tip), sc in next 2 chs, sl st in last ch, ch 1, turn. (9 working sts)
Row 2 (WS): sk sl st, sc in next 2 sts, inc, sc in center st, inc, sc in next 2 sts, sl st in last st, ch 1, turn. (11 sts)
Row 3 (RS): sk sl st, sc in next 2 sts, sc in next st, inc, sc in center st, inc, sc in next st, sc in next 2 sts, sl st in last st. (13 sts plus sl st)
Fasten off, leaving a long tail. Pinch the base to create a natural curve.
For the head stem: Using Color D, ch 4. Sl st in 2nd ch from hook, sl st in next ch, sc in last ch. Fasten off, leaving a long tail. This tiny stem connects the leaf to the top of the head.
Assembly
Step 1: Ears. Position one ear on each upper side of the head, about 3 to 4 stitches back from the top center. Angle them slightly outward. Pin in place and sew firmly.
Step 2: Head Stem Leaf. Sew the base of the large leaf to one end of the stem piece. Then sew the other end of the stem to the very top center of the head, between the ears. The leaf should stand upright or lean slightly forward.
Step 3: Legs. Position legs on the bottom front of the body, one on each side of center, about 3 stitches apart. Feet should point slightly outward and forward. Sew firmly.
Step 4: Arms. Position arms on the upper sides of the body, about 2 rounds below where the neck meets the body. Angle them slightly downward and outward. Sew firmly.
Step 5: Wings. The straight inner edge of each wing attaches along the side of the body, from about Round 22 down to Round 34. The top corner sits near the base of the ear. The bottom corner attaches at the lower body side. Pin extensively before sewing. This seam must be secure.
Step 6: Wing Tip Leaves. Sew one leaf to the upper outer corner of each wing. Angle the leaf so it points upward and slightly outward.
Finishing and Blocking
Weave in all remaining ends securely. Thread each end through at least 2 inches of fabric before trimming.
To block the wings, lightly mist the finished bat with water. Spread the wings to full extension and pin them flat on a blocking board. Allow to dry completely, about 4 to 8 hours.
For stiffer wings that hold their position, cut two wing shapes from stiff interfacing or thin cardboard, slightly smaller than the finished wings. Insert inside the wings before attaching to the body, then whipstitch closed.
Care Instructions
Hand wash in cool water with gentle detergent. Do not wring. Press gently between towels to remove excess water. Reshape while damp and lay flat to dry.
If your yarn is 100% acrylic and no stiffener is used, you may machine wash on a delicate cycle in a mesh bag. Lay flat to dry. Do not machine dry or iron.
Size Customization
Smaller bat (about 5 inches wide): Use fingering weight yarn with a US B-1 or C-2 hook. Keep the same stitch counts. Use 9 mm safety eyes.
Larger bat (about 16 inches wide): Use bulky weight yarn with a US J-10 hook. Keep the same stitch counts. Use 18 mm safety eyes.
Longer body only: Add 2 extra rounds of bobble texture between Rounds 27 and 31.
You Did It!
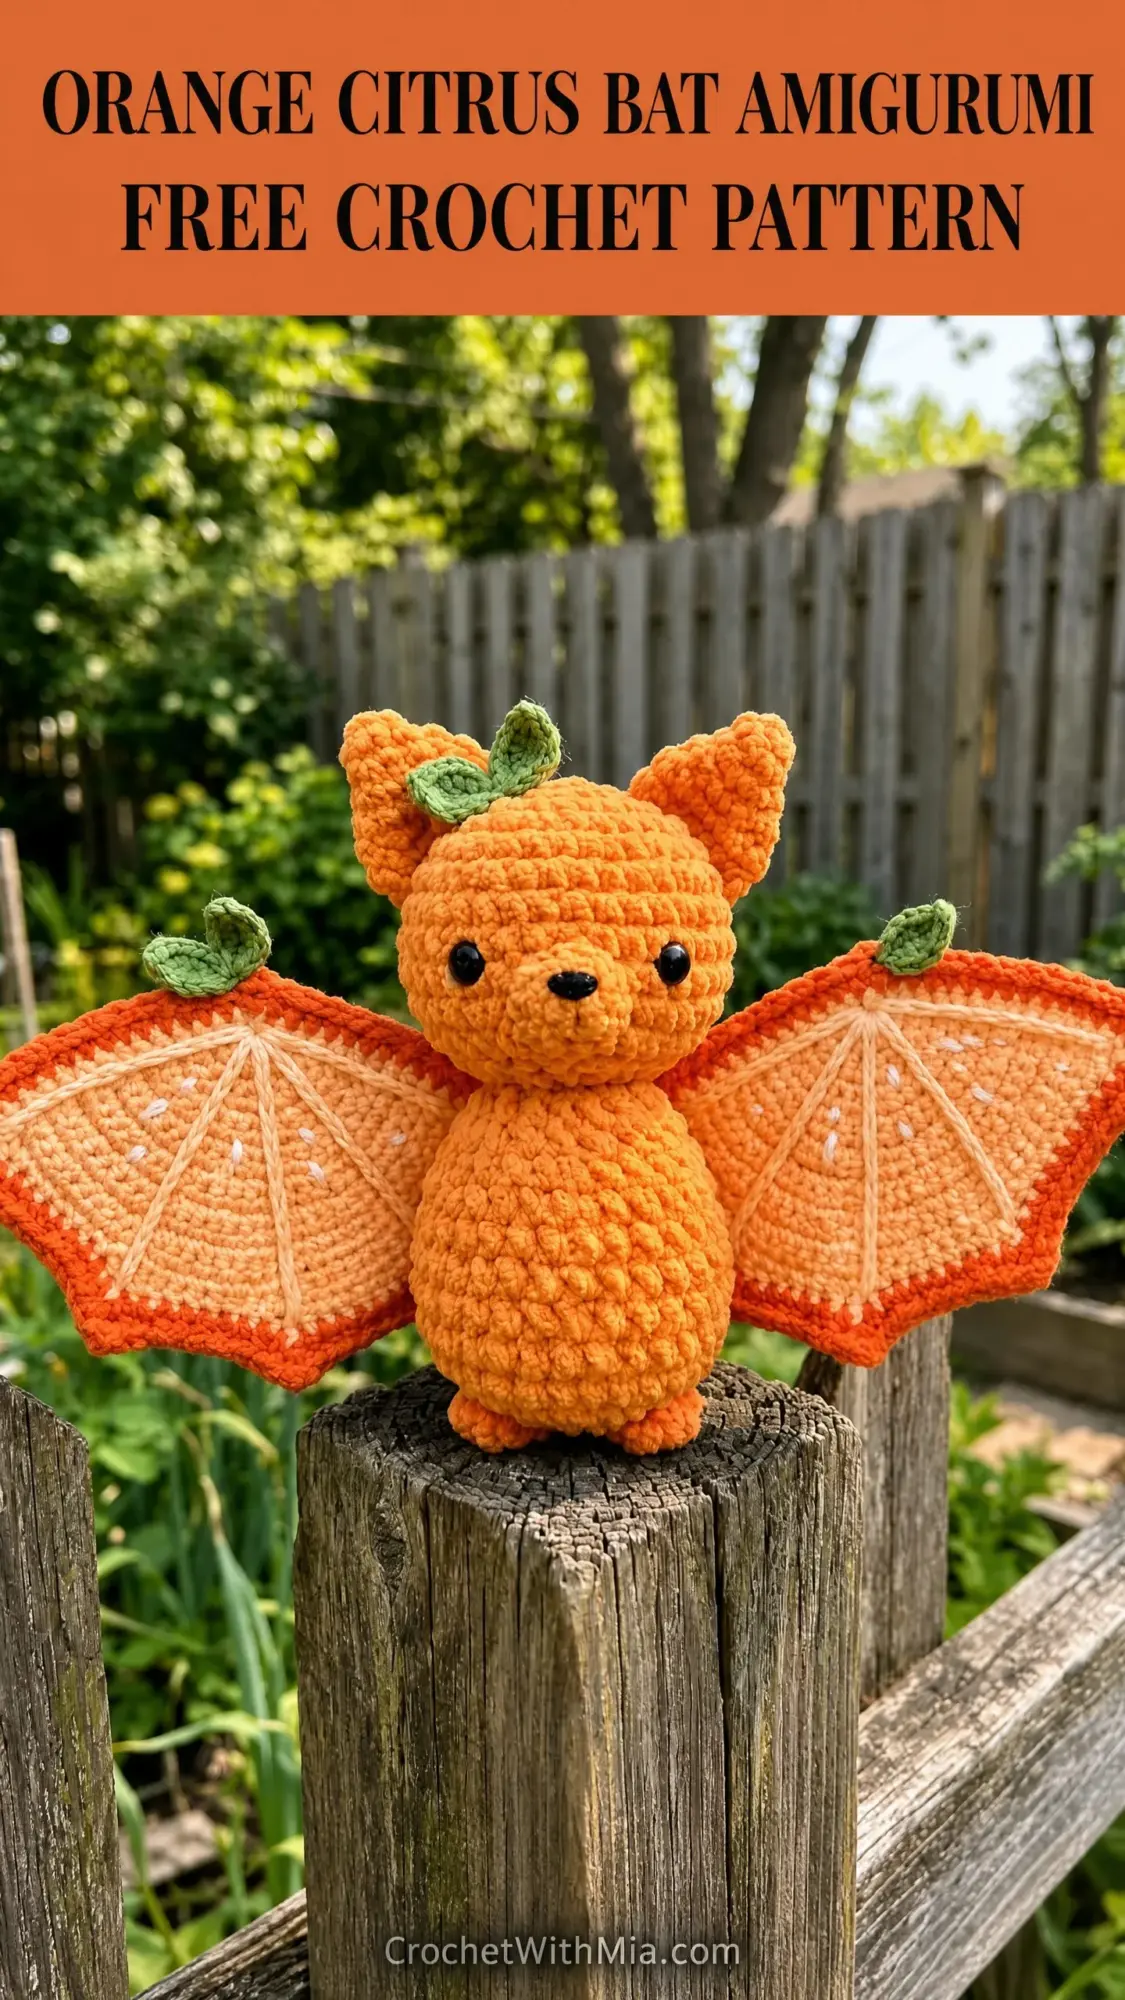
Thank you so much for making this citrus bat with me. I hope you had as much fun crocheting those bobbles as I did designing them. Your finished bat is going to be absolutely adorable sitting on a shelf or perched on a fence post.
If you make one, I would love to see it! Tag me on Instagram or share a photo in my Facebook group. Seeing your creations truly makes my day.
If this pattern made you smile, go ahead and save it to your Pinterest boards so you can find it again later. And please drop a comment below if you give it a try. I read every single one and I love hearing how your projects turn out!