
If you have been looking for a statement piece that transforms a nursery, reading nook, or craft room into something truly special, this hanging jellyfish mobile delivers exactly that. The trio uses simple single crochet construction with just enough variety in the tentacle techniques to keep things interesting.
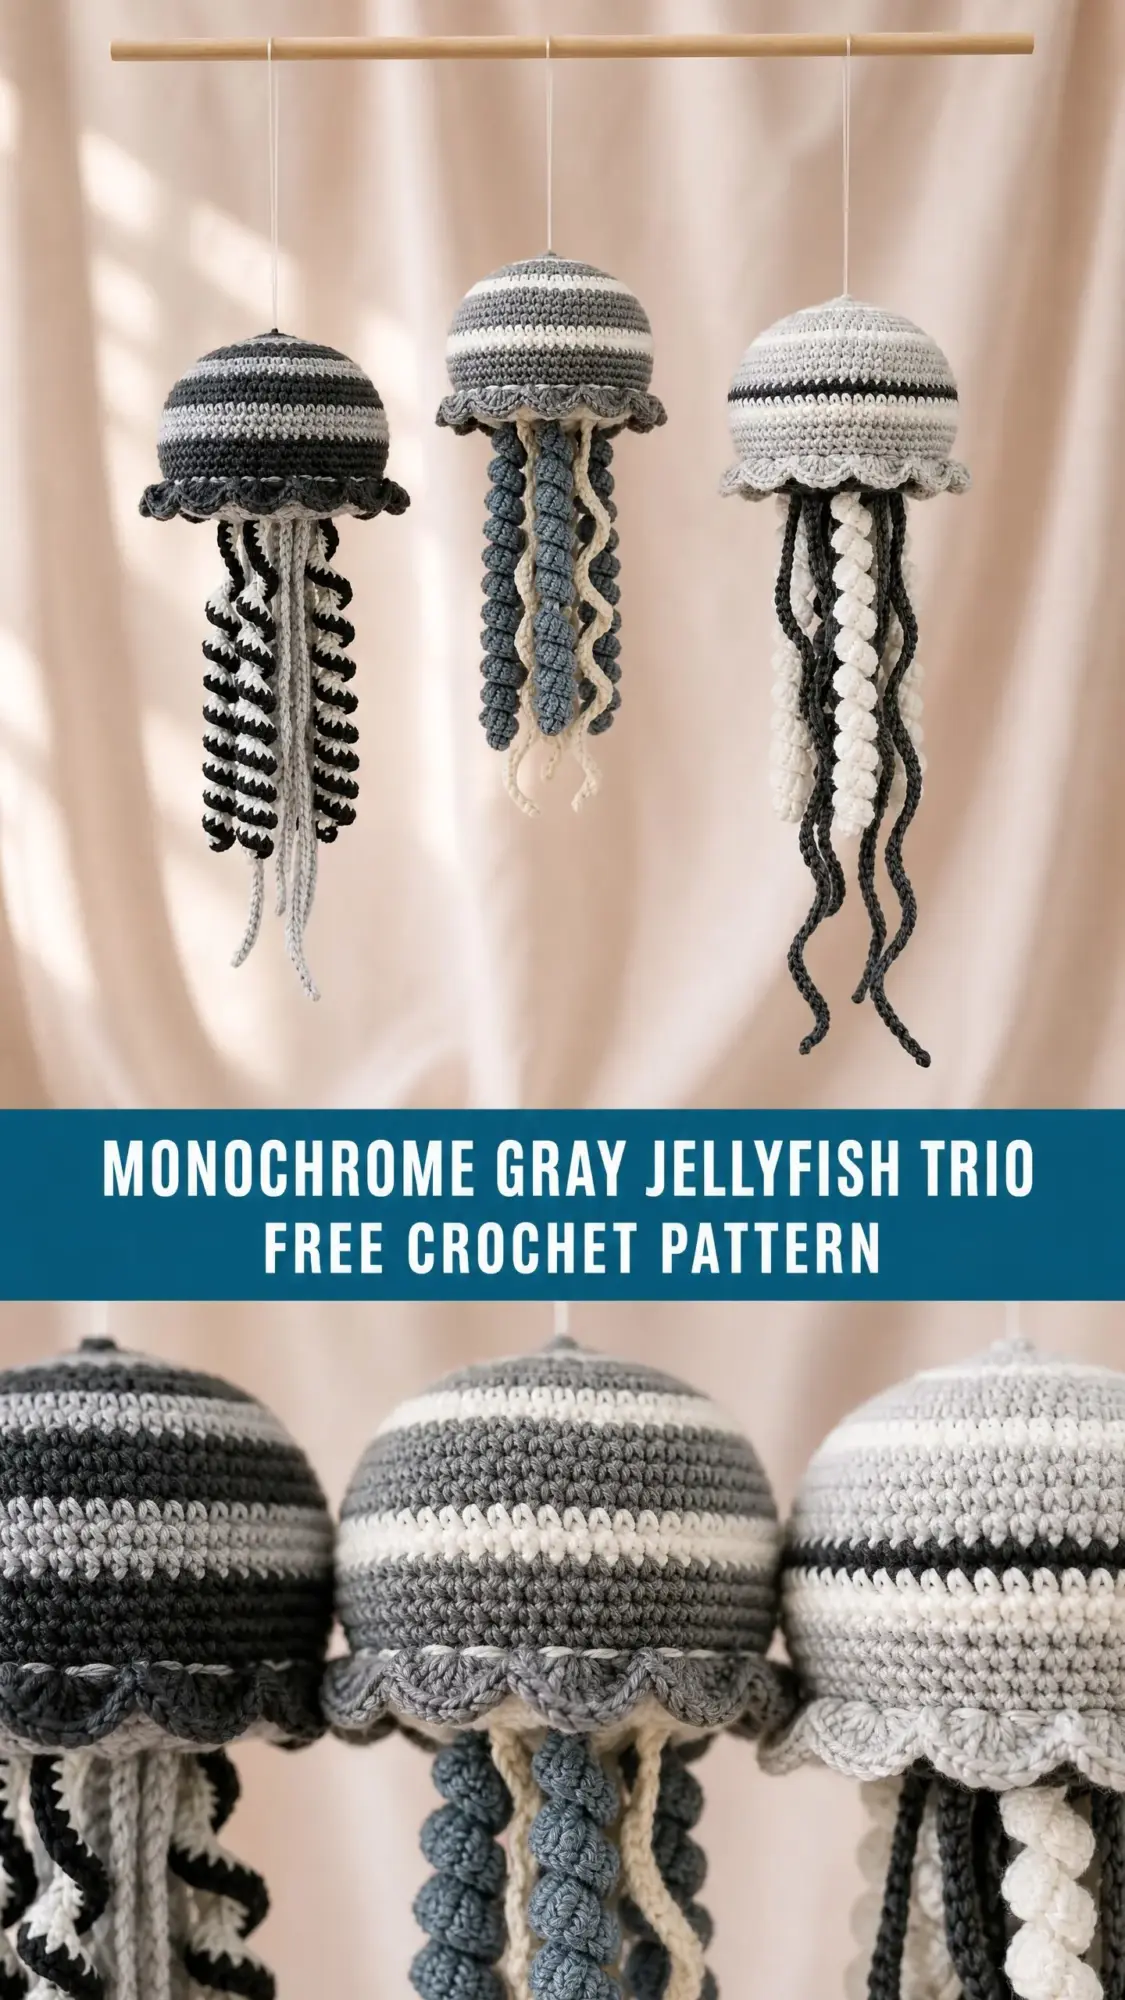
Each jellyfish works up in about four to six hours, making the complete set a perfect weekend project or a thoughtful handmade gift for a baby shower. The neutral gray palette fits seamlessly into modern decor, and the different tentacle styles give each jellyfish its own personality.
This pattern sits at an intermediate skill level, but confident beginners who have completed a couple of amigurumi projects will handle it beautifully. You will learn spiral wrapping, bobble stitches, and beaded chains across the three jellyfish, building your skills as you go.
Why This Jellyfish Mobile Pattern Works So Well
These crocheted jellyfish combine the satisfying structure of amigurumi with the flowing movement of dangling tentacles. The striped domed bells provide visual interest without complicated colorwork. You simply carry your unused colors up the inside of the bell where they stay hidden by stuffing.
The scalloped frill sits at the widest point of each bell, creating that distinctive jellyfish silhouette. It attaches into the front loops of an earlier round, so you work the bell first and add the decorative edge afterward. No fiddly construction required.
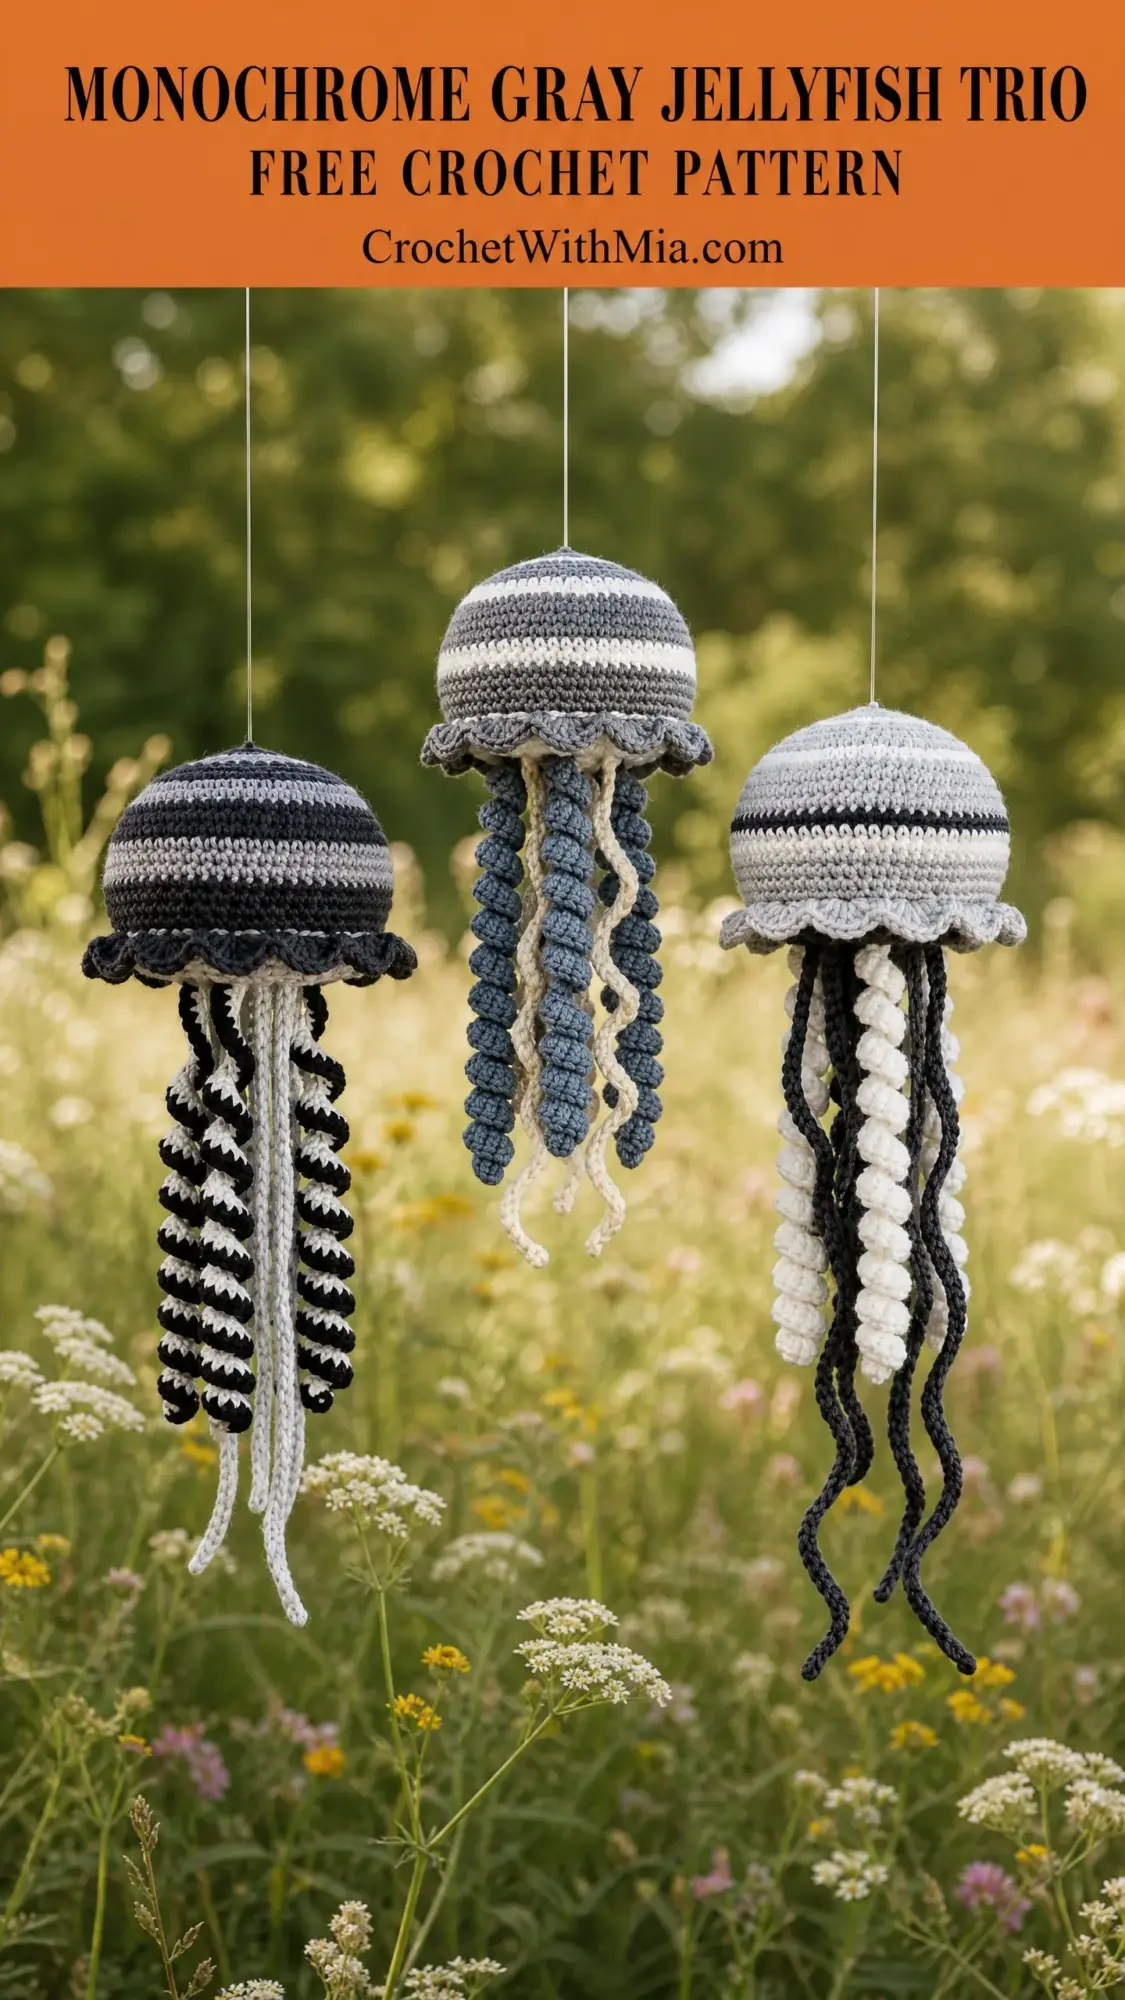
What I love most about this design is how the three tentacle techniques create contrast while maintaining a cohesive look. Jellyfish One features tightly spiraled tentacles that twist and bounce. Jellyfish Two has chunky bobble clusters with wonderful texture. Jellyfish Three sports delicate beaded chains that sway gently. Together, they make an eye-catching display.
Materials You Will Need
Yarn: Worsted weight yarn (Category 4) in the following amounts per jellyfish:
Jellyfish One (Dark):
Jellyfish Two (Mid):
Jellyfish Three (Light):
Hook: US Size G-6 / 4.0 mm
Notions:
Yarn Suggestions That Work Beautifully
Lion Brand Pound of Love gives excellent stitch definition for the stripe pattern and comes in all the gray, white, and charcoal shades you need. It is machine washable, which matters if this is going in a nursery.
Cascade 220 Superwash in merino wool creates a slightly firmer fabric that holds the dome shape exceptionally well. The stitch definition is superior, and the neutral palette options are extensive.
Avoid fuzzy or textured yarns for this project. They will obscure the stripe pattern and the pretty scallop details on the frill.
Gauge Information
14 single crochet x 16 rounds = 4 inches / 10 cm in continuous rounds of single crochet, blocked.
Gauge matters here because you need a fabric tight enough to hold the stuffing without gaps showing through. To check your gauge, work a quick swatch: magic ring, 6 single crochet (sc), increase in each stitch (12 sc), increase in every other stitch (18 sc), increase every third stitch (24 sc). Measure across the diameter. It should hit approximately 3 inches. Adjust your hook size up if your fabric feels too tight, or down if it feels too loose.
Finished Size
Tentacle length is adjustable, so you can customize to fit your space.
Abbreviations and Stitch Definitions
Let me walk you through every stitch you will encounter:
sc = single crochet (insert hook, yarn over, pull up a loop, yarn over, pull through both loops)
inc = increase (work 2 single crochet stitches into one stitch)
dec = invisible decrease (insert hook into front loop of next stitch and front loop of following stitch, yarn over, pull through both loops, yarn over, pull through remaining 2 loops)
ch = chain
sl st = slip stitch
FLO = front loop only
BLO = back loop only
MR or MC = magic ring / magic circle
st(s) = stitch(es)
rnd = round
pm = place marker
Special Stitches Explained Step by Step
Picot Scallop (for the frill)
This creates the pretty ruffled edge around each bell:
1. Work 1 sc in the designated stitch
2. Chain 3
3. Insert hook into the first chain made (the one closest to your sc)
4. Yarn over and pull through to complete a slip stitch
5. Work 1 sc in the next stitch, then 1 sc in the stitch after that before working the next picot
You will end up with a scallop every 3 stitches. It sounds fiddly, but once you do a few, the rhythm clicks.
Bobble Stitch (for Jellyfish Two tentacles)
This creates puffy round bumps along the tentacle:
1. Yarn over, insert hook into the stitch
2. Yarn over, pull up a loop (3 loops on hook)
3. Yarn over, insert hook into the same stitch
4. Yarn over, pull up a loop (5 loops on hook)
5. Yarn over, insert hook into the same stitch
6. Yarn over, pull up a loop (7 loops on hook)
7. Yarn over, pull through all 7 loops
8. Chain 1 to close and secure
Spiral Wrap Tentacle (for Jellyfish One)
This is a construction technique rather than a traditional stitch. You work a foundation chain, then cram 3 sc into every single chain stitch. Because you are adding more stitches than the foundation can hold flat, the tentacle curls into a natural spiral. More stitches per chain equals tighter curl.
Beaded Chain Tentacle (for Jellyfish Three)
This creates a strand that looks like a row of little beads:
1. Leave a 12-inch starting tail
2. Chain 5
3. Work a puff bead: yarn over, insert hook into the first chain, yarn over and pull up a loop. Repeat this 4 times total into the same chain (9 loops on hook). Yarn over and pull through all 9 loops. Chain 1 to close.
4. Chain 4
5. Repeat steps 3 and 4 to desired length
Pattern Notes Before You Begin
The bell is worked in continuous rounds without joining at the end of each round. Use a stitch marker to track your first stitch and move it up as you work.
For color changes, switch to your new color on the last yarn over of the last stitch in the current round. Carry unused colors loosely up the inside of the bell. The stuffing will hide them completely.
The frill attaches into front loops of a specific round after the bell is complete. It is not part of the main round count.
All three jellyfish share identical bell and frill construction. Only the color assignments and tentacle types differ between them.
Stripe Sequence for All Three Bells
Rounds 1 to 3: Color A
Rounds 4 to 5: Color C
Rounds 6 to 8: Color B
Rounds 9 to 10: Color C
Rounds 11 to 13: Color A
Rounds 14 to 15: Color C
Rounds 16 to 18: Color B
Rounds 19 to 20: Color C
Rounds 21 to 24: Color A
Frill: Color B
The Bell Instructions
Work identically for all three jellyfish, substituting colors according to each colorway.
Round 1: Using Color A, make a magic ring. Work 6 sc into the ring. Pull ring closed. (6 sc)
Round 2: Inc in each stitch around. (12 sc)
Round 3: (Sc in next st, inc in next st) 6 times. (18 sc)
Round 4: Change to Color C at the last yo of the last st of Round 3. Using Color C: (Sc in next 2 sts, inc in next st) 6 times. (24 sc)
Round 5: (Sc in next 3 sts, inc in next st) 6 times. (30 sc)
Round 6: Change to Color B. (Sc in next 4 sts, inc in next st) 6 times. (36 sc)
Round 7: (Sc in next 5 sts, inc in next st) 6 times. (42 sc)
Round 8: (Sc in next 6 sts, inc in next st) 6 times. (48 sc)
Round 9: Change to Color C. Sc in each stitch around. (48 sc)
Round 10: Sc in each stitch around. (48 sc)
Round 11: Change to Color A. Sc in each stitch around. (48 sc)
Round 12: Sc in each stitch around. (48 sc)
Round 13: Sc in each stitch around. (48 sc)
Round 14: Change to Color C. Sc in each stitch around. (48 sc)
Round 15: Sc in each stitch around. (48 sc)
Round 16: Change to Color B. Sc in each stitch around. (48 sc)
Round 17: Sc in each stitch around. (48 sc)
Round 18: Sc in each stitch around. (48 sc)
Round 19: Change to Color C. Sc in each stitch around. (48 sc)
Round 20: Sc in each stitch around. (48 sc)
Checkpoint: Your bell should measure approximately 3 inches tall and 4.5 inches across. Begin adding stuffing now. Add a small weighted sachet to the inside bottom if desired for stability.
Round 21: Change to Color A. (Sc in next 6 sts, dec over next 2 sts) 6 times. (42 sc)
Round 22: (Sc in next 5 sts, dec over next 2 sts) 6 times. (36 sc)
Round 23: (Sc in next 4 sts, dec over next 2 sts) 6 times. (30 sc)
Round 24: (Sc in next 3 sts, dec over next 2 sts) 6 times. (24 sc)
Fasten off Color A, leaving a 6-inch tail for weaving in. The bell stays open at the base where the frill and tentacles will attach.
Before adding the frill, insert your monofilament hanging thread through the top center of the bell (through the magic ring closure), bring it back up beside the first insertion, and tie a double knot inside. Leave at least 12 inches extending from the top for hanging. Add final stuffing now, packing firmly.
The Frill Instructions
The frill works into the front loops of Round 20, which has 48 stitches.
Using Color B, join yarn with a slip stitch into any front loop of Round 20.
Frill Round: (Sc in front loop of next st, ch 3, sl st into first ch of those 3 chs to close picot, sc in front loop of next st, sc in front loop of next st) 16 times. (48 stitches used, 16 picot scallops formed)
Fasten off and weave in ends.
Your frill should form a ruffled ring with 16 distinct picot points evenly spaced around the bell.
Jellyfish One Tentacles (Spiral Wrap Style)
Work 4 spiral tentacles in Color D (Black):
Chain 60. Work 3 sc into each chain across. (180 sc) Fasten off, leaving a 10-inch tail.
Work 4 spiral tentacles in Color C (White):
Chain 60. Work 3 sc into each chain across. (180 sc) Fasten off, leaving a 10-inch tail.
Work 4 straight trailing tentacles in Color C (White):
Chain 40. Sl st in second chain from hook and in each chain across. (39 sl sts) Fasten off, leaving a 10-inch tail.
Space all 12 tentacles evenly around the 24-stitch opening. Alternate colors and types as you attach them.
Jellyfish Two Tentacles (Bobble Cluster Style)
Work 4 bobble tentacles in Color D (Steel blue-gray):
Chain 2. Work 1 bobble stitch into the second chain from hook, ch 1 to close, ch 3. Continue: (Work 1 bobble into next ch-3 space, ch 1 to close, ch 3) 14 times. Ch 1. Fasten off with a 10-inch tail. (15 bobbles total)
Work 4 bobble tentacles in Color C (Cream):
Repeat as above.
Work 4 plain chain tentacles in Color B (Light gray):
Chain 50. Sl st in second chain from hook and in each chain across. (49 sl sts) Fasten off with a 10-inch tail.
Attach alternating blue bobble, cream bobble, and plain light gray around the opening.
Jellyfish Three Tentacles (Beaded Chain Style)
Work 4 beaded tentacles in Color C (Dark Charcoal):
Using the beaded chain method, create a strand with 12 beads. Fasten off with a 10-inch tail.
Work 4 beaded tentacles in Color A (White):
Same method, 12 beads per tentacle.
Work 4 plain cord tentacles in Color B (Light gray):
Chain 45. Sl st in second chain from hook and in each chain across. (44 sl sts) Fasten off with a 10-inch tail.
Alternate white beaded, charcoal beaded, and plain light gray around the opening.
Finishing Your Jellyfish Mobile
Weave all remaining ends into the stuffed interior where they will stay hidden. For the hanging loop, tie a small loop in the monofilament about 2 to 3 inches above the bell top.
To display as a trio, suspend the three jellyfish at slightly different heights for a layered effect. A 2-inch difference between each creates lovely visual depth.
If your frill folds upward instead of outward, lightly steam it open using a garment steamer held 2 to 3 inches away. For the spiral tentacles, encourage tighter curls by winding them around a pencil for 10 minutes before releasing.
Care Instructions
For acrylic yarn, spot clean with cool water and mild detergent. Do not machine wash, as the stuffing may clump and tentacles will tangle.
For wool yarn, hand wash in cool water with wool wash. Reshape the bell over an inflated balloon and allow to dry completely before hanging.
Store each jellyfish separately with tentacles loosely coiled to prevent tangling.
Thank you so much for choosing this pattern for your next project. I hope these jellyfish bring whimsy and charm to whatever corner of the world they end up floating in. If you make this trio, I would absolutely love to see your finished mobile. Tag me on Instagram or share a photo in our Facebook group.
If this pattern caught your eye, go ahead and pin it to your crochet board on Pinterest so you can find it when you are ready to start. And please drop a comment below if you make these adorable jellyfish. Hearing from you truly makes my day.