
I don’t know about you, but I have been searching for the perfect summer crochet project that actually feels fun to wear. Something cute, a little retro, and way more interesting than another basic tank top.
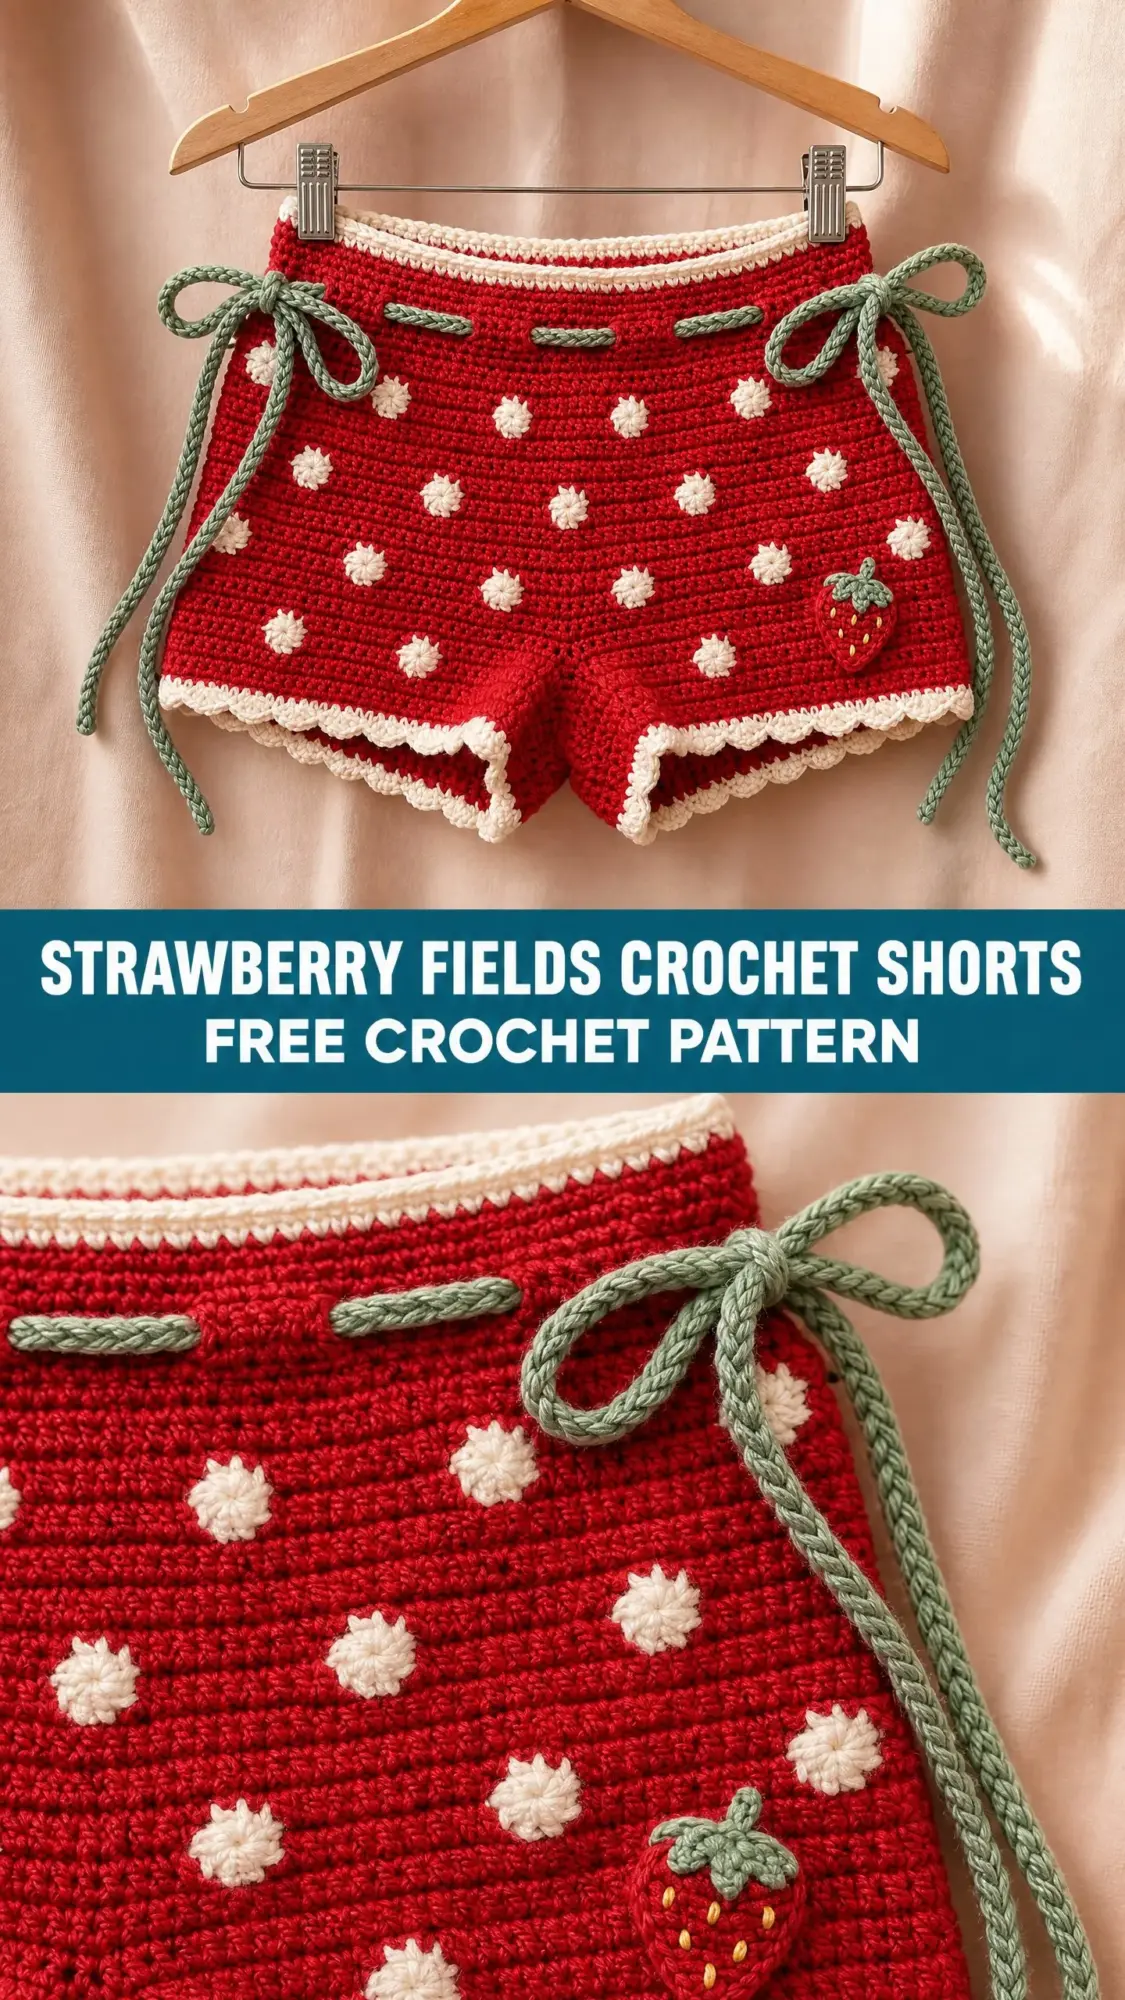
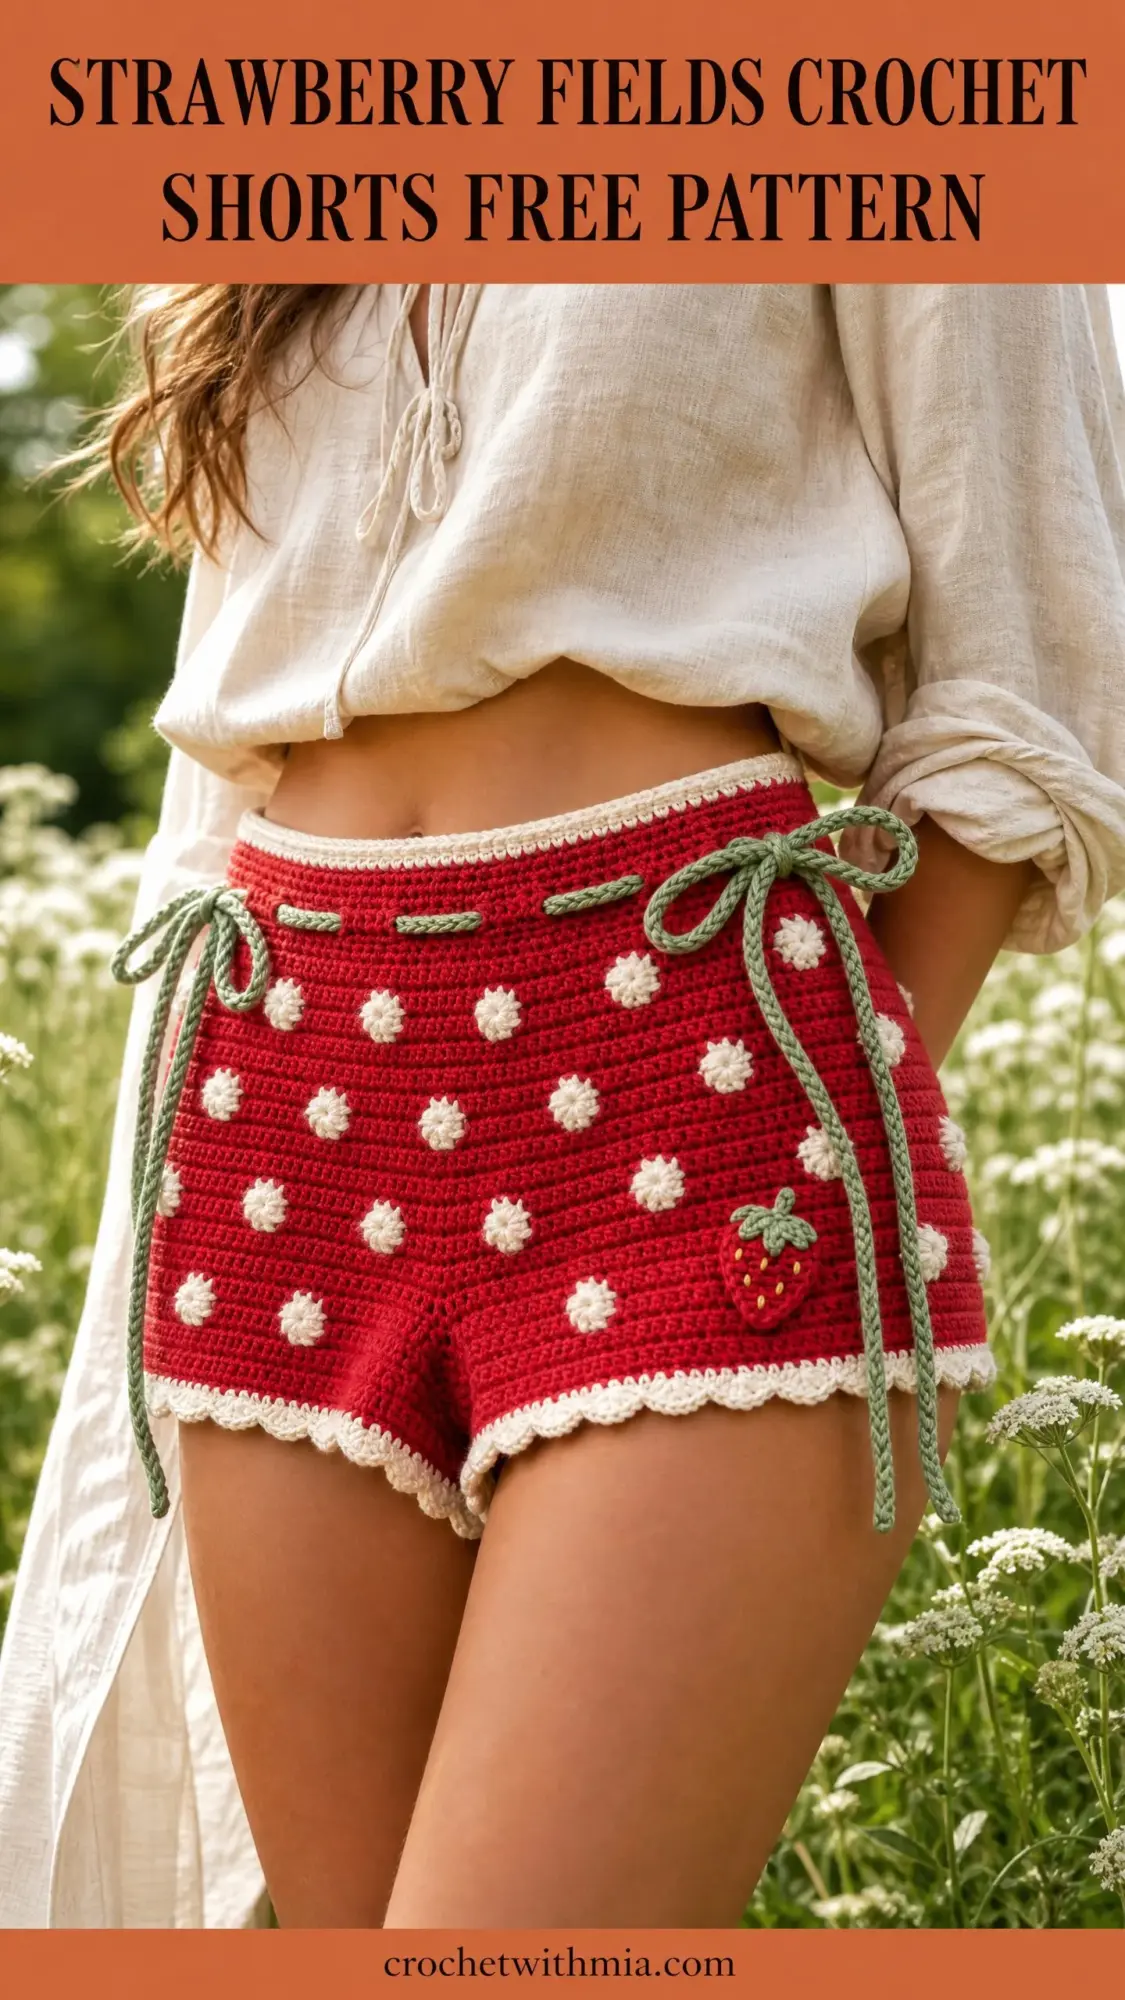
These strawberry shorts are exactly what I was looking for. Red with cream polka dots, sweet scalloped edges, and a tiny strawberry applique that makes the whole thing feel like a vintage dream. They look complicated but honestly break down into simple single crochet panels with some bobble stitches thrown in for texture.
If you have been wanting to try crocheting clothing but felt intimidated, this is a great place to start. Two flat panels, easy seaming, and forgiving construction that does not require perfect shaping skills. Let me walk you through every step.
About This Crochet Shorts Pattern
These cheerful crochet shorts feature a classic polka dot design created by working raised bobble stitches in cream yarn against a bright red background. The overall effect mimics the look of a fresh strawberry, complete with a tiny crocheted strawberry applique on the front.
The construction is straightforward. You will work two identical flat panels in rows using single crochet (sc) as your main stitch. The panels get seamed at the sides with small openings left at each hip for decorative sage green twisted cord ties. A cream picot shell edging finishes the leg openings with a sweet scalloped ruffle.
This is an intermediate level project. You should feel comfortable with color changes mid row, working bobble stitches, seaming flat panels together, and constructing a small three dimensional applique. Nothing here is advanced, but the bobble placement and color management require patience and attention to your tension.
Expect this crochet tutorial to take between 12 and 18 hours for an experienced intermediate crocheter. That does not include blocking time.
Finished Measurements
The pattern is written for a size Small (US 4 to 6) with notes for adjusting larger.
When laid flat, the finished shorts measure:
Materials Needed
Yarn:
Hook: US size G-6 (4.0 mm) or size needed to meet gauge
Notions:
Yarn Suggestions
Paintbox Yarns Simply DK works beautifully for this project. Choose Pillar Box Red for MC, Champagne White for CA, and Dusty Green for CB. This yarn has excellent stitch definition for bobble work and is machine washable.
Lion Brand Pound of Love in Scarlet, Fisherman, and Sage is very economical. The large yardage per skein means you will likely need only one skein of MC total.
Drops Paris is a 100% cotton option perfect for summer wear. Choose Tomato, Off White, and Dusty Mint. Cotton has less stretch than acrylic, so swatch carefully.
Avoid very fuzzy or chenille type yarns. The bobble texture will disappear into fuzzy fibers.
Gauge
18 sc x 22 rows = 4 inches / 10 cm in single crochet with US G-6 (4.0 mm) hook and worsted weight yarn, after blocking.
Gauge matters for a fitted garment. If your swatch has more stitches per 4 inches, go up a hook size. If fewer, go down. Please do not skip this step.
Abbreviations
Here are all the abbreviations used in this step by step crochet pattern:
Special Stitches
Bobble Stitch (bo)
The bobble creates a raised puff on the right side of the fabric. It is worked entirely in cream (CA) against the red (MC) background.
Step 1: At the stitch where the bobble is called for, drop MC without cutting it. Join CA with a slip knot.
Step 2: Insert hook into the designated stitch, yarn over with CA, pull up a loop (2 loops on hook).
Step 3: Yarn over with CA, pull through both loops (1 loop on hook). This is one CA single crochet.
Step 4: Now begin the bobble in that same stitch. Yarn over with CA, insert hook into the same stitch, yarn over, pull up a loop (3 loops on hook), yarn over, pull through 2 loops (2 loops on hook). Repeat this action 4 more times in the same stitch, each time leaving the last loop on the hook, until you have 6 loops on hook.
Step 5: Yarn over with CA, pull through all 6 loops on hook. The bobble closes.
Step 6: Chain 1 tightly with CA to secure and lock the bobble, then drop CA. Carrying CA loosely along the wrong side is recommended when bobbles are close together.
Step 7: Pick up MC and continue working in MC to the next bobble position.
The bobble replaces one single crochet stitch. Your stitch count does not change.
Picot Shell Edging
This decorative edging goes around the leg openings after seaming.
Step 1: Join CA with a slip stitch to any stitch at the leg opening edge.
Step 2: Chain 3, work 2 dc into the same stitch (half shell made).
Step 3: Skip 2 stitches, slip stitch into the next stitch.
Step 4: Chain 3, work 3 dc into the slip stitch just made (full shell made).
Step 5: Skip 2 stitches, slip stitch into the next stitch.
Step 6: Repeat Steps 4 and 5 around the leg opening until you return to the beginning.
Step 7: Join with a slip stitch to the top of the beginning chain 3. Fasten off and weave in ends.
Each repeat uses 3 stitches. Make sure your leg opening stitch count is divisible by 3.
Twisted Cord
Cut 6 strands of CB each measuring 5 yards / 4.6 meters. Hold all 6 strands together as one. Fold the bundle in half so you have a loop at one end and two cut ends at the other. Anchor the looped end over a door handle or have someone hold it. Hold the cut ends and twist them clockwise until the cord begins to kink and twist back on itself. Fold the twisted length in half, allowing it to twist around itself. Tie a knot at each end to secure. Trim ends evenly.
Finished cord length: approximately 45 inches / 114 cm. Make 2 cords total.
Pattern Notes Before You Begin
The shorts are worked as two flat panels (one front panel and one back panel) in single crochet, worked back and forth in rows. The turning chain of 1 does not count as a stitch throughout this pattern.
The panels are identical. The only difference is that the strawberry applique gets sewn to the front panel only.
The right side (RS) is where bobbles puff outward. Row 1 establishes the wrong side. All odd numbered rows are wrong side rows. All even numbered rows are right side rows. Bobbles are worked on right side rows only.
When working color changes, always complete the last yarn over of the stitch before the color change with the new color.
How to Crochet the Front Panel
Foundation chain: Using MC and hook size G-6 (4.0 mm), chain 79.
Row 1 (WS): Sc in 2nd chain from hook and in each chain across. Turn. (78 sc)
Row 2 (RS): Ch 1, sc in each st across. Turn. (78 sc)
Row 3 (WS): Ch 1, sc in each st across. Turn. (78 sc)
Row 4 (RS, bobble row): Ch 1, sc in first 4 sts with MC. Work bo in next st. Sc in next 5 sts with MC. Work bo in next st. Repeat from * across until 3 sts remain. Sc in remaining 3 sts. Turn. (78 sts, 12 bobbles)
Bobbles fall at stitch positions 5, 11, 17, 23, 29, 35, 41, 47, 53, 59, 65, 71.
Rows 5, 6, 7 (plain rows): Ch 1, sc in each st across. Turn. (78 sc each row)
Row 8 (RS, bobble row): Ch 1, sc in first 7 sts with MC. Work bo in next st. Sc in next 5 sts. Work bo in next st. Repeat from * across until no sts remain. Turn. (78 sts, 11 bobbles)
Bobbles fall at stitch positions 8, 14, 20, 26, 32, 38, 44, 50, 56, 62, 68. This staggers the dots relative to Row 4.
Rows 9, 10, 11 (plain rows): Ch 1, sc in each st across. Turn. (78 sc each row)
Continue alternating between Row Type A (bobble positions like Row 4) and Row Type B (bobble positions like Row 8) with 3 plain rows between each bobble row.
Row 12: Repeat Row 4 pattern. (78 sts, 12 bobbles)
Rows 13, 14, 15: Plain sc rows. (78 sc each)
Row 16: Repeat Row 8 pattern. (78 sts, 11 bobbles)
Rows 17, 18, 19: Plain sc rows. (78 sc each)
Row 20: Repeat Row 4 pattern. (78 sts, 12 bobbles)
Rows 21, 22, 23: Plain sc rows. (78 sc each)
Row 24: Repeat Row 8 pattern. (78 sts, 11 bobbles)
Rows 25, 26, 27: Plain sc rows. (78 sc each)
Row 28: Repeat Row 4 pattern. (78 sts, 12 bobbles)
Rows 29, 30, 31: Plain sc rows. (78 sc each)
Row 32: Repeat Row 8 pattern. (78 sts, 11 bobbles)
Rows 33, 34: Plain sc rows. (78 sc each)
Checkpoint: After Row 34, your panel should measure approximately 6.25 inches / 16 cm tall. Count your stitches to confirm 78 before continuing.
Crotch and Leg Shaping
Now the panel divides for the two legs.
Right Leg
Row 35 (WS): Ch 1, sc in first 37 sts. Turn, leaving remaining 41 sts unworked. (37 sc)
Row 36 (RS): Ch 1, sc2tog, sc in each st to last 2 sts, sc2tog. Turn. (35 sc)
Row 37 (WS): Ch 1, sc2tog, sc in each st to last 2 sts, sc2tog. Turn. (33 sc)
Row 38 (RS): Ch 1, sc2tog, sc in each st to last 2 sts, sc2tog. Turn. (31 sc)
Row 39 (WS): Ch 1, sc2tog, sc in each st to end. Turn. (30 sc)
Rows 40, 41: Ch 1, sc in each st across. Turn. (30 sc each row)
Row 42 (RS, bobble row): Ch 1, sc in first 2 sts with MC. Work bo in next st. Sc in next 5 sts. Work bo in next st. Repeat across. Turn. (30 sts, 5 bobbles)
Rows 43, 44: Ch 1, sc in each st across. Turn. (30 sc each row)
Row 45 (WS): Fasten off MC. (30 sc)
Left Leg
Return to Row 34. Skip 4 stitches for the crotch gap. Join MC with a slip stitch to stitch 42.
Row 35 (WS): Ch 1, sc in st 42 and in each remaining st to the end. Turn. (37 sc)
Row 36 (RS): Ch 1, sc2tog, sc in each st to last 2 sts, sc2tog. Turn. (35 sc)
Row 37 (WS): Ch 1, sc2tog, sc in each st to last 2 sts, sc2tog. Turn. (33 sc)
Row 38 (RS): Ch 1, sc2tog, sc in each st to last 2 sts, sc2tog. Turn. (31 sc)
Row 39 (WS): Ch 1, sc in each st to last 2 sts, sc2tog. Turn. (30 sc)
Rows 40, 41: Ch 1, sc in each st across. Turn. (30 sc each row)
Row 42 (RS, bobble row): Repeat right leg Row 42 bobble placement. Turn. (30 sts, 5 bobbles)
Rows 43, 44: Ch 1, sc in each st across. Turn. (30 sc each row)
Row 45 (WS): Fasten off MC. (30 sc)
The front panel is now complete. It should look like a wide rectangular panel with two shorter leg extensions at the bottom.
How to Crochet the Back Panel
Work the back panel exactly as the front panel, following every row from the foundation chain through Row 45. The back is identical to the front. No applique gets sewn to the back.
Joining the Panels
Lay front and back panels with wrong sides together (right sides facing out).
Side seams: Using a yarn needle threaded with MC and a whip stitch or slip stitch seam, join the right side seam from the bottom leg hem up to 1.5 inches / 3.8 cm below the top edge. Stop and leave a 1.5 inch gap unsewn for the drawstring opening. Fasten off. Repeat for the left side seam.
Crotch seam: Whip stitch the 4 unworked center stitches of the front panel to the 4 unworked center stitches of the back panel. Seam the inseam on each leg from the crotch point down to the bottom edge.
Waistband Edging
Join CA with a slip stitch to any stitch at the top edge of the waistband on the right side.
Round 1: Ch 1, sc evenly around the top edge. Work approximately 1 sc per stitch across the tops of both panels. Join with sl st to first sc. (approximately 156 sc)
Round 2: Ch 1, sc in each st around. Join with sl st to first sc. (156 sc)
Round 3: Ch 1, sl st in each st around for a neat finishing edge. Join with sl st to first sc. Fasten off CA.
Thread one twisted cord through each side of the waistband, entering and exiting at the side seam gap so the bow ties at each hip.
Leg Edging
Work the picot shell edging around each leg opening.
If needed, first work a foundation sc round around each leg opening to ensure the stitch count is divisible by 3. Total leg opening circumference should be approximately 45 stitches.
Then work the picot shell edging as written in the special stitches section. Join and fasten off CA.
Strawberry Applique
Berry Body
Using MC and hook size G-6, make a magic ring.
Round 1: Ch 1, 6 sc in ring. Pull ring closed. Join with sl st to first sc. (6 sc)
Round 2: Ch 1, 2 sc in each st around. Join with sl st to first sc. (12 sc)
Round 3: Ch 1, (sc in next st, 2 sc in next st) 6 times. Join with sl st to first sc. (18 sc)
Round 4: Ch 1, sc in each st around. Join with sl st to first sc. (18 sc)
Round 5: Ch 1, (sc in next 2 sts, 2 sc in next st) 6 times. Join with sl st to first sc. (24 sc)
Rounds 6 and 7: Ch 1, sc in each st around. Join with sl st to first sc. (24 sc each round)
Round 8: Ch 1, (sc in next 2 sts, sc2tog) 6 times. Join with sl st to first sc. (18 sc)
Round 9: Ch 1, (sc in next st, sc2tog) 6 times. Join with sl st to first sc. (12 sc)
Stuff the berry lightly with scrap yarn or fiberfill.
Round 10: Ch 1, (sc2tog) 6 times. Join with sl st to first sc. (6 sc)
Fasten off, leaving a long tail. Thread tail through remaining 6 sts and pull tight to close.
Calyx (Leaves)
Using CB and hook size G-6, make a magic ring.
Round 1: Ch 1, 6 sc in ring, do not join. Pull ring closed. (6 sc)
Round 2: (Ch 5, sl st back down the chain: sl st in 2nd ch from hook, sl st in next ch, sc in next ch, hdc in next ch, sl st into the base sc at the disc) 6 times. (6 leaves formed)
Fasten off CB, leaving a long tail for sewing.
Seeds and Assembly
Using yellow embroidery thread and a tapestry needle, sew 5 to 7 small seed stitches (straight stitches approximately 3mm long) across the berry body.
Sew the calyx to the top of the berry. Then sew the complete applique to the lower right front panel, approximately 2 inches from the right side seam and 0.5 inches above the leg edging.
Size Customization
To work a larger size, increase the foundation chain in increments of 6 stitches.
Adjust bobble placement to maintain the 5 stitch spacing between bobbles.
To adjust the rise, add or remove plain rows between bobble rows. Each pair of rows adds or removes approximately 0.36 inches.
Finishing and Care
Weave in all yarn ends, burying them in the back of the fabric for at least 1 inch. Wet block cotton yarns by submerging in cool water, squeezing gently, and laying flat to dry. Steam block acrylic yarns by holding a steam iron above the fabric without pressing.
Machine wash acrylic on gentle cycle in cold water. Lay flat to dry. Hand wash cotton in cool water with mild detergent. Do not bleach or dry clean. Store folded flat.
I really hope you enjoy making these adorable strawberry shorts as much as I enjoyed putting this crochet pattern together. They are such a fun project for summer and make an amazing gift for anyone who loves vintage inspired handmade clothing.
If you are planning to make these, go ahead and save this pattern to your Pinterest boards so you can find it easily when you are ready to start. And please leave a comment below if you give them a try. I would absolutely love to see your finished shorts!