
Looking for a show-stopping outfit that keeps you cool while turning heads? This coordinated lace top and midi skirt set delivers exactly that. The open mesh construction means breathability for warm weather, while the delicate floral appliques add romantic charm perfect for garden parties, brunches, or special occasions.
Get the Ad-Free PDF Pattern
Scroll down for the full pattern, or get the ad-free printable PDF from the shop.
Get the Printable PDF →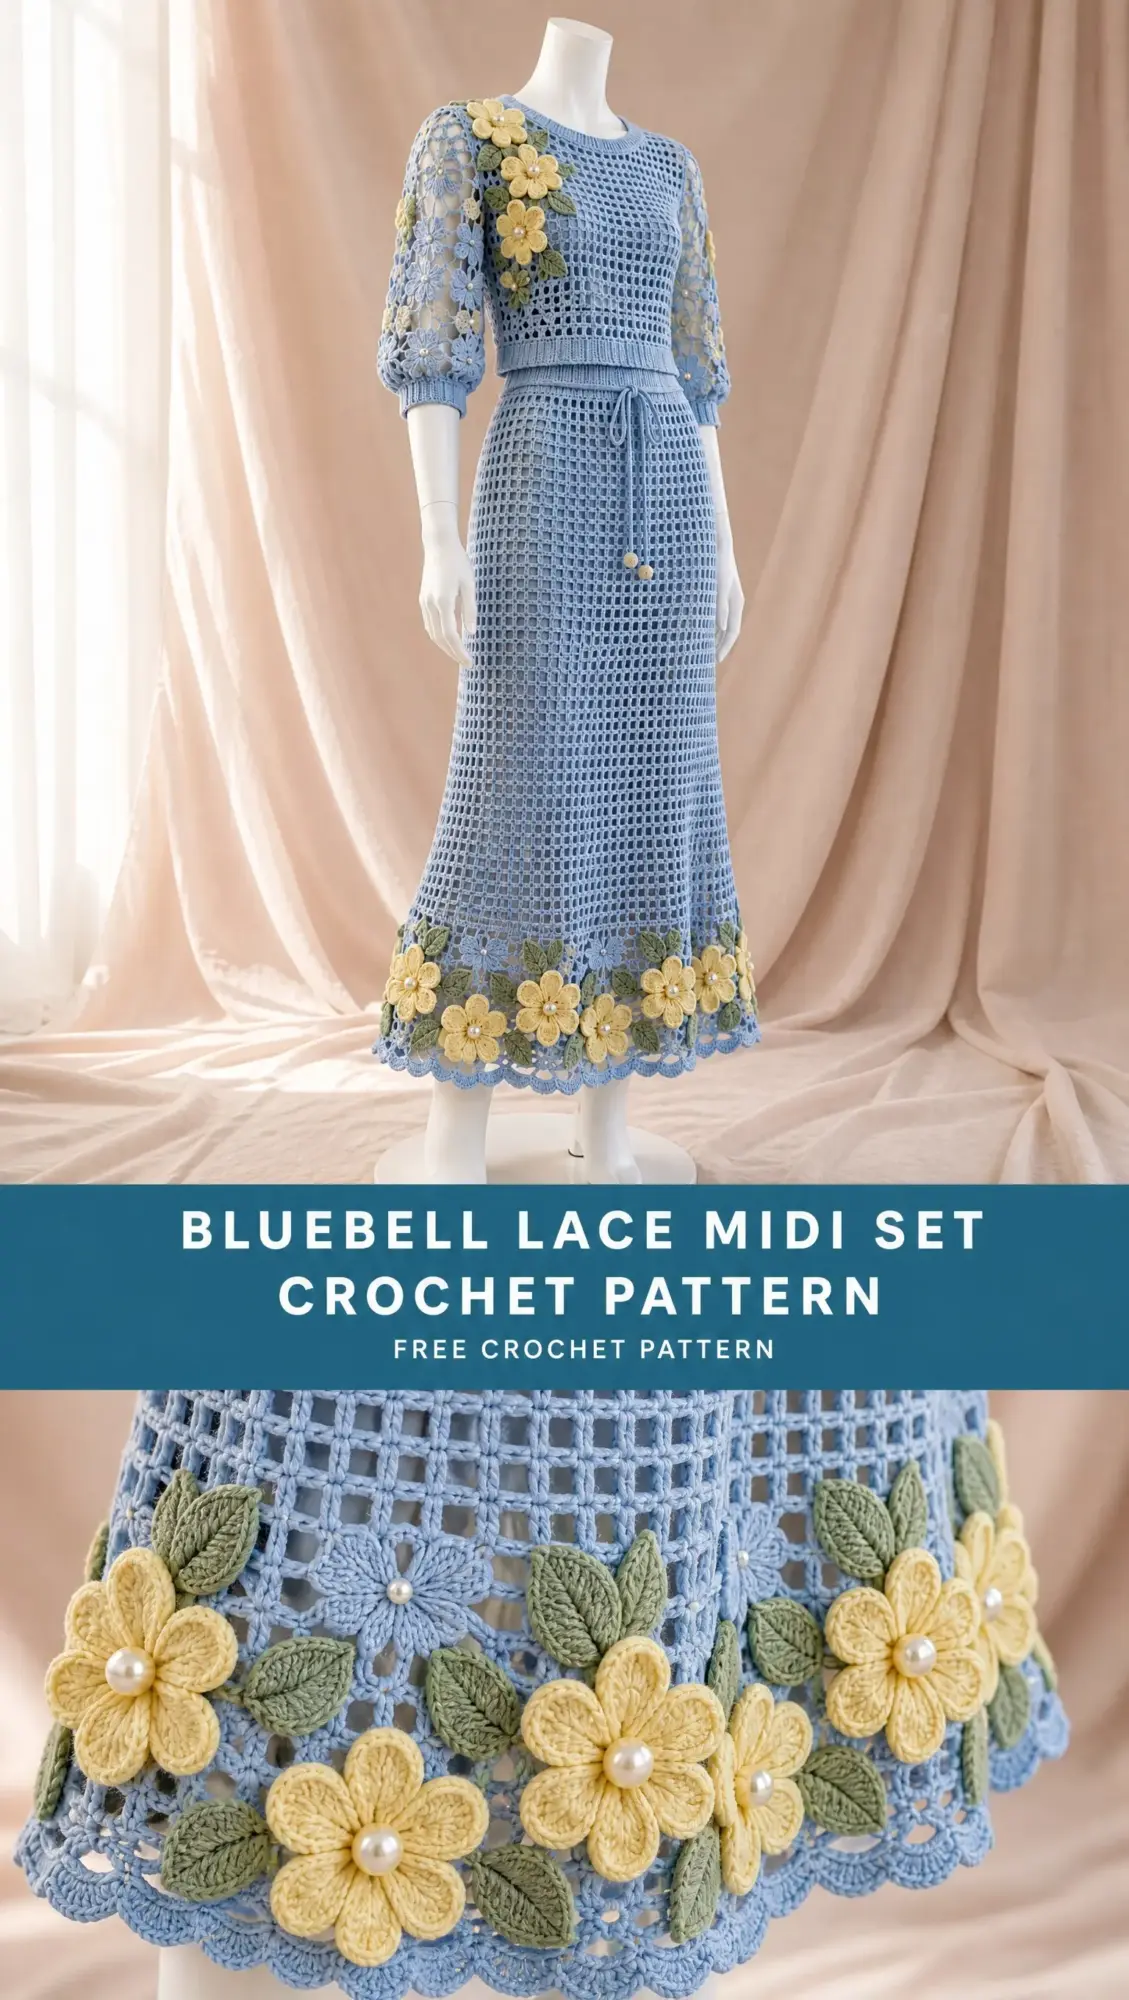
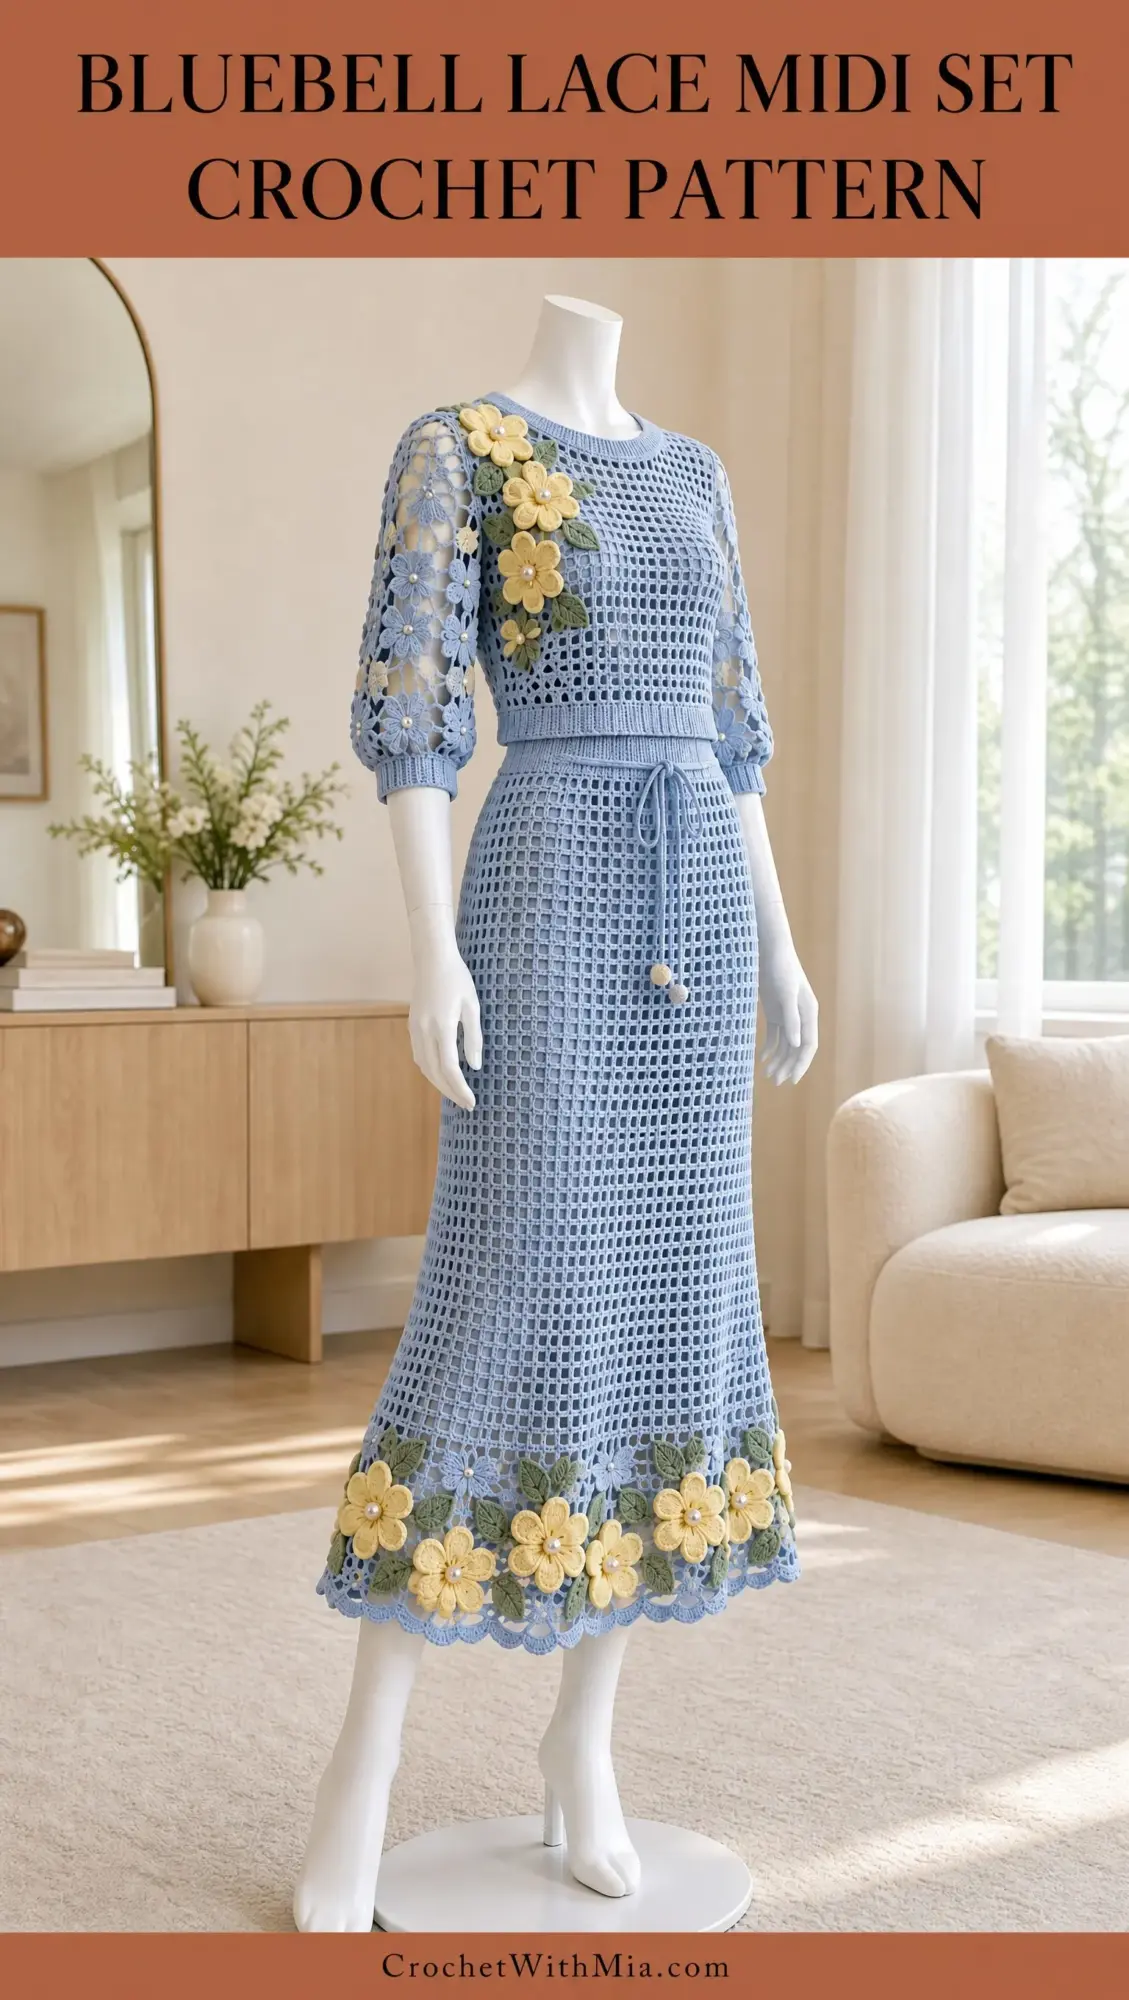
The Bluebell Lace Midi Set uses straightforward mesh stitches that work up faster than they look. You’ll create two separate pieces, a fitted top and a flowing skirt, both built from simple flat panels. The pale lemon flowers and leaf green accents scattered across the shoulders, hem, and cuffs give this set its signature cottage-garden personality.
This pattern suits experienced intermediate crocheters comfortable with post stitches, shaping, and garment assembly. The finished set fits a bust and hip measurement of 98 to 102 cm (38.6 to 40.2 in) with 6 to 12 cm of ease. If you’ve been waiting for the right project to practice garment construction, this elegant set rewards your effort with wearable art.
Why You’ll Love Making This Set
The construction method keeps things manageable even though the finished look is impressive. Each piece starts as a flat panel, so you can focus on one section at a time without wrestling with complicated shaping. The mesh stitch pattern, a simple alternation of double crochet (dc) stitches and chain-1 spaces, creates that beautiful grid texture visible in the reference images.
What makes this set special is the layered design. The floral appliques are made separately and sewn on before assembly, which means you can position them exactly where you want. The drawstring waistband on the skirt adds adjustability and visual interest, while the ribbed edgings at the neckline, cuffs, and hems provide structure and polish.
The powder blue main color photographs beautifully and works across seasons. Pair it with a matching slip underneath for opacity, and you have a versatile two-piece that transitions from daytime events to evening gatherings.
Materials You’ll Need
Gather these supplies before starting:
Yarn:
- Main yarn: DK weight (category 3), smooth plied cotton-acrylic blend, approximately 220 m per 100 g. You’ll need 1900 m total, so purchase 9 x 100 g balls in powder blue. This includes a generous trim allowance.
- Contrast yarn (pale lemon): 250 m, same yarn weight
- Contrast yarn (leaf green): 100 m, same yarn weight
Hooks:
- 4.0 mm hook for main fabric
- 3.5 mm hook for ribbed trims and appliques
- Adjust sizes as needed to meet blocked gauge
Notions:
- Yarn needle
- 12 stitch markers
- Tape measure
- Scissors
- Blocking mats
- Sewing needle and matching thread
- 30 mm soft elastic, 0.9 m, for skirt waist
- 36 small sew-on pearl beads (optional)
Lining: A separate matching slip or professionally fitted lining is recommended for opacity. Lining construction is not included in these crochet instructions.
Gauge Information
Getting gauge right matters for garment fit. Your blocked main fabric should measure 18 stitches (or mesh positions) and 13 rows = 10 x 10 cm (4 x 4 in).
Make a gauge swatch using the main stitch pattern. Chain 39 positions (20 dc + 19 spaces) plus 3 turning chains. Work at least 22 rows, then wash and dry flat. Measure the central 10 cm. Change your hook size until both dimensions match. Do not force-stretch the swatch.
Important tip: Hang the dry swatch for 24 hours and remeasure. A long skirt can grow under its own weight. If your row gauge changes when hanging, use the hanging measurement to choose a shorter row total before starting. Record your yarn, hook, and measured gauge on paper for reference.
Abbreviations and Special Stitches
Here are all the terms used in this pattern:
- ch = chain
- st(s) = stitch(es)
- sp = space
- sl st = slip stitch
- sc = single crochet (insert hook, yarn over, pull up loop, yarn over, pull through both loops)
- hdc = half double crochet
- dc = double crochet (yarn over, insert hook, yarn over, pull up loop, yarn over, pull through 2 loops twice)
- tr = treble crochet
- RS / WS = right side / wrong side
- yo = yarn over
- rep = repeat
- BLO = back loop only
- FPdc = front post double crochet
- BPdc = back post double crochet
- FPtr = front post treble crochet
- pc = popcorn
Special Stitch Definitions
Post stitches: Work around the vertical post of the indicated stitch instead of its top loops. For front post (FP), insert your hook from front to back to front around the post. For back post (BP), insert from back to front to back. Complete the dc or tr normally. Do not also work into that stitch’s top.
sc2tog (single crochet two together): Insert hook in next stitch, yarn over and pull up loop. Repeat in following stitch. Yarn over and draw through all three loops on hook. This consumes two stitches and produces one stitch. It’s a simple decrease.
Shell: Work 5 dc into one stitch.
Picot: Chain 3, slip stitch into first chain. This creates a decorative bump; it’s not a base stitch.
Mesh position: Each dc and each ch-1 space counts as one position. For example, a 99-position row contains 50 dc and 49 ch-1 spaces. When working an edging, place one sc in each dc and one sc in each space.
Pattern Notes Before You Begin
- Turn after every flat row
- Chain 3 before each dc-based row and chain 1 before each sc row. Turning chains never count as a stitch.
- Work into the first stitch
- Stitch counts appear in brackets at the end of each instruction
- Brackets within directions enclose one repeat
- Fasten off with a 20 cm tail when instructed
- Join rounds with slip stitch into first actual stitch. The joining slip stitch and starting chains never count.
- Keep a row counter handy
When a shoulder section begins mid-repeat, preserve the marked physical columns. Do not restart the texture at a new offset. Work edge stitches as plain dc if a cable would cross a cut edge.
Finished Measurements
| Measurement | Target Before Seaming |
|---|---|
| Body panel width | 99 stitches / 18 x 10 = 55 cm |
| Each shoulder | 33 stitches = 18.3 cm |
| Neck opening | 33 center stitches = 18.3 cm; front depth 6.2 cm; back depth 1.5 cm |
| Armhole | 26 row ends = 20 cm on each front/back edge |
| Sleeve width | 77 stitches = 42.8 cm; ease into 40 cm total armhole |
| Side slit | 26 rows = 20.0 cm |
Overall dimensions: Finished body circumference is approximately 108 to 110 cm (42.5 to 43.3 in). Skirt length before edging is 73.8 cm (29.1 in). Top length before edging is 46.2 cm (18.2 in). Sleeve panel is 30.8 cm plus approximately 4 cm cuff.
Construction Overview
You’ll make two top panels, two skirt panels, and two sleeves. Add the floral motifs while panels are flat, then seam shoulders, set sleeves, close top side seams, seam skirt with one slit, and finally work the waist casing, trims, and drawstring cord.
Main Stitch Pattern for Body Panels
With 4.0 mm hook and main color, chain 102 for each 99-stitch panel. The first 3 chains are height only; begin working in the fourth chain from hook.
Row 1 (RS): Dc in fourth ch from hook; [ch 1, skip 1 ch, dc in next ch] 49 times. Turning ch does not count. [50 dc + 49 ch-1 spaces = 99 positions]
Row 2: Dc in first dc; [ch 1, skip ch-1 space, dc in next dc] 49 times. [99 positions]
Following rows: Repeat Row 2, maintaining straight columns. Count each dc and ch-1 space as one position. [99 positions each row]
Front Top Panel Instructions
Work the main stitch pattern through Row 52. [99 positions]
Row 53: Work next 33 positions in established pattern for first shoulder; leave remaining 66 unworked. Turn. [33]
Rows 54-60: Continue over these 33 positions, preserving pattern columns. Fasten off. [33 each row]
Return to Row 52. Leave center 33 positions unworked for neck opening. Join main yarn at outer edge of other 33 positions with correct side facing for Row 53; work its 8 rows to match. [33 each row]
Back Top Panel Instructions
Work a second 99-position panel through Row 58. [99]
Rows 59-60: Work each outer group of 33 positions separately for 2 rows, leaving center 33 unworked. Fasten off. [33 per shoulder each row]
Skirt Panels (Make Two)
Chain 102; work main mesh Rows 1 through 96 without neck shaping. Fasten off. [99 positions per row; 50 dc + 49 spaces]
Mark the lower edge as hem and upper edge as waist. Do not taper these panels; the soft waist casing gathers the excess evenly.
Sleeves (Make Two)
With main yarn and 4.0 mm hook, chain 80. Work the sleeve repeat through Row 40; fasten off. The starting edge is cuff side, the last row is shoulder side. [77 positions per row]
Row 1 (RS): Dc in fourth ch from hook; [ch 1, skip 1 ch, dc in next ch] 38 times. Turning ch does not count. [39 dc + 38 ch-1 spaces = 77 positions]
Row 2: Dc in first dc; [ch 1, skip ch-1 space, dc in next dc] 38 times. [77 positions]
Following rows: Repeat Row 2, maintaining straight columns. [77 positions each row]
Floral Appliques and Leaves
Leaf (Make 36)
With 3.5 mm hook and leaf green (or main yarn), chain 8.
Working in one side of chain: sc in second ch, hdc in next, dc in next 2, hdc in next, sc in next, 3 sc in final ch.
Rotate and work into unused chain loops: sc in next, hdc in next, dc in next 2, hdc in next, sc in last. Join to first sc. [15 sts]
Leave a 25 cm sewing tail. Each leaf should measure about 4 x 2 cm after blocking.
Flower (Make 36)
With 3.5 mm hook and main color, chain 4, join to ring.
Round 1: Ch 1, 6 sc into ring, join. [6 sc]
Round 2: Change to pale lemon; [ch 3, sl st in next sc] 6 times. [6 loops]
Round 3: [sc, hdc, 2 dc, hdc, sc] in each loop; join. [36 sts; 6 petals]
Optional pearl center: Sew one bead through center after blocking.
Applique Placement
Flower target diameter is 4.5 to 5 cm. Small differences are acceptable; never stretch a motif to fit.
- Place 8 flowers along one shoulder and upper chest
- Place 20 flowers around hem
- Place 4 flowers on each cuff
Attach one leaf beside each flower. Distribute in one layer with small gaps. Keep seam allowances and slit opening clear of appliques. Pin first, then sew at centers and petal bases using fine matching yarn.
Belt or Drawstring
With main yarn and 3.5 mm hook, chain 281; slip stitch in second chain and every chain across. [280 sl sts]
Cord target length is 155 to 170 cm. Adjust initial chain length to reach that measurement before working slip stitches. Knot ends securely.
Assembly Instructions
You’ll need main-color yarn, tapestry needle, and 4.0 mm hook for any slip-stitch joining. Use mattress stitch unless noted. Match row ends; keep seams flexible.
Join 1: With RS facing outward, mattress-seam each front shoulder to matching back shoulder, one stitch to one stitch. [33 paired stitches per shoulder; 2 seams]
Join 2: Mark 26 row ends down from each shoulder on both front and back. Center each sleeve last row at shoulder seam; ease half sleeve width to front, half to back. Pin four equal sections and sew. [52 body row ends per sleeve; 2 sleeve seams]
Join 3: Close top sides from hem to armhole marker and sleeve underarms from cuff edge to armhole. [34 row pairs per top side; 40 row pairs per sleeve]
Join 4: Seam one skirt side from hem to waist. On other side, leave bottom 26 row pairs unsewn for slit, seam remainder to waist. [96 row pairs on closed side; 70 joined row pairs on slit side]
Assembly Checkpoint
Shoulder widths should match. Sleeves should be centered and hang without twisting. The assembled chest should measure approximately 108 to 110 cm around after seam take-up. Try over intended slip before edging. Both sleeve seams must match in length.
Edgings and Details
Use main-color yarn and 3.5 mm hook. Mark the first stitch of every round.
Neckline Edging
Neck Round 1: Attach at back neck. Sc into 33 center back positions, 2 sc in each of 2 back neck row ends, 2 sc in each of 8 front neck row ends, 33 center front positions, then mirror both side edges. Join. [106 sc]
Neck Round 2: Ch 3, dc in each sc, join. [106 dc]
Neck Round 3: Ch 3, [FPdc, BPdc] 53 times, join. [106 sts]
Neck Round 4: Repeat Neck Round 3. Fasten off. [106 sts]
Cuff Edging (Each Sleeve)
Cuff Round 1: Sc into first 7 foundation stitches; sc2tog 35 times around remaining foundation edge. Join. [42 sc]
Cuff Round 2: Dc in each sc. Join. [42 dc]
Cuff Rounds 3-6: [FPdc, BPdc] 21 times, join. [42 sts each round]
Fasten off after Round 6.
Slit Edging (Each Edge)
Slit Edging Row 1: Sc 2 into each exposed row end. Fasten off at slit top. [52 sc on each of 2 edges]
Skirt Hem Edging
Hem Row/Round 1: With RS facing, sc once into each foundation position; treat both panels as one open row if there is a slit, otherwise join a round. [198 sc]
Hem Row/Round 2: [Sc in next st, skip 2 sts, 5 dc in next st, skip 2 sts] 33 times. At open hem, fasten off after final skipped stitches; for closed hem, join to first sc. [33 shells + 33 sc = 198 worked sts]
Top Hem Edging
Top Hem Round 1: Sc once into each of 198 foundation positions, join. [198 sc]
Top Hem Round 2: Dc around, join. [198 dc]
Top Hem Rounds 3-4: [FPdc, BPdc] 99 times, join. [198 sts each round]
Fasten off after Round 4.
Edging Checkpoint
Neckline should lie flat and stretch over head. Cuffs should measure approximately 21 to 23 cm around without forcing. Hem should have 33 scallops. If an edging flares or pulls, adjust hook size and rework while keeping listed counts. Secure motifs and beads through multiple fabric strands without visible puckering.
Skirt Waist Casing and Cord
Waist Round 1: At top of joined skirt, sc in each dc and ch-1 space, join. [198 sc]
Waist Rounds 2-4: Hdc in every stitch, join. [198 hdc each round]
Waist Round 5: Hdc in next 94 sts, ch 2, skip 2 sts, hdc in next 6 sts, ch 2, skip 2 sts, hdc in last 94 sts, join. Place holes at front center by shifting round start if needed. [194 hdc + 4 chain positions = 198]
Waist Rounds 6-10: Hdc in every stitch and chain position, join. [198 hdc each round]
Fold casing inward at Round 5; whipstitch Round 10 to base of Round 1, leaving 5 cm open. Cut elastic to comfortable waist measurement plus 2 cm; overlap 2 cm and sew a secure box stitch. For an 80 cm waist, use 82 cm before overlap. Thread elastic through casing, join ends, then close gap. Thread the crochet cord through the two front openings above elastic.
Check that elastic extends comfortably over hips before closing the casing completely.
Finishing Your Set
Pass 1: Weave each tail through at least 5 cm of adjacent stitch backs, reverse direction and repeat; trim after checking security.
Pass 2: Damp-block flat to schematic dimensions; pin scallops evenly and support all garment weight. Avoid heat on acrylic and avoid pressing textured stitches. Body should measure 108 to 110 cm around with two equal sleeves.
Pass 3: Let dry completely, fit over intended lining, and inspect each seam, cord end, and bead. Fold for storage instead of hanging long term.
Final Checkpoint
Final hem should be even. Slit length is 20.0 cm before edging. Record your actual finished measurements and yarn used. Wear-test walking, sitting, and raising arms before public use.
Fit Before Assembly Tips
Block pieces to measurements and baste seams before permanent joining. Check that the neckline passes over the head, the hips have walking ease, and the hem clears the floor in intended footwear. The belt shapes an otherwise straight silhouette.
If you need to change length, work only in complete texture repeats below the armhole. Document any altered row numbers before seaming.
Care Instructions
Follow yarn-label care. Hand wash cool with mild detergent if compatible with your chosen yarn, support while wet, roll in a towel and dry flat. Remove detachable embellishments first. Inspect sewn beads before wearing.
Safety note: Long cords, tassels, and open lace can snag. Keep clear of machinery and flame. Shorten a dragging hem. This pattern is designed for adult clothing.
Make It Your Own
While this pattern creates a beautiful powder blue set with lemon flowers, the design adapts to other color stories. Consider dusty rose with cream flowers for a vintage feel, or crisp white with soft peach accents for a bridal shower. The mesh construction works beautifully in any smooth DK weight cotton blend.
The floral appliques can be placed according to your preference. Some makers might prefer a more minimal arrangement, while others may want to add extra flowers at the neckline or along the side slit.
Thank you so much for choosing this pattern for your next project. The Bluebell Lace Midi Set takes time and care to create, and the result is a truly special handmade garment you’ll treasure. If you make this set, I’d love to see your finished piece! Share your photos on Instagram or Facebook and tag your creation so fellow crocheters can admire your work.
If this pattern inspires you, save it to your Pinterest boards so you can find it when you’re ready to start. And please leave a comment below if you make this set. Hearing about your color choices, any modifications you tried, or how the finished garment fits always makes my day!
Want a Quick & Easy Printable Version?
Get a clean, beautifully formatted PDF of this pattern — easy to follow step by step, ready to print or save on any device. No scrolling, no distractions, just the pattern.
Get the Printable PDF →