
I don’t know about you, but I love a good crochet dress that actually looks like something you’d wear outside the house. All the texture and handmade charm with none of the "craft project" vibes.
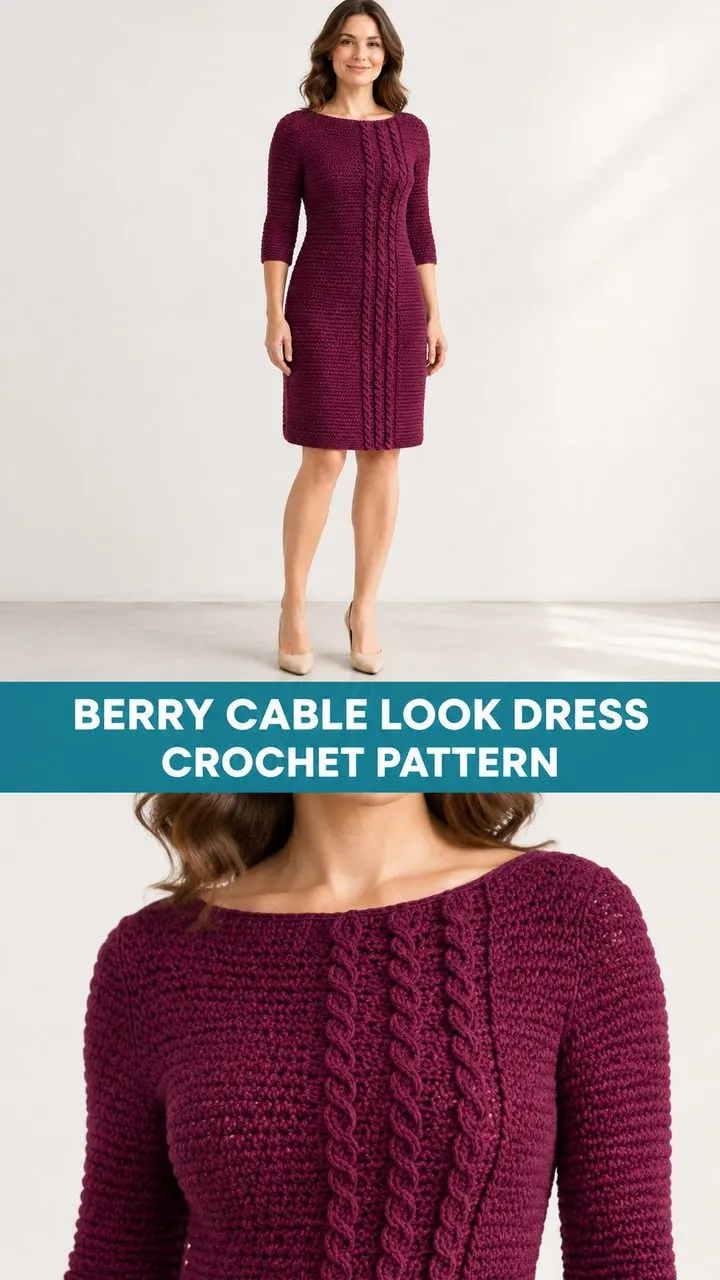
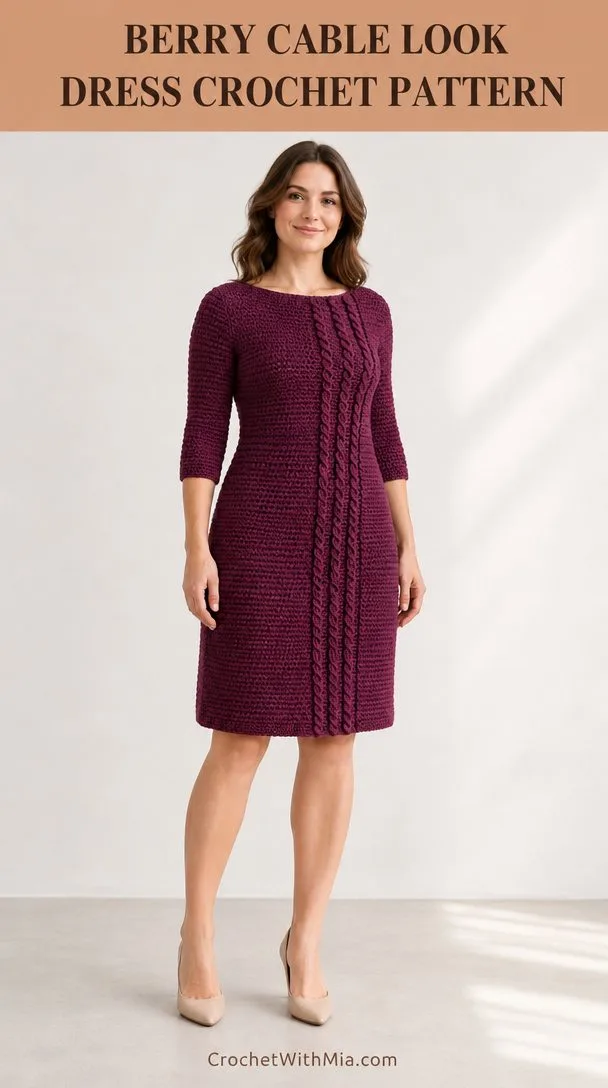
This Berry Cable Look Dress delivers exactly that. The raised rib-and-recess panel running down the front creates a cable-like effect without any crossed stitches. It’s elegant, it’s flattering, and it works up in a gorgeous mulberry shade that feels both modern and timeless.
The A-line silhouette, three-quarter sleeves, and knee length make this a piece you can dress up or down depending on the occasion. Whether you’re heading to brunch, the office, or a weekend gathering, this dress has you covered. Literally.
Why This Dress Design Works So Well
The construction of this dress is clever. You’ll work four main panels: two bodice pieces from waist to shoulders and two skirt pieces from waist to hem. This means you can try on sections as you go, adjusting fit before committing to final seams.
The texture panel on the front is the star here. Using front-post and back-post double crochet stitches, you create vertical columns that look remarkably like knitted cables. But there’s no cable needle, no crossing stitches, no fuss. Just alternating raised and recessed columns that catch the light beautifully.
The dress comes in three sizes (S, M, L) with finished bust measurements of 82 cm, 91 cm, and 100 cm respectively. The waist shaping and gradual skirt flare create that classic A-line shape that flatters most body types.
Skill Level and What You’ll Learn
This pattern is best suited for intermediate crocheters who are comfortable with basic shaping and want to try post stitches. If you’ve never worked front-post double crochet (FPdc) or back-post double crochet (BPdc) before, don’t worry. They’re easier than they sound, and this pattern gives you plenty of practice.
You’ll also gain experience with:
- Working flat panels and seaming them together
- Gradual increases for A-line shaping
- Armhole and neckline shaping
- Installing a side zipper
- Creating a keyhole back opening
The texture panel might look intimidating, but it’s really just a repeating sequence of post stitches. Once you get the rhythm, it becomes almost meditative.
Materials You’ll Need
Yarn: DK weight cotton blend in mulberry (Color A). Look for smooth yarn with good stitch definition so those post stitches really pop.
| Size | Yards Needed | Meters Needed |
|---|---|---|
| S | 1375 | 1257 |
| M | 1525 | 1394 |
| L | 1725 | 1577 |
Buy all your yarn from the same dye lot. The yardage includes a swatching allowance, but these are estimates. Better to have a little extra than run short on the final sleeve.
Hook: 4.0 mm (US G/6) or size needed to achieve gauge.
Notions:
- Stitch markers
- Tapestry needle
- Tape measure
- Rustproof pins
- Matching thread
- Small sew-on hook-and-eye for the upper back opening
- 25 cm / 10 in lightweight nylon coil zipper for the left side seam
Gauge (Please Don’t Skip This)
18 stitches and 8 rows = 10 × 10 cm / 4 × 4 in in double crochet, after washing and drying flat.
To check your gauge, chain 28 and work 26 dc, then continue for at least 12 rows. Measure across the plain double crochet field inside the edges. Use the same yarn and hook you plan to use for the dress.
Also swatch the texture panel as written in the chart. The panel and the adjacent dc field should finish at the same height. If your post stitches pull the fabric tighter, loosen your loops or try a larger hook just for the panel section.
Here’s a tip that will save you frustration: hang your dry swatch for 30 minutes and remeasure before choosing your skirt length. Cotton blends can grow, and you want to know how yours behaves before you’ve made an entire dress.
Finished Measurements
| Measurement | S | M | L |
|---|---|---|---|
| Body bust to fit | 78-80 cm | 87-89 cm | 96-98 cm |
| Finished bust | 82 cm | 91 cm | 100 cm |
| Finished waist | 73 cm | 82 cm | 91 cm |
| Finished hem | 104 cm | 113 cm | 122 cm |
Shoulder-to-hem length is approximately 87 cm / 34.3 in before trim. Choose your size by both bust and waist measurements. Check the skirt against your hips (roughly 18-22 cm below waist) and baste before final seaming.
Abbreviations and Special Stitches
- ch – chain
- dc – double crochet
- hdc – half double crochet
- sc – single crochet
- sl st – slip stitch
- st(s) – stitch(es)
- sp – space
- RS – right side
- WS – wrong side
dc2tog (double crochet two together): Begin a dc in each of the next two stitches, keeping the final loop of each on the hook. Yarn over and draw through all three loops. This decreases your stitch count by one.
FPdc (front-post double crochet): Insert the hook from front to back around the entire vertical post of the stitch in the previous row, then finish a dc. Skip the top loops of that stitch.
BPdc (back-post double crochet): Insert the hook from back to front around the entire vertical post of the stitch in the previous row, then finish a dc. Skip the top loops of that stitch.
Pattern Notes Before You Begin
All size counts throughout this pattern are written as S / M / L. Work flat and turn each row. Chain 2 at the start of dc rows and chain 1 at the start of sc rows. Turning chains and slip joins never count as stitches.
The first body row is RS. At row starts, work the first stitch in the first available stitch unless a shaping instruction says otherwise.
For 8 evenly spaced increases, divide the old stitch count into eight consecutive groups, with group sizes differing by at most one. Work 2 dc in the last stitch of each group and 1 dc in the remaining stitches.
Front and Back Bodice Instructions
Make two panels alike through Row 24. Mark the right side and the waist edge of each panel. Use Color A.
Row 1: Ch (68 / 76 / 84). Dc in third ch from hook and across. (66 / 74 / 82) sts
On the front panel, consult the Texture Panel section before Row 2. Keep the back panel entirely in dc.
Rows 3, 6, 9, and 12: Work 2 dc in first and last stitch. After these rows you’ll have (68 / 76 / 84), (70 / 78 / 86), (72 / 80 / 88), (74 / 82 / 90) sts respectively.
Rows 2, 4-5, 7-8, 10-11, and 13-14: Work straight in the established fabric. After Row 14, you should have (74 / 82 / 90) sts.
Row 15: With RS facing, join yarn in the fifth stitch. Work across, leaving the last four stitches unworked. Fasten the previous row end before joining. (66 / 74 / 82) sts
Rows 16-24: Work straight at the new width in established fabric. (66 / 74 / 82) sts
Front Shoulders
Row 25: Work the first (22 / 24 / 26) sts and leave the rest unworked. With RS facing, rejoin for the second shoulder and work the last (22 / 24 / 26) sts. Leave the center (22 / 26 / 30) sts open.
Work each shoulder independently. Keep the armhole edge straight. At the neck edge, leave the necessary stitches unworked at the end of an inward row, or sl st over those stitches before the turning chain at the start of an outward row.
| Front Shoulder | S | M | L |
|---|---|---|---|
| Row 26 | 19 | 21 | 23 |
| Row 27 | 17 | 19 | 21 |
| Row 28 | 16 | 18 | 20 |
| Row 29 | 16 | 18 | 20 |
| Row 30 | 16 | 18 | 20 |
Fasten off each shoulder after Row 30.
Back Shoulders and Keyhole
Rows 25-28: Work each half separately over (33 / 37 / 41) sts per row. At Row 25, rejoin at the center for the second half. Leave the center edges unjoined to form the opening.
Rows 29-30: With RS facing, rejoin at the first of the outermost (16 / 18 / 20) sts of each half and work only that width for two rows. Leave the inner stitches unworked. Fasten off. (16 / 18 / 20) sts per shoulder
Place a marker in the last worked stitch at the end of each armhole or neck shaping row. These markers will help you line up seams perfectly.
Front and Back Skirt Instructions
Make two panels. Mark RS and the top edge before beginning the second panel. Use Color A. Work increases on both panels.
Row 1: Ch (68 / 76 / 84). Dc in third ch from hook and across. (66 / 74 / 82) sts
On the front, use the Texture Panel chart from Row 2. Add increases only at the side edges so the panel stitches stay vertically aligned.
Increase rows (3, 6, 8, 11, 13, 16, 19, 21, 24, 27, 29, 32, 34, 37): Work 2 dc in the first and last stitch and keep the middle in pattern. Each listed row adds 2 sts.
All other rows through Row 39: Work even in pattern. (94 / 102 / 110) sts after the final row.
Before seaming, each skirt panel should measure about 49 cm / 19.3 in from waist to hem.
Sleeves
Make two. The first row forms the sleeve top. Work toward the cuff and keep the center of the top edge marked for the shoulder seam.
Row 1: Ch (76 / 84 / 92). Dc in third ch from hook and across. (74 / 82 / 90) sts
Decrease rows (2, 4, 6, 9, 11, 13, 16, 18, 20, 22, 24, 27, 29): Dc2tog over the first two sts, work straight to last two sts, dc2tog. Each row removes 2 sts.
Remaining rows through Row 29: Dc across. Final cuff has (48 / 56 / 64) sts.
Pin the sleeve top into the basted armhole before attaching. Match the marked center to the shoulder seam. Goal length is 36 cm / 14.2 in.
Texture Panel Instructions
Apply this chart to the front bodice and front skirt only. Lay each piece RS up, with the waist seam edges facing each other. Count from the right-hand side in this front view. Place markers around the panel positions on Row 1 of each piece.
| Front Panel | S | M | L |
|---|---|---|---|
| First stitch at waist | 11 | 12 | 13 |
| Last stitch at waist | 34 | 35 | 36 |
| Width in stitches | 24 | 24 | 24 |
| Block width | 4 | 4 | 4 |
Row 1: Work dc across as written for the piece.
Rows 2 onward: Across the panel, repeat [4 raised, 4 recessed] three times.
On RS rows, raised means FPdc and recessed means BPdc. On WS rows, raised means BPdc and recessed means FPdc. Work 1 stitch per previous stitch or post.
Follow the vertical columns after edge increases. Move the markers directly up onto the stitches made from the same panel posts, allowing their numbers from the edge to shift. At an armhole or neckline, work only the columns that remain in the piece.
Assembly
Seaming the Dress
Join 1: With RS together, whipstitch each front shoulder to the corresponding back shoulder. (16 / 18 / 20) joined pairs each
Join 2: On the right side of the dress, seam all 39 skirt row pairs and 14 bodice row pairs. On the left, leave the first 9 skirt rows and first 10 bodice rows from the waist open for the zipper. That’s 30 skirt row pairs and 4 bodice row pairs seamed on the left.
Join 3: Join skirt and bodice waist edges RS together. At the zipper opening, secure the seam ends separately. (132 / 148 / 164) joined waist pairs
Join 4: Close each sleeve side seam from its cuff to its top. 29 row pairs per sleeve.
Join 5: Match each sleeve seam to the underarm and the marked top center to the shoulder. Distribute the stitches around the opening. (74 / 82 / 90) sleeve positions per armhole
Installing the Side Zipper
Baste 1: Align the zipper teeth between the two open edges. Match the waist seam on both sides. Tip the zipper tape toward the WS and baste it in position.
Seam 2: Backstitch the tape to each edge without catching the teeth. Anchor the tape ends, remove basting, and close the zipper.
The zipper should run smoothly with the waist seam aligning across both sides. If your closed zipper length differs from the opening, adjust the end of the left skirt seam before sewing.
Edgings and Details
Neckline and Back Opening
Row 1: Start at the upper edge of one side of the back opening. Sc evenly along the back neck, across both shoulder joins and around the front neck to the opposite side of the opening. (84 / 92 / 100) sc
Row 2: Turn. Dc in each sc. Same count as Row 1.
Row 3: Turn. Alternate FPdc and BPdc across. Same count as Row 1.
Closure: Sew one hook and one eye, opposite each other at the top of the back opening.
Hem and Cuffs
Round 1: Join at a side seam, work one sc per hem stitch and join. (188 / 204 / 220) sc
Round 2: Sl st loosely in each sc and join. (188 / 204 / 220) sl sts
Cuff Round: Work one sc per cuff stitch and join. (48 / 56 / 64) sc per cuff
If the edging curls or cups, redo it with a slightly larger hook.
Finishing Your Dress
Weave every tail back and forth through matching stitches. Tuck hook-and-eye sewing ends on the WS.
Wash or wet-block as directed on the yarn label. Roll in a towel, ease to the published measurements, and dry completely flat.
Check bust, waist, hem, and shoulder-to-hem length. Make sure both sleeves are even. Make any seam adjustments after drying.
Care Instructions
Follow the yarn label. For washable cotton blends, wash gently in cool water and dry flat. Store folded to help keep the skirt from growing over time.
Keep detachable hardware away from young children and pets. Inspect the closure and seams before each wear.
Tips for Success
Try it on as you go. This pattern is designed so you can baste pieces together and check the fit before committing. Take advantage of this, especially at the waist and bust.
Mark everything. The pattern asks you to mark RS, waist edges, and shoulder centers. These markers will save you from seaming mistakes.
Swatch the texture panel. Post stitches can pull differently than regular dc. If your panel is shorter than your plain fabric, you’ll get puckering. Adjust your tension or hook size for the panel section.
Don’t rush the zipper. A well-installed zipper makes the difference between a professional-looking dress and a homemade one. Baste first, check the alignment, then sew.
This Berry Cable Look Dress is a substantial project, but the result is a wearable, elegant piece you’ll reach for again and again. The texture panel gives it visual interest without complicated techniques, and the A-line shape is universally flattering. Take your time, trust the process, and enjoy watching this beautiful dress come together under your hook.
Thank you so much for choosing this pattern! If you make this dress, I’d love to see it. Share your finished project on Instagram or Facebook and tag your photos so fellow crocheters can admire your work.
Save this Berry Cable Look Dress pattern to your Pinterest boards so you can find it when you’re ready to start. And if you make it, please leave a comment below. I’d love to hear how it turned out for you!