
Go dig through your stash right now. I know you have those gorgeous coral and peach skeins tucked away, waiting for the perfect project. This is it. This tiered baby dress with matching beret combines granny squares, top-down construction, and delicate lace work into one stunning heirloom piece.
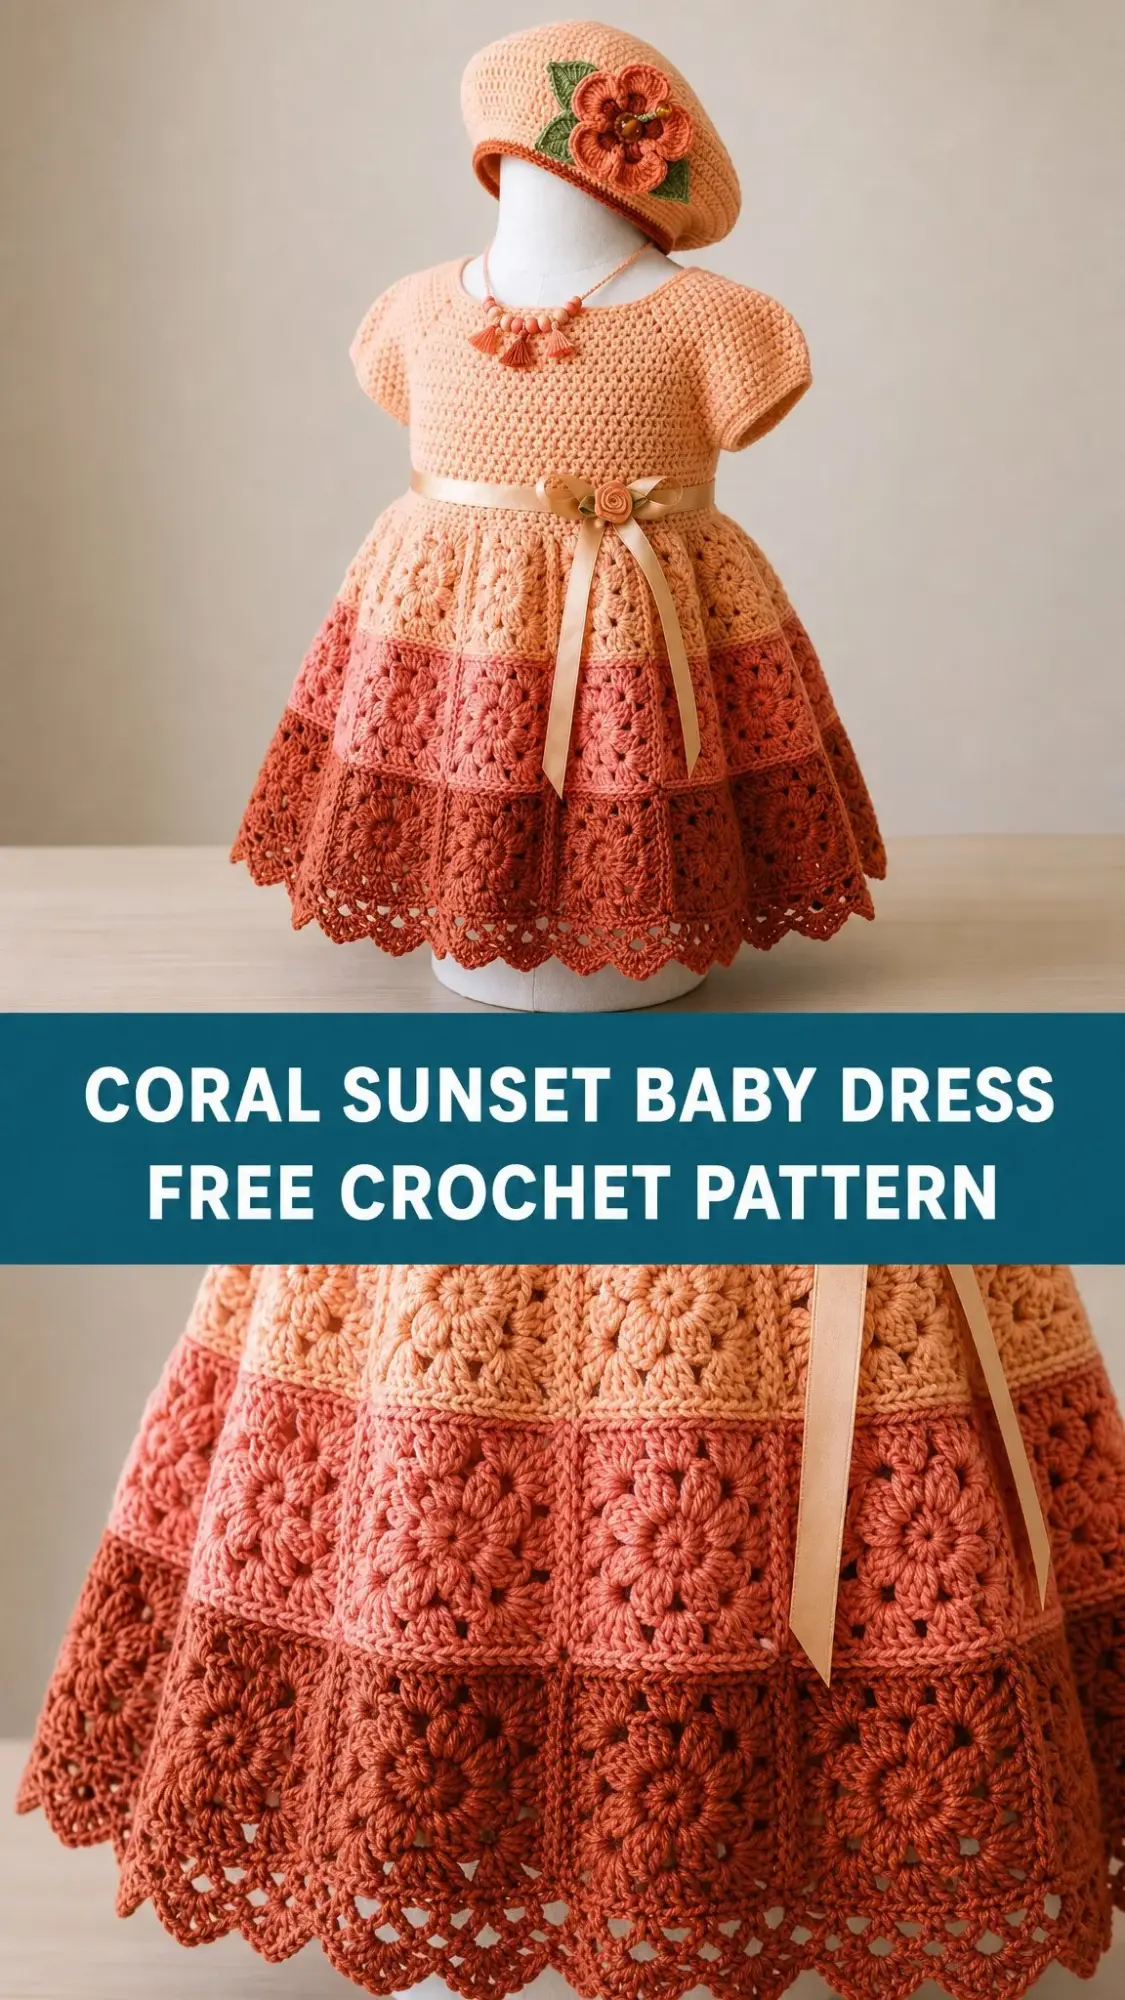
Fair warning: this is not a weekend project. The combination of fitted yoke shaping, join-as-you-go squares, and a lace border puts this firmly in intermediate to advanced territory. But if you have been crocheting for a while and want something that will genuinely challenge you while creating a breathtaking keepsake, keep reading.
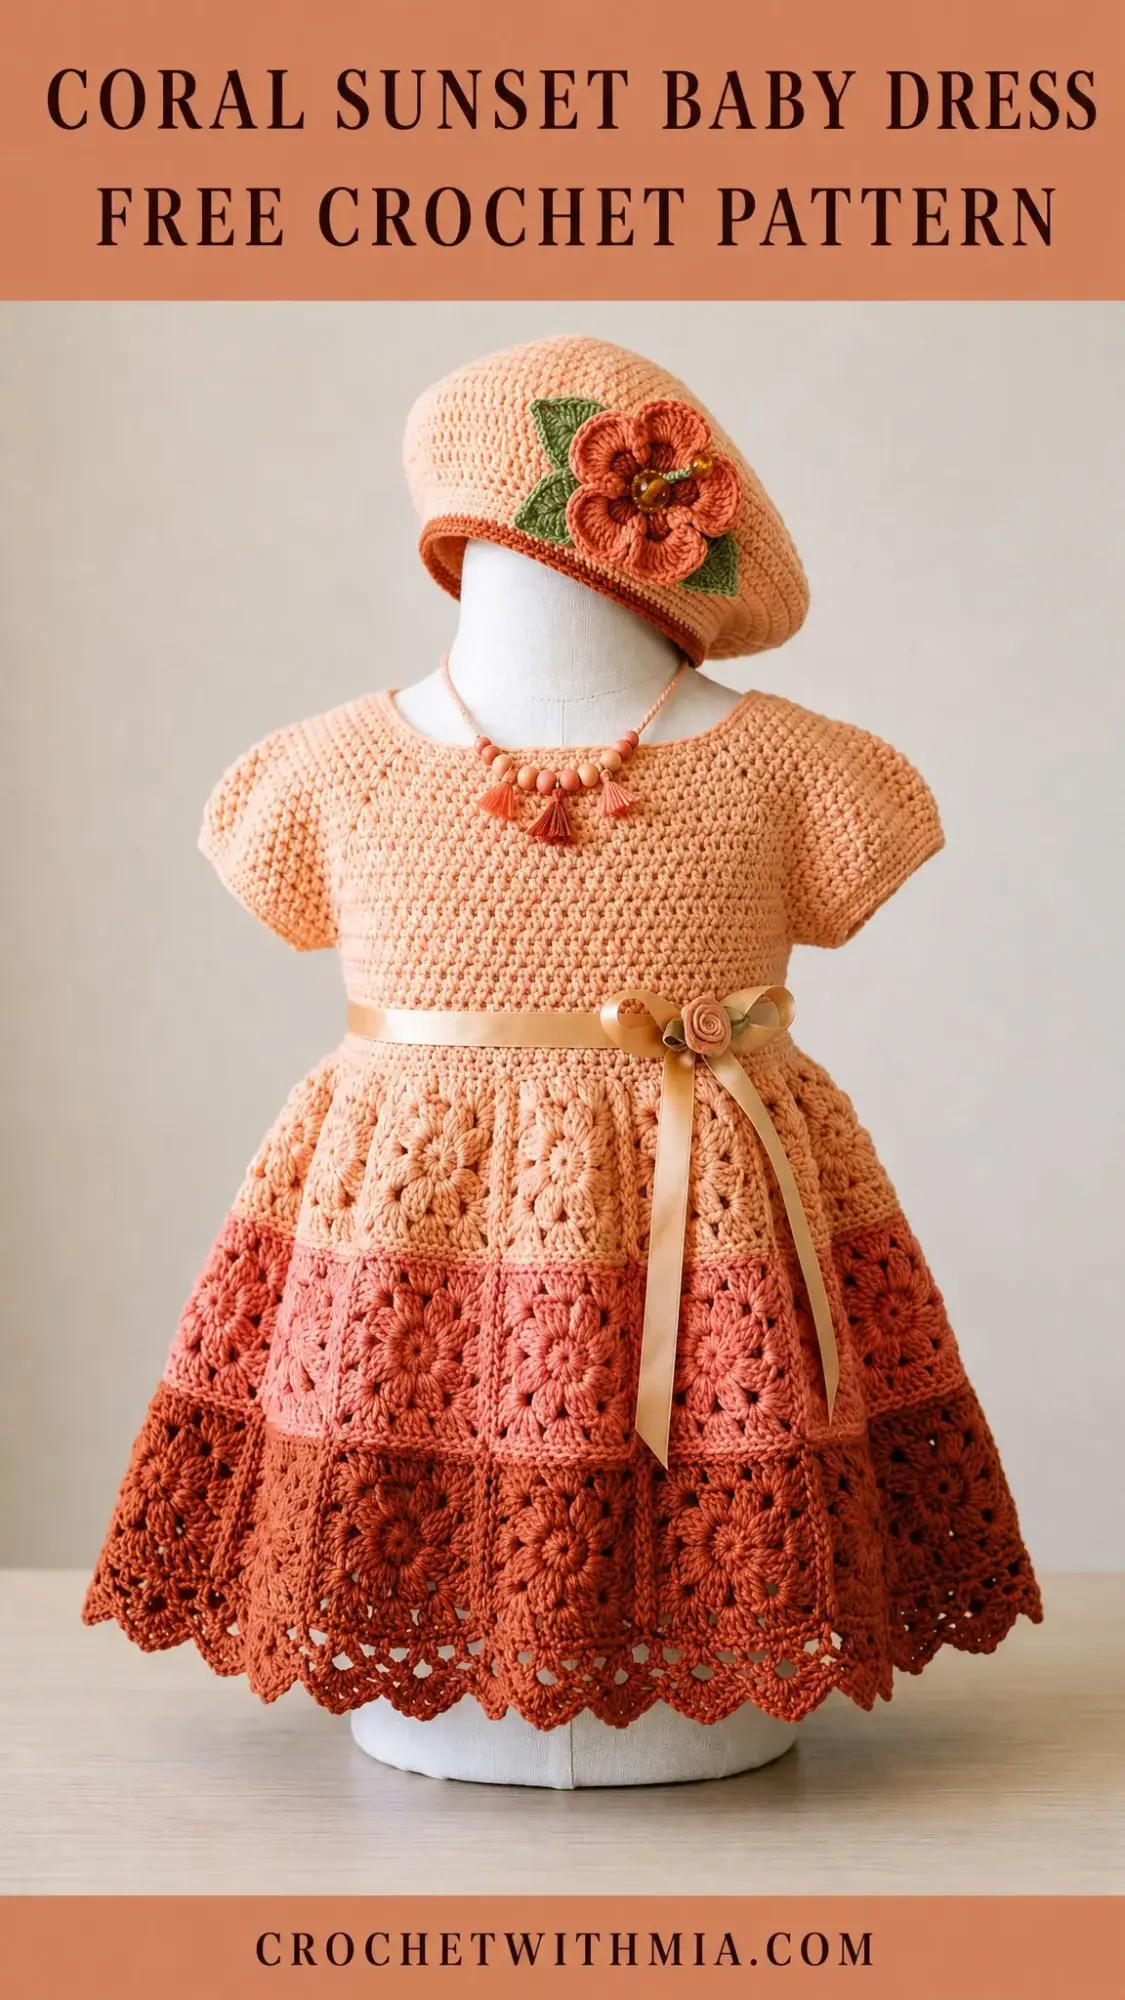
The construction is actually quite clever. You work the bodice seamlessly in the round from the neckline down, then build the skirt separately as joined granny squares before attaching it at the empire waist. The three-tier ombre effect, moving from soft peach through coral to deep terracotta, happens naturally as you change yarns between sections.
Why This Baby Dress Pattern Stands Out
Most baby dress patterns feel either too simple or overwhelmingly complicated. This one hits a sweet spot. The bodice uses straightforward half double crochet (hdc) worked in the round with raglan-style increases. Nothing fancy there. The magic happens in the skirt construction.
The first tier is eight granny squares in the lightest peach, joined into a ring. The second tier uses ten squares in medium coral, and those extra two squares create the natural A-line flare without any complicated shaping math. The lace border at the hem adds elegance without overwhelming the granny square design.
That satin ribbon threaded at the waist? It is not crocheted in. You simply weave it through after blocking. This means you can swap ribbon colors for different occasions or replace it if it gets worn.
Materials You Will Need
Gather these supplies before you start. Running out of yarn mid-project on something this involved is deeply frustrating.
Yarn (DK weight cotton or cotton-blend):
Hooks:
Notions:
Recommended Yarn Options:
Lion Brand 24/7 Cotton DK works beautifully here. The mercerized cotton gives excellent stitch definition for those granny squares. Paintbox Yarns Simply DK is a budget-friendly acrylic alternative that washes well for baby items. Drops Safran has a slight sheen from its polyamide content if you want a more polished look.
Avoid fuzzy or bouclé yarns. They will obscure all that lovely granny square and lace detail you worked so hard to create.
Finished Measurements
This pattern is written for size 12 months, fitting approximately 18 to 20 lb / 8 to 9 kg babies.
Gauge (Do Not Skip This)
With E-4 / 3.5 mm hook and DK weight yarn:
With D-3 / 3.25 mm hook:
Gauge matters enormously for garment fit. Please swatch before diving into the bodice. Adjust your hook size up or down until you match these numbers.
Abbreviations and Stitch Definitions
beg = beginning
BLO = back loop only (inserting your hook under just the back loop of the stitch instead of both loops)
ch = chain (yarn over, pull through loop on hook)
ch-sp = chain space (the gap created by a chain in the previous row)
dc = double crochet (yarn over, insert hook, yarn over and pull up a loop, yarn over and pull through 2 loops twice)
hdc = half double crochet (yarn over, insert hook, yarn over and pull up a loop, yarn over and pull through all 3 loops at once)
hdc2tog = half double crochet 2 together, a decrease (yarn over, insert hook in next st and pull up a loop, yarn over, insert hook in following st and pull up a loop, yarn over and pull through all 5 loops)
MR = magic ring (adjustable starting ring)
rnd = round
RS = right side
sc = single crochet (insert hook, yarn over and pull up a loop, yarn over and pull through both loops)
sk = skip
sl st = slip stitch (insert hook, yarn over, pull through stitch and loop on hook in one motion)
sp = space
st(s) = stitch(es)
tr = treble crochet
WS = wrong side
YA = Yarn A (lightest peach)
YB = Yarn B (medium coral)
YC = Yarn C (deep terracotta)
Special Stitches and Techniques
Granny Square (3-Round Version)
This is the building block for your skirt tiers.
Round 1: With designated color, make a MR. Ch 3 (counts as first dc), work 2 dc in ring, ch 2, [3 dc in ring, ch 2] 3 times. Sl st to top of beg ch-3 to join. Pull MR closed. (4 clusters of 3 dc, 4 ch-2 corner spaces)
Round 2: Sl st to first ch-2 sp. Ch 3 (counts as dc), work 2 dc in same sp, ch 2, 3 dc in same sp (corner made). Ch 1. [Work corner of (3 dc, ch 2, 3 dc) in next ch-2 sp. Ch 1.] 3 times. Sl st to top of beg ch-3. (8 clusters of 3 dc, 4 ch-2 corner sp, 4 ch-1 side sp)
Round 3: Sl st to first ch-2 sp. Ch 3 (counts as dc), work 2 dc in same sp, ch 2, 3 dc in same sp (corner). Ch 1, 3 dc in ch-1 side sp, ch 1. [Corner in next ch-2 sp, ch 1, 3 dc in ch-1 side sp, ch 1.] 3 times. Sl st to top of beg ch-3. (12 clusters of 3 dc, 4 ch-2 corner sp, 8 ch-1 sp)
Fasten off leaving a 12 in / 30 cm tail for joining.
Join-As-You-Go Method (JAYG)
When beginning Round 3 of a new square that will join to an adjacent finished square, replace the chains at join points with slip stitches into the neighboring square:
At a corner join: ch 1, sl st into corner sp of neighbor, ch 1 (replacing ch 2)
At a side join: sl st into corresponding ch-1 sp of neighbor (replacing ch 1)
This creates a nearly invisible flat join. Only join along edges that meet another square.
Crochet Rose
Ch 30. Row 1: Work 2 dc in 4th ch from hook, then [3 dc in next ch] to end. (approximately 84 dc plus foundation chain)
Fasten off leaving a long tail. Roll the strip from one end, using the tail to stitch through the base as you roll. Flatten the base and stitch securely closed at the back.
Shell Stitch
Work (2 dc, ch 2, 2 dc) all in the same stitch or space.
Step-by-Step Crochet Pattern Instructions
Section 1: Bodice
Work with YA and E-4 / 3.5 mm hook throughout this section.
Neckline foundation ring: Ch 72. Without twisting, sl st to first ch to form a ring.
Rnd 1 (neckline): Ch 2 (does not count as st now or ever). Hdc in each ch around. Sl st to first hdc. (72 hdc)
Rnd 2 (set up yoke increase points): Ch 2. Hdc in first 9 sts, place marker (raglan point 1). Hdc in next 12 sts, place marker (raglan point 2). Hdc in next 18 sts, place marker (raglan point 3). Hdc in next 12 sts, place marker (raglan point 4). Hdc in next 9 sts, hdc in remaining 12 sts. Sl st to first hdc. (72 hdc)
The 12-st sections between markers 1-2 and 3-4 are the sleeves. The 18-st sections are front and back.
Rnd 3 (yoke increase rnd 1): Ch 2. [Hdc to 1 st before marker, 2 hdc in next st, move marker to new st, 2 hdc in next st] 4 times. Hdc to end. Sl st to first hdc. (80 hdc)
Rnd 4: Ch 2. Hdc in each st around. Sl st to first hdc. (80 hdc)
Rnd 5 (yoke increase rnd 2): Ch 2. [Hdc to 1 st before marker, 2 hdc in next st, move marker, 2 hdc in next st] 4 times. Hdc to end. Sl st to first hdc. (88 hdc)
Rnd 6: Ch 2. Hdc in each st around. Sl st to first hdc. (88 hdc)
Rnd 7 (yoke increase rnd 3): Ch 2. [Hdc to 1 st before marker, 2 hdc in next st, move marker, 2 hdc in next st] 4 times. Hdc to end. Sl st to first hdc. (96 hdc)
Rnd 8: Ch 2. Hdc in each st around. Sl st to first hdc. (96 hdc)
Rnd 9 (yoke increase rnd 4): Ch 2. [Hdc to 1 st before marker, 2 hdc in next st, move marker, 2 hdc in next st] 4 times. Hdc to end. Sl st to first hdc. (104 hdc)
Rnd 10: Ch 2. Hdc in each st around. Sl st to first hdc. (104 hdc)
Rnd 11 (yoke increase rnd 5): Ch 2. [Hdc to 1 st before marker, 2 hdc in next st, move marker, 2 hdc in next st] 4 times. Hdc to end. Sl st to first hdc. (112 hdc)
After rnd 11: Front panel has 28 hdc, each sleeve has 22 hdc, back panel has 40 hdc.
Rnd 12 (divide for sleeves and body): Ch 2. Hdc across 28 front sts. Ch 4 (underarm bridge). Skip 22 sleeve sts. Hdc across 40 back sts. Ch 4 (underarm bridge). Skip 22 sleeve sts. Sl st to first hdc. (68 hdc plus 8 ch, total 76 working sts)
Rnds 13-18: Ch 2. Hdc in each st around. Sl st to first hdc. (76 hdc)
Fasten off YA. Leave a long tail for attaching the skirt panel.
Checkpoint: The bodice tube should measure approximately 6 in / 15 cm tall with a lower edge circumference of approximately 17 in / 43 cm.
Section 2: Short Sleeves
Work both sleeves identically.
With RS facing, attach YA to any skipped sleeve st at the underarm.
Rnd 1: Ch 2. Hdc in each of the 22 skipped sleeve sts. Hdc in each of the 4 underarm ch. Sl st to first hdc. (26 hdc)
Rnd 2: Ch 2. Hdc in each st around. Sl st to first hdc. (26 hdc)
Rnd 3 (sleeve cap shaping): Ch 2. [Hdc2tog, hdc in next 11 sts] twice. Sl st to first hdc. (24 hdc)
Rnd 4: Ch 2. Hdc in each st around. Sl st to first hdc. (24 hdc)
Rnd 5 (sleeve edge): Ch 1 (does not count as st). Sc in each st around. Sl st to first sc. Fasten off. (24 sc)
Repeat for second sleeve.
Section 3: Granny Square Skirt
Tier 1 Squares: Make 8 squares in YA using the granny square instructions. Join in a strip using JAYG, then close into a ring.
Tier 2 Squares: Make 10 squares in YB. Join in a strip and close into a ring. Attach to the bottom edge of Tier 1 using JAYG. Space the extra 2 squares evenly around the ring to create the A-line flare.
Attaching Skirt to Bodice: Pin the top edge of Tier 1 to the lower bodice edge, aligning seams at back.
Join rnd: Attach YA to lower bodice edge. Ch 1. Working through both layers, sc evenly around, placing approximately 3 sc per granny square top edge side. Sl st to first sc. Fasten off. (approximately 24 sc)
Thread the satin ribbon through Rnd 18 of the bodice, weaving every 2 stitches. Tie at front.
Section 4: Lace Border Tier (Tier 3)
Switch to D-3 / 3.25 mm hook and YC.
Foundation Rnd: Attach YC to any bottom corner ch-sp of Tier 2. Ch 1. Work sc evenly around, placing 3 sc per dc cluster and 2 sc in each corner ch-sp. Adjust to reach 120 sc total. Sl st to first sc. (120 sc)
Lace Rnd 1: Ch 4 (counts as first dc plus ch 1). Sk next sc. [Dc in next sc, ch 1, sk next sc] around. Sl st to 3rd ch of beg ch-4. (60 dc, 60 ch-1 sp)
Lace Rnd 2: Ch 1. Sc in same sp. Sk next ch-1 sp. [Shell (2 dc, ch 2, 2 dc) in next dc. Sk next ch-1 sp. Sc in next dc. Sk next ch-1 sp.] Rep around, ending with sl st to first sc. (20 shells, 20 sc)
Lace Rnd 3: Sl st to ch-2 sp of first shell. Ch 3 (counts as dc). Work (2 dc, ch 2, 3 dc) in same ch-2 sp. Ch 1. Sc in next sc. Ch 1. [Work (3 dc, ch 2, 3 dc) in ch-2 sp of next shell. Ch 1. Sc in next sc. Ch 1.] Rep around. Sl st to top of beg ch-3. (20 shell clusters, 20 sc)
Lace Rnd 4: Sl st to ch-2 sp. Ch 1. Sc in ch-2 sp. Ch 5. [Sc in next ch-2 sp. Ch 5.] Around. Sl st to first sc. (20 sc, 20 ch-5 sp)
Lace Rnd 5 (scallop hem): Ch 1. [Work 7 dc in ch-5 sp. Sc in next sc.] Around. Sl st to first sc. Fasten off YC. (20 scallops of 7 dc, 20 sc)
Section 5: Beret
Work with YA and E-4 / 3.5 mm hook.
Rnd 1: Make a MR. Ch 2. Work 10 hdc in ring. Sl st to first hdc. Pull ring closed. (10 hdc)
Rnd 2: Ch 2. Work 2 hdc in each st around. Sl st to first hdc. (20 hdc)
Rnd 3: Ch 2. [2 hdc in next st, hdc in next st] 10 times. Sl st to first hdc. (30 hdc)
Rnd 4: Ch 2. [2 hdc in next st, hdc in next 2 sts] 10 times. Sl st to first hdc. (40 hdc)
Rnd 5: Ch 2. [2 hdc in next st, hdc in next 3 sts] 10 times. Sl st to first hdc. (50 hdc)
Rnd 6: Ch 2. [2 hdc in next st, hdc in next 4 sts] 10 times. Sl st to first hdc. (60 hdc)
Rnd 7: Ch 2. [2 hdc in next st, hdc in next 5 sts] 10 times. Sl st to first hdc. (70 hdc)
Rnd 8: Ch 2. [2 hdc in next st, hdc in next 6 sts] 10 times. Sl st to first hdc. (80 hdc)
Rnds 9-11: Ch 2. Hdc in each st around. Sl st to first hdc. (80 hdc)
Rnd 12 (begin brim decrease): Ch 2. [Hdc2tog, hdc in next 6 sts] 10 times. Sl st to first hdc. (70 hdc)
Rnd 13: Ch 2. [Hdc2tog, hdc in next 5 sts] 10 times. Sl st to first hdc. (60 hdc)
Rnd 14: Ch 2. [Hdc2tog, hdc in next 4 sts] 10 times. Sl st to first hdc. (50 hdc)
Rnd 15 (brim edge): Ch 1. Sc in each st around. Sl st to first sc. Fasten off. (50 sc)
Section 6: Beret Flower Applique
Flower Petals (YC):
Rnd 1: Make a MR. Ch 1. Work 6 sc in ring. Sl st to first sc. (6 sc)
Rnd 2: [Ch 5, sl st in next sc] 6 times. (6 ch-5 loops)
Rnd 3: [Work (sc, hdc, 3 dc, hdc, sc) in each ch-5 loop.] 6 times. Sl st to base. (6 petals)
Fasten off leaving a long tail.
Leaf (make 2 in green DK yarn):
Ch 8. Row 1: Sc in 2nd ch from hook, hdc in next ch, dc in next 2 ch, hdc in next ch, sc in next ch, 3 sc in last ch (tip). Work back along other side: sc in next ch, hdc in next ch, dc in next 2 ch, hdc in next ch, sc in next ch. Sl st to first sc to close. Fasten off.
Attach flower to beret slightly off-center. Position leaves behind flower extending to either side.
Blocking and Finishing
Weave in all ends securely, working in opposite directions for at least 1 in / 2.5 cm.
Wet blocking is strongly recommended. Submerge the dress in cool water, gently press out excess without wringing. Lay flat on a blocking mat, pinning each lace scallop outward. Allow to air dry completely.
Block the beret over a balloon or 7 in / 18 cm diameter bowl. Dampen gently and allow to dry.
Thread the satin ribbon after blocking to avoid puckering.
Care Instructions
Hand wash in cool water with mild soap. Do not wring. Press in a towel to remove excess water. Reshape and lay flat to dry. Do not place in dryer or hang to dry. Store folded, not on a hanger.
Time Investment
Expect this project to take approximately 25 to 35 hours total. The dress alone is 20 to 28 hours depending on your experience with the techniques involved. The beret adds 3 to 4 hours, and embellishments another 2 to 3 hours.
This is absolutely a labor of love. The result is an heirloom-quality piece that can be passed down through generations.
Thank you so much for choosing this pattern for your next project. I truly hope you enjoy the process of watching this beautiful dress come together piece by piece. If you make one, please share your photos on Instagram or Facebook. I absolutely love seeing how these pieces turn out in different color combinations.
If this pattern caught your eye, go ahead and pin it to your Pinterest boards so you can find it when you are ready to start. And please drop a comment below if you make this dress. I would love to hear how it turned out for you!