
This is it. THIS is the dress that makes people stop and say, "Wait, you MADE that?" I’m not exaggerating when I tell you this Ivory Pearl Lace Dress is one of the most stunning crochet garments you’ll ever create with your own two hands.
Get the Ad-Free PDF Pattern
You can find the free pattern below, or you can purchase the ad-free printable PDF from my shop.
Get the Printable PDF →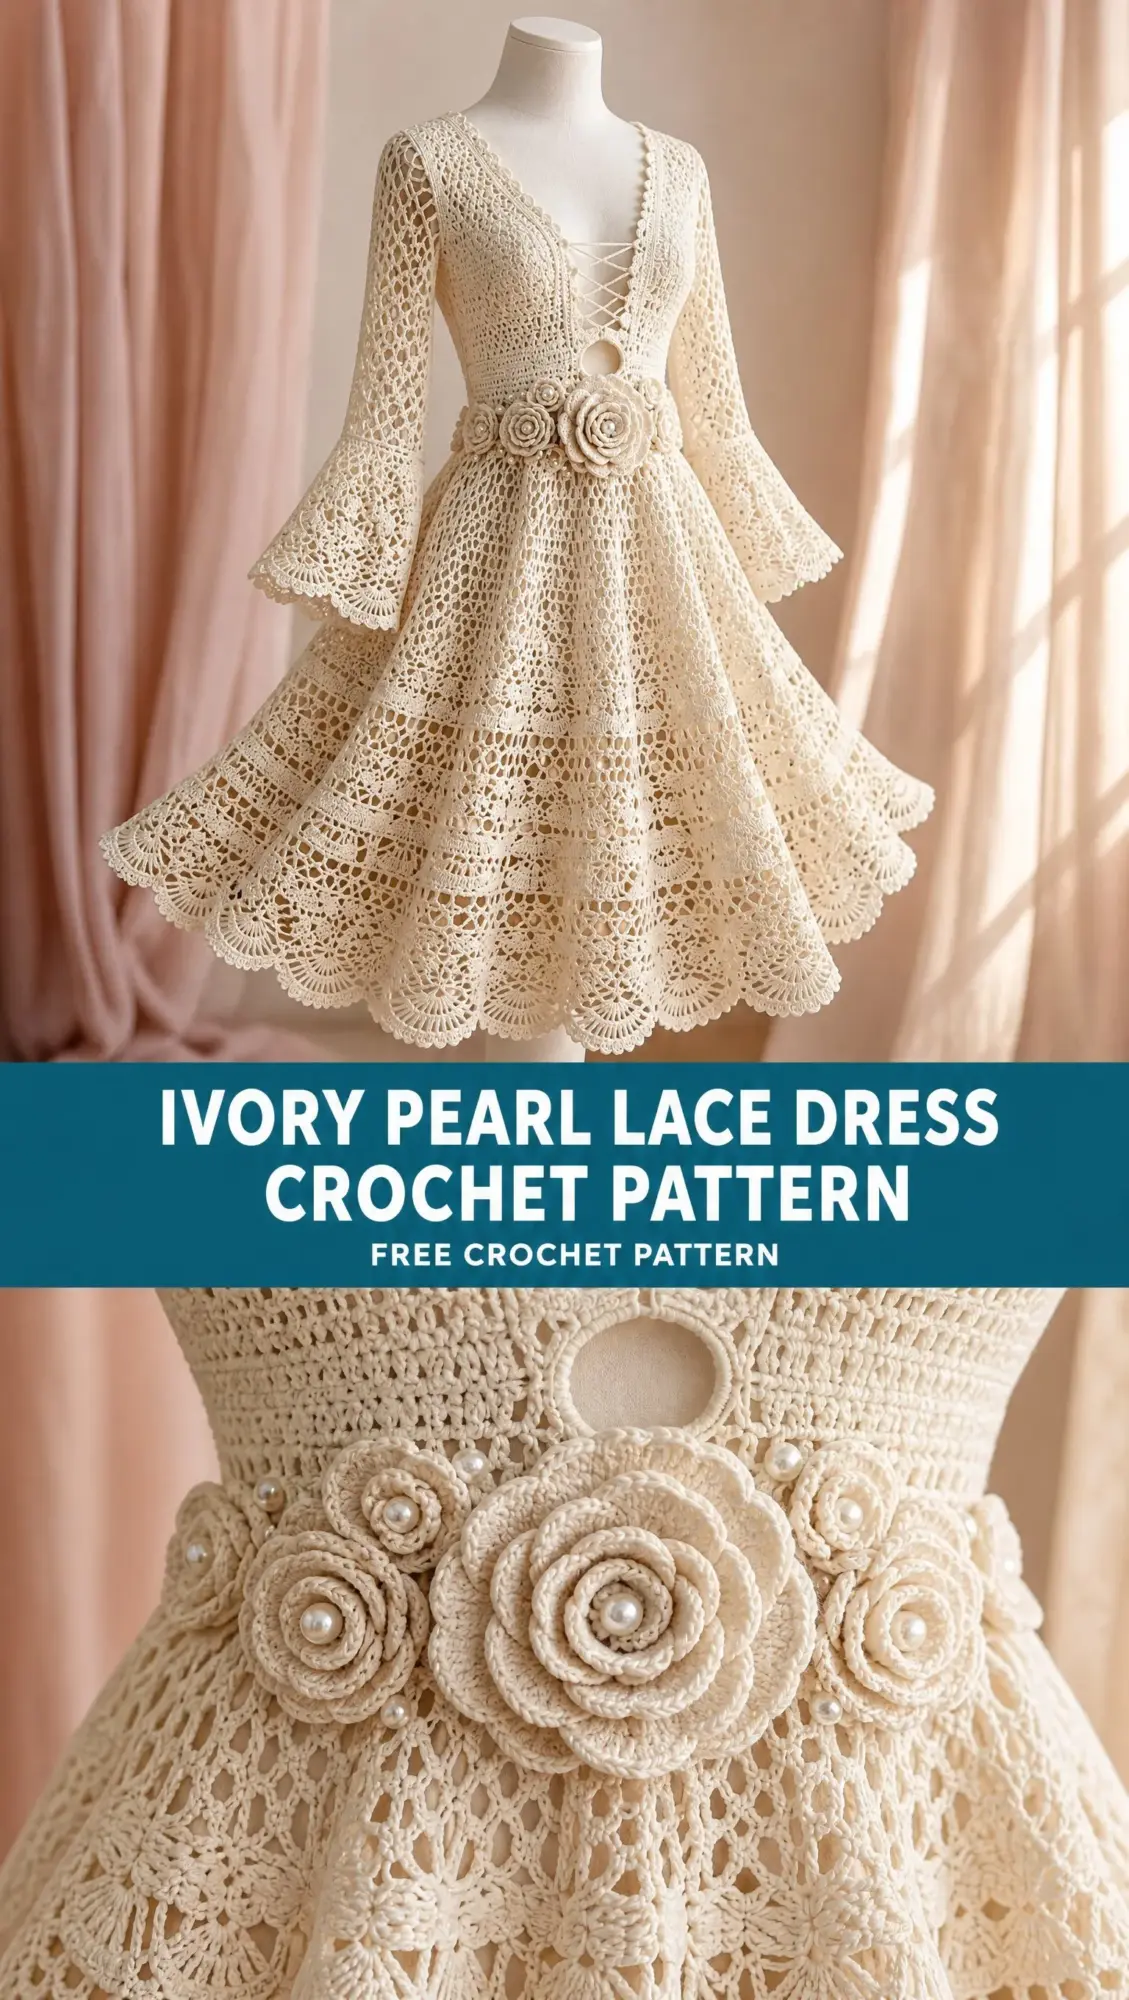
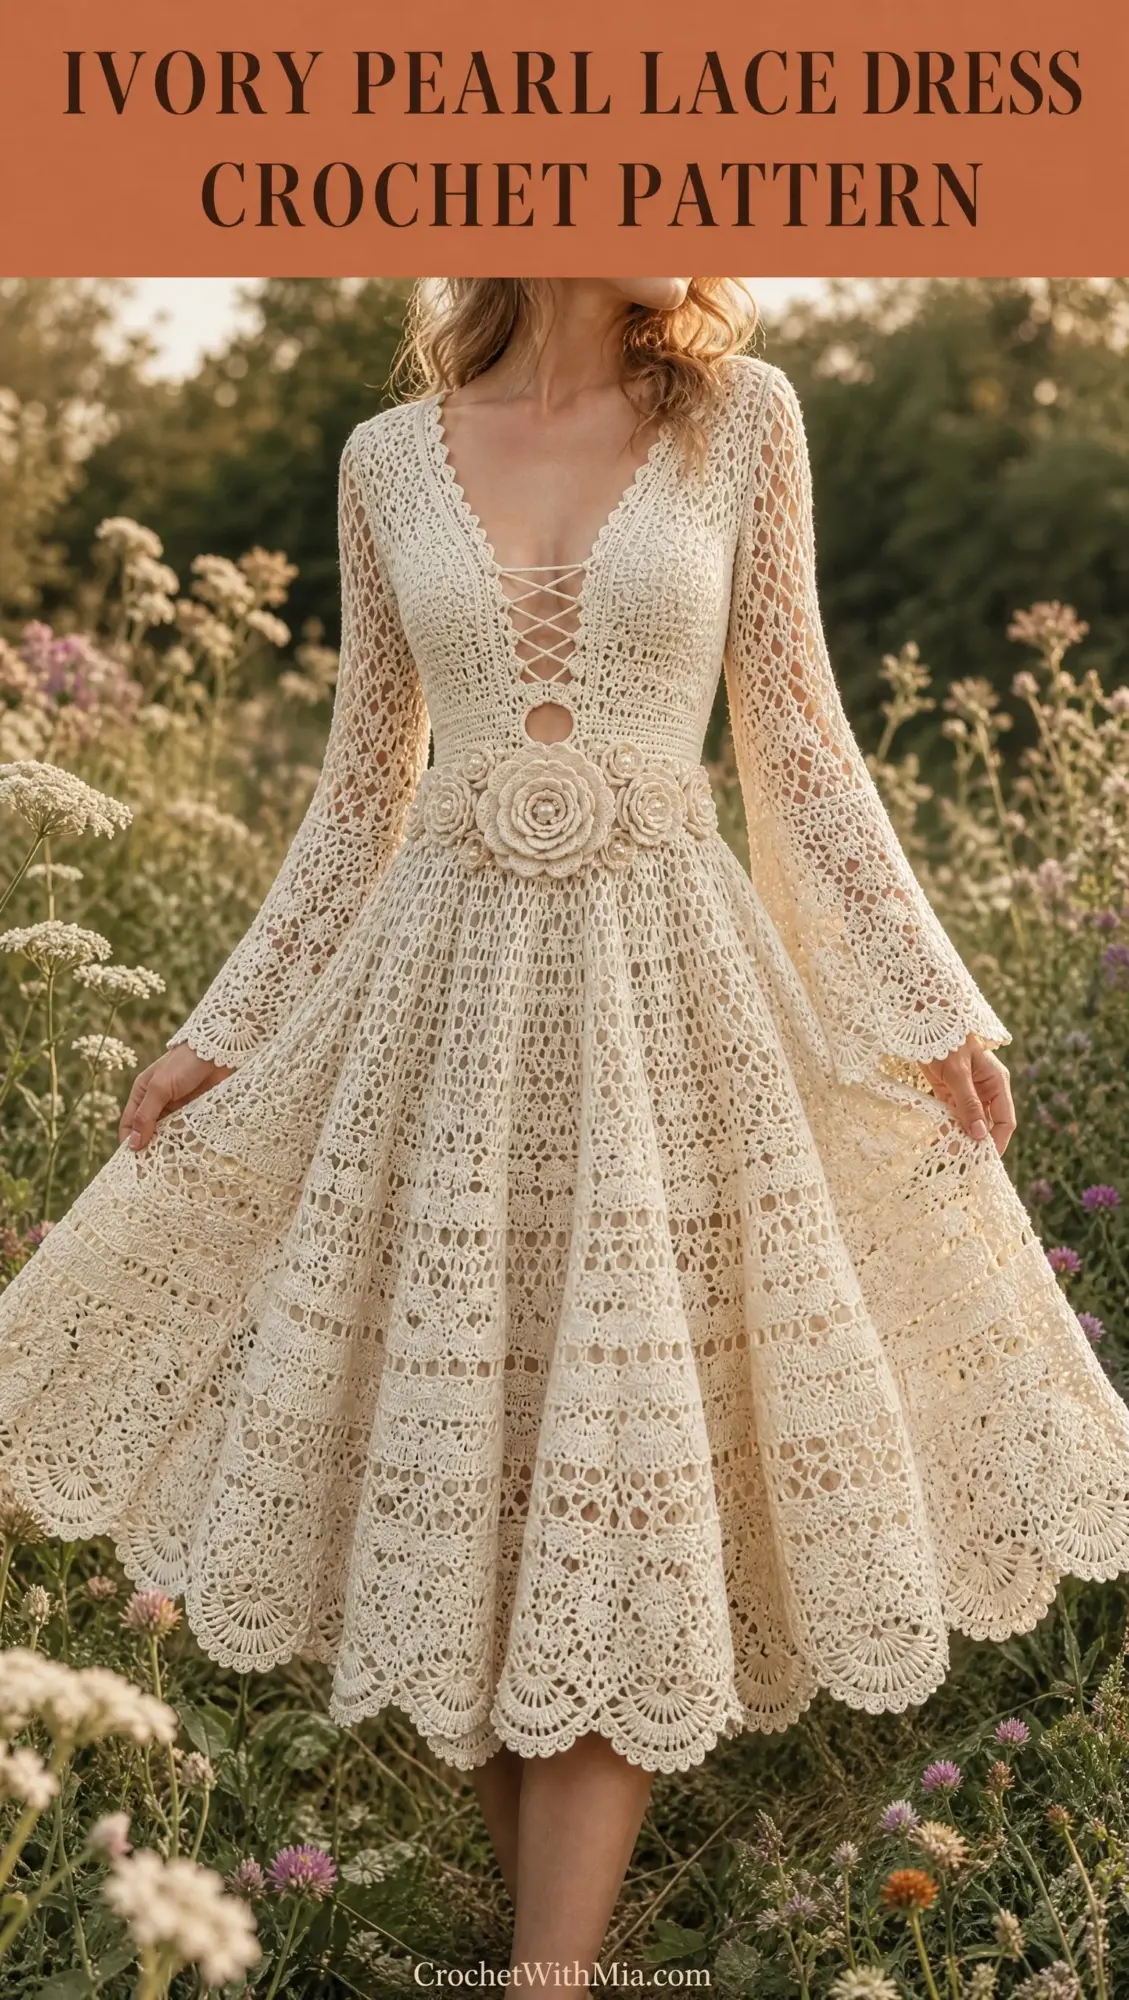
Yes, it’s an advanced intermediate project. Yes, it takes time and patience. But every single hour you invest shows in the finished piece. We’re talking a fitted lace-up bodice, dreamy diamond mesh sleeves, dimensional roses with actual pearl centers, and a skirt that flows and swirls like something straight off a runway.
If you’ve been waiting for that special occasion project, the one that pushes your skills and leaves you with a true heirloom piece, this is your sign. Let’s make something extraordinary together.
Why This Dress Is Worth Every Stitch
I won’t pretend this is a weekend project. This dress demands your attention, your best yarn, and your full commitment. But here’s what you get in return: a completely customizable, knee-length occasion dress that works for weddings, garden parties, elegant events, or any moment when you want to feel absolutely incredible.
The construction is smart and manageable. You’ll work the dress in sections, which means you’re never overwhelmed by the whole garment at once. The bodice comes first, then the sleeves, then that gorgeous flared skirt. Each piece gets assembled at the end, and the finishing touches bring everything together beautifully.
The mercerized cotton gives you that refined sheen that photographs like a dream. And those pearl-centered roses at the waist? They’re the kind of detail that elevates this from "nice handmade dress" to "couture-level showpiece."
Materials You’ll Need
Before you start, gather everything so you’re not hunting for supplies mid-project. Here’s your complete list pulled directly from the pattern:
Yarn:
Suggested Yarn Options:
1. Mercerized cotton lace or fingering yarn with smooth sheen
2. Egyptian cotton crochet thread
3. Bamboo-cotton blend for softer drape
Tools and Notions:
The yarn quantity has a range because your finished size and personal tension will affect how much you use. I always recommend buying a bit extra. Running out of a dye lot mid-dress is heartbreaking.
Finished Size and Customization
This pattern is designed to be customizable. You’ll adjust the bodice circumference and skirt fullness by changing stitch counts in multiples of the mesh repeat.
Example Sample Measurements:
Take your measurements before you begin and compare them to the sample. The pattern gives you flexibility, but you need to know your starting point.
Gauge
Getting gauge right on a garment this fitted is essential. Don’t skip your swatch.
Approximate Gauge:
32 double crochet stitches x 16 rows = 4 x 4 inches (10 x 10 cm)
Work a swatch, block it the way you’ll block the finished dress, and measure after it’s dry. If you’re getting more stitches per inch, go up a hook size. Fewer stitches? Go down. This step saves you from ripping out hours of work later.
Skill Level
This pattern is rated Advanced Intermediate.
Skills Required:
If you’ve made fitted garments before and you’re comfortable with lace patterns, you’re ready. If this is your first wearable, I’d suggest practicing the mesh pattern on a smaller project first, maybe a scarf or shawl, to get the feel of the stitches.
Abbreviations
Let me break down every stitch abbreviation you’ll encounter. Understanding these fully before you start will make the instructions flow smoothly.
Construction Overview
The dress comes together in seven distinct sections:
1. Fitted bodice front and back
2. Lace-up V neckline with side shaping
3. Oval underbust opening
4. Sleeves worked separately in diamond mesh
5. Flared skirt joined at waist
6. Crochet roses and pearl details
7. Final scalloped edging and blocking
Working in sections keeps the project manageable and gives you natural stopping points. You can complete the bodice over several sessions, then move to sleeves, then tackle the skirt. No need to crochet for hours at a stretch.
Step-by-Step Pattern Instructions
Bodice Pattern
Foundation:
Chain enough stitches to fit half the bust measurement plus your turning chain. This forms one panel of your bodice.
Row 1:
Work double crochet (dc) across the entire foundation chain.
Rows 2 through 8:
Continue working double crochet rows while shaping the waist with gradual decreases at both sides. These decreases create the fitted silhouette that makes the bodice hug your curves beautifully.
V Neck Shaping
Divide your front panel into two sides at the center.
Decrease one stitch near the neckline edge every other row until you reach your desired V depth. The decreases create that elegant plunging neckline you see in the reference image.
Lace-Up Detail
This is where the drama happens. Create evenly spaced eyelet rows along both neckline edges using this pattern:
(sc, ch 1, skip 1 stitch) repeated across.
Once both edges are complete, thread an ivory crochet cord through the openings. The lacing effect is both decorative and functional, allowing you to adjust the fit.
Underbust Oval Cutout
Create a centered oval opening by skipping the central stitches in your work. Reinforce the surrounding edge with single crochet (sc). Work several rounds around the opening to stabilize the shape and prevent stretching.
This cutout adds visual interest and that modern, slightly daring element to the bodice.
Back Bodice
Work straight rows matching the front width. Add slight waist shaping to mirror the front panel. The back is simpler since there’s no V-neck or lace-up detail, but the shaping keeps everything fitted and flattering.
Sleeves
The sleeves are worked separately, then attached. The diamond mesh creates that airy, romantic look that’s perfect for warm weather occasions.
Diamond Mesh Sleeve:
Round 1:
Create your sleeve foundation chain.
Mesh Pattern:
(ch 5, skip 3 stitches, sc into next stitch) repeat around.
Continue working mesh rounds until you reach your desired sleeve length. The pattern indicates 18 inches (46 cm) for the sample size.
Bell Cuff:
Increase evenly around the final rounds to create that beautiful flare at the wrist.
Work shell lace for the cuff edge:
5 dc into same stitch, skip stitches, repeat around.
The bell cuff adds movement and elegance. When you gesture or reach for something, the sleeves flow gorgeously.
Skirt
Join your yarn at the waist of the completed bodice.
Flare Increase Round:
Increase evenly around the waist circumference. This sets up the generous fullness of the skirt.
Mesh Band:
(ch 6, sc into next mesh space) repeat around.
Shell Lace Band:
In each space: 7 dc shell, skip next space, repeat around.
Alternate between mesh and shell lace sections until you reach knee length. This creates those beautiful horizontal bands of texture you see in the finished dress, with lighter, airier mesh sections between the denser shell lace.
Hem Finish:
Work scalloped fan edging around the entire hem:
(sc, hdc, 5 dc, hdc, sc) in repeating sections.
This edging gives the skirt that classic vintage lace finish that photographs beautifully and moves with your body.
Crochet Roses
The dimensional roses at the waist are what truly set this dress apart.
Large Waist Rose:
Create a spiral chain base. Work layered petals using increasing shell stitches. The shells get larger as you work outward, creating natural petal shapes.
Curl the completed strip into a rose shape and sew securely. The spiral construction means you’re essentially rolling the fabric into a flower form.
Rose Center:
Attach a small ivory pearl bead firmly through the flower center. Sew it through multiple times to ensure it’s completely secure.
Arrange multiple roses around the waistline. The sample shows three roses clustered at the front center, but you can adjust the placement and quantity to suit your style.
Finishing
Take your time with finishing. It’s the difference between a homemade dress and a professional-looking garment.
Blocking is non-negotiable for lace. Before blocking, your dress will look rumpled and the stitch definition will be unclear. After blocking, every mesh opening will be crisp and even, and the overall silhouette will be smooth and elegant.
Care Instructions
Treat this dress gently. It’s an investment piece.
Troubleshooting Tips
If the skirt feels heavy: Reduce your yarn weight or increase your hook size. The lighter the fabric, the better the drape.
If lace openings are too loose: Reduce your hook size. You want the mesh to hold its shape without being stiff.
If the bodice stretches: Reinforce waist seams with matching thread. A few hand-sewn reinforcement stitches can prevent the cotton from losing its shape over time.
Designer Notes
This dress is intended for special occasions, bridal events, garden parties, and elegant handmade wardrobes. The pattern is designed to be customizable, so don’t be afraid to adjust the length, change the sleeve style, or add more roses if that’s your vision.
Finished garments may be gifted or sold. However, the written pattern itself should not be redistributed or resold. Please respect the designer’s work.
You’ve Got This
I know this pattern looks ambitious. And honestly? It is. But you’re not doing it all in one sitting. You’re making a bodice, then sleeves, then a skirt, then some pretty roses. Each piece is manageable on its own.
When you slip this dress over your head for the first time and see how it fits, how the lace catches the light, how the skirt swirls when you move? That moment makes every single stitch worth it.
This is the kind of project that reminds you why you fell in love with crochet in the first place.
Thank you so much for choosing this pattern. I truly hope you enjoy every moment of creating your Ivory Pearl Lace Dress. When you finish, I would absolutely love to see your work! Tag me on Instagram or share in our Facebook group so I can celebrate with you.
If this pattern inspired you, save it to your Pinterest boards so you can find it whenever you’re ready to start. And please drop a comment below if you make this dress. I’d love to hear about your color choices, any modifications you made, or just how incredible it feels to wear something you created yourself.
Want a Quick & Easy Printable Version?
Get a clean, beautifully formatted PDF of this pattern — easy to follow step by step, ready to print or save on any device. No scrolling, no distractions, just the pattern.
Get the Printable PDF →