
You know that moment when you spot someone wearing the most gorgeous crocheted hat, and you think, "I need to make that immediately"? This is that hat.
Get the Ad-Free PDF Pattern
Scroll down for the full pattern, or get the ad-free printable PDF from the shop.
Get the Printable PDF →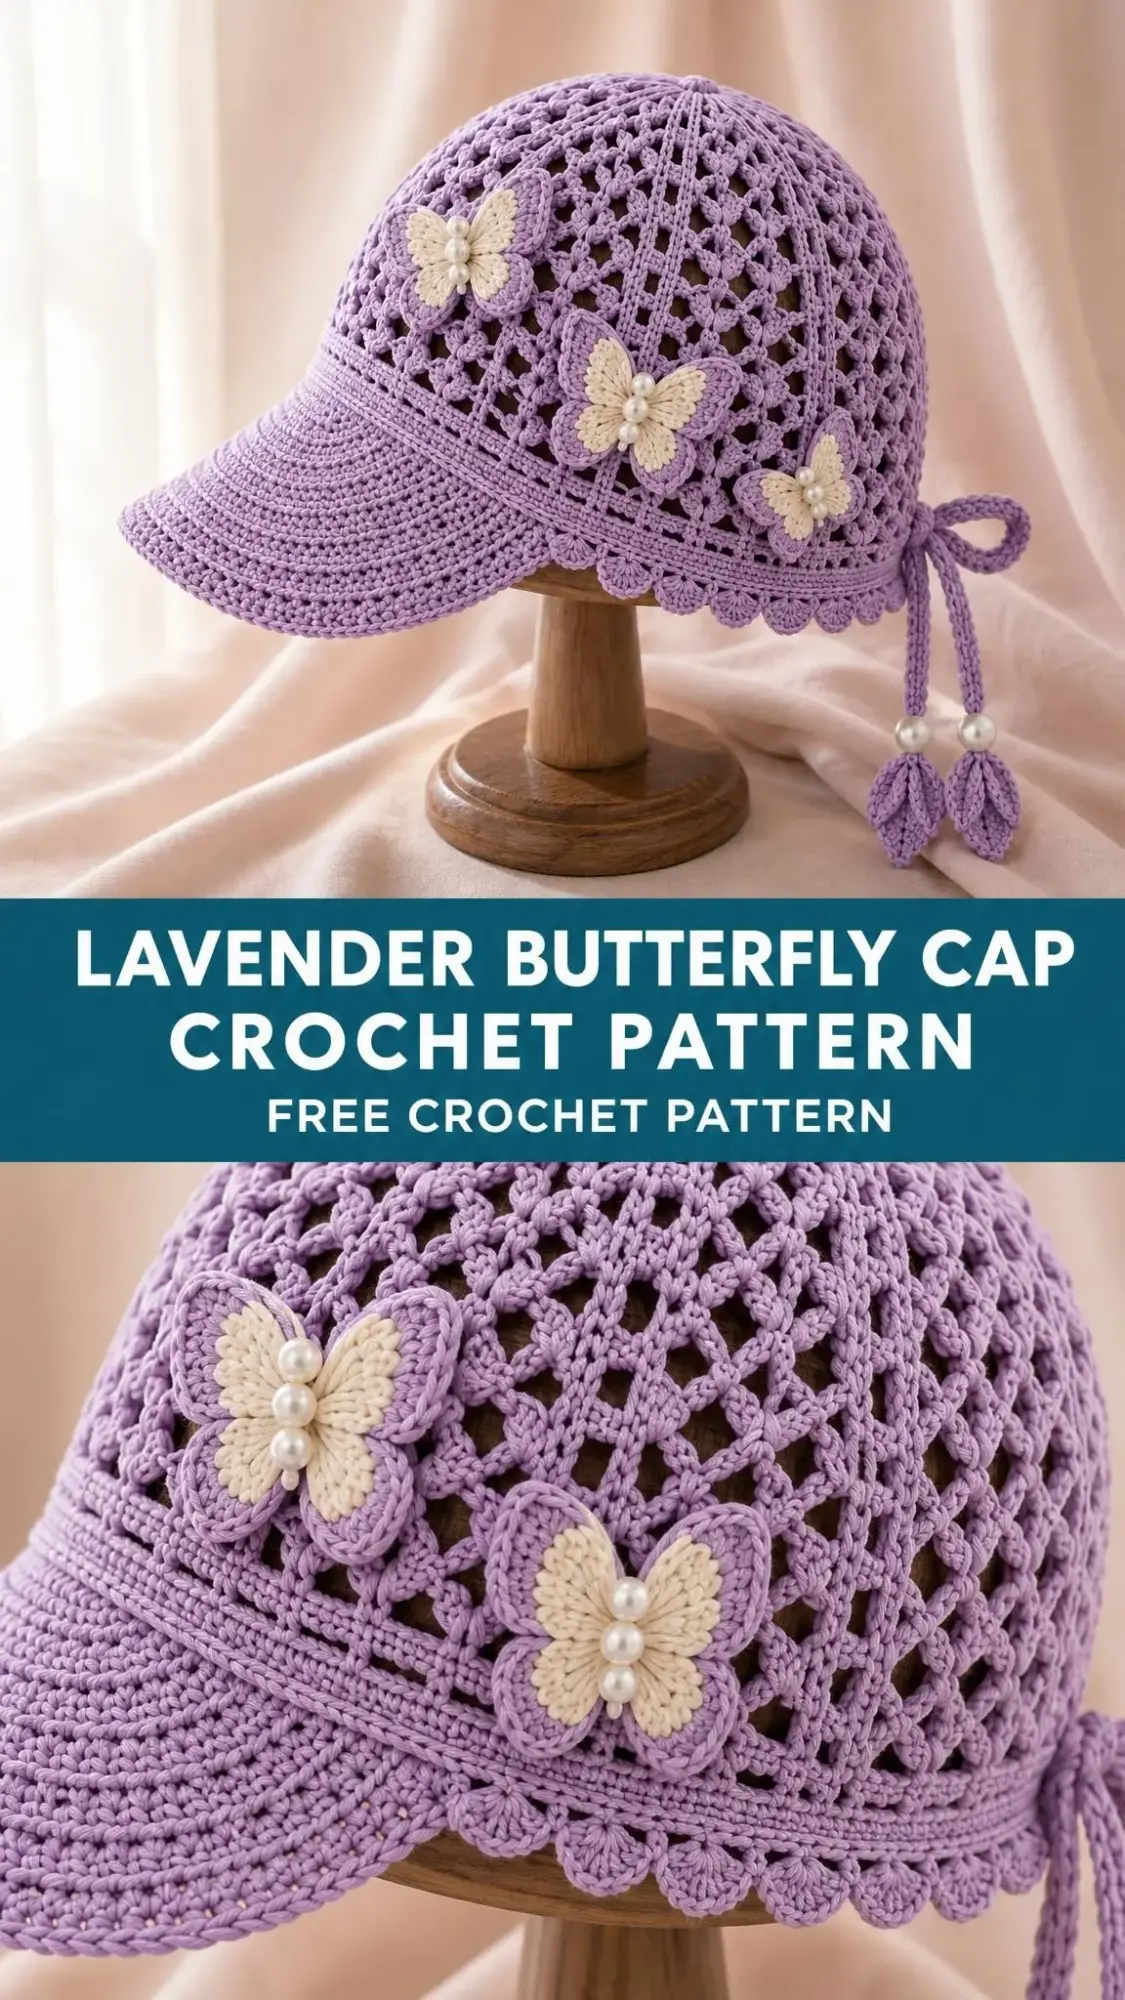
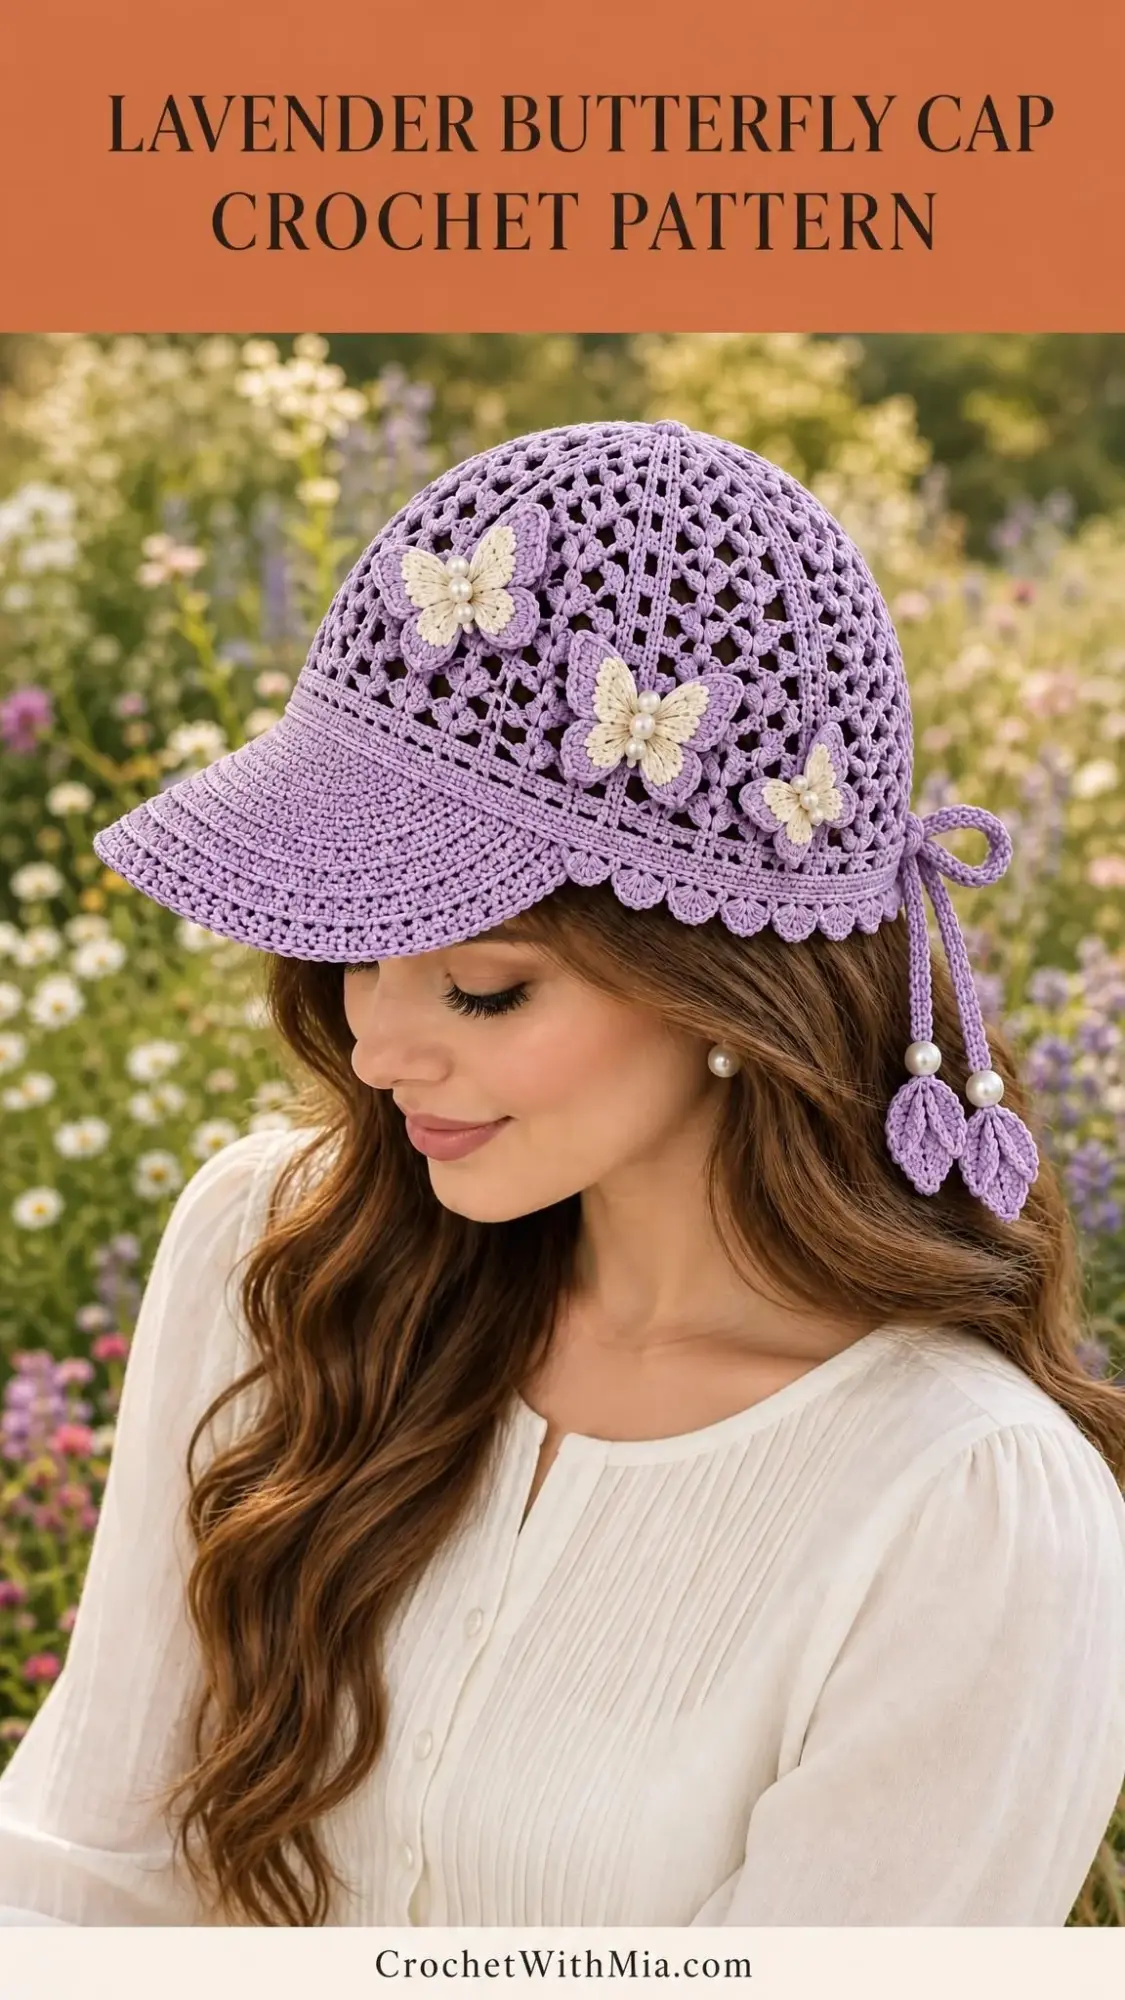
The Lavender Butterfly Cap is a fitted ponytail visor cap that combines delicate mesh lacework with charming butterfly appliques. The open mesh dome keeps things breathable for warmer days, while the dense double-layer visor adds structure and a touch of vintage elegance. Those three raised butterfly motifs in lilac and ivory? They transform a simple cap into something truly special.
Whether you’re looking for a standout accessory for summer outings or a thoughtful handmade gift for someone who appreciates detailed craftwork, this pattern delivers. The construction moves from the crown down, opens at the back for a ponytail, then finishes with a sturdy visor and picot edging. Let’s walk through everything you need to bring this beauty to life.
What Makes This Crochet Cap Pattern Special
This design hits a sweet spot between decorative and wearable. The fine mesh crown creates an airy, lace-like texture that looks intricate but builds from a simple repeating pattern. Six evenly spaced increases shape the flat disc into a gentle dome, and once you reach 60 mesh cells, you transition into straight rounds that form the sides of the cap.
The rear opening is a clever feature. Rather than working continuous rounds all the way down, you leave a notch at the back. This creates space for a ponytail or bun, and the ribbon ties let you adjust the fit. Practical and pretty.
The double-layer visor gives the brim real body. Two identical dense single crochet (sc) pieces are whipstitched together around the curved edge, with an optional flexible insert sandwiched between for extra stability. The result is a visor that holds its shape beautifully.
And then there are the butterflies. Each applique works up in a single round using treble crochet (tr) and double crochet (dc) to form four distinct wings. A few wraps of yarn around the center divide the wings and create that classic butterfly silhouette. They’re small, quick, and absolutely charming.
Materials and Tools
Here’s what you’ll need to gather before you start:
Yarn:
- Smooth fingering weight cotton, approximately 200 meters per 50 grams
- Main color (lavender): 100 grams / 400 meters
- Contrast colors (lilac and ivory for butterflies): 15 grams / 60 meters each
The estimated quantities include enough for the appliques and double visor, plus a bit extra for swatching.
Hooks:
- 2.5 mm hook for the crown
- 2.25 mm hook for the visor and trim
Adjust hook sizes as needed to achieve gauge.
Notions:
- Tapestry needle
- 8 stitch markers
- Scissors
- Tape measure
- Optional: washable flexible visor insert, cut 3 mm smaller than the crocheted layers
- For pearl versions: 6 to 10 sew-on 8 mm imitation pearls and strong sewing thread
Gauge
Getting gauge right matters here, especially since this is a fitted cap.
Crown gauge: 22 stitch positions (11 small-mesh cells) x 12 rows = 10 cm
Dense visor gauge: 22 sc x 24 rows = 10 cm
The 120-position crown circumference measures approximately 54.5 cm.
Make a swatch at least 15 x 15 cm. Wash and dry it the same way you’ll care for the finished piece, then measure the central 10 cm without stretching. If your numbers don’t match, go up or down a hook size. Record both width and height, as cotton lace can lengthen while worn.
Abbreviations and Special Stitches
This pattern uses US crochet terminology throughout.
- ch = chain
- st(s) = stitch(es)
- sp = space
- sl st = slip stitch
- sc = single crochet (insert hook, yarn over, pull through, yarn over, pull through both loops)
- hdc = half double crochet
- dc = double crochet (yarn over, insert hook, yarn over, pull through, yarn over, pull through two loops, yarn over, pull through remaining two loops)
- tr = treble crochet (yarn over twice, insert hook, yarn over, pull through, then yarn over and pull through two loops three times)
- BLO = back loop only
- RS/WS = right side/wrong side
- rep = repeat
- inc = increase
- sc2tog = single crochet two stitches together (a decrease)
Small mesh, flat: Chain 3 (counts as first dc), then work [ch 1, skip next ch-1 space, dc in next dc] to end. Work the dc into the post stitch, not the gap. A mesh cell is one ch-1 space bounded by dc posts. For flat work with C cells, you’ll have C+1 dc posts and C chains, for a total of 2C+1 positions.
Shell trim: On a prepared sc edge with a multiple of 6 stitches, work [skip 2 sc, 5 dc in next sc, skip 2 sc, sl st in next sc].
Picot trim: Work [sc in next 3 sts, ch 3, sl st into third ch from hook].
Pattern Notes
A few things to keep in mind as you work:
- Turning ch 3 counts as a dc. Ch 1 does not count as a sc.
- Join rounds with sl st unless stated otherwise.
- Flat rows turn after each row. Joined dress rounds do not turn.
- Brackets enclose a repeat.
- Do not count joining sl sts.
- Sew with RS together unless directed otherwise.
- Work main fabric in lavender. Use remaining colors for named trims and appliques.
This document supplies one adult sample size only, fitting a 54 to 57 cm head with approximately 18 cm depth and a 20 x 6 cm visor. Check the measurements before committing yarn. Altering stitch counts requires recalculating motif placement and shaping.
Construction Overview
Here’s the basic roadmap:
- Increase a circular lace top to 60 mesh cells (120 stitch positions)
- Work four closed mesh rounds
- Work five open rows, leaving a rear notch
- Add the front visor
- Finish the edges
- Attach motifs and ties
Target measurements:
- Head circumference: 54 to 57 cm
- Crown depth: about 18 cm
- Rear opening: about 6 x 5 cm
- Visor: 20 x 6 cm
Instructions
Crown Lace Disc
Round 1: Into an adjustable ring, ch 3 (counts as first dc), 11 dc; join. (12 dc)
Round 2: Ch 3, ch 1; [dc in next dc, ch 1] 11 times; join. (12 dc + 12 ch-1 spaces; 12 cells)
Round 3: Sl st into first ch-1 space. Work [(dc, ch 1, dc, ch 1) in next space, (dc, ch 1) in each of next 1 spaces] 6 times; replace first dc with ch 3 and join. (18 dc + 18 ch-1 spaces; 18 cells)
Round 4: Sl st into first ch-1 space. Work [(dc, ch 1, dc, ch 1) in next space, (dc, ch 1) in each of next 2 spaces] 6 times; replace first dc with ch 3 and join. (24 dc + 24 ch-1 spaces; 24 cells)
Round 5: Sl st into first ch-1 space. Work [(dc, ch 1, dc, ch 1) in next space, (dc, ch 1) in each of next 3 spaces] 6 times; replace first dc with ch 3 and join. (30 dc + 30 ch-1 spaces; 30 cells)
Round 6: Sl st into first ch-1 space. Work [(dc, ch 1, dc, ch 1) in next space, (dc, ch 1) in each of next 4 spaces] 6 times; replace first dc with ch 3 and join. (36 dc + 36 ch-1 spaces; 36 cells)
Round 7: Sl st into first ch-1 space. Work [(dc, ch 1, dc, ch 1) in next space, (dc, ch 1) in each of next 5 spaces] 6 times; replace first dc with ch 3 and join. (42 dc + 42 ch-1 spaces; 42 cells)
Round 8: Sl st into first ch-1 space. Work [(dc, ch 1, dc, ch 1) in next space, (dc, ch 1) in each of next 6 spaces] 6 times; replace first dc with ch 3 and join. (48 dc + 48 ch-1 spaces; 48 cells)
Round 9: Sl st into first ch-1 space. Work [(dc, ch 1, dc, ch 1) in next space, (dc, ch 1) in each of next 7 spaces] 6 times; replace first dc with ch 3 and join. (54 dc + 54 ch-1 spaces; 54 cells)
Round 10: Sl st into first ch-1 space. Work [(dc, ch 1, dc, ch 1) in next space, (dc, ch 1) in each of next 8 spaces] 6 times; replace first dc with ch 3 and join. (60 dc + 60 ch-1 spaces; 60 cells)
Round 11: Ch 3; [ch 1, dc in next dc] 59 times; ch 1, join to top of ch 3. (60 dc + 60 ch-1 spaces)
Rounds 12 to 14: Ch 3; [ch 1, dc in next dc] 59 times; ch 1, join. (60 dc + 60 ch-1 spaces)
Rear Opening
Mark a rear arc of 7 mesh cells. Place the working start at the first boundary post of the remaining 53-cell front arc. Cut and rejoin yarn there if needed.
Row 15: Ch 3; [ch 1, dc in next dc] 53 times along the front arc. Leave rear 7 cells unworked; turn. (54 dc + 53 ch-1 spaces; 53 cells)
Rows 16 to 19: Work small mesh across; turn. (54 dc + 53 ch-1 spaces; 53 cells)
Checkpoint: Crown circumference before opening should measure about 54.5 cm. Rear notch should be about 6.4 cm wide x 4.2 cm deep. Block crown to approximately 18 cm depth, adjusting only the straight mesh-row count if needed.
Visor (Make 2 Matching Layers)
Use 2.25 mm hook. The starting edge attaches to the cap later. For the wide version, block width to 21 cm. For petite versions, block to 19 cm without changing stitch counts.
Row 1: Ch 45; sc in second ch and each remaining ch; turn. (44 sc)
Row 2: Ch 1, sc2tog, sc in next 40 sts, sc2tog; turn. (42 sc)
Row 3: Ch 1, sc2tog, sc in next 38 sts, sc2tog; turn. (40 sc)
Row 4: Ch 1, sc2tog, sc in next 36 sts, sc2tog; turn. (38 sc)
Row 5: Ch 1, sc2tog, sc in next 34 sts, sc2tog; turn. (36 sc)
Row 6: Ch 1, sc2tog, sc in next 32 sts, sc2tog; turn. (34 sc)
Row 7: Ch 1, sc2tog, sc in next 30 sts, sc2tog; turn. (32 sc)
Row 8: Ch 1, sc2tog, sc in next 28 sts, sc2tog; turn. (30 sc)
Row 9: Ch 1, sc2tog, sc in next 26 sts, sc2tog; turn. (28 sc)
Row 10: Ch 1, sc2tog, sc in next 24 sts, sc2tog; turn. (26 sc)
Row 11: Ch 1, sc2tog, sc in next 22 sts, sc2tog; turn. (24 sc)
Row 12: Ch 1, sc2tog, sc in next 20 sts, sc2tog; turn. (22 sc)
Row 13: Ch 1, sc2tog, sc in next 18 sts, sc2tog; turn. (20 sc)
Row 14: Ch 1, sc2tog, sc in next 16 sts, sc2tog; turn. (18 sc)
Butterfly Appliques (Make 3)
Round 1: Into an adjustable ring work [(ch 3, 3 tr, ch 3, sl st), (ch 2, 3 dc, ch 2, sl st)] twice. Pull ring snug; fasten off. (4 wings; 6 tr + 6 dc)
Wrap the yarn tail around the centre four times to divide the wings. Knot at the back and retain tails for sewing. Do not add wire antennae.
Assembly
You’ll need: Main colour, 2.25 mm hook, tapestry needle, both visor layers, optional flexible insert.
Assembly pass 1: Align visor layers WS together. Whipstitch their shaped outer edges, inserting the optional washable support before closing the last edge. (2 layers joined)
Assembly pass 2: Centre the 44-st starting edge over the front 44 stitch positions of the cap rim. Sew through both visor layers and cap edge once per position. (44 attachment stitches)
Checkpoint: Visor sits symmetrically opposite the rear opening and curves down slightly. No sharp insert corners may protrude.
Edgings and Details
You’ll need: Main or named contrast colour, 2.25 mm hook, motifs, pearl beads only for pearl versions.
Edging round 1: Sc around the rear opening and exposed lower rim, using 1 sc per stitch/chain position and 2 sc per dc row end. Mark and record actual total E. (E sc)
Edging round 2: Work 1 sc in each sc. For scalloped versions, add shell trim on the exposed lower sides only, leaving up to 5 remainder sts as sc. For picot versions, use picot trim. For straight edges, use plain sc. (E base stitches consumed)
Tie row 1 (make 2): Ch 66, sl st in second ch and each remaining ch; fasten off. Attach one tie to each lower rear corner. (65 sl sts per tie)
For butterfly versions: Sew the three butterfly motifs around the crown with balanced spacing.
For pearl versions: Stitch beads firmly to tie ends with separate doubled thread; secure three times.
Checkpoint: Ties close comfortably without pulling the opening shut. All decorations are secure and visor remains centred.
Finishing
You’ll need: Matching yarn tails, tapestry needle, no working hook, towel and a head-shaped blocking form.
Finishing pass 1: Weave each tail through at least 4 cm of dense fabric, reverse direction and trim. (0 unsecured tails)
Finishing pass 2: Damp-block the crown over a 54 to 55 cm form and shape visor by hand; air-dry fully. (1 finished cap)
Final measurements: Target head range 54 to 57 cm; crown about 18 cm deep; visor about 20 x 6 cm. Do not stretch lace while wet.
Care and Safety
Follow the yarn label instructions. Unless it specifies otherwise, hand-wash cool with mild detergent, support the wet fabric, and dry flat away from direct heat. Remove any removable visor insert before washing. Do not wring, tumble dry, or iron acrylic components.
Safety notes: This is an adult item only. Beads, tassels, and appliques are small parts and potential snagging hazards. Attach securely and inspect before wear. Keep away from babies and young children. Avoid loose cords around machinery. Open mesh does not provide sun protection or opaque coverage.
Tips for Success
Watch your tension on the mesh. The lacy crown can look uneven if your tension varies. Try to keep each dc and ch-1 consistent. Blocking works wonders, but starting with even stitches makes the final result much smoother.
Don’t skip the swatch. Cotton behaves differently than acrylic or wool. It has less stretch and can grow with wear. A proper swatch, washed and measured, saves you from a cap that ends up too big or too small.
The butterflies are fast. Each one takes just a few minutes. Consider making extras in different colors if you want options for placement before committing.
Block the visor pieces before assembly. This helps them match perfectly when you whipstitch them together.
Who Will Love This Pattern
This cap makes a wonderful gift for anyone who appreciates handmade accessories with vintage charm. The ponytail opening makes it practical for active wear, while the butterfly details add a feminine, whimsical touch.
It’s also a satisfying project for crocheters who want to expand their skills beyond basic hats. The mesh construction, shaped visor, and applique techniques offer variety without overwhelming complexity.
Thank you so much for choosing this pattern! If you make the Lavender Butterfly Cap, please share your finished project on Instagram or Facebook. Seeing your creations brings so much joy, and your photos might inspire someone else to pick up their hook and start stitching.
Save this pattern to your Pinterest boards so you can find it easily when you’re ready to cast on. And if you have questions or want to share how yours turned out, drop a comment below. Happy crocheting!
Want a Quick & Easy Printable Version?
Get a clean, beautifully formatted PDF of this pattern — easy to follow step by step, ready to print or save on any device. No scrolling, no distractions, just the pattern.
Get the Printable PDF →