
You know that gorgeous skein of light blue yarn you’ve been saving for something special? This is the project. Dig into your stash and pull out that navy worsted weight you bought on sale, too. The Winter Snowflake Granny Square Tote combines raised puff stitch snowflakes with classic granny square construction, and the result is absolutely stunning.
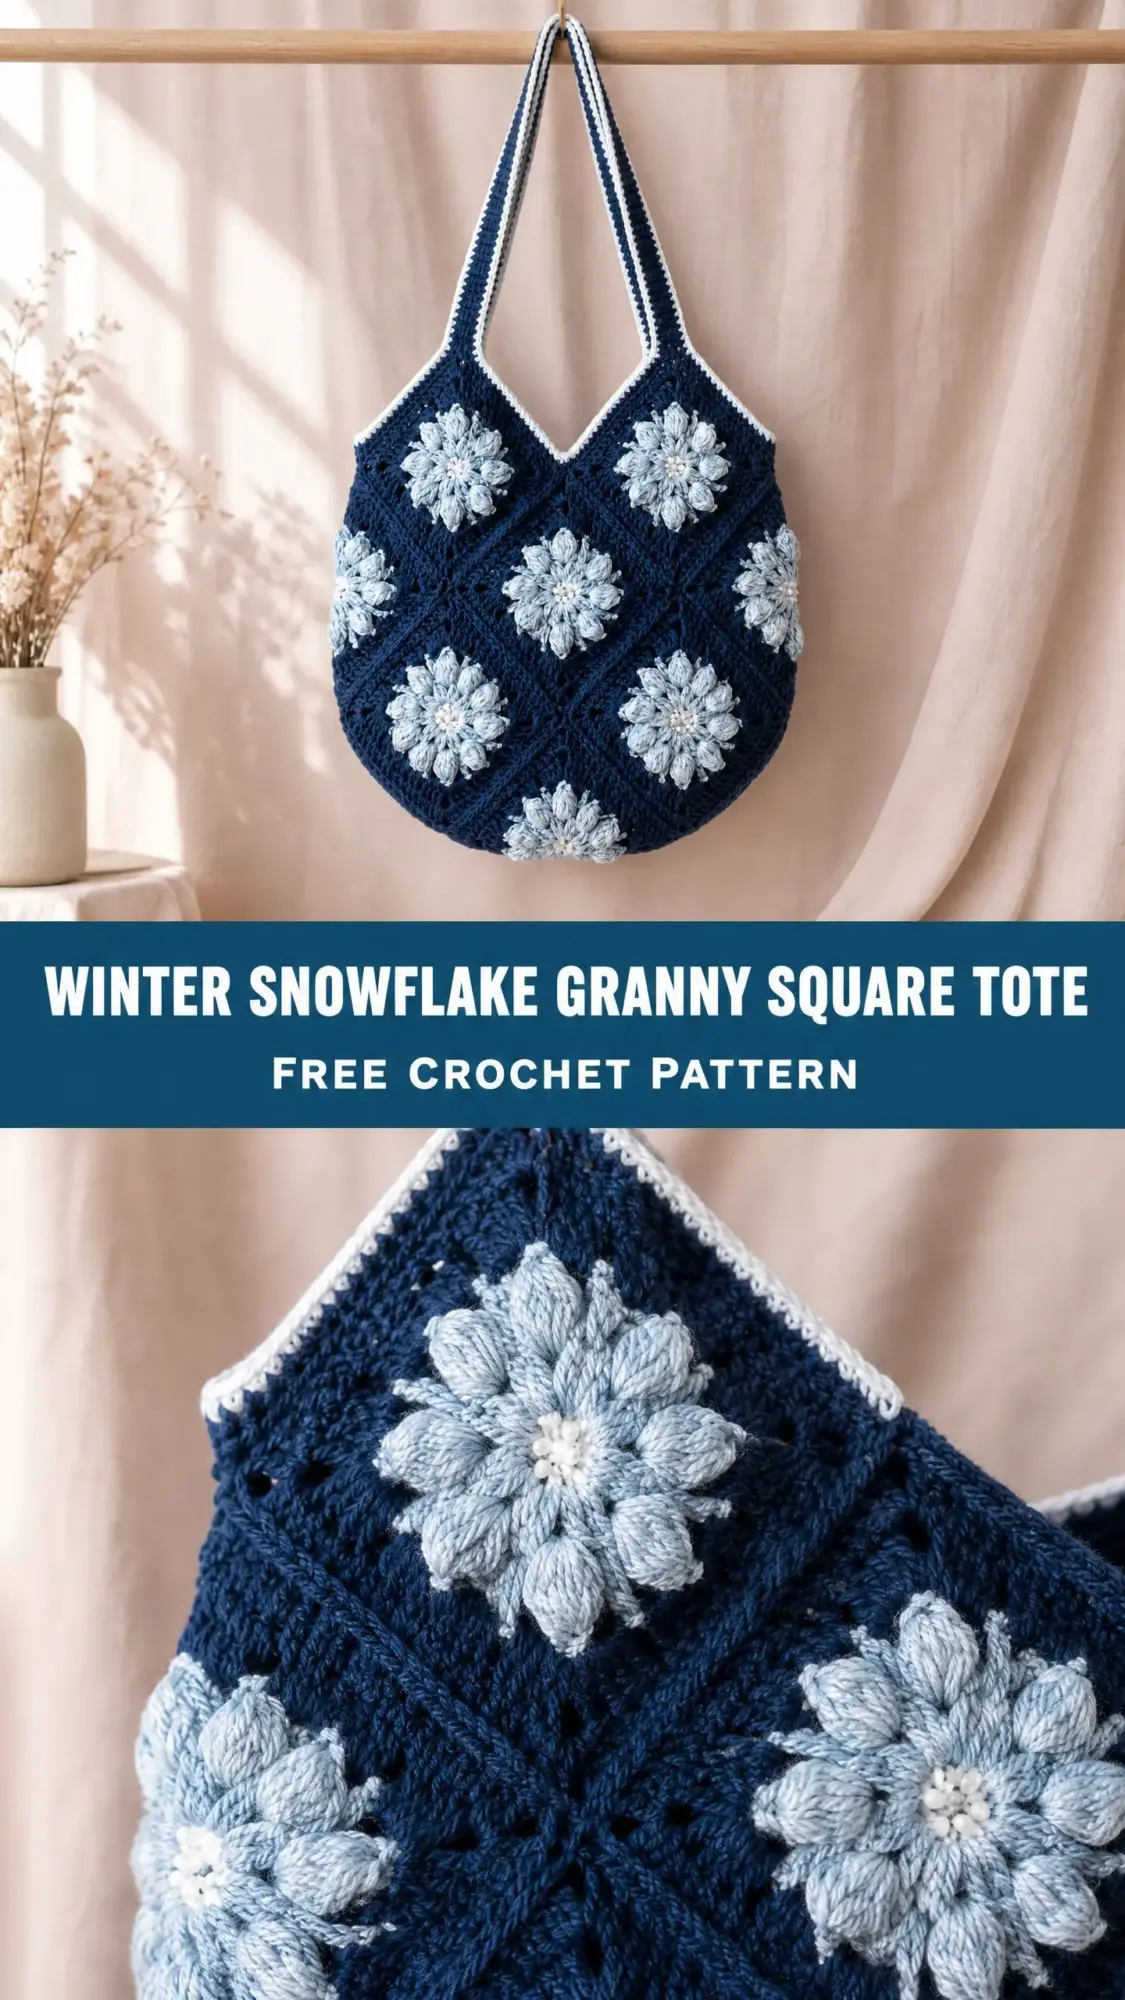
This crochet pattern sits firmly at the intermediate level. You’ll need comfort with working in the round, puff stitches, and the join-as-you-go technique. If you’ve completed a few granny square projects before, you can absolutely tackle this bag. The construction is methodical and satisfying once you get into a rhythm.
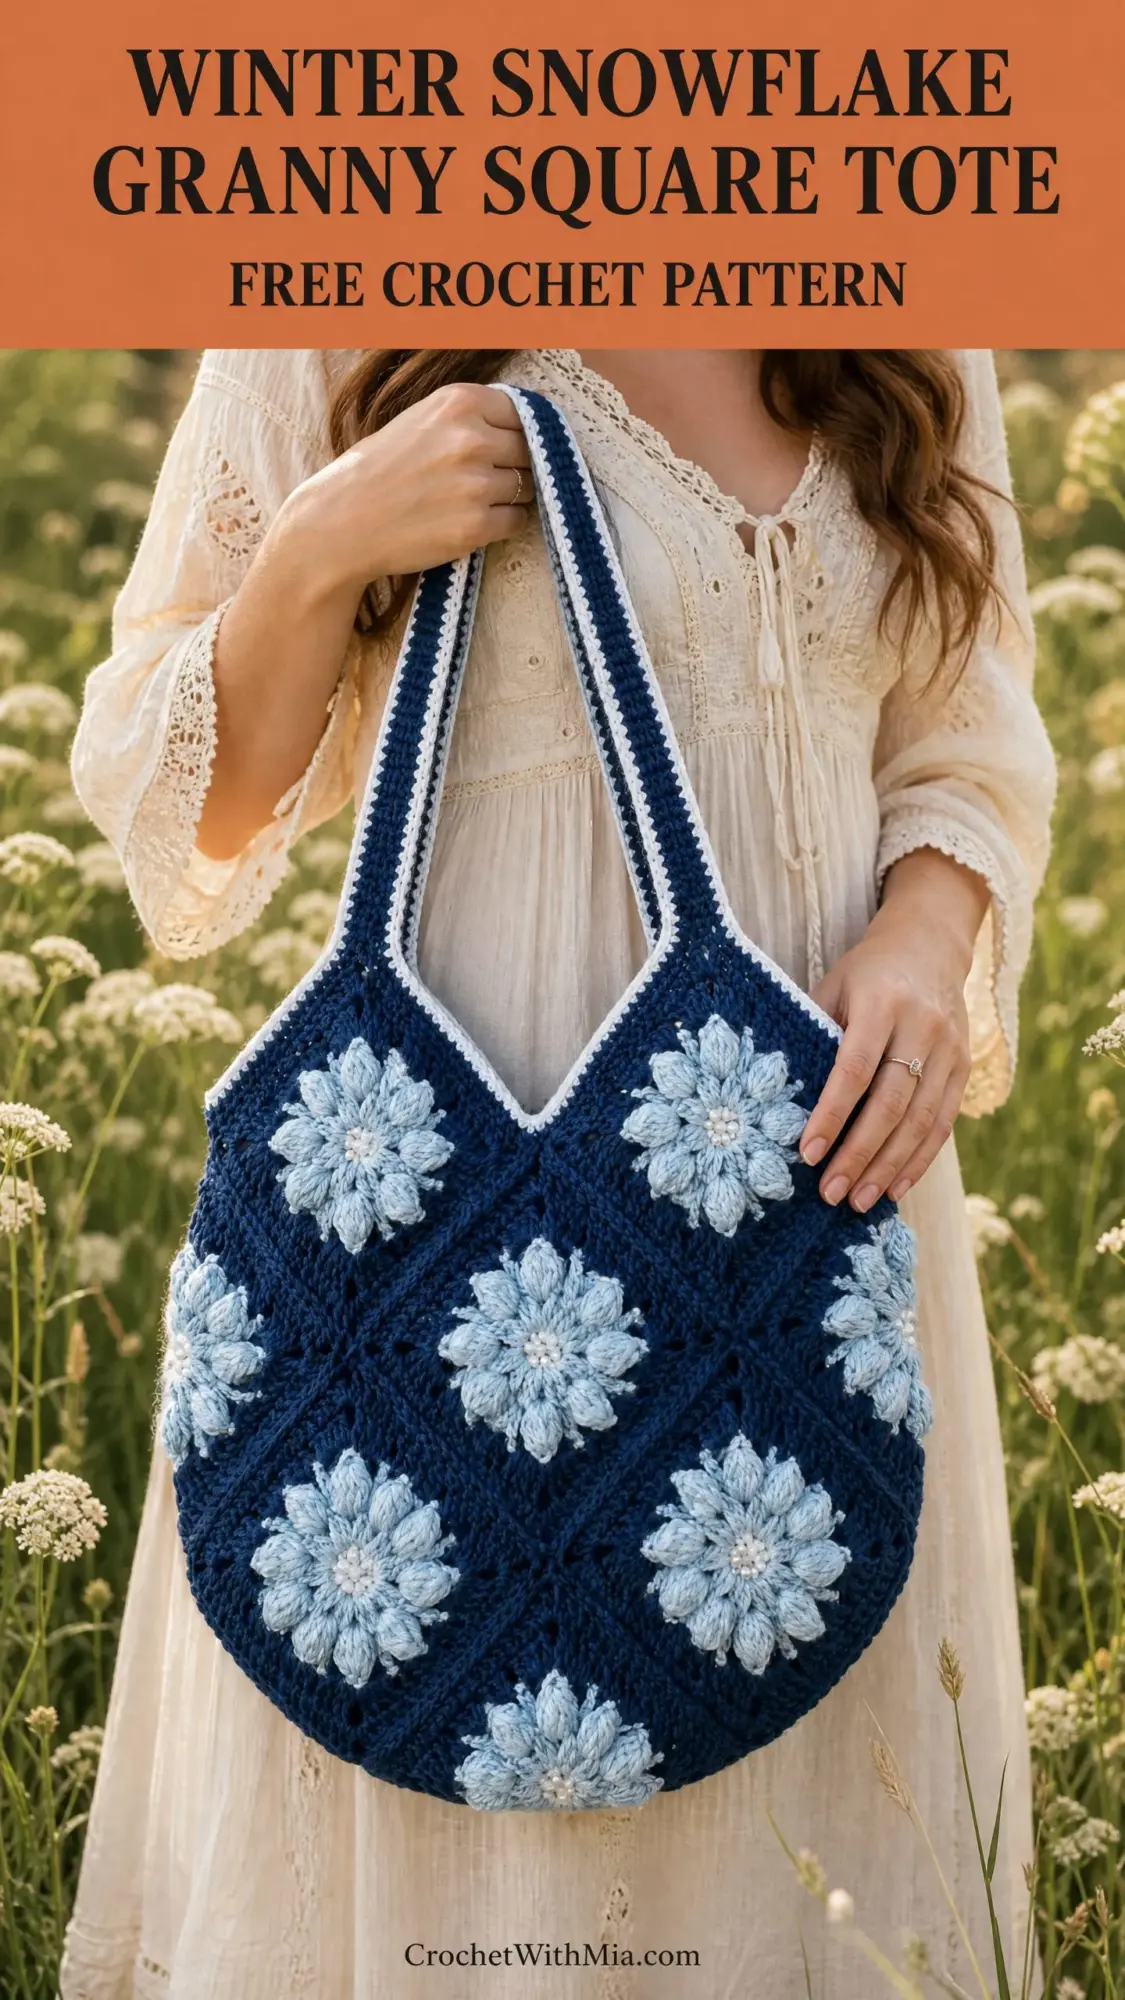
The finished tote has a beautiful rounded silhouette created by arranging squares on-point, which means they’re rotated 45 degrees. Pearl beads at the center of each snowflake add an elegant finishing touch. Let me walk you through everything you need to create this beautiful bag from start to finish.
Why You’ll Love This Crochet Tote Pattern
This granny square tote bag stands out because of those raised puff stitch snowflakes. Each square features eight fluffy petals worked in light blue against a deep navy background. The texture is incredible. You can feel each little bobble, and they catch the light beautifully.
The on-point arrangement gives the bag its distinctive rounded bottom without complicated shaping. You’re simply arranging squares at an angle and filling in the gaps with half squares and quarter squares. Smart construction that looks far more complex than it actually is.
Pearl bead embellishments transform this from a nice bag into something truly special. One small bead at the center of each snowflake creates a focal point that draws the eye. It’s an optional step, but I highly recommend it.
Finished Size and Gauge Information
Your completed bag will measure approximately 15 inches wide by 14 inches tall at the widest and tallest points, not counting the straps. The strap length is approximately 22 inches from the top edge on one side to the top edge on the other.
Each individual granny square measures 4.5 inches by 4.5 inches after blocking. Getting your gauge right matters here because it affects the final bag size and ensures all your squares match.
Gauge: With a US size J/10 (6.0 mm) hook, one completed granny square equals 4.5 inches by 4.5 inches after blocking. If you work a single crochet swatch, you should get 14 single crochet stitches and 16 rows in a 4 inch by 4 inch square.
If your square comes out smaller than 4.5 inches, go up a hook size. If it’s larger, go down a hook size. I always recommend making one full test square before committing to all 18.
Materials You’ll Need
Yarn:
Recommended Yarn Options:
Lion Brand Pound of Love in Oxford Navy, Sky Blue, and White works wonderfully. It’s affordable, widely available, and holds its shape well for structured bags.
Paintbox Yarns Simply DK held double is another excellent choice. The color range includes perfect navy and sky blue shades.
For a sturdier bag, try Drops Safran cotton held double. Cotton adds structure and durability, and the stitch definition for puff stitches is excellent.
Substitution note: Any worsted weight yarn or DK held double with a smooth, tightly plied structure works well. Avoid fuzzy or loosely spun yarns because the puff stitch snowflake definition will disappear into the fuzz.
Tools:
Stitch Abbreviations and Definitions
Before we dive into the step by step crochet tutorial, let’s define every stitch you’ll use.
ch = chain: Yarn over, pull through loop on hook
sl st = slip stitch: Insert hook, yarn over, pull through stitch and loop on hook in one motion
sc = single crochet: Insert hook, yarn over, pull up a loop (2 loops on hook), yarn over, pull through both loops
dc = double crochet: Yarn over, insert hook, yarn over, pull up a loop (3 loops on hook), yarn over, pull through 2 loops, yarn over, pull through remaining 2 loops
ch-sp = chain space: The gap created by a chain in the previous row or round
ps = puff stitch: A raised, rounded bobble created by pulling up multiple loops in the same stitch. Full instructions below.
RS = right side: The front of your work
MC = main color (Yarn A, navy)
CC1 = contrast color 1 (Yarn B, light blue)
CC2 = contrast color 2 (Yarn C, white)
Special Stitches Explained
Puff Stitch (ps)
This is the star of the show. Here’s how to work it:
1. Yarn over, insert hook into indicated stitch or space
2. Yarn over and pull up a loop to approximately half an inch tall. You now have 3 loops on your hook
3. Yarn over, insert hook into the same stitch or space
4. Yarn over and pull up a loop to the same height. You now have 5 loops on your hook
5. Yarn over, insert hook into the same stitch or space
6. Yarn over and pull up a loop to the same height. You now have 7 loops on your hook
7. Yarn over and draw through all 7 loops on hook
8. Chain 1 to close the puff stitch. This ch-1 does not count as a stitch
The completed puff stitch creates one raised, rounded bobble. Don’t worry if your first few look a bit wonky. They get better with practice, and blocking helps even them out.
Join-As-You-Go (JAYG)
When joining a new square to a completed square during the final round, you’ll replace the corner ch-2 or the ch-1 between stitches on the joining side with a slip stitch into the corresponding chain space on the adjacent completed square. This joins squares as you work instead of seaming afterward. Full instructions appear at each join point in the pattern.
Standing Double Crochet
Make a slip knot and place on hook. Yarn over, insert hook into indicated stitch or space, yarn over and pull up a loop, yarn over and draw through 2 loops, yarn over and draw through 2 loops. This begins a round without a starting chain 3, giving a neater join.
Understanding the Layout
Each panel of the bag uses:
The top edge is straight, formed by the flat edge of the top row of squares. The bottom is rounded by the on-point arrangement and the quarter squares at the lower corners.
Total motifs for the entire bag (both panels): 18 full squares, 12 half squares, 4 quarter squares
Full Granny Square Pattern (Make 18)
Each square is worked in 4 rounds. You’ll start with light blue for the snowflake center, then switch to navy for the background.
Foundation ring: With CC1 (light blue), make a magic ring. If you prefer, you can chain 4 and slip stitch to form a ring instead.
Round 1 (Snowflake Petals)
Ch 1 (does not count as a stitch).
Work (ps, ch 2) 8 times into the ring.
Sl st to top of first ps to join.
Stitch count: 8 puff stitches, 8 ch-2 spaces
Round 2 (Snowflake Outer Ring)
Sl st into first ch-2 sp.
Ch 3 (counts as dc).
Work 2 dc into same ch-2 sp.
Ch 1.
(3 dc into next ch-2 sp, ch 1) 7 times.
Sl st to top of beginning ch-3 to join.
Stitch count: 24 dc, 8 ch-1 spaces
Fasten off CC1. Weave in ends or leave to weave later.
Round 3 (Navy Background, Square Shaping)
Join MC (navy) with standing dc into any ch-1 sp.
2 dc into same ch-1 sp (3 dc total counting standing dc).
Ch 2 (corner).
3 dc into next ch-1 sp.
Ch 1 (side).
3 dc into next ch-1 sp.
Ch 2 (corner).
3 dc into next ch-1 sp.
Ch 1 (side).
Repeat from beginning 2 more times (total 4 corners, 4 sides).
Sl st to top of beginning standing dc.
Stitch count: 24 dc, 4 ch-2 corner spaces, 4 ch-1 side spaces
Round 4 (Navy, Final Square Round)
Sl st to corner ch-2 sp.
Ch 3, 2 dc into same corner sp, ch 2, 3 dc into same corner sp (first corner made).
Ch 1.
3 dc into ch-1 side sp, ch 1.
(3 dc, ch 2, 3 dc) into next corner ch-2 sp (corner).
Ch 1.
3 dc into ch-1 side sp, ch 1.
Repeat from corner instruction 2 more times.
Sl st to top of beginning ch-3 to join.
Stitch count: 48 dc, 4 ch-2 corner spaces, 8 ch-1 side spaces
Fasten off, leaving a 12-inch tail for joining if not using JAYG.
Checkpoint: Each completed full square should measure 4.5 inches by 4.5 inches after a light block. The snowflake puffs should be centered with all 8 petals visible and raised.
Half Square Pattern (Make 12)
The half square fills the side edges of each panel. It’s worked in rows, not rounds, creating a right-triangle shape.
Foundation: With MC (navy), ch 4, sl st into first ch to form a ring (or use a magic ring).
Row 1 (RS)
Ch 3 (counts as dc).
2 dc into ring.
Ch 2.
3 dc into ring.
Turn.
Stitch count: 6 dc, 1 ch-2 space (this is the corner)
Row 2
Ch 3, turn.
2 dc into first ch-3 sp at base of beginning ch.
Ch 1.
(3 dc, ch 2, 3 dc) into ch-2 corner sp.
Ch 1.
3 dc into turning ch-3 sp.
Turn.
Stitch count: 18 dc, 1 ch-2 space, 2 ch-1 spaces
Row 3 (Final Row)
Ch 3, turn.
2 dc into beginning ch-3 sp.
Ch 1.
3 dc into ch-1 sp.
Ch 1.
(3 dc, ch 2, 3 dc) into ch-2 corner sp.
Ch 1.
3 dc into ch-1 sp.
Ch 1.
3 dc into turning ch-3 sp.
Turn.
Stitch count: 30 dc, 1 ch-2 corner space, 4 ch-1 spaces
Fasten off. The two short legs each measure approximately 4.5 inches, matching the full square sides.
Quarter Square Pattern (Make 4)
The quarter square fills the two bottom corners of each panel.
Foundation: With MC (navy), ch 4, sl st to join into ring.
Row 1 (RS)
Ch 3 (counts as dc).
2 dc into ring.
Ch 2.
3 dc into ring.
Turn.
Stitch count: 6 dc, 1 ch-2 space
Fasten off. This forms a small triangular wedge with one corner at the point.
Joining the Squares
Arrange squares for one panel in the on-point layout. Join squares along their shared edges using the slip stitch JAYG method during Round 4 of each new square.
To join along one edge during Round 4:
When working the ch-1 between clusters on the joining edge, replace the ch-1 with a slip stitch into the corresponding ch-1 space of the adjacent completed square, then continue.
When working the ch-2 corner on a shared corner, replace with: ch 1, slip stitch into the ch-2 corner space of the adjacent square, ch 1.
Join all 9 full squares for each panel first. Then attach half squares around the perimeter. Finally add quarter squares at the bottom corners.
Alternative seam method: If JAYG feels overwhelming, you can whipstitch or mattress stitch squares together after completing them all. Use MC and a yarn needle, working through the back loops of corresponding edge stitches.
Once all squares for one panel are joined, repeat for the second panel.
Checkpoint: Each completed panel should measure approximately 15 inches wide by 14 inches tall before seaming.
Joining the Two Panels
Place both panels with wrong sides together, aligning all edges.
With MC and yarn needle (or using a slip stitch seam with your hook), join panels along the bottom curved edge and up both side edges. Leave the top edge open.
For a slip stitch seam: Hold panels together, insert hook through corresponding stitches of both panels from front to back, draw up a loop, chain 1. Insert hook into next stitch, draw loop through both stitches and loop on hook. Continue across.
This creates a visible seam ridge on the outside. Turn the bag inside out after seaming if you prefer a hidden seam.
Top Edging
With RS facing, join CC2 (white) with sl st at the top right corner of the bag opening.
Round 1
Ch 1 (does not count as stitch).
Sc evenly around the entire top opening, working approximately 1 sc per dc stitch and 1 sc into each ch-sp. At each corner of the V-shaped top opening, work 3 sc into the corner space.
Sl st to first sc to join.
Approximate stitch count: 68 sc total around the top opening (34 sc per panel side). Adjust as needed to maintain a flat, even edge.
Round 2
Ch 1.
Sc in each sc around.
Sl st to first sc to join. (68 sc)
Fasten off CC2.
Straps (Make 2)
The strap is a long, narrow strip worked in MC with CC2 edging.
Foundation: With MC, ch 121.
Row 1
Sc in second ch from hook and in each ch across.
Turn. (120 sc)
Rows 2, 3, and 4
Ch 1, turn.
Sc in each stitch across. (120 sc)
Fasten off MC after Row 4.
Strap Edging with CC2
Join CC2 with sl st at one short end of strap.
Ch 1.
Work sc evenly along the long edge, across the short end, along the other long edge, and across the other short end.
Work 1 sc per row along the long edges and 3 sc into each corner.
Sl st to first sc to join.
Fasten off CC2.
Repeat for second strap.
Each strap measures approximately 22 inches long by 1.25 inches wide after edging.
Attaching Straps
Position one strap on the front panel with each end approximately 3.5 inches from the center top edge. The strap forms a loop rising above the bag. Pin in place.
Using MC and yarn needle, whipstitch each strap end securely to the inside of the top edging. Work through several rows of the strap and several stitches of the bag. Sew a box with an X reinforcement stitch for durability.
Attach the second strap to the back panel in the same position.
Bead Embellishment
Using a sewing needle threaded with white or cream thread, attach one pearl or seed bead to the very center of each snowflake motif. Stitch through the initial ring of the square several times and knot securely on the wrong side.
For the 18 full squares: 18 beads
For the 12 half squares: Attach beads only where the center is visible, approximately 12 beads
Total minimum: approximately 30 beads
For extra sparkle, you can add additional beads to the tips of individual puff stitches, using up to 8 beads per flower.
Finishing and Blocking
Weave in all yarn ends securely using a yarn needle. Work through the backs of stitches in multiple directions to prevent unraveling.
Wet blocking: Soak the completed bag in cool water for 15 to 20 minutes. Gently press out excess water in a towel without wringing. Pin each granny square area to a blocking mat. Allow to dry completely, typically 24 hours.
Steam blocking alternative: Use a garment steamer or iron held 1 to 2 inches above the surface. Do not press the iron directly onto yarn, especially acrylic, as this will permanently flatten the puff stitches.
After blocking, attach pearl beads as described above.
Size Customization Options
To make the bag wider: Add one additional column of full squares. Each full square adds 4.5 inches to the width. Add approximately 60 yards of MC and 20 yards of CC1 per additional full square.
To make the bag taller: Add one additional row of full squares. Each row adds approximately 4.5 inches of height.
For a smaller bag or wristlet: Work granny squares at a smaller gauge by going down to a US size G/6 (4.0 mm) hook with DK weight yarn held single. Squares will measure approximately 3 inches each.
For a sturdier bag: Hold MC yarn double throughout the background rounds. This will use approximately double the MC yardage and may require going up to a US size K/10.5 or L/11 hook.
To add a lining: Cut fabric to the shape of the joined panels, adding half an inch seam allowance. Sew a fabric bag, fold under the top edge, and slip stitch to the inside of the bag top after all crochet is complete.
Care Instructions
Hand wash in cool water with a gentle soap. Lay flat to dry, reshaping to original dimensions. Do not wring or twist. Do not tumble dry.
If your yarn is superwash wool or acrylic, machine wash on gentle cycle in a mesh laundry bag and lay flat to dry. Do not iron directly. Store flat or stuffed lightly with tissue paper to maintain shape.
Time Estimate and Skill Level
Plan for approximately 20 to 30 hours total, depending on your experience with granny squares and the join-as-you-go technique. The repetitive nature of making 18 identical squares makes this a perfect TV show project. Put on a good series and work through a few squares each evening.
This crochet pattern is rated intermediate. You should be comfortable with working in the round, basic granny square construction, and puff stitches. If you’ve never tried JAYG before, practice on two sample squares first. Once you get the hang of it, you’ll love how it eliminates seaming later.
Final Thoughts on This Granny Square Crochet Pattern
This Winter Snowflake Granny Square Tote is one of those projects that looks incredibly impressive but breaks down into simple, manageable steps. Each square is its own small accomplishment. Before you know it, you’ll have a stack of beautiful snowflake motifs ready to become a stunning bag.
The combination of raised puff stitches, classic granny square construction, and delicate pearl beads creates something truly special. It’s the kind of bag that gets compliments everywhere you go. And when someone asks where you got it, you’ll get to say you made it yourself.
Thank you so much for choosing this pattern for your next project. I genuinely hope you enjoy every stitch. If you make this tote, I would absolutely love to see it! Share your finished bag on Instagram or Facebook and tag me so I can admire your work.
Don’t forget to save this pattern to your Pinterest boards so you can find it easily when you’re ready to start. And please drop a comment below if you make this bag or have any questions along the way. I love hearing from you!