
When I sat down to design this romper, I had three goals in mind. First, I wanted that gorgeous woven texture you see in high-end baby boutiques. Second, it needed to be practical enough for real life with snaps and easy dressing. Third, those little nautical details had to be just right.
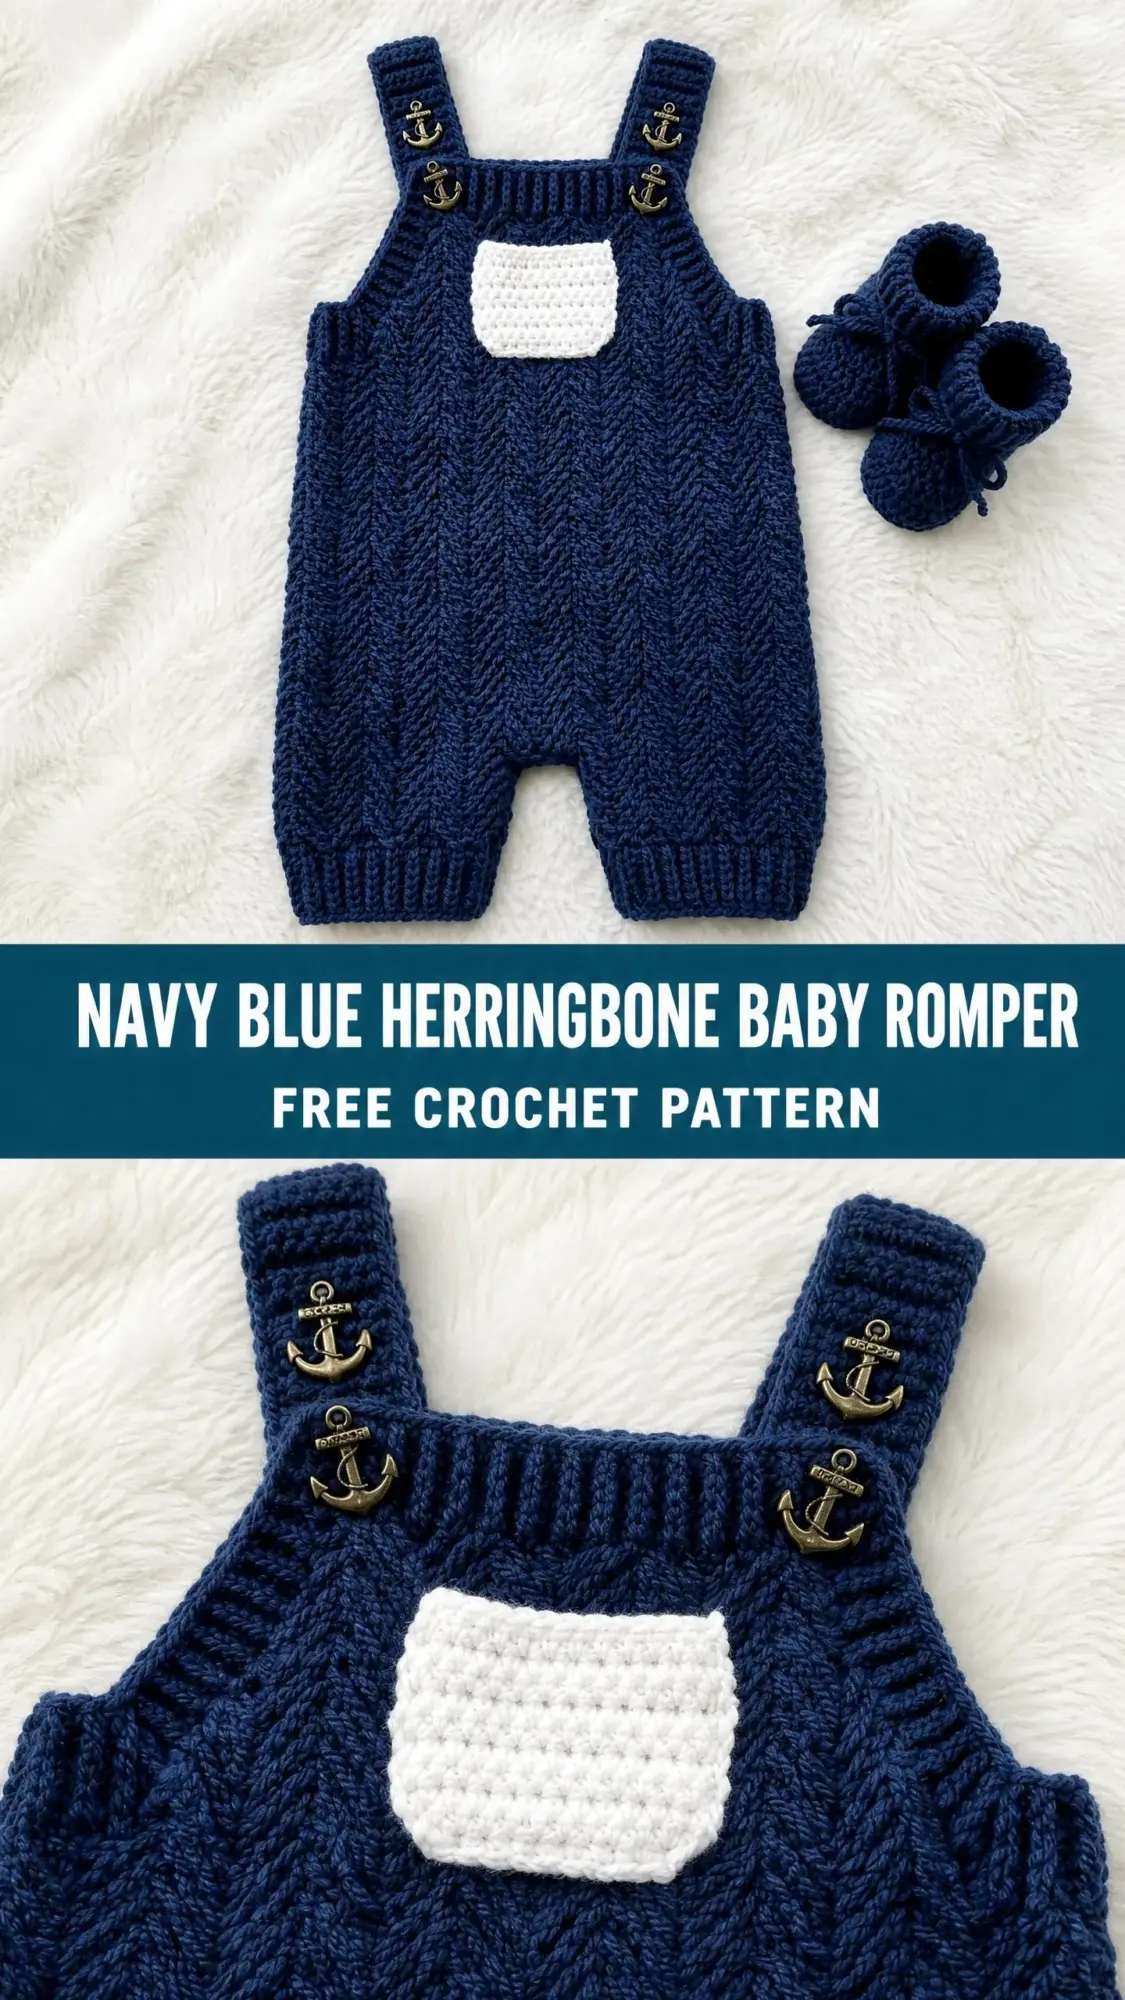
I spent weeks perfecting the herringbone stitch tension and figuring out the best way to shape the bib without any fussy increases or decreases. The anchor buttons were the final touch that brought everything together.
I am SO pleased with how this turned out. The diagonal weave catches the light beautifully, the fit is generous enough for cloth diapers underneath, and every parent who has seen it asks where they can buy one. Now you can make it yourself.
About This Baby Romper Crochet Pattern
This adorable navy blue romper features a stunning herringbone half double crochet texture that creates a dense, diagonal weave resembling woven fabric. The construction is straightforward once you understand the pieces. You will work a front panel, a back panel, two shoulder straps, and a small contrast pocket. Everything is worked flat and seamed together at the end.
The bib section sits at the top of the front panel with squared armhole cutouts on each side. Ribbed trim finishes the edges beautifully, and those decorative anchor buttons add the perfect nautical touch. The matching booties in the photos are worked separately as their own project.
Finished size for 0 to 3 months:
Size customization notes are included at the end of the pattern if you need to size up.
Skill Level
This is an intermediate level project. The herringbone half double crochet requires some practice to maintain consistent tension. You will also be working multiple separate pieces, shaping armhole cutouts, and finishing with seaming, ribbed edging worked in rounds, and button attachment.
If you are comfortable with basic shaping and reading stitch counts, you will find this manageable. I recommend making a practice swatch before diving in.
Time estimate: 12 to 18 hours total, spread across multiple sessions. This includes swatching, working all pieces, blocking, and finishing.
Materials You Will Need
Yarn:
Hooks:
Notions:
Yarn Suggestions
Lion Brand Pound of Love works beautifully here. It is 100% acrylic, machine washable, durable, and soft against baby skin. One skein covers multiple projects since it contains 1020 yards.
Paintbox Yarns Simply DK used doubled is another excellent option. Doubling creates a worsted-equivalent weight with excellent stitch definition for the herringbone texture.
For an heirloom project, try We Are Knitters The Wool in 100% Peruvian wool. Just note that it requires hand washing only.
Important: Choose a yarn that is smooth, not textured or fuzzy, so the herringbone stitch definition remains visible. Avoid yarns with high halo like angora blends. Always swatch and match gauge before beginning.
Gauge (Do Not Skip This)
Gauge is mandatory for a fitted garment. Incorrect gauge will produce a romper that does not fit a 0 to 3 month infant.
With MC and J-10 hook in herringbone half double crochet:
Rib gauge with I-9 hook in back loop only slip stitch ribbing:
To check your gauge: Chain 20. Work herringbone half double crochet for 14 rows. Block lightly. Measure the center 14 stitches across and the center 10 rows vertically. Adjust hook size up if your swatch is too small, down if too large.
Abbreviations
Special Stitches for This Crochet Pattern
Herringbone Half Double Crochet (hbhdc)
This stitch pulls through loops differently than a standard half double crochet, creating a dense diagonal texture. Here is exactly how to work it:
Step 1: Yarn over.
Step 2: Insert hook into the next stitch.
Step 3: Yarn over and pull up a loop. You now have 3 loops on your hook.
Step 4: Before working off the loops as in a standard hdc, pull the yarn through the FIRST loop only. This is the loop closest to your hook tip. You now have 2 loops remaining on your hook.
Step 5: Yarn over and pull through both remaining loops on hook.
That completes one hbhdc. The stitch leans diagonally. When worked in rows with a turning chain of 1, the fabric develops that beautiful herringbone woven appearance.
Slip Stitch Rib
This creates all the ribbed edgings on the romper.
Foundation: Chain the desired number of stitches for rib depth (for example, 5 chains for a 5-stitch deep rib).
Row 1: Slip stitch in the 2nd chain from hook and in each chain across. Turn.
Row 2: Chain 1, slip stitch in back loop only of each stitch across. Turn.
Repeat Row 2 for the rib pattern. The rib is worked perpendicular (sideways) to the garment edge.
Moss Stitch (for the chest pocket)
Row 1 (RS): Chain an even number. Single crochet in the 2nd chain from hook. (Chain 1, skip 1 chain, single crochet in next chain) across. Turn.
Row 2: Chain 1. Single crochet in first chain space. (Chain 1, skip single crochet, single crochet in next chain space) across, single crochet in last single crochet. Turn.
Repeat Row 2 for the pattern. Each single crochet lands in the chain space of the previous row.
Pattern Notes Before You Begin
1. The romper front and back are worked separately, flat, from the bottom leg openings upward. They join at the crotch, then continue up to the armhole shaping.
2. Both front and back have the same stitch count through the main body. The front includes bib shaping that creates a raised chest panel with shoulder straps. The back has straight shoulder edges.
3. Turning chains: For hbhdc rows, chain 1 at the beginning of each row. This chain 1 does NOT count as a stitch. The first hbhdc is worked into the first stitch of the row directly at the base of the chain 1.
4. Place a marker at the crotch join point and at each armhole edge to track shaping.
5. The pocket is worked separately and sewn on after blocking.
6. All pieces are blocked before seaming.
7. The buttons are decorative. The straps are fixed length. The romper goes on the baby by pulling over the head and stepping into the legs, then the straps are buttoned over the shoulders to the front bib top.
8. The right side is the side facing outward where the diagonal texture leans consistently.
Step by Step Instructions
Front Right Leg Panel
With MC and J-10 hook, ch 17.
Row 1 (RS): Hbhdc in 2nd ch from hook and in each ch across. Turn. (16 hbhdc)
Row 2: Ch 1, hbhdc in each st across. Turn. (16 hbhdc)
Rows 3 through 12: Repeat Row 2. (16 hbhdc each row)
After Row 12, do not fasten off. Set piece aside. This is your Front Right Leg Panel.
Checkpoint: Front Right Leg Panel should measure approximately 4 inches (10 cm) wide and 4.8 inches (12 cm) tall.
Front Left Leg Panel
With MC and J-10 hook, ch 17.
Work Rows 1 through 12 exactly as Front Right Leg Panel. (16 hbhdc)
Do not fasten off.
Joining Front Legs and Working Front Body
With Front Left Leg Panel still on hook, chain 2. Hold Front Right Leg Panel with RS facing and join by working hbhdc across all 16 stitches of Front Right Leg Panel.
Row 13 (joining row): Hbhdc across 16 sts of Front Left Leg, hbhdc in each of the 2 joining chains, hbhdc across 16 sts of Front Right Leg. Turn. (34 hbhdc)
Row 14: Ch 1, hbhdc in each st across. Turn. (34 hbhdc)
Rows 15 through 28: Repeat Row 14. (34 hbhdc each row through Row 28)
Checkpoint: After Row 28, the main front body from crotch join upward should measure approximately 5.6 inches (14 cm) tall. Total piece from leg bottom to current row should be approximately 10.4 inches (26 cm).
Front Bib Shaping
The bib is the raised chest panel. You will work only the center 22 stitches, leaving 6 stitches on each side for the armhole cutouts.
Row 29 (bib start): Ch 1, sk first 6 sts, hbhdc in next 22 sts, leave last 6 sts unworked. Turn. (22 hbhdc)
Row 30: Ch 1, hbhdc in each of 22 sts across. Turn. (22 hbhdc)
Rows 31 through 34: Repeat Row 30. (22 hbhdc each row through Row 34)
Checkpoint: The bib section (Rows 29 through 34) should measure approximately 2.4 inches (6 cm) tall. The full front panel from leg bottoms to top of bib should be approximately 13 inches (33 cm).
Fasten off MC. Weave in ends.
Front Armhole Edging
With RS facing and I-9 hook, join MC to the leftmost skipped stitch at the left armhole edge (the 6 unworked stitches on the left side of Row 29).
Work 1 sc in each of the 6 skipped sts across the bottom of the armhole, then work 8 sc evenly up the side edge of the bib (approximately 1 sc per row along the 6 bib rows plus 2 corner stitches). Fasten off. Repeat for right armhole. This neatens the armhole edges.
Back Panel
With MC and J-10 hook, work Back Right Leg Panel and Back Left Leg Panel identically to Front Right and Front Left Leg Panels. (16 hbhdc each, 12 rows each)
Join Back Legs same as Front:
Joining Row 13: Hbhdc across 16 sts of Back Left Leg, hbhdc in each of 2 joining chains, hbhdc across 16 sts of Back Right Leg. Turn. (34 hbhdc)
Row 14: Ch 1, hbhdc across. Turn. (34 hbhdc)
Rows 15 through 32: Repeat Row 14. (34 hbhdc each row through Row 32)
Note: The back continues 4 rows taller than the front body before the shoulder edge because the back has no bib shaping. The back top edge is straight.
Row 33: Ch 1, hbhdc across. Turn. (34 hbhdc)
Row 34: Ch 1, hbhdc across. Turn. (34 hbhdc)
Fasten off MC.
Back Armhole Edging
With RS facing and I-9 hook, join MC to the top right corner of the back panel.
Work 1 sc in each of 6 sts in from each shoulder edge along the top of the back, then 8 sc down the armhole edge. This mirrors the front armhole edging depth. Fasten off. Repeat for both armhole corners.
The back shoulders: Each back shoulder measures 6 stitches wide on the left and 6 stitches wide on the right, with the center 22 stitches forming the open back between the shoulder edges.
Straps (Make 2)
With MC and J-10 hook, ch 9.
Row 1: Hbhdc in 2nd ch from hook and in each ch across. Turn. (8 hbhdc)
Row 2: Ch 1, hbhdc in each st across. Turn. (8 hbhdc)
Rows 3 through 14: Repeat Row 2. (8 hbhdc each row through Row 14)
Fasten off, leaving a long tail for seaming.
Each strap measures approximately 1.5 inches (4 cm) wide and 5.6 inches (14 cm) long unstretched.
Top Rib Edging for Bib
With I-9 hook and MC, work a slip stitch rib band across the top of the bib.
Foundation: With RS of bib facing, join MC to the top right corner of the bib. Ch 5.
Rib Row 1: Sl st in 2nd ch from hook and in each of next 3 ch. Sl st into the first st along the bib top edge to anchor. Turn. (4 rib sts)
Rib Row 2: Ch 1, sl st in blo of each of 4 sts. Sl st into next bib top edge st to anchor. Turn. (4 rib sts)
Continue working Rib Row 2 across all 22 stitches of the bib top, anchoring one rib row to each bib stitch, for a total of 22 rib rows. Fasten off.
Back Top Rib Edging
Work the same slip stitch rib across the top of the back panel (34 stitches), anchoring 1 rib row per stitch, for 34 rib rows with the I-9 hook. Fasten off.
Leg Ribbed Cuffs (Make 2)
Work these after side seams and inseam are joined. Each leg opening has 16 stitches across the front panel leg bottom edge plus 16 stitches across the back panel leg bottom edge, for a total of 32 stitches around each leg opening after seaming.
Join MC to the bottom edge of one leg opening. Place marker at BOR.
Rnd 1: Ch 4 (this is the rib depth foundation). Sl st in 2nd ch from hook and in next 2 ch. Sl st into first leg opening st to anchor. Turn. (3 rib sts)
Rnd 2: Ch 1, sl st in blo of each of 3 sts. Sl st into next leg opening st. Turn.
Continue working around all 32 stitches of the leg opening, anchoring 1 rib row to each leg opening stitch. When you have worked all 32 anchor points, slip stitch the starting edge and the ending edge of the rib band together to close the cuff ring.
Repeat for second leg.
Checkpoint: Each leg cuff should measure approximately 8 inches (20.5 cm) in circumference and approximately 0.75 inches (2 cm) tall.
Chest Pocket
With CC and I-9 hook, ch 12.
Row 1 (RS): Sc in 2nd ch from hook. (Ch 1, sk 1, sc in next ch) 5 times. Turn. (6 sc, 5 ch-1 sps)
Row 2: Ch 1. Sc in first ch-1 sp. (Ch 1, sk sc, sc in next ch-1 sp) 4 times. Ch 1, sk sc, sc in last sc. Turn. (6 sc, 5 ch-1 sps)
Rows 3 through 8: Repeat Row 2. (6 sc, 5 ch-1 sps each row through Row 8)
Fasten off CC, leaving a long tail for sewing.
The pocket measures approximately 2.5 inches (6.5 cm) wide and 2 inches (5 cm) tall.
Pocket Top Edging: With I-9 hook and CC, join yarn to the top right corner of the pocket. Work 1 sc in each stitch and ch-1 space across the top edge (11 sc). Fasten off.
Finishing Your Baby Romper
Step 1: Block all pieces. Wet block by soaking each piece in cool water for 10 minutes. Gently press out excess water in a towel, pin to measurements on a foam mat, and allow to dry completely. This is critical before seaming because the hbhdc fabric has natural curl.
Step 2: Seam the inseam. With RS together, align the two inner leg edges of the front panel at the crotch curve. With MC and yarn needle, slip stitch seam the inseam from the bottom of the right front leg, across the crotch, and down to the bottom of the left front leg. Repeat for the back panel.
Step 3: Seam the side seams. With RS together, align the front panel and back panel along their side edges. Slip stitch seam from the top of the left leg opening upward along the left side, stopping at the armhole. Leave the top 8 rows (approximately 3.2 inches or 8 cm) open for the armhole. Repeat for the right side seam.
Step 4: Attach straps. Position each strap so it bridges from the back shoulder (6 stitch shoulder edge of back panel) over to the front bib top. The strap bottom edge sits at the back shoulder. The strap top end folds over and lands at the front bib top. Sew each strap to the back shoulder using the long tail and a yarn needle, with approximately 3 rows of the strap overlapping the back shoulder. Leave the front end of the strap free for button attachment.
Step 5: Attach buttons. Sew 2 anchor buttons to the top of each strap end where it meets the front bib top corners. The buttons pass through the ribbed bib top band to secure the straps to the front. Sew 2 additional anchor buttons to the strap itself near the back attachment point for symmetry and decoration, matching the reference design (2 buttons visible per strap, 4 total).
Step 6: Sew on chest pocket. Center the pocket on the front bib, approximately 3 rows down from the bib top rib. The pocket sits between the two anchor buttons. Sew around the three sides (left, bottom, right) using CC yarn and a yarn needle, leaving the top open. Weave in all ends.
Step 7: Work leg cuffs as described in the Leg Ribbed Cuffs section above, after all seaming is complete.
Step 8: Weave in all remaining ends. Turn garment RS out.
Size Customization Tips
For 3 to 6 months: Add 2 stitches to each leg panel (work on ch 19, resulting in 18 sts per leg panel and 38 sts total body width). Add 4 rows to the body above the crotch join. Add 2 rows to the bib section. Strap length: work 16 rows instead of 14.
For 6 to 12 months: Add 4 stitches to each leg panel (work on ch 21, resulting in 20 sts per leg panel and 42 sts total body width). Add 8 rows to the body above the crotch join. Add 4 rows to the bib section. Strap length: work 18 rows instead of 14.
General rule: Every 2 additional stitches adds approximately 0.57 inches (1.5 cm) to the width. Every 2 additional rows add approximately 0.8 inches (2 cm) to the length.
Care Instructions
For acrylic yarn: Machine wash on gentle or delicate cycle in cold water. Tumble dry on low heat or lay flat to dry. Do not iron directly on the fabric.
For wool or wool blend yarn: Hand wash in cool water with a gentle wool wash. Do not wring. Press flat in a towel and reshape. Lay flat to dry. Do not hang.
Store folded, not on a hanger, to prevent the shoulders from stretching.
You Did It!
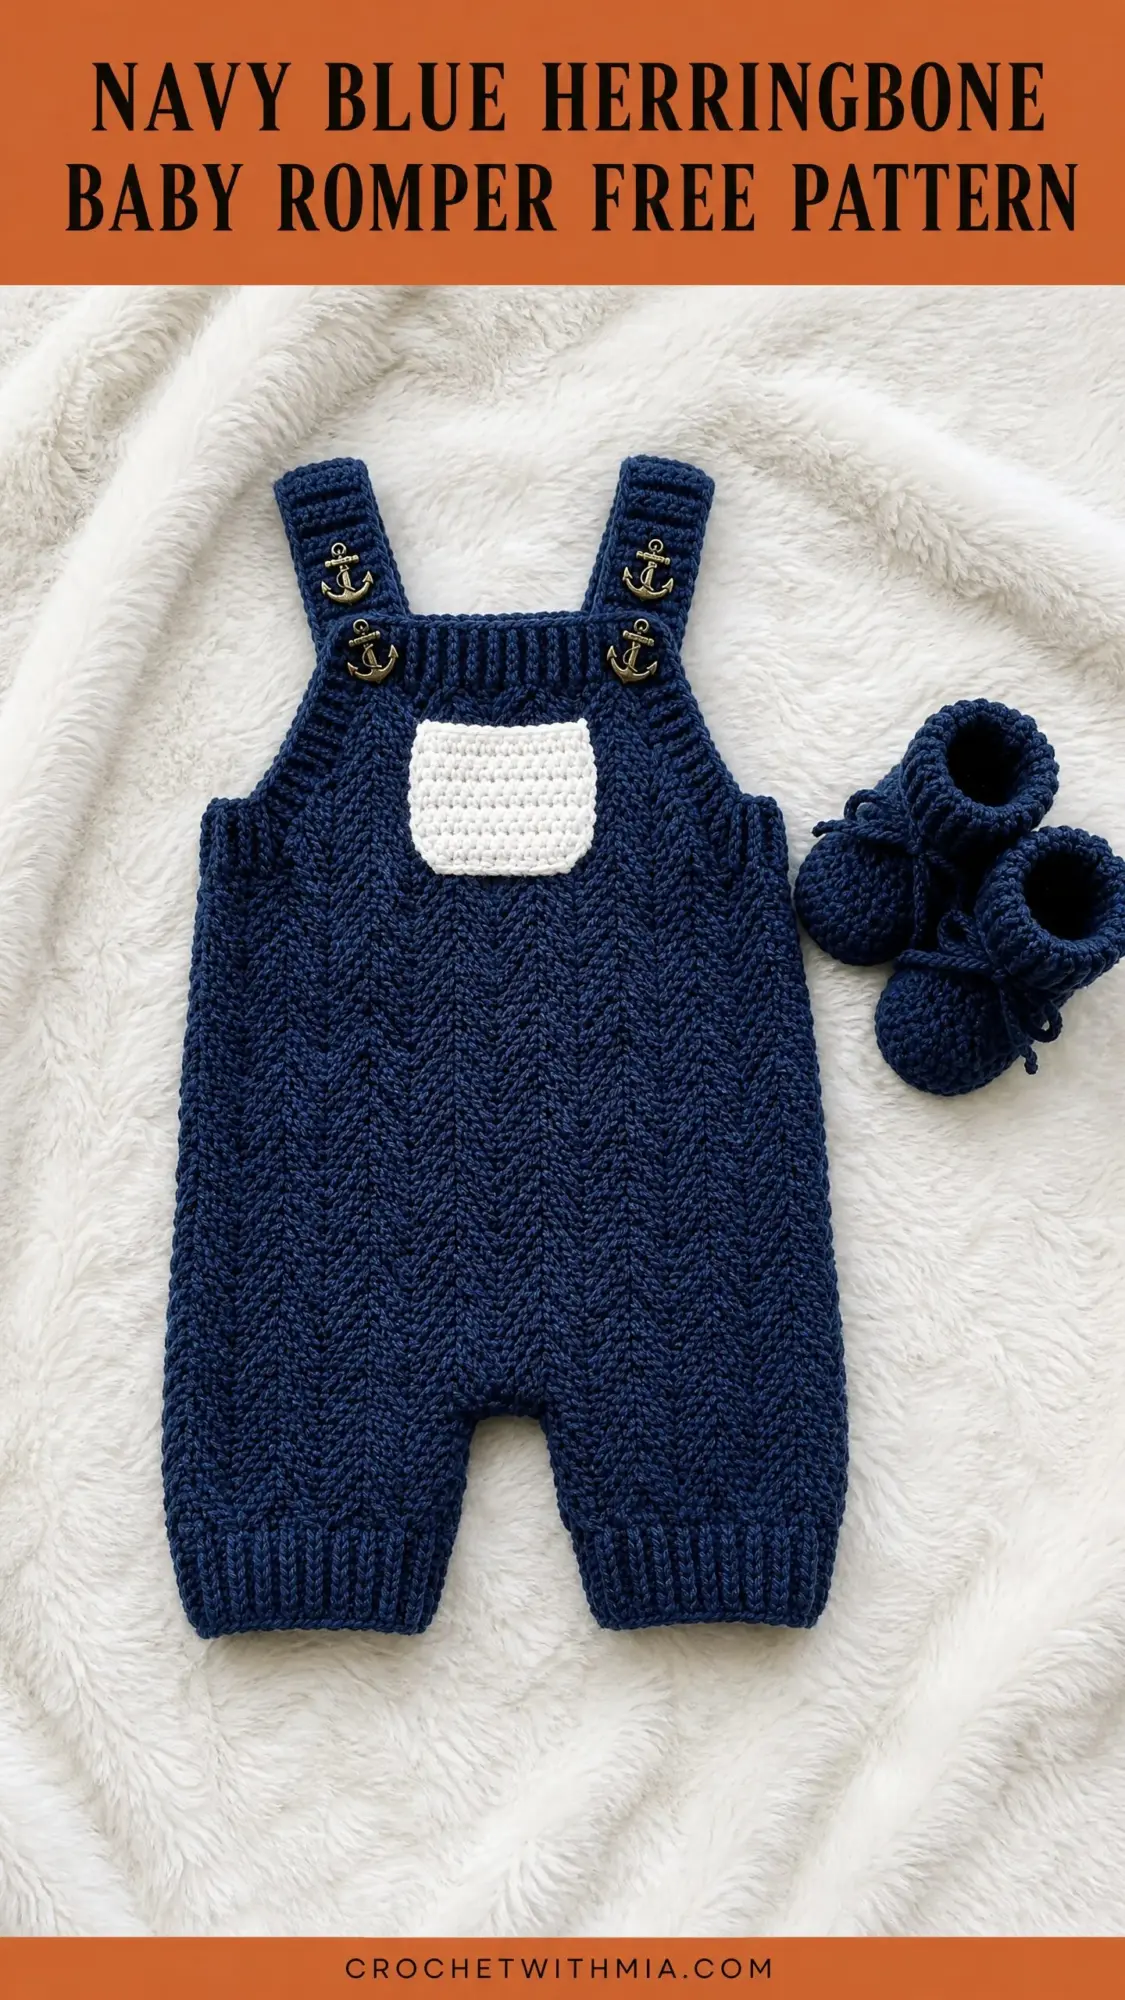
Thank you so much for choosing this pattern for your next baby project. I truly hope you love making this romper as much as I loved designing it. The herringbone texture really does look impressive, and those little anchor buttons make everyone smile.
If you make this baby romper crochet pattern, I would absolutely love to see your finished piece! Tag me on Instagram or share a photo in our Facebook group. Seeing your creations makes my whole day.
Love this navy blue herringbone baby romper? Save it to your Pinterest boards so you can find it when you are ready to start. And please drop a comment below if you make one. I read every single comment and would love to hear how it turned out for you!