
I’ve been on the hunt for the perfect summer bag pattern for months now, and this one stopped me in my tracks. The combination of airy mesh construction with those delicate appliqued flowers hits every mark on my wishlist. This is my new favourite bag design, and I’m thrilled to share it with you today.
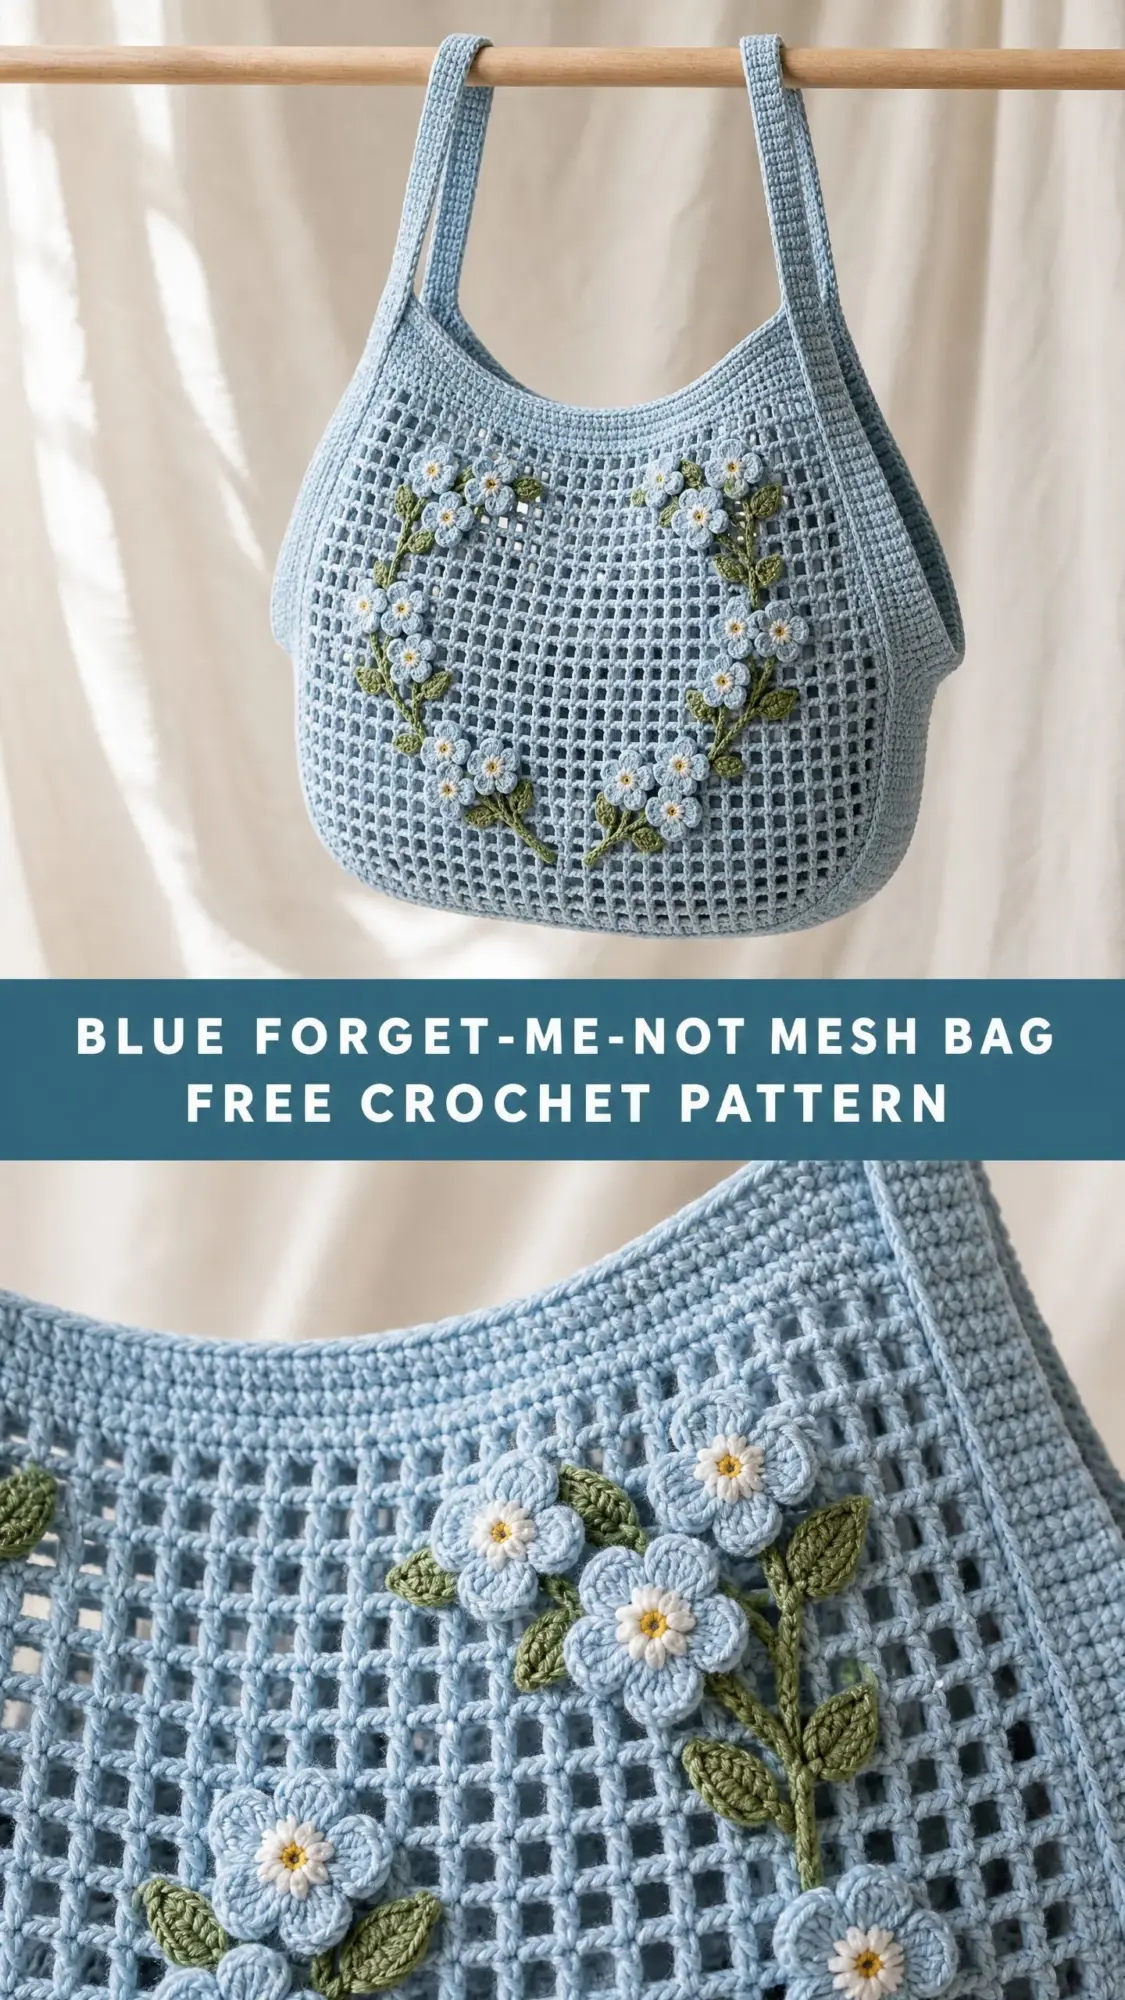
The pale powder blue yarn creates such a soft, romantic backdrop for those sweet forget-me-not flowers arranged in a heart shape. It’s cottage-core meets practical everyday carry. And that open mesh body? It works up faster than you’d think once you get into the rhythm.
Whether you’re heading to the farmer’s market, the beach, or just running errands around town, this bag has the structure and style to handle it all. Let’s dive into everything you need to make your own.
About This Crochet Bag Pattern
This roomy shoulder bag features an open mesh body worked in the round from the bottom up. The construction starts with a solid single crochet (sc) base that creates a firm, rounded rectangular foundation. From there, you’ll transition into the mesh pattern that gives the bag its beautiful, breathable texture.
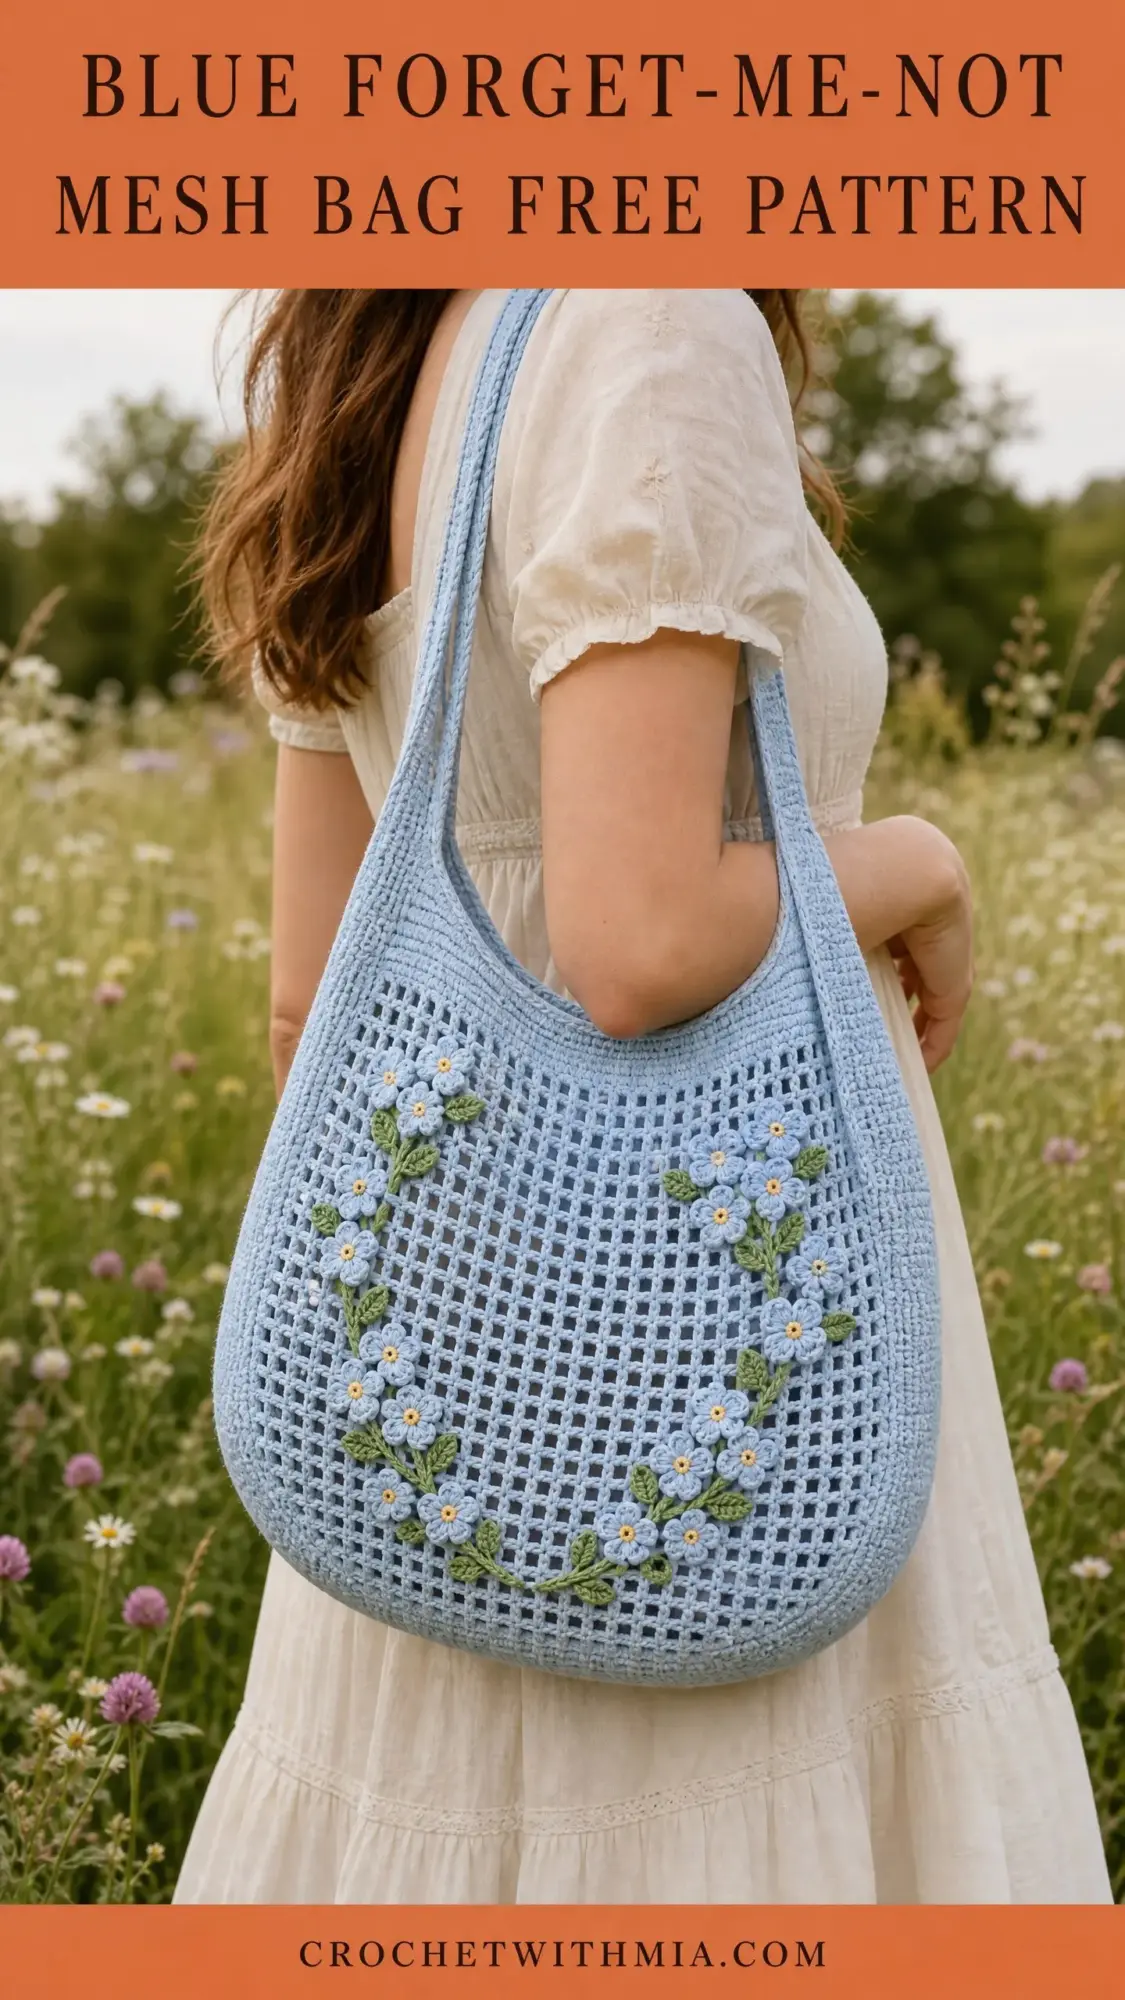
The real showstopper here is the heart-shaped garland of forget-me-not flowers and crocheted leaves on both the front and back panels. Each flower is made separately and sewn on, which sounds fussy but is actually quite meditative once you get going.
Skill level: Intermediate. You’ll need to keep track of stitch counts over many rounds and work small, tight appliques. But nothing here is complicated once you understand the techniques.
Time estimate: 12 to 18 hours total, including applique construction and assembly.
Finished dimensions: Approximately 14 inches wide by 11 inches tall, with a strap length of approximately 22 inches from top edge to top edge. In metric, that’s about 35.5 cm wide by 28 cm tall, with a 56 cm strap.
Materials You’ll Need
Yarn (Main Color, MC): Approximately 400 yards of DK weight cotton or cotton-blend yarn in pale powder blue
Yarn (Flower Color, FC): Approximately 60 yards of DK weight cotton in the same pale powder blue
Yarn (Center Color, CC1): Approximately 15 yards of DK weight cotton in white or off-white
Yarn (Center Accent, CC2): Approximately 10 yards of DK weight cotton in soft yellow
Yarn (Leaf Color, LC): Approximately 40 yards of DK weight cotton in sage or medium green
Hooks:
Notions: Tapestry needle, scissors, pins for applique placement, stitch markers
Yarn Suggestions
Paintbox Yarns Simply DK (100% cotton, 137 yards per 50 g skein) works beautifully here. It has a smooth, firm twist that defines the mesh squares well and holds its shape after blocking.
Lion Brand 24/7 Cotton DK (100% mercerized cotton, 186 yards per 100 g skein) is another excellent choice. The mercerization gives it a slight sheen that enhances the delicate look of both the bag and the appliques.
Scheepjes Catona (100% mercerized cotton, 62 yards per 25 g ball, used doubled for DK weight) comes in an extensive color palette, making it easy to match the exact powder blue and sage green shown.
Important substitution note: Choose any DK weight cotton or cotton-linen blend with a recommended gauge of 22 stitches per 4 inches in stockinette. Avoid acrylic for this project. Cotton’s natural stiffness and weight help the mesh hold its shape without blocking stiffener.
Gauge
With E-4 / 3.5 mm hook and MC, in mesh pattern:
For solid single crochet sections:
Take time to check your gauge. The bag’s dimensions depend directly on consistent mesh tension. If your mesh units are larger than stated, go down one hook size. If smaller, go up one hook size.
Abbreviations and Stitch Definitions
ch = chain: yarn over, pull through loop on hook
sl st = slip stitch: insert hook, yarn over, pull through both loops at once
sc = single crochet: insert hook, yarn over, pull up a loop (2 loops on hook), yarn over, pull through both loops
hdc = half double crochet: yarn over, insert hook, yarn over, pull up a loop (3 loops on hook), yarn over, pull through all 3 loops
dc = double crochet: yarn over, insert hook, yarn over, pull up a loop (3 loops on hook), yarn over, pull through 2 loops, yarn over, pull through remaining 2 loops
tr = treble crochet: yarn over twice, insert hook, yarn over, pull up a loop, (yarn over, pull through 2 loops) three times
sk = skip: pass over the indicated stitch without working into it
sp = space
ch-sp = chain space: the gap created by chain stitches in a previous row
st/sts = stitch/stitches
pm = place marker
MR = magic ring: an adjustable loop that closes tight at the center
RS = right side
WS = wrong side
rep = repeat
rnd = round
Special Stitches
Mesh Unit: Chain 2, skip 2 stitches (or skip the next ch-2 space in subsequent rounds), single crochet in next stitch. Each complete mesh unit is counted as one unit for pattern purposes.
Picot: Chain 3, slip stitch in the first chain made. Used in leaf edging.
Pattern Instructions
Part 1: Base
The base is worked flat in rows to form a rounded rectangle approximately 10 inches long by 4 inches wide.
With MC and E-4 hook, chain 35.
Row 1 (RS): Starting in the 2nd chain from hook, sc in each ch across. Turn. (34 sc)
Rows 2 through 8: Ch 1, sc in each st across. Turn. (34 sc)
Continue in this manner, working plain sc rows, until the base measures 4 inches from the starting chain. This will be approximately 22 rows total depending on your row gauge.
Do not fasten off.
Checkpoint: Your base rectangle should measure approximately 10 inches long by 4 inches wide.
Part 2: Body Setup Rounds
Without turning, begin working around the perimeter of the base to join it into a tube.
Round 1 (Setup): Do not turn. Working around the entire perimeter, work 34 sc across the top edge of the last row, 2 sc in corner, 22 sc evenly along the long side edge (one sc per row end), 2 sc in corner, 34 sc across the bottom starting chain edge, 2 sc in corner, 22 sc along the remaining long side edge, 2 sc in corner. Join with sl st to the first sc. (120 sc)
Place marker at beginning of round.
Round 2: Ch 1, sc in each st around. Join with sl st to first sc. (120 sc)
Checkpoint: After Round 2 you have a solid sc tube sitting atop the flat base. The perimeter should measure approximately 26 to 27 inches when laid flat.
Part 3: Mesh Body
Here’s where the magic happens. Each mesh unit consists of 1 sc plus a ch-2 space. With 120 stitches, you’ll create 40 mesh units per round.
Round 3 (First Mesh Round): Ch 3 (counts as sc, ch 2). Skip next 2 sts. Sc in next st, ch 2, skip next 2 sts. Rep from around. Join with sl st to the first sc. (40 mesh units)
Round 4: Sl st into the first ch-2 sp. Ch 3 (counts as sc, ch 2). Sc in next ch-2 sp. Ch 2, sc in next ch-2 sp. Rep from around, ending ch 2. Join with sl st to the first sc. (40 mesh units)
Rounds 5 through 28: Rep Round 4. (40 mesh units each round)
Don’t worry if the mesh looks a bit wonky at first. It will even out beautifully with blocking.
Checkpoint: After Round 28, the mesh body should measure approximately 10 inches tall from the base join.
Part 4: Top Edge Finishing
Round 29: Sl st into ch-2 sp. Ch 1. Sc in sc anchor, sc in ch-2 sp, sc in same ch-2 sp. Rep from around. Join with sl st to first sc. (120 sc)
Round 30: Ch 1. Sc in each st around. Join with sl st to first sc. (120 sc)
Fasten off and weave in end.
Checkpoint: The top edge should be clean, firm, and lie flat without curling.
Part 5: Strap
The strap is picked up from the top opening and worked in solid sc rows.
Identify the center back top edge. Count 10 sts to the left of center back and place a marker. Count 10 sts to the right and place a second marker.
Row 1 (Strap): With RS facing and E-4 hook, join MC with sl st in the left marker stitch. Ch 1. Sc in the same st and in each of the next 9 sts. Turn. (10 sc)
Row 2: Ch 1. Sc in each st across. Turn. (10 sc)
Continue working Row 2 until strap measures approximately 22 inches from the attachment point. This will be approximately 100 rows.
Do not fasten off. Hold the strap end against the front top edge of the bag, aligned with the 10 sts directly opposite. Work sl st through both layers across all 10 sts to attach.
Fasten off. Reinforce strap attachment at both ends by sewing through both layers several times with tapestry needle and MC.
Part 6: Forget-Me-Not Flower Appliques
Make 18 flowers total.
With D-3 hook and FC, make a magic ring.
Round 1: Ch 1. Work 5 sc into the magic ring. Pull ring closed. Join with sl st to first sc. (5 sc)
Round 2 (Petals): Ch 2, tr in the same st, ch 2, sl st in next sc. Rep from 4 more times. (5 petals)
Fasten off FC, leaving a tail for sewing.
Round 3 (Center accent): Join CC1 in the center of the magic ring with a sl st. Ch 1. Work 5 sc tightly into the center of the ring. Join with sl st. (5 sc)
Fasten off CC1.
Round 4 (Yellow dot): Join CC2 in center. Work a single sl st to anchor, then work 3 sc tightly in a cluster at the very center. Fasten off CC2.
Weave in all ends on each flower.
Checkpoint: Each finished flower should be approximately 1 inch in diameter.
Part 7: Leaf Appliques
Make 14 leaves total.
With D-3 hook and LC, chain 8.
Row 1: Starting in the 2nd ch from hook, sc in next ch, hdc in next ch, dc in next 2 ch, hdc in next ch, sc in next ch. Work 3 sc in the last ch (tip of leaf). Now working back along the other side of the foundation chain: sc in next ch, hdc in next ch, dc in next 2 ch, hdc in next ch, sc in next ch. Join with sl st to the first sc. (17 sts around)
Optional edging: Ch 1, sc evenly around the leaf perimeter, working a picot (ch 3, sl st in first ch) at the tip. Join with sl st. Fasten off.
The finished leaf should measure approximately 1.5 inches long by 0.75 inch wide.
Part 8: Assembly and Applique Placement
The garland is arranged in a heart outline shape approximately 7 inches wide at its widest and 6 inches tall, centered on each panel.
1. Lay the bag flat and use pins to mark the center of the front panel
2. Pin flowers and leaves around the heart outline. The top has two rounded lobes formed by 4 to 5 flowers each. The bottom V point is formed by 1 to 2 flowers meeting at the center base
3. Place leaves between and behind flowers throughout, with tips pointing outward
4. Use a tapestry needle and matching yarn to sew each piece to the bag surface with small whipstitches
5. Repeat for the back panel if decorating both sides
6. Optionally, embroider a simple stem line using LC in chain stitch to connect the garland
Finishing and Blocking
Weave in all remaining yarn ends.
Wet block by submerging in cool water, pressing out excess water (do not wring), and reshaping to final dimensions on a flat surface. Pin into shape if needed. Allow to dry completely, which may take 24 hours for cotton.
Blocking will open the mesh squares, firm the base, and flatten the appliques so they lie smooth.
Size Customization Tips
For a smaller bag (about 10 inches wide): Start with a chain of 25 instead of 35. After working around the base perimeter you’ll have approximately 90 stitches for 30 mesh units.
For a larger market bag (about 16 inches wide): Start with a chain of 43. After perimeter setup you’ll have approximately 144 stitches for 48 mesh units.
To adjust the strap: Each additional 5 rows adds approximately 1 inch of length. A narrower strap (6 sts) is more comfortable for lighter loads, while a wider strap (12 sts) distributes weight better.
Care Instructions
Machine wash on gentle cycle or hand wash in cool water with mild soap. Do not use hot water with cotton as it may cause shrinkage. Lay flat to dry. Do not tumble dry. If ironing is needed, use a pressing cloth and low steam setting, avoiding the flower appliques.
I hope you love making this bag as much as I enjoyed putting this tutorial together for you. If you make one, I would absolutely love to see it! Tag me on Instagram or share a photo in my Facebook group.
If this pattern caught your eye, go ahead and save it to your Pinterest boards so you can find it when you’re ready to start. And please drop a comment below if you give it a try. I read every single one and it truly makes my day to see your finished projects.