
I found this design tucked away in one of my old notebooks from years ago. I had sketched it out for my niece’s first birthday, imagining her toddling around in something handmade and sweet. The name came instantly because the soft purple tones reminded me of summer lavender fields, and it just stuck.
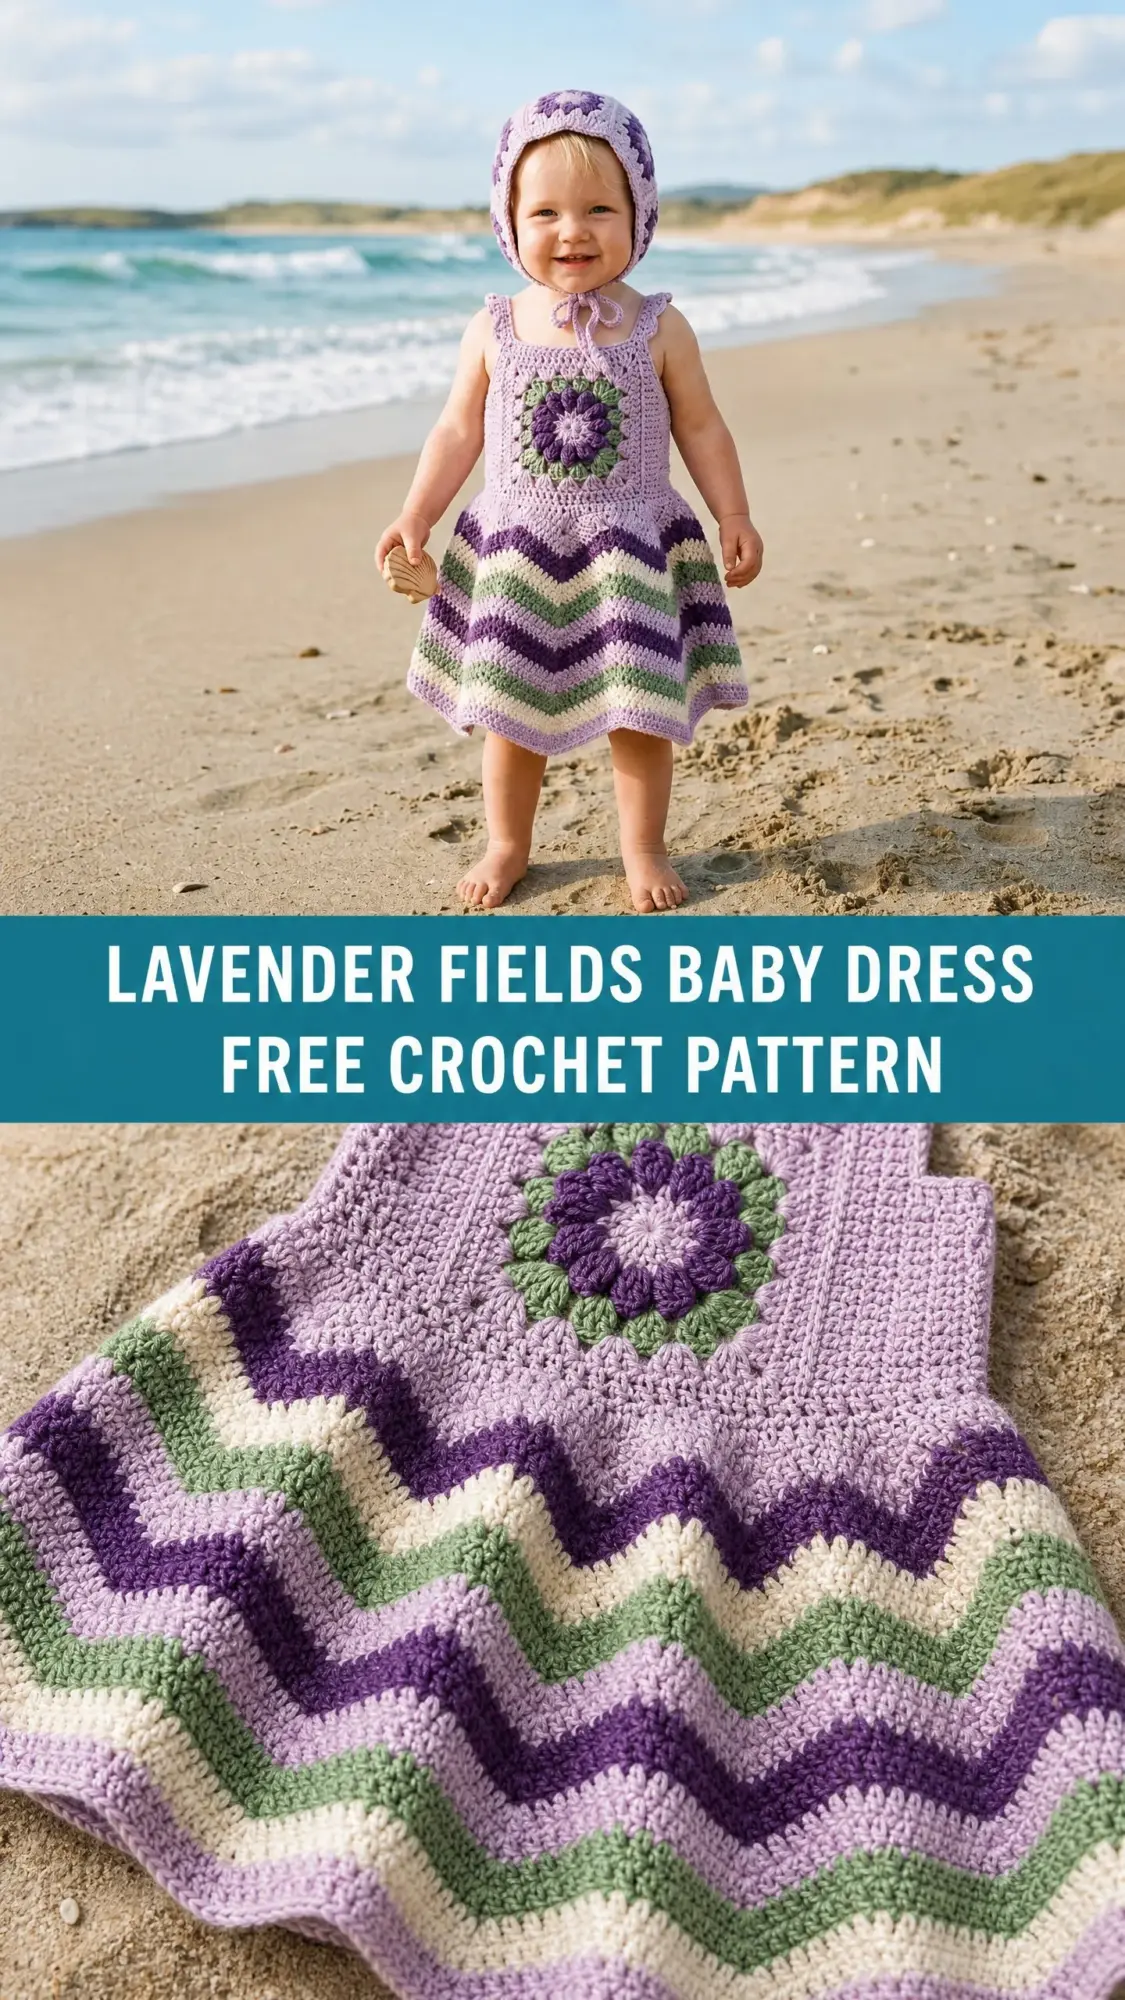
That original dress got so many compliments that I finally sat down to write out the full pattern properly. The combination of a centered granny square motif with a flowing chevron skirt creates something truly special. It looks impressive but breaks down into manageable sections that build on each other.
If you love a project with variety, this one delivers. You will work granny squares, solid double crochet fabric, and ripple stitches all in one garment. Let me walk you through every step so you can create your own Lavender Fields Baby Dress.
About This Crochet Pattern
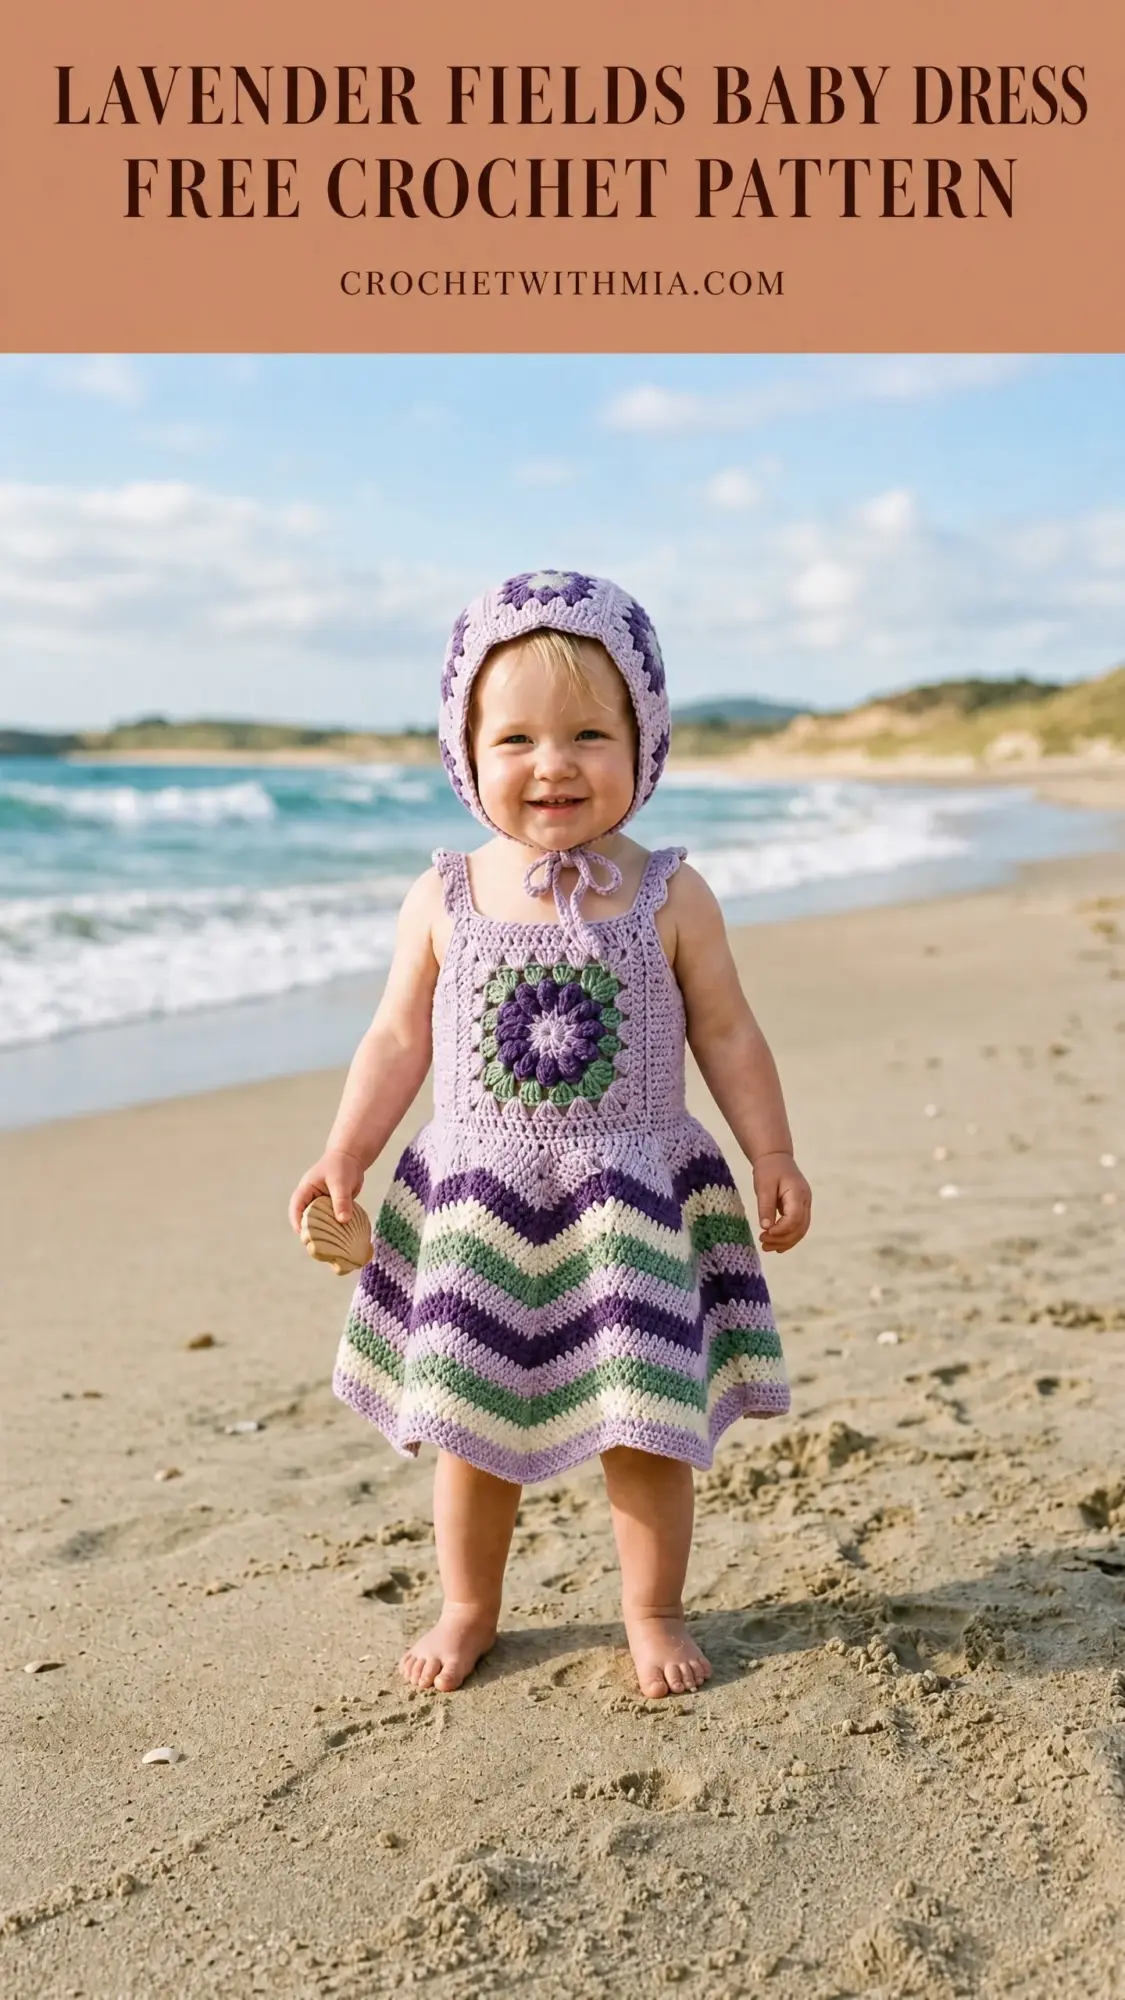
This sleeveless toddler dress features three distinct sections that come together beautifully. The bodice showcases a single large granny square motif centered on the front, surrounded by solid lavender fabric. The skirt flows downward in classic chevron ripples using five coordinating colors.
The construction is straightforward once you understand the order. You will work the granny square first, then build the bodice around it, seam the sides, and finally work the skirt in the round from the waist down. Each section uses familiar techniques, just combined in a fresh way.
Skill level: Intermediate. You should be comfortable with working granny squares in the round, basic double crochet fabric, joining pieces, and following color changes. If you have made a granny square blanket and a basic garment before, you are ready for this.
Time estimate: 8 to 12 hours total. Expect roughly 1 hour for the granny square, 2 to 3 hours for the bodice, 4 to 5 hours for the skirt, and about 1 hour for finishing.
Finished Measurements
This pattern is written for size 12 to 18 months.
Materials Needed
Yarn (DK weight, CYCA #3 Light):
Yarn suggestions:
Paintbox Yarns Simply DK works wonderfully here with excellent stitch definition and easy care. We Are Knitters The Petite Wool offers luxurious softness for special occasions but requires hand washing. Lion Brand Pound of Love provides exceptional value if you want one large skein of lavender plus small contrast amounts from your stash.
Avoid very slippery yarns like bamboo or tencel blends. The chevron points will not hold their shape with slick fibers.
Hook: US size G-6 or 4.0 mm
Notions:
Gauge
18 double crochet stitches and 10 rows equals 4 inches or 10 cm in double crochet, blocked.
20 stitches and 9 rows equals 4 inches or 10 cm in chevron ripple stitch, blocked.
Gauge matters for garments. Work a 6 inch swatch in double crochet, wash and block it, then measure. Adjust your hook size up if your swatch is too small, or down if too large.
Abbreviations and Stitch Definitions
Let me walk you through every stitch you will use. Even if you know these, a quick review helps.
ch = chain. Wrap yarn over hook and pull through the loop on your hook. This creates the foundation for most crochet work.
sl st = slip stitch. Insert hook, yarn over, pull through both the stitch and the loop on your hook in one motion. Used for joining and moving across stitches without adding height.
sc = single crochet. Insert hook, yarn over, pull up a loop (2 loops on hook), yarn over, pull through both loops.
dc = double crochet. Yarn over, insert hook, yarn over, pull up a loop (3 loops on hook), yarn over, pull through 2 loops (2 loops remain), yarn over, pull through remaining 2 loops.
ch-sp = chain space. The gap created by a chain in a previous row or round that you work into.
RS = right side. The front or public side of your work.
WS = wrong side. The back or inside of your work.
t-ch = turning chain. The chain worked at the beginning of a row to bring your hook up to the correct height.
Special Stitches for This Pattern
Double Crochet 2 Together (dc2tog): This decrease joins two stitches into one. Yarn over, insert hook into next stitch, yarn over and pull up a loop, yarn over and pull through 2 loops. You now have 2 loops on your hook. Yarn over, insert hook into the following stitch, yarn over and pull up a loop, yarn over and pull through 2 loops. You now have 3 loops on your hook. Yarn over and pull through all 3 loops. One stitch created from two.
Ripple Peak Increase (RPI): Work 3 double crochet stitches into the same stitch. This creates the upward peak of each chevron wave.
Ripple Valley Decrease (RVD): This decrease spans 3 stitches and creates the valley between chevron peaks. Yarn over, insert hook into next stitch, yarn over, pull up a loop, yarn over, pull through 2 loops. Skip the next stitch. Yarn over, insert hook into the following stitch, yarn over, pull up a loop, yarn over, pull through 2 loops. Yarn over and pull through all 3 loops on your hook. You have consumed 3 stitches and produced 1 stitch.
The RPI and RVD balance each other perfectly. Each peak adds 2 stitches, and each valley removes 2 stitches, keeping your total stitch count constant across every round of the skirt.
Pattern Notes Before You Begin
Read these through before starting. They will save you confusion later.
1. The bodice front and back are worked flat separately, then seamed at the sides.
2. The skirt is worked in the round, joined to the lower edge of the bodice after seaming.
3. The granny square is made first and incorporated into the bodice front.
4. Turning chains: For double crochet rows, chain 3 at the beginning counts as the first dc. Work your last dc of each row into the top of the previous row’s chain 3.
5. Color changes: Change to the new color in the last yarn over pull through of the last stitch before the color change. Carry unused colors loosely up the inside if they return within 2 rounds. Cut and rejoin colors separated by more rounds.
6. Stitch counts in parentheses show total working stitches, not counting turning chains unless they stand in as a stitch.
7. Block all finished sections before final assembly for the best results.
Section 1: Granny Square Motif
This square forms the center front panel of the bodice. Work it in the round from a magic ring.
Color sequence:
Round 1 (Color C): Make a magic ring. Ch 3 (counts as first dc), work 2 dc into ring, ch 2, (3 dc into ring, ch 2) 3 times. Sl st to top of ch-3 to join. (4 groups of 3 dc, 4 ch-2 corner spaces) Fasten off Color C.
Round 2 (Color B): Join Color B with sl st to any ch-2 corner space. Ch 3, work 2 dc into same space, ch 2, 3 dc into same space (first corner made), ch 1, (3 dc, ch 2, 3 dc) into next ch-2 corner space, ch 1. Repeat from to 2 more times. Sl st to top of ch-3. (8 groups of 3 dc, 4 ch-2 corner spaces, 4 ch-1 side spaces) Fasten off Color B.
Round 3 (Color A): Join Color A with sl st to any ch-2 corner space. Ch 3, 2 dc into same space, ch 2, 3 dc into same space, ch 1, 3 dc into next ch-1 space, ch 1, (3 dc, ch 2, 3 dc) into next ch-2 corner space, ch 1, 3 dc into next ch-1 space, ch 1. Repeat from to 2 more times. Sl st to top of ch-3. (12 groups of 3 dc, 4 ch-2 corner spaces, 8 ch-1 side spaces) Do not fasten off.
Round 4 (Color A): Sl st into next 2 dc and into ch-2 corner space. Ch 3, 2 dc into same space, ch 2, 3 dc into same space, (ch 1, 3 dc into next ch-1 space) twice, ch 1, (3 dc, ch 2, 3 dc) into next ch-2 corner space. Repeat from to 2 more times. Ch 1, 3 dc into next ch-1 space, ch 1, 3 dc into next ch-1 space, ch 1. Sl st to top of ch-3. (16 groups of 3 dc, 4 ch-2 corner spaces, 12 ch-1 side spaces) Fasten off and weave in ends.
Checkpoint: Your granny square should measure 3.5 inches or 9 cm on each side after light blocking.
Section 2: Bodice Front
The bodice front incorporates your granny square. You will work from the waist up, attach the square in the middle, then continue to the straps.
Foundation: With Color A, ch 44.
Row 1 (WS): Dc into 4th ch from hook (counts as 2 dc), dc in each ch across. Turn. (42 dc)
Row 2 (RS): Ch 3 (counts as dc), dc in each st across, dc in top of t-ch. Turn. (42 dc)
Rows 3 through 6: Repeat Row 2. Turn after each row. (42 dc each row)
After Row 6, your lower front panel should measure approximately 2.75 inches or 7 cm tall. Do not fasten off.
Incorporating the Granny Square
Position your granny square centered horizontally on Row 6, right side facing you. The square’s bottom edge will span 14 stitches of your 42 stitch row.
Row 7 (RS, joining row): Ch 3, dc in next 13 sts (14 dc total including t-ch). Now work across the bottom edge of the granny square as follows: dc into each dc and ch-1 space across the bottom edge of the square (this produces 14 dc across the square bottom). Dc in each remaining 14 sts of Row 6. Turn. (42 dc)
After completing Row 7, use Color A and a yarn needle to sew or slip stitch the bottom edge of the granny square to Row 7, keeping the square flat.
Rows 8 and 9: Work in dc across all 42 sts. Turn. (42 dc each row)
Upper Bodice and Straps
Row 10: Ch 3, dc in next 13 sts. (14 dc for left strap section) Fasten off. Skip center 14 sts (this forms the neckline opening). Rejoin Color A to next st, ch 3, dc in next 13 sts. (14 dc for right strap section) Fasten off.
Left Strap Rows 11 through 14: Rejoin Color A to left strap section. Ch 3, dc in next 13 sts. Turn. (14 dc) Repeat for Rows 12, 13, and 14. Fasten off after Row 14.
Right Strap Rows 11 through 14: Repeat the same as left strap.
Now attach the granny square permanently. Using Color A and a yarn needle, whip stitch the left, right, and top edges of the granny square to the corresponding stitches of Rows 7 through 9.
Checkpoint: Your bodice front (excluding straps) should measure 9.5 inches or 24 cm wide and 5 inches or 12.5 cm tall from waist to neckline split.
Section 3: Bodice Back
The bodice back is identical to the front but without the granny square. Work entirely in Color A.
Foundation: Ch 44.
Row 1 (WS): Dc into 4th ch from hook, dc in each ch across. Turn. (42 dc)
Rows 2 through 9: Ch 3, dc in each st across, dc in top of t-ch. Turn. (42 dc each row)
Row 10: Ch 3, dc in next 13 sts. (14 dc left section) Fasten off. Skip center 14 sts. Rejoin Color A, ch 3, dc in next 13 sts. (14 dc right section) Fasten off.
Rows 11 through 14 (each strap): Ch 3, dc in next 13 sts. Turn. (14 dc each row) Fasten off after Row 14.
Checkpoint: Bodice back should match bodice front dimensions exactly.
Section 4: Seaming and Assembly
Side seams: Hold bodice front and back with right sides together. Using Color A and a yarn needle, whip stitch or mattress stitch from the waist edge upward through Row 5 only (approximately 2.25 inches or 5.7 cm of seam). Leave Rows 6 through 14 open on each side to form the armholes.
Shoulder seams: Hold front and back straps with right sides together at each shoulder. Slip stitch or whip stitch across the tops of the straps (14 dc) on each side. Fasten off and weave in ends.
Checkpoint: The bodice should now form a tube measuring approximately 19 inches or 48 cm in circumference at the waist. Each armhole opening should measure approximately 2.75 inches or 7 cm tall.
Section 5: Chevron Ripple Skirt
The skirt is the showstopper of this dress. You will work in the round from the waist edge, with the right side always facing outward.
Joining Round Setup
The bodice has 84 foundation chain stitches at the waist (42 front plus 42 back). You need 100 stitches for the ripple pattern to work correctly with 10 complete repeats.
Joining Round (Color A): Join Color A to any foundation chain stitch at the waist. Ch 3 (counts as dc). Work (dc in next 4 sts, 2 dc in next st) 16 times, dc in next 3 sts. Sl st to top of ch-3 to join. (100 dc)
Chevron Skirt Color Sequence
Ripple Round Instructions
Each round: Ch 3 (counts as first dc), dc in next 2 sts. Work RPI into next st, dc in next 3 sts, RVD over next 3 sts, dc in next 3 sts. Repeat from to 8 more times. Work RPI into next st, dc in next 3 sts, RVD over next 3 sts. Sl st to top of ch-3 to join round. (100 sts)
Color change tip: At the end of the last round of each color, change to the new color in the final yarn over of your slip stitch join. Cut the old color if it will not return within 2 rounds.
Work Rounds 1 through 19 following the color sequence above. After Round 19, fasten off and weave in all ends.
Checkpoint: Your completed skirt should measure approximately 9 inches or 23 cm from the joining round to the lowest hem point at the valleys.
Finishing Touches
Block your completed dress by soaking it in lukewarm water with a drop of wool wash or gentle detergent. Gently squeeze out excess water without wringing. Lay flat on a blocking mat and pin the chevron points to shape them nicely. Allow to dry completely before removing pins.
The ripple hem will naturally create decorative peaks and valleys. Pin each peak point and each valley to emphasize the chevron pattern while blocking.
Weave in any remaining ends securely, especially at color changes in the skirt where ends might work loose with wear and washing.
Care Instructions
For machine washable yarn like Paintbox Simply DK, wash on gentle cycle in cold water and tumble dry low. For wool or delicate fibers, hand wash in cool water and lay flat to dry. Always check your yarn label for specific recommendations.
Store the dress folded rather than hung to prevent stretching at the shoulders.
I hope you love making this little dress as much as I loved designing it. The finished result always makes me smile, especially when I see photos of tiny ones actually wearing them. If you make your own Lavender Fields Baby Dress, I would absolutely love to see it! Tag me on Instagram or share in our Facebook group.
Save this pattern to your Pinterest boards so you can find it easily when you are ready to start. And please drop a comment below if you make one. I read every single comment and seeing your finished projects truly makes my day.