
I’ve been on the hunt for the perfect beach-themed baby outfit for months now. This Ocean Wave Baby Romper is my absolute favourite find. The combination of that dusty blue yarn with the sweet clamshell applique creates something so charming that I had to share it immediately.
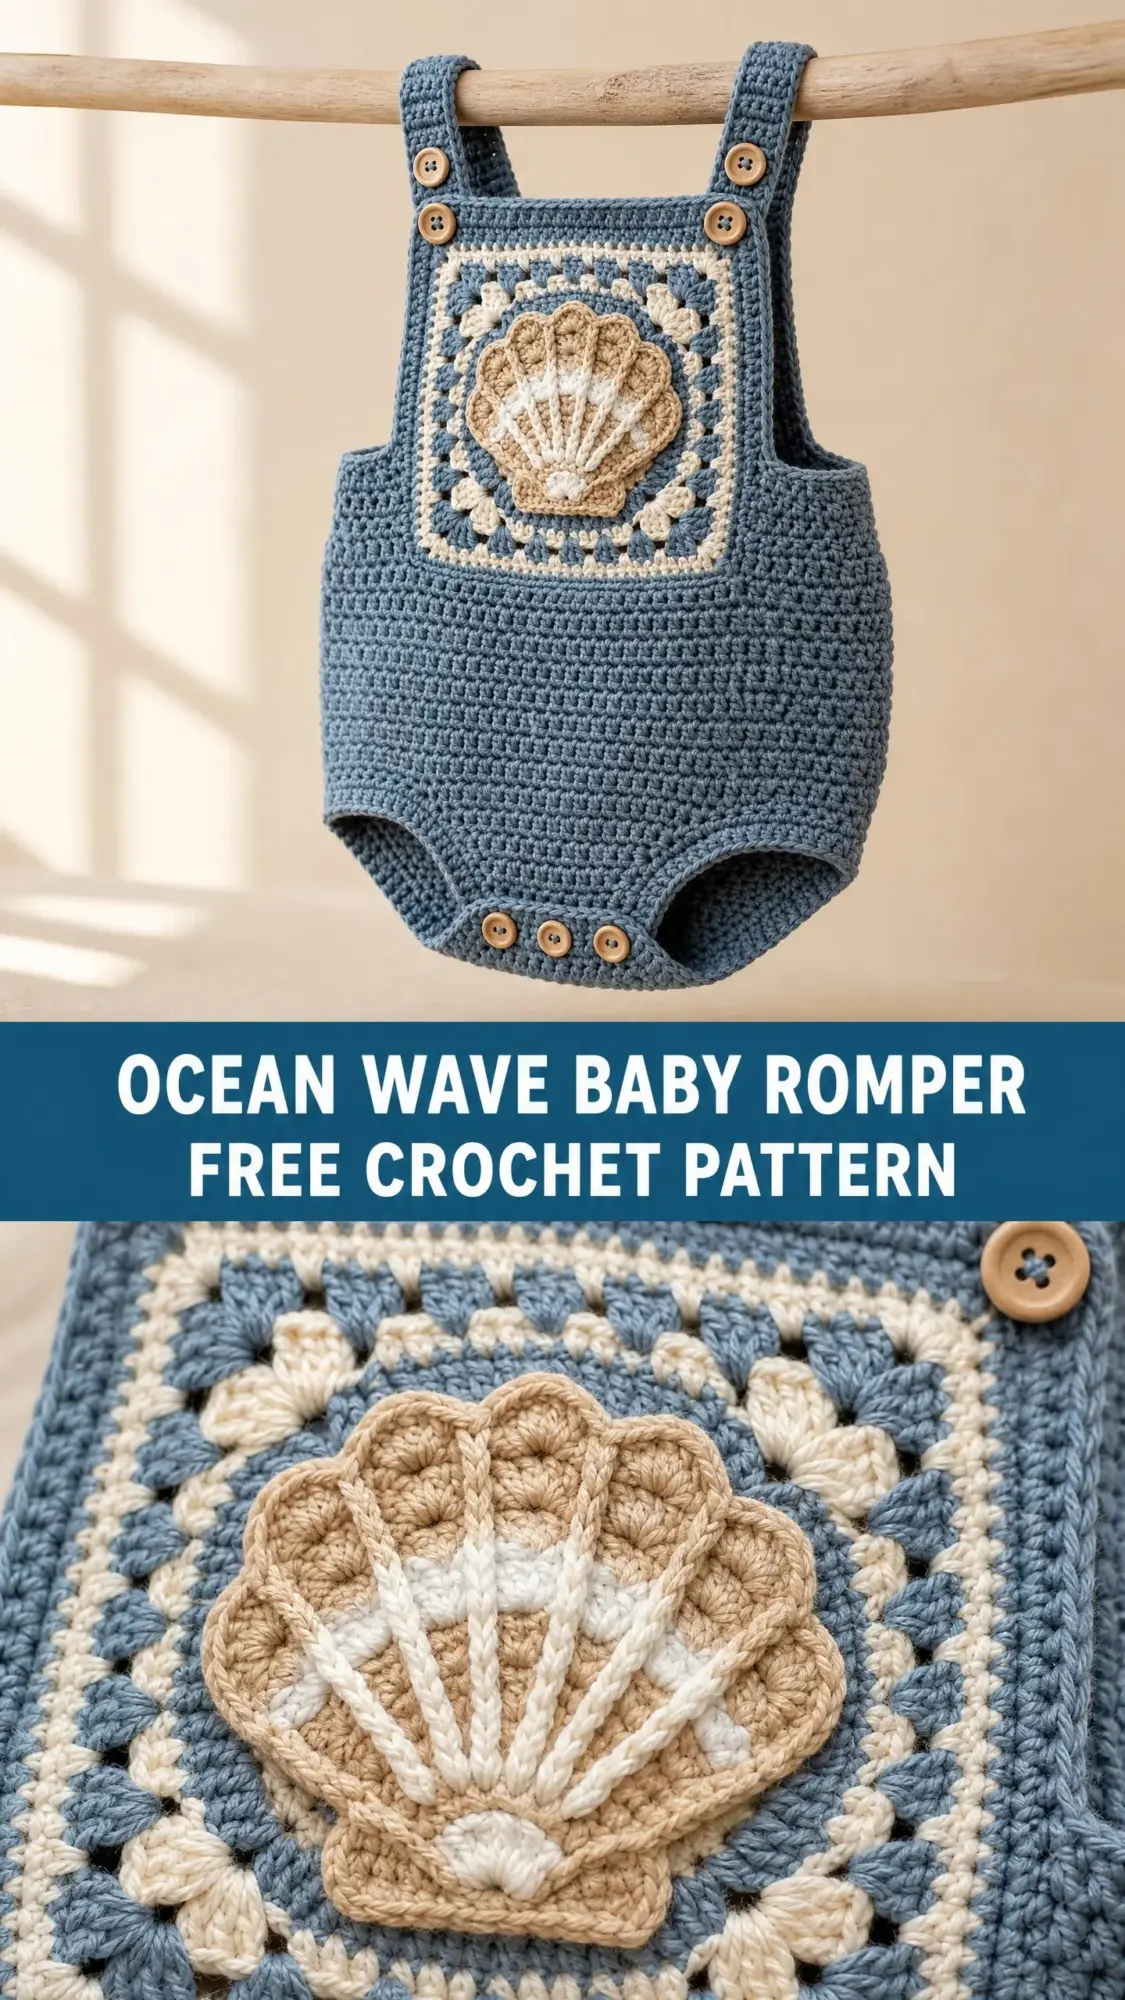
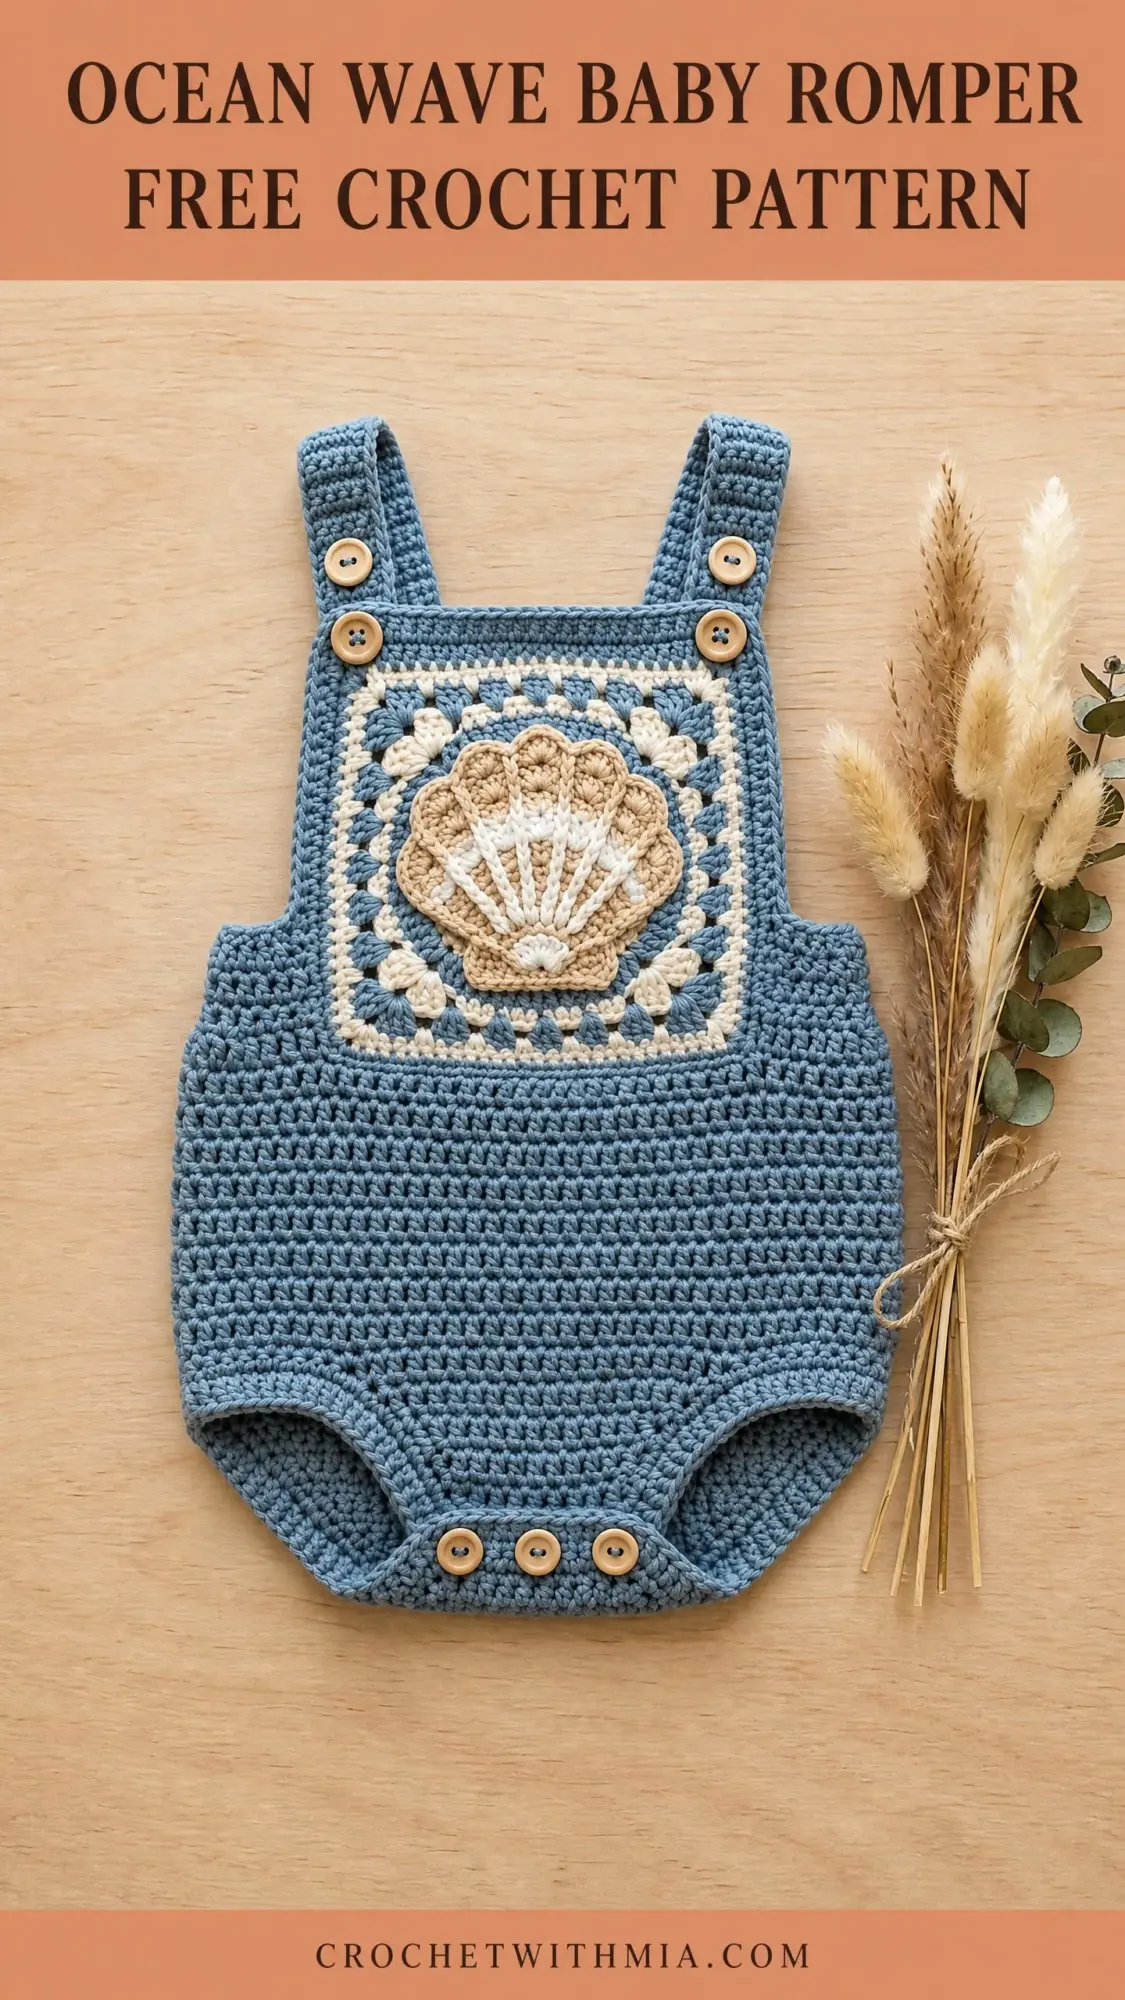
The romper features a granny square bib front with a dimensional seashell at the center. Classic dungaree-style straps button at the shoulders. And that bubble bottom silhouette? Adorable on every baby who wears it.
Whether you’re making this for a summer baby shower or your own little one, this crochet pattern delivers professional results with clear instructions every step of the way. Let me walk you through everything you need to know.
About This Baby Romper Crochet Pattern
This intermediate-level project combines several techniques into one stunning garment. You’ll work a flat granny square bib panel, then build the body in rows. The straps attach with wooden buttons, and snap closures along the crotch make diaper changes a breeze.
The construction flows in a logical order. First you make the granny square bib. Then you add a border and pick up stitches for the body. After that comes leg opening shaping, straps, and finally the adorable clamshell applique that gets sewn to the center.
Skill level: Intermediate. You should feel comfortable working in the round, making flat panels, seaming pieces together, and basic shaping with increases and decreases. If you’ve completed at least five crochet projects, you can absolutely handle this one section at a time.
Time estimate: Plan for 12 to 18 hours if you’re an experienced intermediate crocheter. Add another 3 to 4 hours if this is your first granny square or applique project.
Finished Measurements
The pattern includes three baby sizes:
Size 0 to 3 months: Chest 14 inches (35.5 cm), length from shoulder to crotch 13 inches (33 cm)
Size 3 to 6 months: Chest 16 inches (40.5 cm), length 14 inches (35.5 cm)
Size 6 to 12 months: Chest 18 inches (45.5 cm), length 15.5 inches (39.5 cm)
The bib panel measures 5.5 inches (14 cm) square for all sizes. The body width adjusts based on which size you’re making.
Throughout these instructions, numbers appear in this format: 0 to 3 months (3 to 6 months, 6 to 12 months). When only one number appears, it applies to all sizes.
Materials Needed
Yarn
You’ll use DK weight yarn (also called CYCA 3 or light worsted) in three colours:
Main Colour (MC): Dusty blue, 200 (250, 310) yards or 183 (229, 284) meters
Contrast Colour A (CA): Cream or off-white, 40 yards or 37 meters
Contrast Colour B (CB): Warm tan or sand, 25 yards or 23 meters
Recommended yarns:
Paintbox Yarns Simply DK works beautifully here. It’s 100% acrylic with excellent stitch definition and machine washable, perfect for baby items. The colour "Dusty Blue" matches the main colour in the photos.
Lion Brand 24/7 Cotton DK gives you a breathable natural fibre option for warm weather. You’ll need 2 skeins of the main colour plus small amounts of contrast colours.
Choose a smooth, tightly plied yarn so your single crochet texture reads cleanly and the granny square clusters pop. Avoid fuzzy or textured yarns for this project.
Hooks
US size E/4 (3.5 mm) for the bib granny square and applique
US size F/5 (3.75 mm) for the body
Notions
6 wooden buttons, 3/4 inch (19 mm) diameter. You need 4 for the shoulder straps (2 on each side) and 3 for the crotch closure.
Yarn needle for seaming and weaving ends
At least 6 stitch markers
Scissors
Optional: blocking mat and pins
Gauge
Getting gauge right ensures proper fit. Please make a swatch before starting.
Body (single crochet with F/5 hook): 18 sc and 20 rows equals 4 inches by 4 inches (10 cm by 10 cm)
Bib (granny square with E/4 hook): Completed granny square before border equals 5 inches by 5 inches (12.7 cm by 12.7 cm)
Wash and block your swatch the same way you plan to care for the finished romper.
Abbreviations and Special Stitches
Let me define every abbreviation before we begin. I’ll explain each stitch in plain English so nothing feels mysterious.
ch: Chain. Wrap yarn over hook and pull through the loop.
sl st: Slip stitch. Insert hook, yarn over, pull through both the stitch and the loop on your hook in one motion.
sc: Single crochet. Insert hook, yarn over, pull up a loop (2 loops on hook), yarn over, pull through both loops.
dc: Double crochet. Yarn over, insert hook, yarn over, pull up a loop, yarn over, pull through 2 loops, yarn over, pull through remaining 2 loops.
hdc: Half double crochet. Yarn over, insert hook, yarn over, pull up a loop (3 loops on hook), yarn over, pull through all 3 loops.
inc: Increase. Work 2 sc in the same stitch.
sc2tog: Single crochet 2 together. A decrease. Insert hook in first stitch, yarn over, pull up a loop. Insert hook in next stitch, yarn over, pull up a loop. Yarn over, pull through all 3 loops on hook.
fsc: Foundation single crochet. Creates a chain and single crochet row simultaneously. Chain 2. Insert hook into second chain from hook, yarn over, pull up a loop, yarn over, draw through 1 loop (this makes your chain), yarn over, draw through 2 loops (this makes your sc). For each additional fsc, insert hook into that chain loop at the bottom of the previous stitch and repeat.
gs-cl: Granny square cluster. Work 3 dc into the indicated chain space. This forms one "leg" of a classic granny square.
3dc-cl: 3 double crochet cluster. This technique joins 3 partial double crochets at the top. Yarn over, insert hook, yarn over, pull up a loop, yarn over, draw through 2 loops. Repeat two more times in the same spot. You now have 4 loops on your hook. Yarn over and draw through all 4 loops.
bp3dc: Back post triple double crochet. Used in the clamshell applique for dimensional ridges. Yarn over 3 times, insert hook from back to front to back around the post of the stitch below, yarn over, pull up a loop, then yarn over and draw through 2 loops four times.
ch-sp: Chain space. The gap created by a chain in the previous row or round.
RS: Right side. The public-facing side of your work.
WS: Wrong side. The back of your work.
pm: Place marker.
Pattern Notes Before You Begin
Read these tips first. They’ll save you confusion later.
The romper is constructed in this order: bib granny square panel, bib border, body worked in joined rounds from the bib bottom, leg opening shaping, straps, clamshell applique, assembly and finishing.
The bib panel sits only on the front. The back is plain single crochet seamed to the front at the sides.
Turning chains: For single crochet rows, chain 1 at the beginning. This turning chain does NOT count as a stitch. Work your first sc into the first stitch at the base of that chain.
When working the granny square, keep the right side always facing you. Do not turn between rounds.
Block your finished granny square before attaching it to the body.
Section 1: Bib Granny Square Panel
This square is the same for all sizes. Use your E/4 hook.
With CA:
Foundation Ring: Ch 4, join with sl st to form a ring.
Round 1 (RS): Ch 3 (counts as first dc in granny square only), 2 dc into ring, ch 2, [3 dc into ring, ch 2] 3 times, join with sl st to top of beginning ch-3. (4 gs-cl, 4 ch-2 corner spaces)
Fasten off CA.
Round 2: Join MC with sl st to any ch-2 corner space. Ch 3, [2 dc, ch 2, 3 dc] into same corner space, ch 1, [3 dc, ch 2, 3 dc] into next corner space, ch 1; repeat from 2 more times, join with sl st to top of beginning ch-3. (8 gs-cl, 4 ch-2 corner spaces, 4 ch-1 side spaces)
Fasten off MC.
Round 3: Join CA with sl st to any ch-2 corner space. Ch 3, [2 dc, ch 2, 3 dc] into same corner space, ch 1, 3 dc into next ch-1 space, ch 1, [3 dc, ch 2, 3 dc] into next corner space, ch 1, 3 dc into next ch-1 space, ch 1; repeat from 2 more times, join with sl st to top of beginning ch-3. (12 gs-cl, 4 ch-2 corner spaces, 8 ch-1 side spaces)
Fasten off CA.
Round 4: Join MC with sl st to any ch-2 corner space. Ch 3, [2 dc, ch 2, 3 dc] into same corner space, ch 1, [3 dc into next ch-1 space, ch 1] twice, [3 dc, ch 2, 3 dc] into next corner space, ch 1, [3 dc into next ch-1 space, ch 1] twice; repeat from 2 more times, join with sl st to top of beginning ch-3. (16 gs-cl, 4 ch-2 corner spaces, 12 ch-1 side spaces)
Fasten off MC.
Round 5 (Border round): Join MC with sl st to any ch-2 corner space. Ch 1. Work [sc, ch 1, sc] into corner space, work 1 sc into each dc across the side and 1 sc into each ch-1 side space until you reach the next corner space, [sc, ch 1, sc] into corner space; repeat from 2 more times, work 1 sc into each dc and each ch-1 space across last side, join with sl st to first sc. (14 sc per side, 56 sc total plus 4 ch-1 corner spaces)
Do not fasten off. You’ll use this working loop for the bib border.
Checkpoint: Your granny square should measure approximately 5 to 5.5 inches per side. Pin and block lightly if needed.
Section 2: Bib Border and Neck Shaping
The top edge of the bib becomes your neckline opening. Continue with MC and E/4 hook.
Turn your granny square so the top edge faces up.
Bib Border Round (three sides only):
With RS facing, join yarn at top-right corner. Ch 1. Work 1 sc into each stitch down the right side (14 sc), [sc, ch 1, sc] into bottom-right corner, 1 sc into each stitch across the bottom (14 sc), [sc, ch 1, sc] into bottom-left corner, 1 sc into each stitch up the left side (14 sc). Do not join. You’re now at the top-left corner. Fasten off. (46 sc plus 2 ch-1 corner spaces along three sides)
Top Neckline Edge:
With RS facing, join MC at top-left corner. Ch 1. Work 1 sc into each stitch across the top edge. (14 sc)
Fasten off.
Section 3: Front Body Panel
Switch to your F/5 hook. The front body picks up stitches along the bottom of the bib.
Row 1 (RS): Join MC at bottom-right corner of bib. Ch 1. Work 1 sc into each of the 16 available stitches across the bottom edge, including corner spaces. Turn. (16 sc)
Row 2 (WS): Ch 1. Inc in first st, sc to last st, inc in last st. Turn. (18 sc)
Row 3 (RS): Ch 1. Inc in first st, sc to last st, inc in last st. Turn. (20 sc)
Row 4 (WS): Ch 1. Inc in first st, sc 1, inc in next st, sc to last 3 sts, inc in next st, sc 1, inc in last st. Turn. (24 sc)
Row 5 (RS): Ch 1. Inc in first st, sc 1, inc in next st, sc to last 3 sts, inc in next st, sc 1, inc in last st. Turn. (28 sc)
Row 6 (WS): Ch 1. Inc in first st, sc 1, inc in next st, sc to last 3 sts, inc in next st, sc 1, inc in last st. Turn. (32 sc)
For size 3 to 6 months: Work Row 6 once more. (36 sc)
For size 6 to 12 months: Work Row 6 two more times. (40 sc)
Work Even Section:
Continue in sc (ch 1, turn, sc across) with no shaping until front body measures:
Size 0 to 3 months: 6 inches from bib pickup row
Size 3 to 6 months: 6.5 inches from bib pickup row
Size 6 to 12 months: 7.5 inches from bib pickup row
Stitch count remains (32, 36, 40) sc.
Fasten off and set aside.
Section 4: Back Body Panel
The back has no bib. Use F/5 hook and MC.
Make an fsc of 32 (36, 40) stitches. Or chain 33 (37, 41) and work 1 sc into the second chain from hook and each chain across. (32, 36, 40 sc)
Work even in sc until back panel measures:
Size 0 to 3 months: 7.5 inches
Size 3 to 6 months: 8 inches
Size 6 to 12 months: 9 inches
Fasten off.
Section 5: Side Seaming and Crotch Shaping
With your yarn needle and MC, seam front and back panels together along both side edges. Use mattress stitch or whip stitch. Align bottom edges.
Leave the top 1.75 (2, 2.25) inches of the back panel open on each side for armholes.
Front Crotch Panel:
With RS facing and F/5 hook, join MC at bottom-right side seam. Work 1 sc into each stitch across front bottom edge. (32, 36, 40 sc) Turn.
Row 1 (WS): Ch 1. Sc2tog, sc to last 2 sts, sc2tog. Turn. (30, 34, 38 sts)
Row 2 (RS): Ch 1. Sc2tog, sc to last 2 sts, sc2tog. Turn. (28, 32, 36 sts)
Row 3 (WS): Ch 1. Sc2tog, sc to last 2 sts, sc2tog. Turn. (26, 30, 34 sts)
Row 4 (RS): Ch 1. Sc2tog, sc to last 2 sts, sc2tog. Turn. (24, 28, 32 sts)
Row 5 (WS): Ch 1. Sc2tog, sc to last 2 sts, sc2tog. Turn. (22, 26, 30 sts)
Row 6 (RS): Ch 1. Sc2tog, sc to last 2 sts, sc2tog. Turn. (20, 24, 28 sts)
Fasten off.
Back Crotch Panel:
Join MC at bottom-left side seam. Work 1 sc into each stitch across back bottom edge. (32, 36, 40 sc) Turn.
Work Rows 1 through 6 identically to front crotch panel. (20, 24, 28 sts)
Fasten off.
Section 6: Crotch Button Band
Front Button Loop Band:
Join MC at right edge of front crotch panel. Ch 1. Work 1 row of sc across top edge. (20, 24, 28 sc)
Row 2: Ch 1, sc 2 (3, 3), ch 2, skip 2 sts, sc 4 (4, 5); repeat 1 (1, 2) more times, ch 2, skip 2 sts, sc to end. Turn. (Creates 3 button loops)
Row 3: Ch 1. Sc across, working 2 sc into each ch-2 space. Turn. (20, 24, 28 sc)
Fasten off.
Back Button Band:
Join MC at right edge of back crotch panel. Ch 1. Work 3 rows of sc even. (20, 24, 28 sc each row)
Fasten off.
Sew 3 wooden buttons to back crotch band, aligning with front loops.
Section 7: Leg Opening Edging
Work a simple sc edging around each leg opening.
Join MC at base of side seam. Ch 1. Work sc evenly around entire leg opening. Work approximately 1 sc per row end along straight sides and 1 sc per stitch along crotch shaping. Join with sl st to first sc. Sl st into each sc around for a neat edge. Fasten off.
Repeat for second leg.
Section 8: Straps
Make 2 identical straps with F/5 hook and MC.
Make an fsc of 6 stitches. Or chain 7 and work sc into second chain from hook and each chain across. (6 sc)
Work even in sc rows until strap measures:
Size 0 to 3 months: 10 inches
Size 3 to 6 months: 11 inches
Size 6 to 12 months: 12 inches
Final row: Ch 1. Sc 1, ch 2, skip 2 sts, sc 1 (creates button loop).
Fasten off. Make second strap.
Sew back end of each strap to top corners of back body panel. Sew 2 wooden buttons to front bib top corners for strap attachment.
Section 9: Clamshell Applique
Use E/4 hook with CB and CA.
Base:
With CB, ch 2.
Round 1: Work 10 sc into second chain from hook, join with sl st. (10 sc)
Round 2: Ch 1. [Inc in each of next 2 sts, sc 1] 3 times, inc in next st, sc 1. Join with sl st. (16 sc)
Shell Fan Section:
Turn so WS faces you. The bottom 4 stitches form the shell hinge. The remaining 12 stitches form the fan arc.
Row 1 (RS): Join CB with sl st to 5th stitch of Round 2. Ch 3 (counts as dc). Work 1 dc into each of next 11 stitches. (12 dc) Turn.
Row 2 (WS): Ch 3. Dc in same stitch (increase). Work bp3dc around each dc post in row below. Dc in same as last stitch (increase). Turn. (14 sts)
Row 3 (RS): Ch 3. Dc in same stitch (increase). Dc across to last stitch, dc twice in last stitch (increase). Turn. (16 dc)
Row 4 (WS): Ch 1. Sc across. Turn. (16 sc)
Change to CA.
Row 5 (RS): Ch 1. [Sc, hdc, dc, hdc, sc] in next stitch, skip 2 stitches; repeat once more, [sc, hdc, dc, hdc, sc] in next stitch. Work sc in remaining stitches. This creates scalloped edges.
Fasten off CA.
Rejoin CB at shell base. Work 1 round of sc around entire perimeter. Fasten off.
Sew completed clamshell to center of granny square. Position hinge at bottom with fan opening upward. Whip stitch around base and lower edges. Leave fan top dimensional for 3D effect.
Section 10: Finishing
Weave in all ends securely, especially at colour changes.
Wet block by soaking in cool water for 10 minutes. Press excess water out in a towel without wringing. Pin to measurements and dry completely.
Attach all remaining buttons. Give the clamshell a light steam to help it lie flat at the base while keeping the fan raised.
Care Instructions
Machine wash cold on gentle cycle, inside out. Lay flat to dry. Do not tumble dry or bleach. Store folded to prevent strap stretching.
For cotton yarn, iron on low steam on the wrong side. For acrylic, skip the iron entirely.
You Did It!
This Ocean Wave Baby Romper makes such a thoughtful handmade gift. The combination of the granny square bib, bubble bottom silhouette, and that precious clamshell applique creates something truly special. I hope you enjoyed working through this crochet tutorial as much as I enjoyed designing it.
Thank you so much for choosing this pattern. If you make one, I would absolutely love to see it! Tag me on Instagram or share a photo on Facebook. Seeing your finished projects genuinely makes my day.
If this pattern caught your eye, go ahead and save it to your Pinterest boards so you can find it when you’re ready to start. And please drop a comment below if you make this romper. I read every single one and love hearing about your colour choices and any modifications you try!