
Bobble stitches look intimidating until you actually try them. I know that sounds like something your overly optimistic craft teacher would say, but hear me out. This Autumn Harvest Floral Bucket Bag uses bobbles throughout the upper section, and if you can work a basic double crochet, you can absolutely make those satisfying little bumps pop out from your fabric. The same goes for the flower motifs. They might look like advanced crochet wizardry, but they’re just simple rounds worked flat, and I’ll walk you through every single step.
This pattern is designed for intermediate crocheters, but don’t let that label scare you off if you’re an adventurous beginner. If you’ve made a few hats or simple bags and you’re comfortable working in the round, you have all the foundational skills you need. The construction is logical. You start at the bottom with a flat oval base, work your way up the sides, add texture with those bobbles, and finish with a pretty scalloped edge. Each section builds on the one before it.
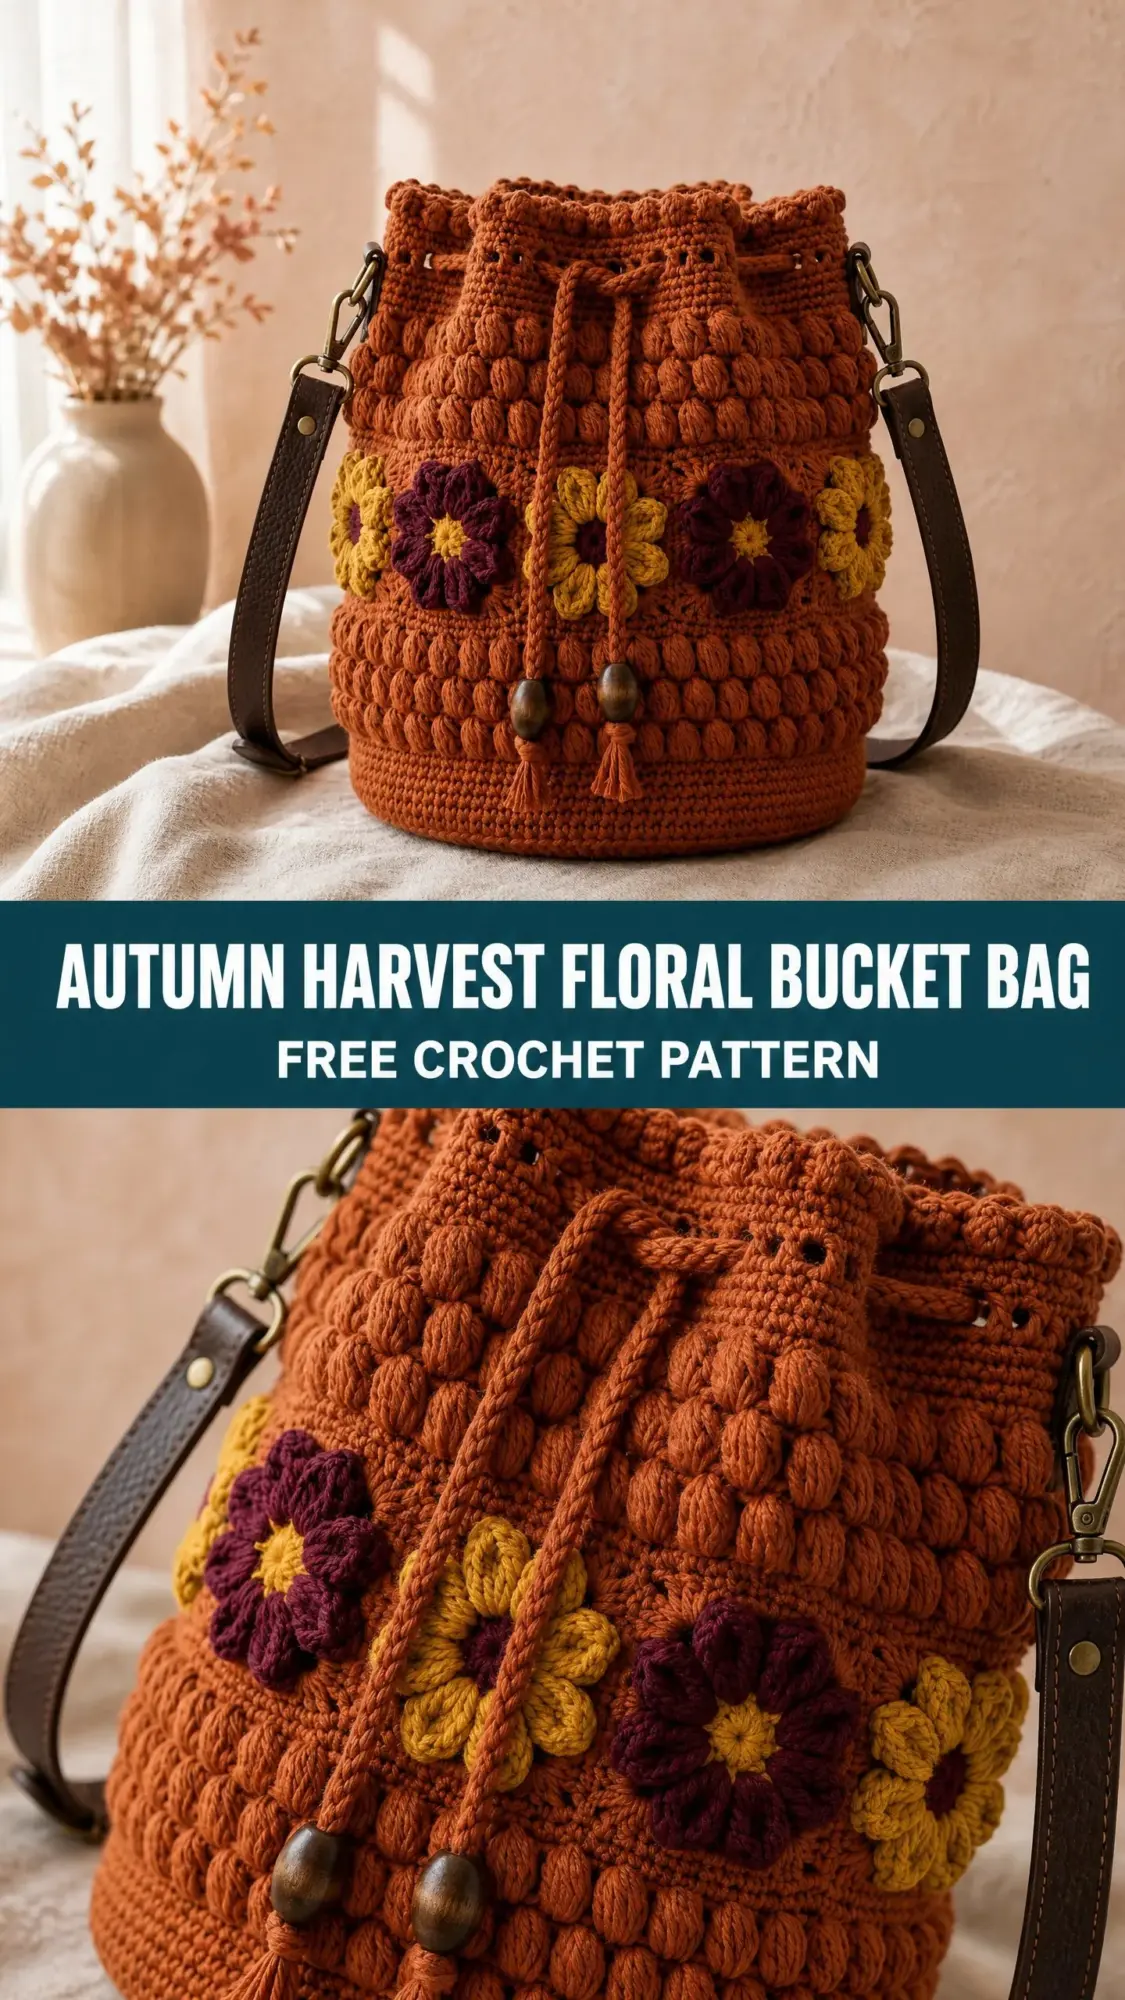
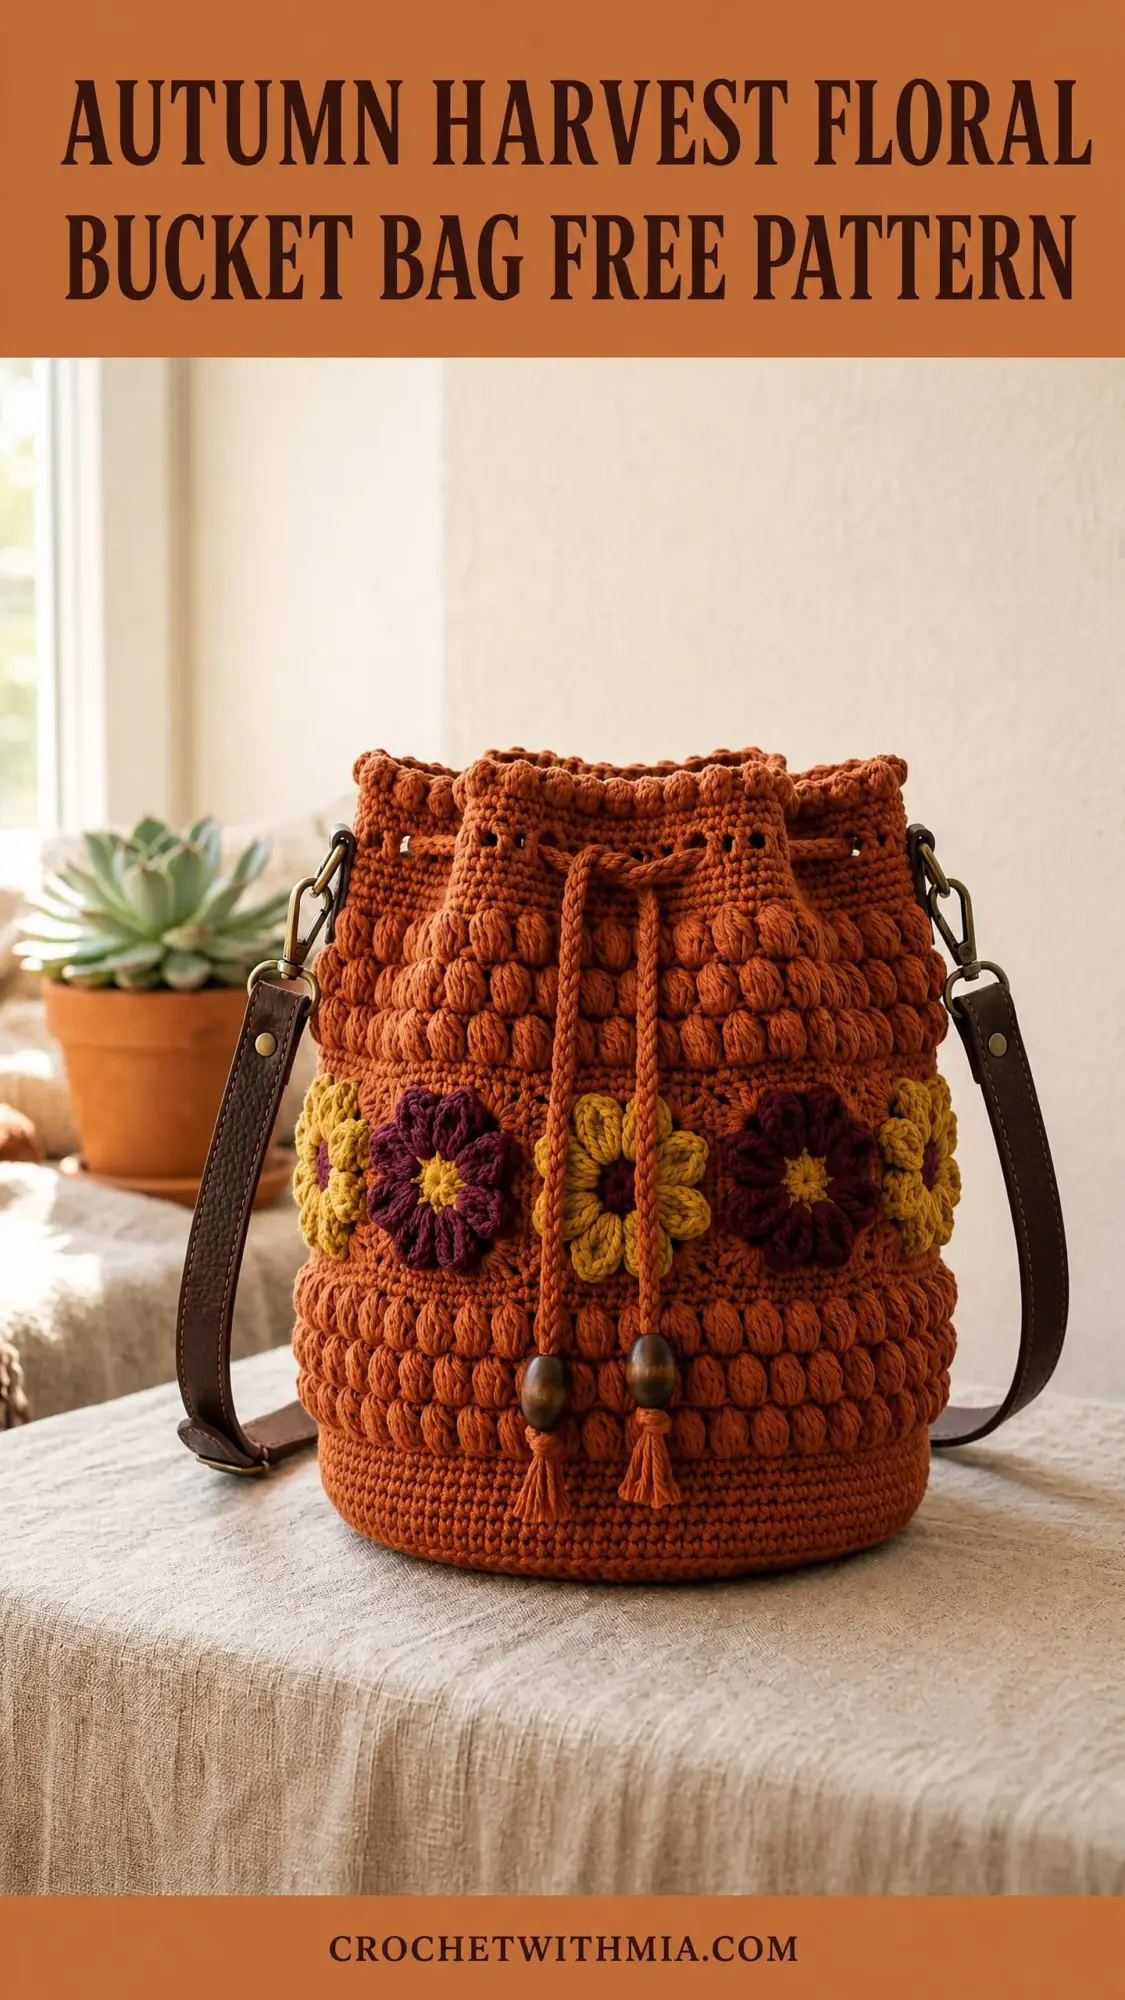
By the end of this tutorial, you’ll have a gorgeous rust-orange bucket bag adorned with goldenrod and burgundy flowers, complete with a drawstring closure, wooden bead accents, and a professional-looking leather crossbody strap. It’s the kind of project that makes people ask where you bought it. And you get to say you made it yourself.
Why You’ll Love This Crochet Bucket Bag Pattern
This bag has everything going for it. The rich burnt orange color feels perfectly autumnal, while the folk-art inspired flower band adds personality without being overwhelming. The bobble stitch texture creates visual interest and gives the bag structure, and the drawstring closure keeps your belongings secure while looking absolutely charming with those wooden beads and tassel.
The finished bag measures approximately 11 inches wide by 11 inches tall by 8 inches deep. That’s roomy enough for your everyday essentials, a water bottle, your current crochet project, and then some. The leather base insert and firm cotton yarn ensure this bag holds its shape beautifully, whether it’s sitting on a café table or hanging at your hip.
Materials You’ll Need
Gather these supplies before you begin:
Yarn:
Hook: US Size J-10 / 6.0 mm crochet hook, or size needed to obtain gauge
Additional Materials:
Yarn Suggestions
I recommend Lion Brand 24/7 Cotton in Terracotta for the main color, Goldenrod for Color A, and Wine for Color B. This 100% mercerized cotton works beautifully at bulky weight when held doubled on a J hook, creating that firm sculptural texture you see in the photos. You’ll need approximately 3 skeins of the main color and 1 skein each of the accent colors.
Paintbox Yarns Cotton Aran held doubled also works wonderfully. Try Burnt Orange, Mustard Yellow, and Raspberry Pink as a burgundy substitute. This yarn gives excellent stitch definition for bobbles and motifs.
Substitution Note: Choose a smooth, tightly spun cotton or cotton-acrylic blend that holds its shape under tension. Avoid soft, drapey fibers like alpaca or bamboo for this project. The bag requires a firm hand to maintain its cylindrical silhouette.
Gauge
Getting gauge right matters for this crochet bag pattern. With MC and your J-10 / 6.0 mm hook:
A bag that’s too loose will lose its shape. One that’s too tight will be stiff and difficult to close. Swatch both textures and adjust your hook size as needed before starting.
Abbreviations
Let me define all the stitches you’ll encounter:
Special Stitches
Bobble Stitch (bob)
This is the star of the show, and it’s simpler than it looks. Here’s how it works:
Yarn over, insert hook into the indicated stitch, yarn over and pull up a loop (3 loops on hook), yarn over and pull through 2 loops (2 loops on hook). That completes one incomplete double crochet. Without finishing, yarn over and insert hook into the SAME stitch again, yarn over and pull up a loop (4 loops on hook), yarn over and pull through 2 loops (3 loops on hook). Repeat this action one more time in the same stitch so you have 4 loops on hook. Yarn over and pull through all 4 loops at once. One bobble made.
The bobble pops to the right side of the work. Each bobble occupies one stitch space and counts as 1 stitch throughout this pattern.
Magic Ring
Form a loop with the yarn, leaving a 6-inch tail. Insert hook through the loop, yarn over with the working yarn, and pull up a loop. Chain as directed, then work stitches into the center of the ring. Pull the tail to close the ring.
Scallop Stitch
Skip 2 stitches, work 5 double crochet into next stitch, skip 2 stitches, slip stitch into next stitch. This 6-stitch unit creates one scallop shell.
Flower Motif (worked flat)
Round 1: Using CB, magic ring, chain 1, work 6 sc into ring, pull ring closed, sl st to first sc to join. (6 sc)
Round 2: Chain 1, work 2 sc into each stitch around, sl st to first sc to join. (12 sc) Fasten off CB.
Round 3: Join CA with a standing single crochet in any stitch. Work (sc, hdc, 2 dc, hdc, sc) all into same stitch, sl st into next stitch. Repeat around all 12 stitches, working each petal group. You will complete 6 petals total. Fasten off CA, leaving a 12-inch tail for sewing. (6 petals)
Make 6 flower motifs total.
Pattern Notes Before You Begin
1. The bag body is worked entirely in continuous rounds from the bottom up. Do not join or turn at the end of rounds unless specifically instructed. Use a locking stitch marker to track the beginning of each round.
2. The bobble stitch creates a textured honeycomb-like raised surface. On subsequent rounds, bobbles fall between the bobbles of the previous round, creating that beautiful offset texture.
3. All stitch counts include bobbles counted as 1 stitch each.
4. Flowers are made separately and blocked flat before being sewn onto the bag.
5. Do NOT cut yarn between bobble rounds unless changing color. MC is continuous throughout the body.
Step by Step Crochet Pattern Instructions
Section 1: Oval Base
The base creates an oval approximately 8 inches by 5 inches.
With MC and J-10 hook, chain 13.
Rnd 1: Starting in the 2nd chain from hook, sc 11 across the chain, work 3 sc into the last chain (this turns the corner around the short end). Now working along the underside of the foundation chain, sc 10 back across, work 2 sc into the first chain (this closes the other short end). Do not join. Place marker. (26 sc)
Rnd 2: Work 2 sc into first stitch (inc), sc 10, inc into next stitch, inc into next stitch, sc 10, inc into last stitch. (30 sc)
Rnd 3: Inc, inc, sc 10, inc, inc, inc, inc, sc 10, inc, inc. (38 sc)
Rnd 4: Sc 1, inc, sc 1, inc, sc 10, inc, sc 1, inc, sc 1, inc, sc 1, inc, sc 10, inc, sc 1, inc. (46 sc)
Rnd 5: Sc 2, inc, sc 2, inc, sc 10, inc, sc 2, inc, sc 2, inc, sc 2, inc, sc 10, inc, sc 2, inc. (54 sc)
Rnd 6: Sc 3, inc, sc 3, inc, sc 10, inc, sc 3, inc, sc 3, inc, sc 3, inc, sc 10, inc, sc 3, inc. (62 sc)
Rnd 7: Sc 4, inc, sc 4, inc, sc 10, inc, sc 4, inc, sc 4, inc, sc 4, inc, sc 10, inc, sc 4, inc. (70 sc)
Rnd 8: Sc across all stitches without increasing. (70 sc)
Checkpoint: After Round 8, your oval base should measure approximately 8 inches by 5 inches. It should lie flat with no curling. If it’s smaller, your tension is too tight. If it’s larger, your tension is too loose.
Section 2: Lower Body Band
Continue working in continuous rounds without joining.
Rnds 9 through 16: Sc in each stitch around, working in BLO for Round 9 only (this creates a visible ridge where the base meets the sides and encourages the sides to stand up), then in both loops for Rounds 10 through 16. (70 sc each round)
After Round 16, your bag should stand approximately 2.25 inches tall from the base.
Section 3: Flower Motif Band Positioning Row
Rnd 17: Sc in each stitch around. (70 sc)
This round serves as the foundation row onto which the flower motifs will be sewn after the bag is complete. Place stitch markers at stitches 12, 23, 35, 47, and 58 to guide motif placement later.
Rnds 18 through 20: Sc in each stitch around. (70 sc each round)
Checkpoint: After Round 20, the bag body should measure approximately 4.5 inches from the base floor to your working round.
Section 4: Bobble Stitch Upper Body
This is where the magic happens! The bobble stitch section creates the raised textured upper body. Work the bobbles on the RS, which is the outside of the bag.
Rnd 21 (Bobble Setup Round): Bob in each stitch around. (70 bob)
Rnd 22: Sc in each stitch around, working into the top of each bobble. (70 sc)
Rnd 23: Bob into each stitch around. (70 bob)
Rnd 24: Sc in each stitch around. (70 sc)
Rnd 25: Bob into each stitch around. (70 bob)
Rnd 26: Sc in each stitch around. (70 sc)
Rnd 27: Bob into each stitch around. (70 bob)
Rnd 28: Sc in each stitch around. (70 sc)
Rnd 29: Bob into each stitch around. (70 bob)
Rnd 30: Sc in each stitch around. (70 sc)
Checkpoint: After Round 30, the bag body should measure approximately 9 inches from the base floor. The textured area should show 5 clear horizontal rows of bobbles separated by single crochet rows.
Section 5: Eyelet Round for Drawstring
Rnd 31: (Ch 2, sk 2 sts, sc in next st) rep around. Work as follows: (ch 2, sk 2, sc in next) 23 times, then sc in last st. (23 eyelets, 70 stitches maintained)
The chain-2 spaces replace 2 skipped stitches with 2 chains, so the stitch count remains 70. On the following round, work into the chain-2 spaces as though they were stitches.
Rnd 32: Sc in each stitch and into each ch-2 space around. (70 sc)
Section 6: Rim and Scallop Edging
Rnd 33 (adjusted, recommended): Sc 34, inc, sc 34, inc. (72 sc)
Adding these 2 increases allows for exactly 12 scallop repeats.
Rnd 34 (Scallop Rim): (Sk 2 sts, 5 dc into next st, sk 2 sts, sl st into next st) 12 times. (12 scallops, 72 stitches consumed)
Fasten off MC. Weave in end securely.
Checkpoint: The finished crochet shell should measure approximately 11 inches tall from base to rim, with a firm cylindrical shape that holds itself upright.
Section 7: Flower Motifs
Make 6 Flower Motifs following the instructions under Special Stitches. Block each motif flat by dampening with water, pinning to blocking mats in a flat flower shape approximately 2.5 inches in diameter, and allowing to dry completely.
Placement: Sew the flower motifs onto the bag at Rounds 17 through 20, creating a horizontal band around the circumference. Space the 6 flowers evenly, placing one flower center at every 11th to 12th stitch. Overlap each motif slightly at its edges so the flowers appear to form a continuous garland.
Using the CA tail and yarn needle, whipstitch each motif firmly to the bag body around the outer petal edge. Bury all ends inside the bag.
Section 8: Drawstring
Cut 6 strands of MC, each 55 inches long. Hold all 6 strands together and twist or braid tightly until the cord measures approximately 45 inches. Knot at each end. Thread one end through the 23 eyelets from left to right on the front, and back from right to left on the back, so both cord ends emerge at the center front.
Thread one wooden bead onto each end of the drawstring below the eyelet row. Knot below each bead to secure.
For the tassel: Cut 12 strands of MC, each 8 inches long. Fold in half. Using a separate short piece of MC, tie around the folded end and secure to the drawstring cord ends below the beads, creating a short tassel bundle. Trim tassel ends evenly to approximately 2 inches.
Section 9: Strap Hardware Attachment
Mark the center point of the top edge at the left and right sides of the bag, approximately stitch 18 from center front on each side. These are your strap attachment points.
Using a leather punch or strong hand-sewing needle and waxed thread, attach one riveted leather tab at each side, securing it through the top 3 rounds of crochet and through the scallop base round. Attach one swivel snap hook to each leather tab loop.
Thread the leather or faux-leather strap through the adjustable slider, then snap each end to the swivel hooks. Adjust strap length as desired, typically 20 to 24 inches drop for crossbody wear.
Section 10: Base Insert
Place the oval leather insert inside the bag flat on the base. Use a few drops of fabric glue around the perimeter to adhere it to the interior base, or whipstitch through the leather and the bottom crochet round using a leather needle and waxed thread. This provides rigidity so the bag holds its shape when carried.
Size Customization Tips
To make the bag wider: Increase the foundation chain by 2 stitches and add 1 additional increase point per end in each oval base round. Every 2 additional stitches added adds approximately 1.4 inches to the bag circumference.
To make the bag taller: Add additional rounds in either the lower body band (Section 2) or the bobble section (Section 4). Adding 2 rounds of sc and 1 round of bobbles plus 1 round of sc adds approximately 1 inch to bag height.
To make a mini bucket style: Reduce foundation chain to 9, reduce oval base rounds to 5, and reduce overall body rounds proportionally.
Finishing and Blocking Your Crochet Bucket Bag
Weave in all ends using a yarn needle, running each tail through at least 1 inch of crochet fabric in two directions before trimming.
To block the finished bag, fill it with plastic bags or a rolled towel to hold the cylindrical shape. Dampen the exterior lightly with a spray bottle. Gently smooth all bobbles with your fingers to ensure even texture. Allow to dry completely upright before removing stuffing.
The scallop rim may be pinned outward while wet to encourage the scallops to open fully.
Care Instructions
Hand wash in cool water with a gentle wool or cotton wash. Do not wring. Press water out gently and roll in a clean towel to remove excess moisture. Reshape while damp and allow to dry flat or stuffed to maintain shape. Do not machine wash or tumble dry. Remove leather strap before washing. Spot clean leather components only with a damp cloth and leather conditioner as needed.
You Did It!
Thank you so much for choosing this Autumn Harvest Floral Bucket Bag crochet pattern. I hope you enjoyed the process as much as I enjoyed designing it. There’s something deeply satisfying about transforming yarn into a functional, beautiful accessory that you’ll reach for again and again. If you make this bag, I would absolutely love to see it! Tag me on Instagram or share a photo in our Facebook group.
If you loved this pattern, go ahead and save it to your Pinterest boards so you can find it easily when you’re ready to cast on. And please drop a comment below if you make one. I read every single comment, and seeing your finished projects honestly makes my day. Happy crocheting!