
Last summer, my sister called me in a panic. Her daughter’s first birthday party was three weeks away, and she wanted something handmade for the photos. Something special. Something that would make everyone ask, "Where did you get that?" I grabbed my hooks that night and started sketching.
Get the Ad-Free PDF Pattern
You can find the free pattern below, or you can purchase the ad-free printable PDF from my shop.
Get the Printable PDF →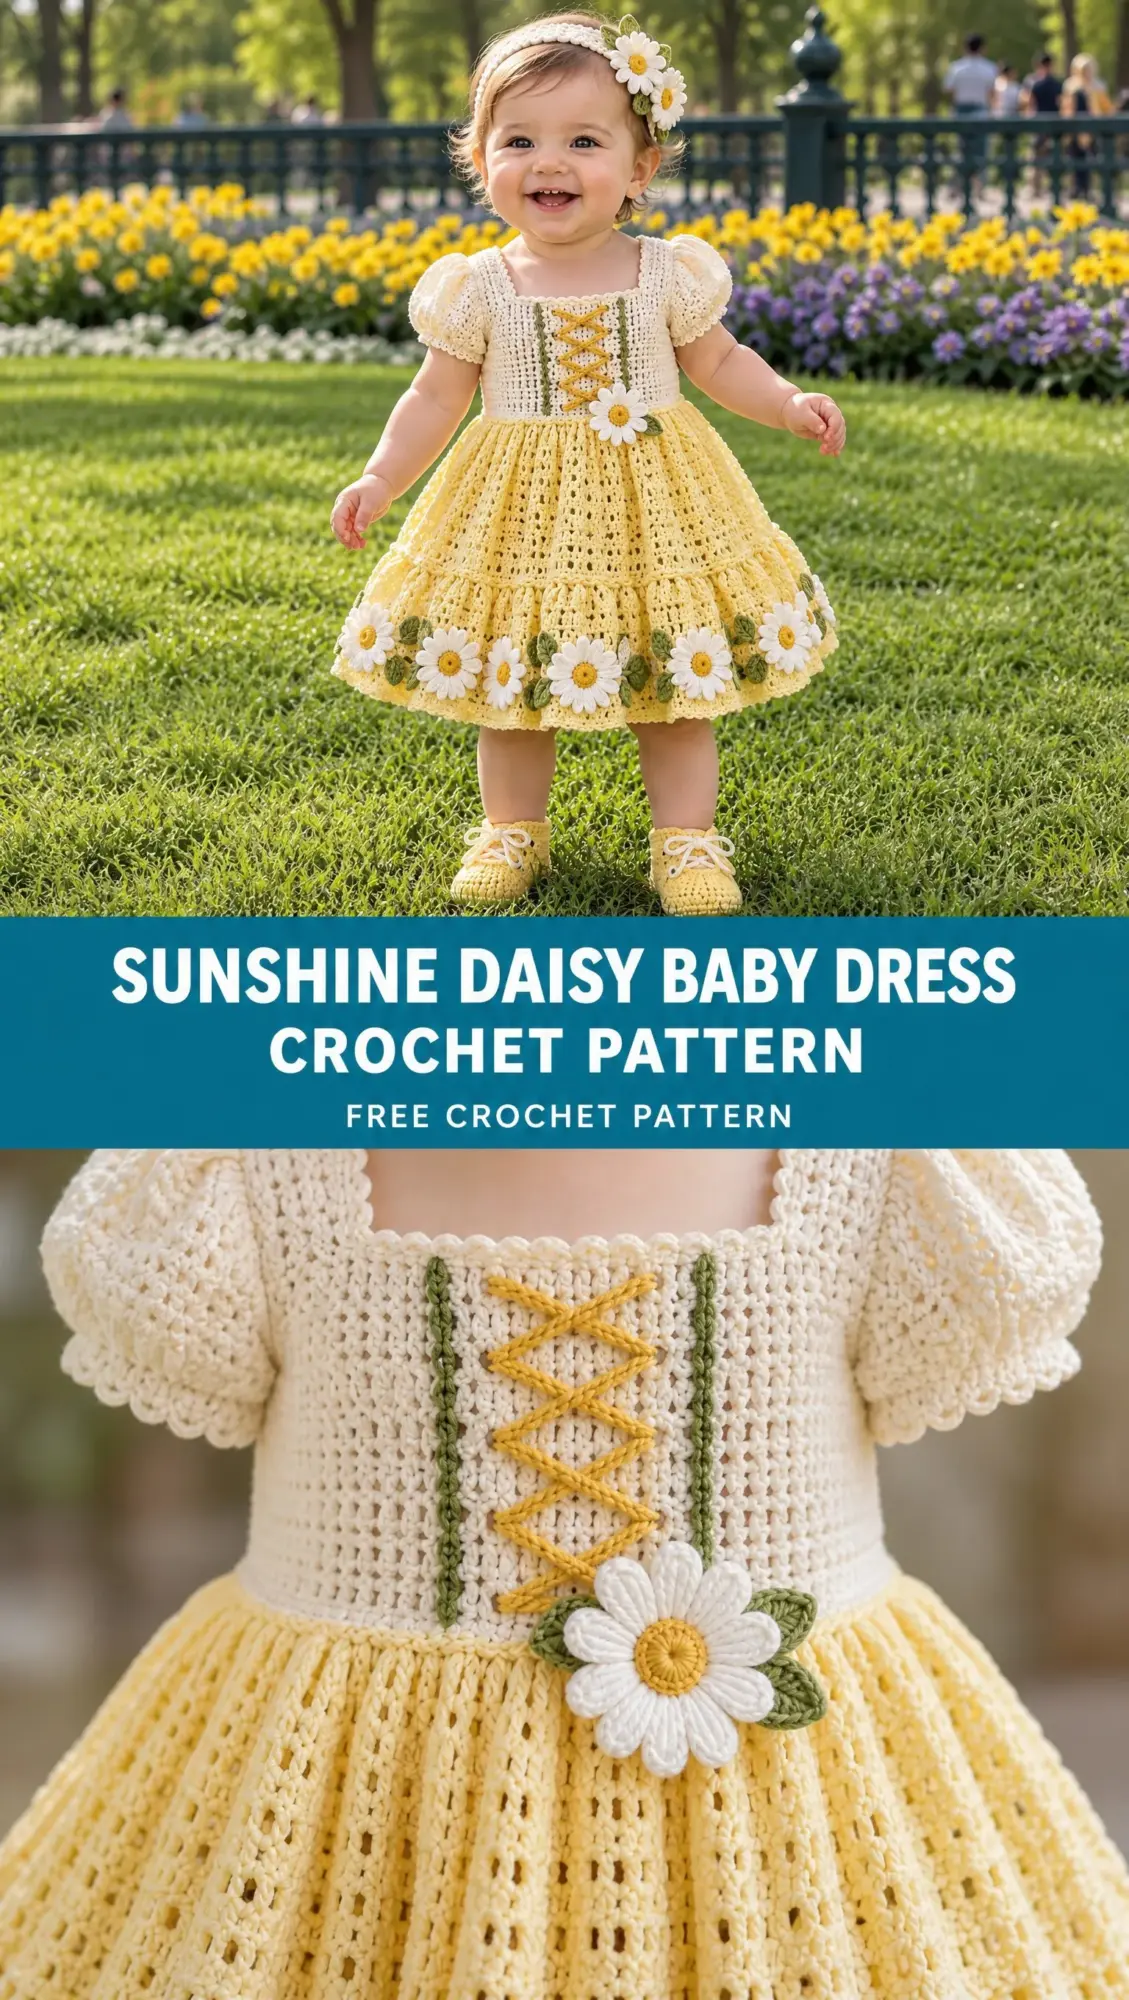
What came out of those late-night crochet sessions is this Sunshine Daisy Baby Dress. It has everything I love about making baby clothes: a cheerful color palette, sweet details that photograph beautifully, and construction that actually makes sense once you get going. The matching headband and booties were my sister’s idea, and honestly, they take the whole set from cute to absolutely adorable.
If you have been looking for a show-stopping baby dress pattern that works up faster than it looks, this is the one. The bodice comes together smoothly from the top down, the skirt has just enough texture to be interesting, and those little daisies around the hem? They are easier than you would think. Let me walk you through every single step.
About This Pattern
This Sunshine Daisy Baby Dress is rated as an intermediate level project. You should be comfortable with basic crochet stitches and working in the round before diving in. The suggested size fits babies 6 to 12 months, though I have included adjustments for smaller and larger sizes at the end.
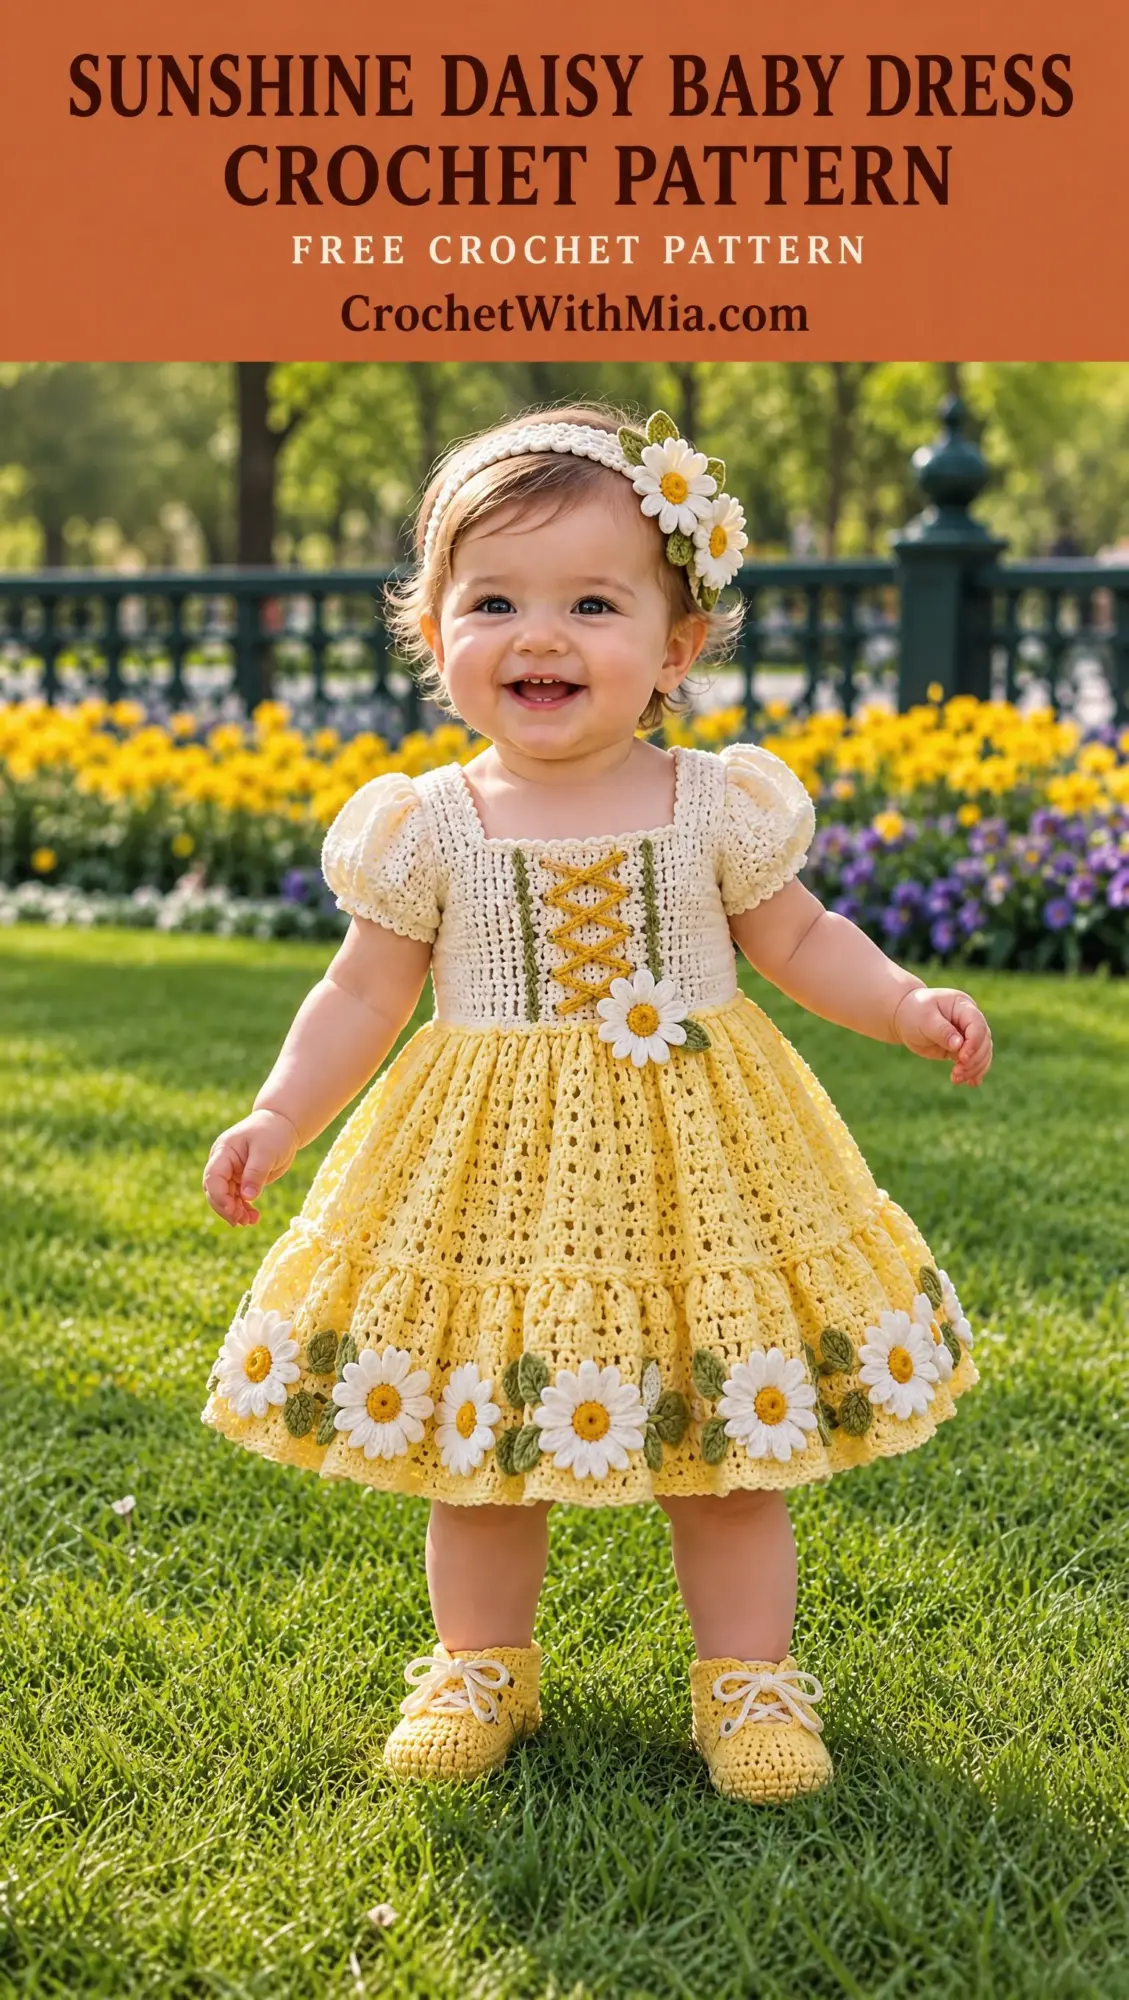
The finished look features a sunny yellow bodice, an ivory eyelet skirt with layered ruffles, daisy-inspired flower details, green leaf accents, a matching floral headband, and coordinating booties. It is the kind of set that makes people stop and stare at baby showers.
The dress is constructed top down, which means you start at the neckline and work your way to the hem. This method lets you try the dress on as you go and adjust the length easily.
Materials You Will Need
Gathering your supplies before you start will save you from frustrating mid-project trips to the craft store. Here is everything this pattern requires:
Yarn:
Cotton yarn works best for baby garments because it is breathable, washable, and soft against delicate skin. Avoid acrylic blends for this project since they do not have the same drape.
Tools:
Gauge
Getting your gauge right matters for fit, especially with baby clothes. Work a test swatch before starting the bodice.
20 double crochet stitches x 10 rows = approximately 10 cm x 10 cm
If your swatch is larger than this, try going down a hook size. If it is smaller, go up a hook size. Taking five minutes to check gauge now saves hours of frustration later.
Abbreviations
Let me explain every abbreviation you will encounter in this pattern. Even if you know these stitches well, a quick refresher never hurts.
Step 1: Creating the Bodice
The bodice forms the foundation of your dress. You will work it in sunshine yellow yarn, creating a soft square yoke shape that looks polished and professional.
Row 1: Chain 62 stitches. Join carefully to work in the round, making sure your chain is not twisted. A twisted foundation row will ruin your entire project, so take a moment to lay your chain flat and check it before joining.
Row 2: Chain 2 (this counts as your turning chain), then work a half double crochet (hdc) in each stitch around. Join with a slip stitch to the top of your beginning chain 2.
Row 3: This is where you create the neckline shaping. Work increases evenly across both the front and back sections. The increases help the bodice lie flat against the baby’s chest and back rather than bunching up.
Rows 4 through 12: Continue working hdc rounds. At each round, add increases at the sleeve corners to create that soft square yoke shape. The corners are where the front meets the sleeves and where the back meets the sleeves. Placing your increases here builds out the shoulder area naturally.
Working the Sleeves
Once you finish the yoke, you will separate the sleeve stitches from the body stitches.
Separate the sleeve stitches and work 5 to 6 rounds of hdc for each sleeve. These short sleeves give the dress a sweet, finished look without adding bulk.
To finish the sleeves, work a small scalloped edge using this sequence: sc, ch 2, skip 1 stitch around. This creates delicate little waves at the sleeve hem that catch the light beautifully.
Add ivory edging around the neckline using the same scalloped technique or a simple row of single crochet. The contrast color frames the baby’s face and ties into the skirt color.
Step 2: Adding Bodice Details
The decorative front lacing is what makes this dress stand out. It creates the look of a traditional dirndl or folk dress without any complicated construction.
Creating the Front Lacing:
Adding Leaf Accents:
The combination of ivory lacing and green leaves against the yellow bodice creates that signature daisy-inspired look.
Step 3: Building the Skirt
Now the fun really begins. Attach your ivory yarn at the waist where the bodice ends.
Round 1: Work double crochet (dc) evenly around the waist. Count your stitches and place a marker at the beginning of the round.
Round 2: Increase every 3rd stitch. This adds fullness to the skirt so it flares out nicely. Work 2 dc in every third stitch while working 1 dc in all other stitches.
Rounds 3 through 15: Continue working in dc and eyelet stitch pattern. The eyelet pattern is: dc, ch 1, skip 1 stitch around. This creates tiny holes throughout the skirt that let air flow through and give the fabric beautiful texture.
Creating Layered Ruffles
The ruffles add dimension and movement to the skirt. Babies love watching them swish when they move.
Yellow Ruffle:
Ivory Ruffle:
The layered effect makes the skirt look much more complex than it actually is. Each ruffle only takes about 15 to 20 minutes once you get your rhythm going.
Step 4: Making the Daisy Flower Border
These raised daisies are the star of the show. You will make several and attach them evenly around the skirt hem.
Flower Center
Using your golden yellow yarn:
Create a magic ring. Work 6 single crochet (sc) into the ring, then join with a slip stitch. Pull the ring closed.
The magic ring gives you a tight center with no hole. If you have never made one before, there are plenty of video tutorials online. It takes a little practice but becomes second nature quickly.
Petals
Switch to white yarn. Work 5 petals using this sequence:
Slip stitch into the center, chain 3, work 3 dc, chain 3, slip stitch back into the center.
Repeat this sequence 5 times total, once for each petal. The petals should fan out naturally around the golden center.
Attach your finished flowers evenly around the skirt hem. Space them so they frame the dress without looking crowded. Most dresses need 8 to 12 flowers depending on how full your skirt is.
Leaves
Using green yarn:
Chain 5 stitches. Work sc and hdc back along the chain to create small pointed leaves.
Sew one or two leaves beside each flower. The green pops against the ivory and yellow, making the daisies look more realistic.
Step 5: Adding the Waist Flower
Create one larger daisy using the same method as the border flowers. You can make it bigger by adding more single crochet to the center (try 8 instead of 6) and making slightly longer petals.
Sew this larger flower securely at the center waist where the bodice meets the skirt. It hides the transition and adds a beautiful focal point.
Make sure to sew it down firmly. Babies grab at everything, and you want this flower to stay put through multiple washes.
Step 6: Creating the Headband
The matching headband ties the whole set together perfectly.
Band:
Using ivory yarn, chain enough stitches to fit comfortably around the baby’s head. Measure an existing headband or hat if you are unsure. For a 6 to 12 month baby, this is typically around 35 to 40 cm.
Work rows of hdc until you reach your desired width. Most headbands look nice at about 2 to 3 cm wide.
Decoration:
Add two small yellow daisies using the same flower pattern from the border. Sew green leaves beside them.
Position the flowers slightly off-center for a more natural look, or center them if you prefer symmetry.
Step 7: Making the Matching Booties
Complete the set with coordinating booties. Make two identical booties.
Sole
Work an oval shape using single crochet with increases. Start with a chain of about 10 stitches, then work around it, adding increases at each end to create the oval. Continue until the sole measures approximately 9 to 10 cm for a 6 to 12 month baby.
Upper
Continue upward from the sole, working hdc rounds without increases. This creates the sides of the bootie. Work 4 to 5 rounds depending on how tall you want the ankle portion.
Finish
Add ivory straps by chaining a strip and attaching it across the top of the bootie. Decorate each bootie with a small daisy to match the dress and headband.
Finishing Your Sunshine Daisy Baby Dress
Take your time with the finishing steps. They make the difference between homemade and handmade.
Weave in all ends using your yarn needle. Cotton yarn can work loose over time, so weave each end through at least 2 inches of stitches in different directions.
Block lightly to shape. Wet blocking works well for cotton. Soak the dress in cool water, gently squeeze out excess moisture (never wring), and lay flat to dry. Pin the skirt into shape if needed.
Check all sewn decorations to make sure they are secure. Give each flower and leaf a gentle tug. If anything feels loose, add a few more stitches.
Wash gently according to your yarn’s care instructions before gifting. This removes any oils from your hands and makes the dress ready to wear.
Customization Tips
For larger sizes: Increase the starting chain by 6 stitches and add extra skirt rounds. You can also add length to the bodice by working additional rounds before separating the sleeves.
For newborn size: Reduce the bodice length by working fewer rounds, and decrease skirt fullness by reducing the number of increases in round 2.
Color variations: This dress looks beautiful in other color combinations too. Try soft pink with white daisies, mint green with yellow centers, or lavender with cream accents. The daisy theme works with almost any color palette.
Why This Pattern Works
What I love about this Sunshine Daisy Baby Dress pattern is how impressive it looks compared to how straightforward it actually is. The top-down construction means no seaming the bodice. The eyelet skirt pattern is just a two-stitch repeat. And those daisies that look so intricate? They are basically just chains and double crochets arranged in a circle.
The hardest part is honestly sewing on all the decorations at the end. But even that is just patience, not skill.
My sister’s daughter wore her dress for the birthday photos, and three other moms asked for the pattern before the party was over. It is one of those projects that makes you look like a crochet wizard even if you are still learning.
Thank you so much for choosing this pattern. I hope you enjoy every stitch of making it. When you finish your Sunshine Daisy Baby Dress, I would absolutely love to see it! Tag me on Instagram or share a photo in my Facebook group. Seeing your finished projects is genuinely the best part of designing patterns.
If you found this helpful, save it to your Pinterest boards so you can find it again when you need a baby shower gift or want to make another size. And please drop a comment below if you make this dress. I read every single one, and hearing about your projects always makes my day!
Want a Quick & Easy Printable Version?
Get a clean, beautifully formatted PDF of this pattern — easy to follow step by step, ready to print or save on any device. No scrolling, no distractions, just the pattern.
Get the Printable PDF →