
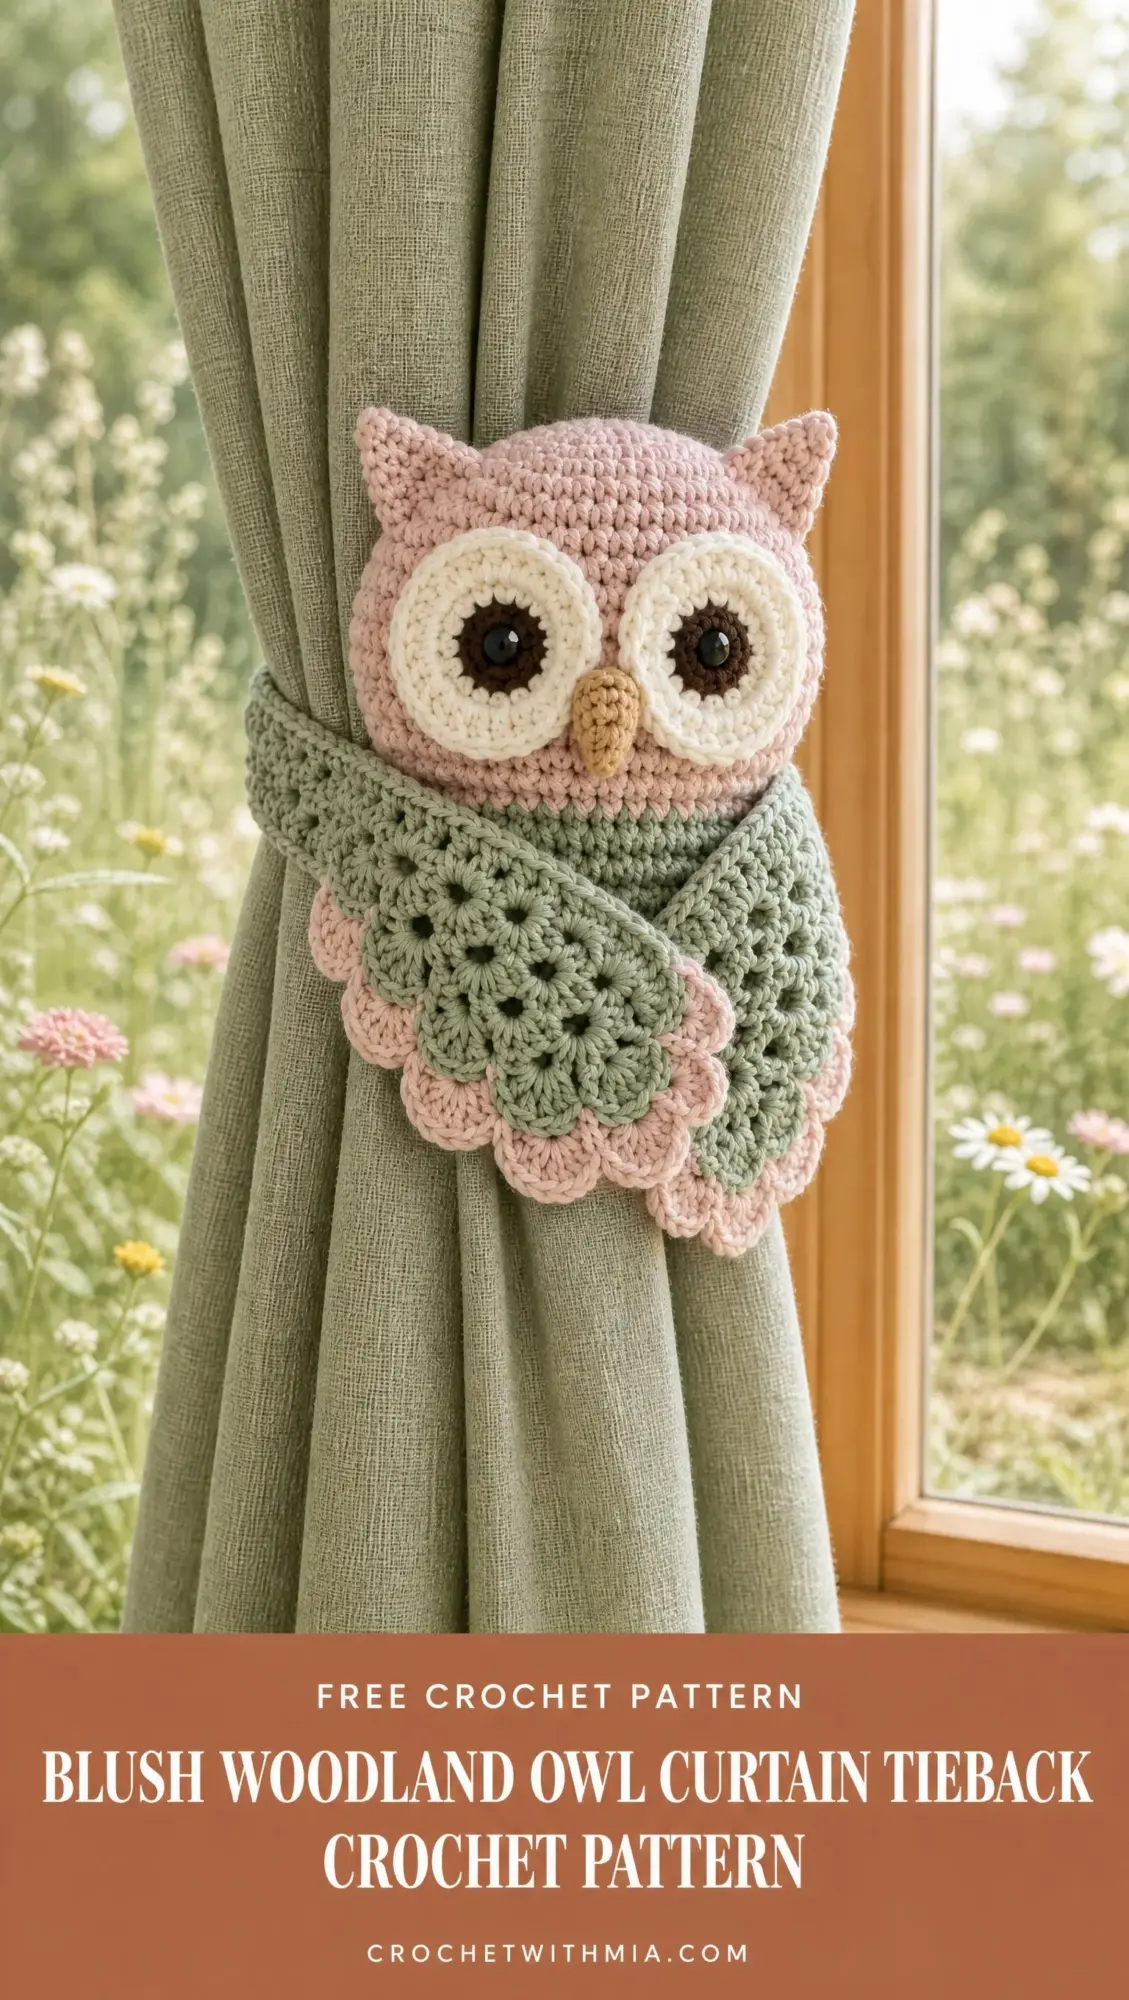
I’ve been on the hunt for the perfect nursery accent piece, and this adorable owl curtain tieback is exactly what I was looking for. The soft dusty blush paired with sage green wings creates such a sweet woodland vibe without being too cutesy.
Get the Ad-Free PDF Pattern
You can find the free pattern below, or you can purchase the ad-free printable PDF from my shop.
Get the Printable PDF →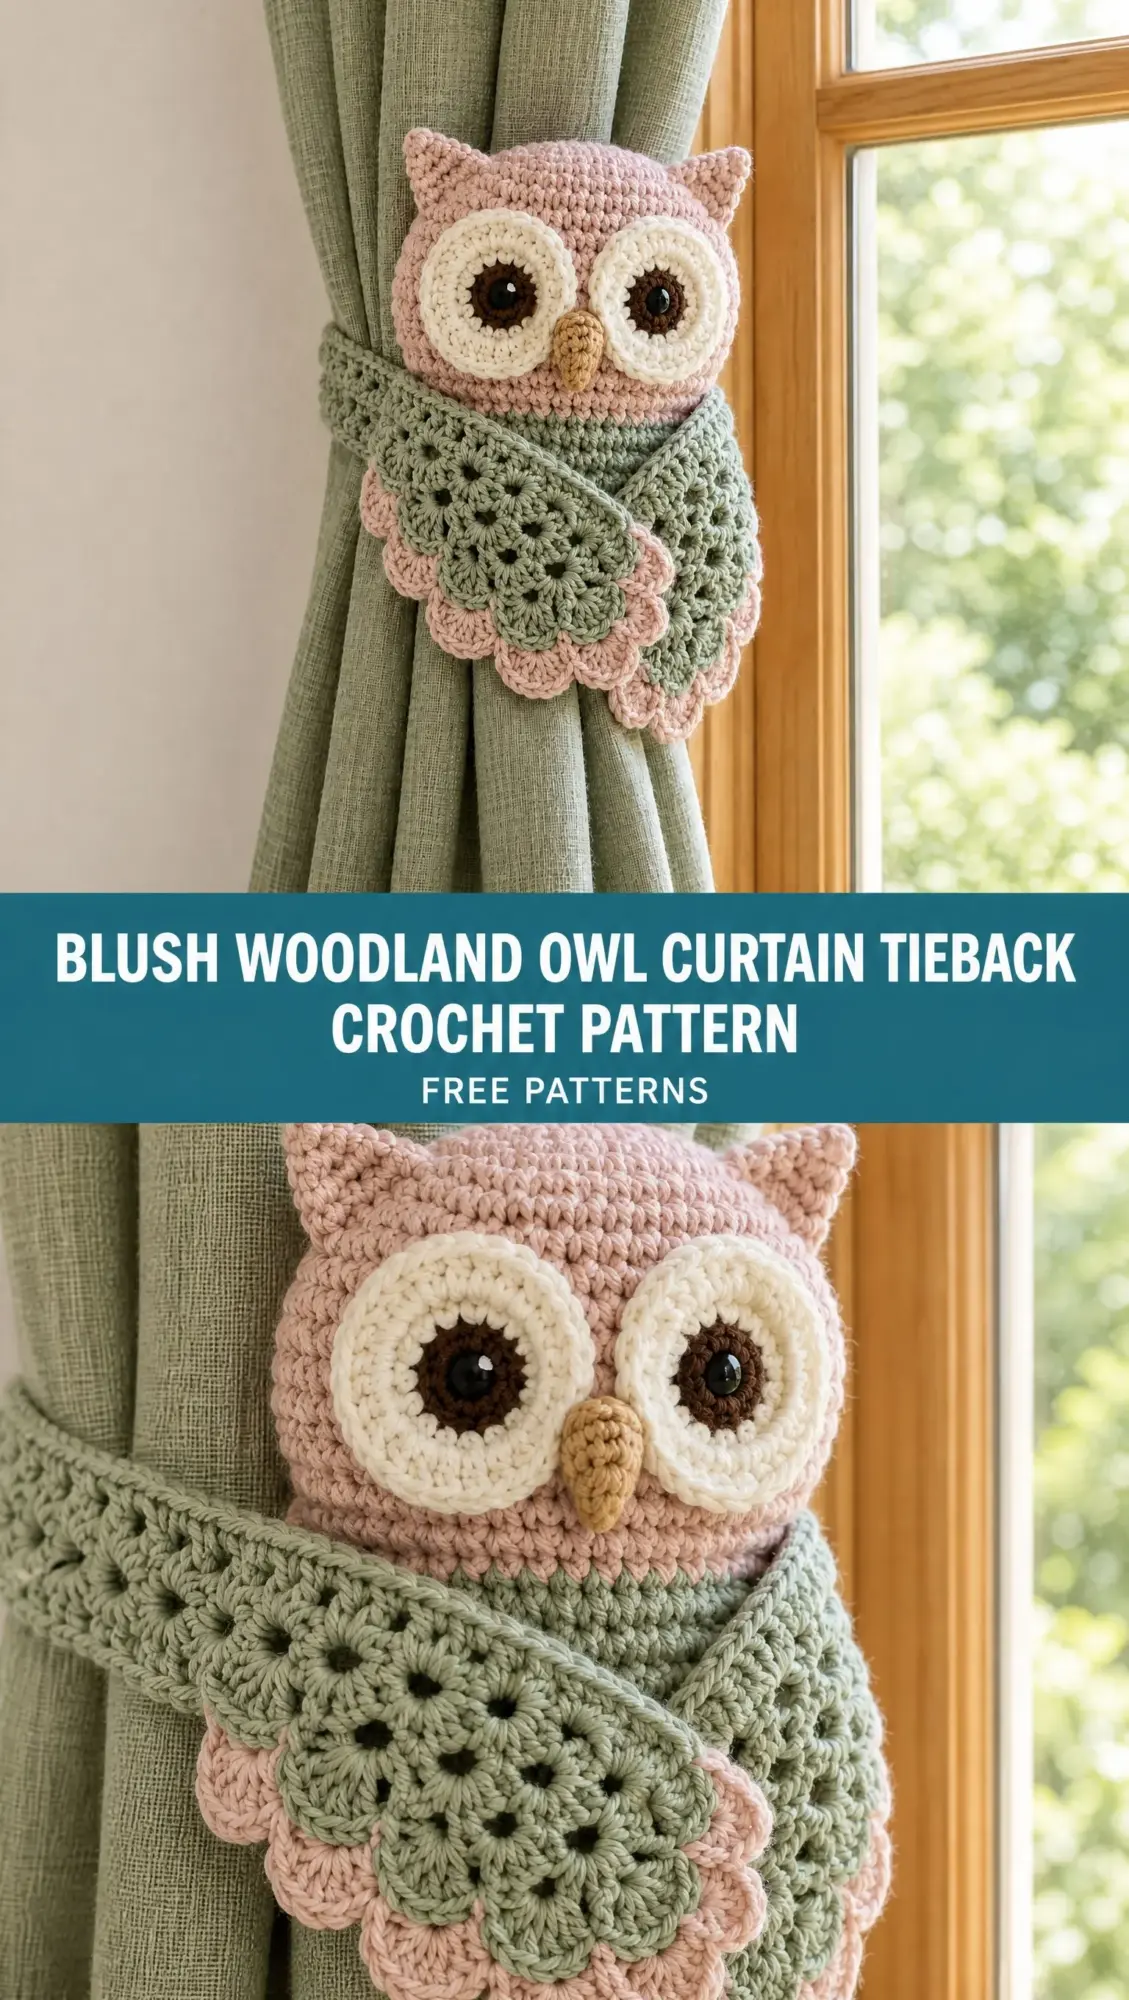
This little owl sits right on your gathered curtain, holding it back with a hidden band while looking absolutely precious. The crossed scalloped wings give it texture and dimension that photographs beautifully.
If you’ve been wanting to make something decorative that actually serves a purpose, this is your project. It’s intermediate level, uses basic stitches you probably already know, and makes a stunning handmade gift for new parents or anyone who loves whimsical home decor.
About This Owl Curtain Tieback Crochet Pattern
This pattern creates a dusty blush owl with cream eye rounds, a tan beak, a sage green breast chevron, and two gorgeous crossed fan stitch wings. The clever construction includes a concealed fastening band that wraps around your gathered curtain and buttons closed behind the fabric. This means the decorative wings don’t bear any weight. They just look pretty while the sturdy band does all the work.
The finished owl measures approximately 22 to 25 cm tall when assembled. The head spans about 11 to 12 cm across, and each wing measures roughly 10 to 11 cm wide by 12 to 15 cm long depending on your shell gauge. The band is custom made to fit your own curtain, so you’ll measure that before starting.
Pattern status: This is an original, untested interpretation. Stitch counts have been checked on paper, but finished measurements and yarn use are estimates. Your finished piece will vary slightly from the reference image, and that’s completely normal. Make a swatch and check the fit before final assembly.
Skill Level
This project is rated intermediate. You should be comfortable working in rounds and rows, making increases and decreases, shell stitch, surface embroidery, and sewing pieces together. If you’ve made amigurumi before, you have most of the skills needed.
Allow several making sessions plus drying time for blocking. This isn’t a one evening project, but each component works up relatively quickly on its own.
Materials Needed
Yarn:
Smooth DK or light worsted weight cotton or cotton rich yarn, approximately 110 to 125 meters per 50 grams. Use the same yarn weight throughout for consistent results.
These are generous purchasing estimates, not measured consumption. You’ll likely have yarn left over.
Hooks:
Notions:
Optional: 2.5 to 3 cm wide cotton tape for reinforcing the band if you have heavy curtains.
Gauge and Fabric
Target gauge with 3.5 mm hook: 18 single crochet (sc) and 20 rows equals 10 cm.
To make a swatch: Chain (ch) 22. Work a single crochet in the second chain from hook and in each remaining chain across. That gives you 21 stitches. Work 23 more rows of sc, chaining 1 and turning at the end of each row. Wash and dry flat, then measure the central 10 cm.
Adjust your hook size to get dense fabric with no stuffing showing through. The shell gauge for the wings is more flexible. Just measure both wings and make sure they match each other.
Abbreviations and Conventions
Let me define all the stitches you’ll use:
sc2tog (single crochet two together): Insert hook in next stitch, yarn over and pull up a loop. Repeat in the following stitch. Yarn over and pull through all 3 loops on hook. This decreases by one stitch.
Shell: Work 5 dc in the same stitch.
Reading the pattern: Numbers in parentheses are your final stitch counts. Repeat instructions in brackets the stated number of times.
Turning chains: The turning ch 1 never counts as a stitch. The turning ch 3 counts as one dc in the wings only.
Work circular pieces in a continuous spiral. Mark the first stitch and move your marker each round. Do not join rounds unless the pattern tells you to. Work through both loops unless otherwise noted.
For all sc rows: ch 1, turn, then work the stated row.
Color changes: Change color on the last yarn over of the previous stitch.
Tails: Leave 25 to 35 cm sewing tails on small parts.
How the Owl is Constructed
Understanding how everything fits together helps a lot. You’ll make:
The head discs get lightly padded and sewn together. The body panels get lightly padded and sewn together. The head attaches to the top of the body. The band sews to the back. The wings cross decoratively over the front.
Placement note: Left and right always mean as you look at the owl from the front.
Important safety note: This is a decorative curtain accessory, not a toy. Keep the band and curtain cords out of reach of children. Secure all sewn pieces and buttons firmly.
Head Discs
Make 2 in blush using your 3.5 mm hook.
Rnd 1: 6 sc in MR. Tighten securely. (6)
Rnd 2: Inc in each st around. (12)
Rnd 3: [Sc 1, inc] 6 times. (18)
Rnd 4: [Sc 2, inc] 6 times. (24)
Rnd 5: [Sc 3, inc] 6 times. (30)
Rnd 6: [Sc 4, inc] 6 times. (36)
Rnd 7: [Sc 5, inc] 6 times. (42)
Rnd 8: [Sc 6, inc] 6 times. (48)
Rnd 9: [Sc 7, inc] 6 times. (54)
Rnd 10: [Sc 8, inc] 6 times. (60)
Rnd 11: [Sc 9, inc] 6 times. (66)
Sl st in next st and fasten off. The slip stitch is not part of the count.
Leave a 90 cm tail on the back disc for sewing later. Lay both discs flat. A little cupping is acceptable, but if they curl strongly, your tension is too tight. Keep them unjoined until the face is sewn on.
Ear Tufts
Make 2 in blush using your 3.5 mm hook.
Ch 7.
Row 1: Sc in second ch from hook and next 5 ch. (6)
Row 2: Sc across. (6)
Row 3: Dec, sc 2, dec. (4)
Row 4: Sc across. (4)
Row 5: Dec twice. (2)
Row 6: Dec. (1)
Fasten off with a sewing tail. The 6 stitch starting edge is the base. The final stitch is the tip.
Body Panels
Make 2 in blush using your 3.5 mm hook.
Start at the lower edge. Ch 19.
Row 1: Sc in second ch from hook and each ch across. (18)
Ch 1 and turn between every row.
Row 2: Inc, sc 16, inc. (20)
Row 3: Inc, sc 18, inc. (22)
Row 4: Inc, sc 20, inc. (24)
Row 5: Inc, sc 22, inc. (26)
Rows 6 through 18: Sc in every st. (26 each row)
Row 19: Dec, sc 22, dec. (24)
Row 20: Sc across. (24)
Row 21: Dec, sc 20, dec. (22)
Row 22: Sc across. (22)
Row 23: Dec, sc 18, dec. (20)
Row 24: Sc across. (20)
Row 25: Dec, sc 16, dec. (18)
Row 26: Sc across. (18)
Fasten off. Leave a 100 cm tail on the back panel for sewing.
Cream Eye Rounds
Make 2 using cream and your 3.5 mm hook.
Work head rounds 1 through 5:
Rnd 1: 6 sc in MR. (6)
Rnd 2: Inc in each st. (12)
Rnd 3: [Sc 1, inc] 6 times. (18)
Rnd 4: [Sc 2, inc] 6 times. (24)
Rnd 5: [Sc 3, inc] 6 times. (30)
Sl st in next st and fasten off with a sewing tail. Expected diameter is about 5 to 5.5 cm.
Deep Brown Centers
Make 2 using dark brown and your 3.5 mm hook.
Rnd 1: 6 sc in MR. (6)
Rnd 2: Inc in each st around. (12)
Sl st in next st and fasten off.
Sew one center to each cream disc, centered or shifted slightly toward the middle of the face. Optionally embroider one tiny cream highlight in each brown center for that classic eye sparkle. This version uses sewn yarn eyes with no plastic eye hardware.
Tiny Tan Beak
Make 1 using tan and your 3.5 mm hook.
Ch 5.
Row 1: Sc in second ch from hook and next 3 ch. (4)
Row 2: Sc across. (4)
Row 3: Dec twice. (2)
Row 4: Sc across. (2)
Row 5: Dec. (1)
Fasten off. Sew as a flat triangle with the wide end above and the point facing down, overlapping the inner lower edges of the cream eyes slightly.
Open Fan Stitch Wings
Make 2 identical panels using sage and your 4 mm hook.
These flexible shell panels create the beautiful layered wing effect. The starting edge becomes the shoulder and the final scalloped edge becomes the feather tips. You’ll sew them diagonally in opposite directions to form the crossed wings.
Foundation and Shell Rows
Foundation: Ch 20 loosely.
Row 1: Sc in second ch from hook and each remaining ch. (19 sc)
Row 2 (full shells): Ch 1, turn. Sc in first st. [Skip 2 sts, 5 dc in next st, skip 2 sts, sc in next st] 3 times. (3 shells + 4 sc = 19 sts)
Row 3 (offset shells): Ch 3, turn. This counts as first dc. Work 2 dc in the first sc. Skip 2 dc, sc in the third dc of the first shell, skip 2 dc. [5 dc in next sc, skip 2 dc, sc in the third dc of the next shell, skip 2 dc] twice. Work 3 dc in the final sc. (2 full shells + two 3 dc edge groups + 3 sc = 19 sts)
Row 4 (full shells): Ch 1, turn. Sc in first dc. [Skip 2 dc, 5 dc in next sc, skip 2 dc, sc in next dc] 3 times. The final sc goes into the top of the turning ch 3. (3 shells + 4 sc = 19 sts)
Rows 5 through 10: Repeat Rows 3 and 4 three times, alternating offset and full shell rows. Row 10 is a full shell row. (19 sts each row)
Row 11: Repeat Row 3 in sage. Change to blush on the final yarn over of the last dc. (19 sts)
Row 12 (pink feather tips): Repeat Row 4 in blush. Fasten off without straightening or filling the valleys between the 3 shells. (19 sts)
Shape and Finish Wings
Weave ends into the back of solid stitches, not across open gaps. Wet block both wings to the same size, preserving the three pink scallops. Do not stretch the gaps aggressively. The shoulder edge may be gathered slightly when sewn to the owl. Keep the pink feather edge free.
Length adjustment: Before Rows 11 and 12, add pairs of Rows 3 and 4 in sage if you need longer wings. Each extra pair keeps the stitch pattern aligned. For shorter wings, omit one pair from Rows 5 through 10. Always finish with an offset sage row followed by a full shell blush row.
Check before sewing: Lay the wings over the body. Each should reach diagonally from an upper side to the opposite lower side, with the tips overlapping below the breast. The open spaces are decorative. The hidden band carries the load.
Adjustable Curtain Band
Measure Your Curtain First
Gather your curtain at the intended height. Wrap a measuring tape around the bundle without compressing it hard. Record that circumference as C. Make the finished band approximately C + 5 cm long to allow button overlap.
Example: For C = 30 cm, make a band about 35 cm long. Always check on your actual curtain before fastening off.
Sage Band Using 3.5 mm Hook
Row 1: Ch 8. Sc in second ch from hook and each remaining ch. (7)
Row 2 onward: Ch 1, turn. Sc in every st. (7)
Repeat until the strip measures approximately C + 1 cm, finishing on a full row. At the target gauge, each 2 rows adds about 1 cm.
Buttonhole row A: Ch 1, turn. Sc 2, ch 3, skip 3 sc, sc 2. (4 sc + 3 ch)
Next row: Ch 1, turn. Sc 2, work 1 sc in each of the 3 chains, sc 2. (7)
Next 2 rows: Ch 1, turn. Sc across. (7 each row)
Buttonhole row B: Repeat buttonhole row A. (4 sc + 3 ch)
Next row: Ch 1, turn. Sc 2, 1 sc in each of the 3 chains, sc 2. (7)
Final 2 rows: Ch 1, turn. Sc across. (7 each row)
Fasten off and weave in ends.
These last 8 rows add approximately 4 cm, giving you the target C + 5 cm. Confirm that your buttons pass through the holes snugly. If needed, choose buttons that fit the completed holes. Do not force oversized buttons through the crochet.
Optional Reinforcement for Heavier Curtains
Cut cotton tape to fit the solid portion of the band, ending before the first buttonhole. Turn tape ends under by 1 cm and stitch the tape to the inside of the band with small sewing stitches. Avoid stretching the crochet. Keep the buttonholes clear. This reinforcement limits lengthwise stretch but does not replace checking the curtain fit.
Set the Closure
Wrap the band around the gathered curtain with the buttonhole end over the starting end. Mark two button positions on the starting end through the holes. Sew both buttons securely at those marks with matching sewing thread, through the reinforcement if used.
Both buttons close together for stability. Move the buttons if the fit needs adjustment. The band should stay at the selected height without crushing the folds. If it slides, shorten the fitted circumference slightly and retest.
Place the closure behind the curtain or at its wall facing side. Do not rely on the wings to tighten the curtain.
Assembly Instructions
Step 1: Build the Face
Place the front head disc right side up. Pin the cream eye discs side by side, with their inner edges almost touching and their centers slightly above the head center. Leave a narrow blush outline around the face.
Sew the cream outer edges down with small whipstitches, catching only the front disc. Sew the beak between and just below the eyes. Secure all tails on the wrong side.
Step 2: Close the Head and Add Ear Tufts
Put the two head discs wrong sides together and align all 66 edge stitches. Insert the 6 stitch base of one tuft between the discs at approximately 10 o’clock and the other at 2 o’clock, tips pointing outward.
Using the back disc tail, whipstitch corresponding outer loops around the discs and through the tuft bases where they meet the seam. Leave an opening of about 12 stitches at the bottom.
Add a thin, even layer of stuffing. Aim for a softly padded disc about 1.5 to 2 cm thick, not a ball. Close the remaining seam. Secure the yarn and bury the tail. Flatten gently with your hands.
Step 3: Pad the Body
Place body panels wrong sides together, aligning the starting edges and all row ends. Whipstitch the lower edges and both sides, catching corresponding edge stitches or row ends.
Add just enough stuffing to prevent hollowness, keeping the body fairly flat. Close the top 18 stitch edges together. Secure and bury the tail.
Step 4: Join the Head and Body
Place the head over the top of the body with about 2 cm of overlap. Pin centrally. Sew across the overlap on the back, then take a second line of small stitches along the underside of the head on the front.
Catch solid crochet fabric, not stuffing alone. The join should span roughly 7 to 8 cm so the head does not flop.
Step 5: Embroider the Narrow Sage Chevron
Mark a V shape on the upper body just below the head. The arms should be about 6 cm apart with the center point about 2 cm lower.
With sage yarn, work short chain stitches along the marked V. For each chain stitch, bring the needle up, insert close to the same point, bring it up a short distance ahead inside the yarn loop, and draw gently snug. Finish with a tiny anchoring stitch. Keep this accent narrow. Do not fill the whole breast.
Step 6: Attach the Hidden Band
Close the band on the curtain and mark the front center. Remove it. Center the owl over that mark with the band running horizontally behind the upper third of the body, just below the head join.
Sew a rectangle about 6 cm wide by the band’s width through the band and back body panel. Keep stitches off the owl’s front. Add a second pass at both vertical ends. Avoid sewing the band into a permanent closed loop.
Step 7: Position the Two Wings
With the owl face up, pin the first wing’s foundation edge along the upper left side of the body, just beneath the head. If it is too wide, run a gathering stitch through the foundation edge and ease it to about 6 cm. Point the blush scallops diagonally toward the lower right.
Pin the second wing the same way at the upper right, pointing toward the lower left, so the two panels overlap in an X below the chevron. Keep both eyes, the beak, and the narrow V visible. Place the second wing over the first at the crossing. Adjust the angles until the scallops sit evenly.
Step 8: Sew Without Closing the Open Fans
Sew each gathered foundation edge firmly to the upper side of the body. Add a few discreet anchoring stitches down the outer side of each wing.
Secure the crossing with 2 to 3 small stitches through solid shell stitches and the front body panel. Leave the pink scalloped tips and most fan openings free. Hide all tails inside the body.
Step 9: Fit on the Curtain
Wrap the band around your curtain with the owl facing the room. Close both buttons behind the gathered fabric. Arrange the curtain folds evenly above and below the owl.
Check that the head is upright and the crossed wings lie against the body. Reposition the buttons or the body to band seam if the owl tilts.
Troubleshooting Common Issues
Head leans forward: Remove excess stuffing and widen the head to body seam. Make sure the band is attached high enough on the body.
Tieback slides: Adjust the band fit. Add the optional cotton tape if the crochet stretches. A very heavy curtain may need a conventional wall supported tieback behind this decorative owl.
Wing edge flares: Check that each full shell contains exactly 5 dc and each row totals 19 stitches. Block gently.
Wings hide the chevron: Move the crossing lower and angle the shoulders outward.
Face puckers: Loosen the eye sewing stitches. Do not pull the cream rounds tighter than their natural circumference.
Care Instructions
Follow your yarn’s care instructions. For washable yarn and stuffing, gently hand wash, press out water in a towel, and dry flat with the wings shaped. Do not hang wet. Avoid ironing the padded parts. Check the button and band seams periodically.
Completion Checklist
Before calling your owl finished, verify:
Your Project Notes
Keep track of your own details for this project:
Thank you so much for choosing this pattern. I hope this sweet little owl brings a smile every time you walk past your window. If you make one, I would absolutely love to see it. Tag me on Instagram or share a photo in our Facebook group.
Don’t forget to save this pattern to your Pinterest boards so you can find it again when you’re ready to start. And if you have any questions or want to share how yours turned out, drop a comment below. Happy crocheting!
Want a Quick & Easy Printable Version?
Get a clean, beautifully formatted PDF of this pattern — easy to follow step by step, ready to print or save on any device. No scrolling, no distractions, just the pattern.
Get the Printable PDF →