
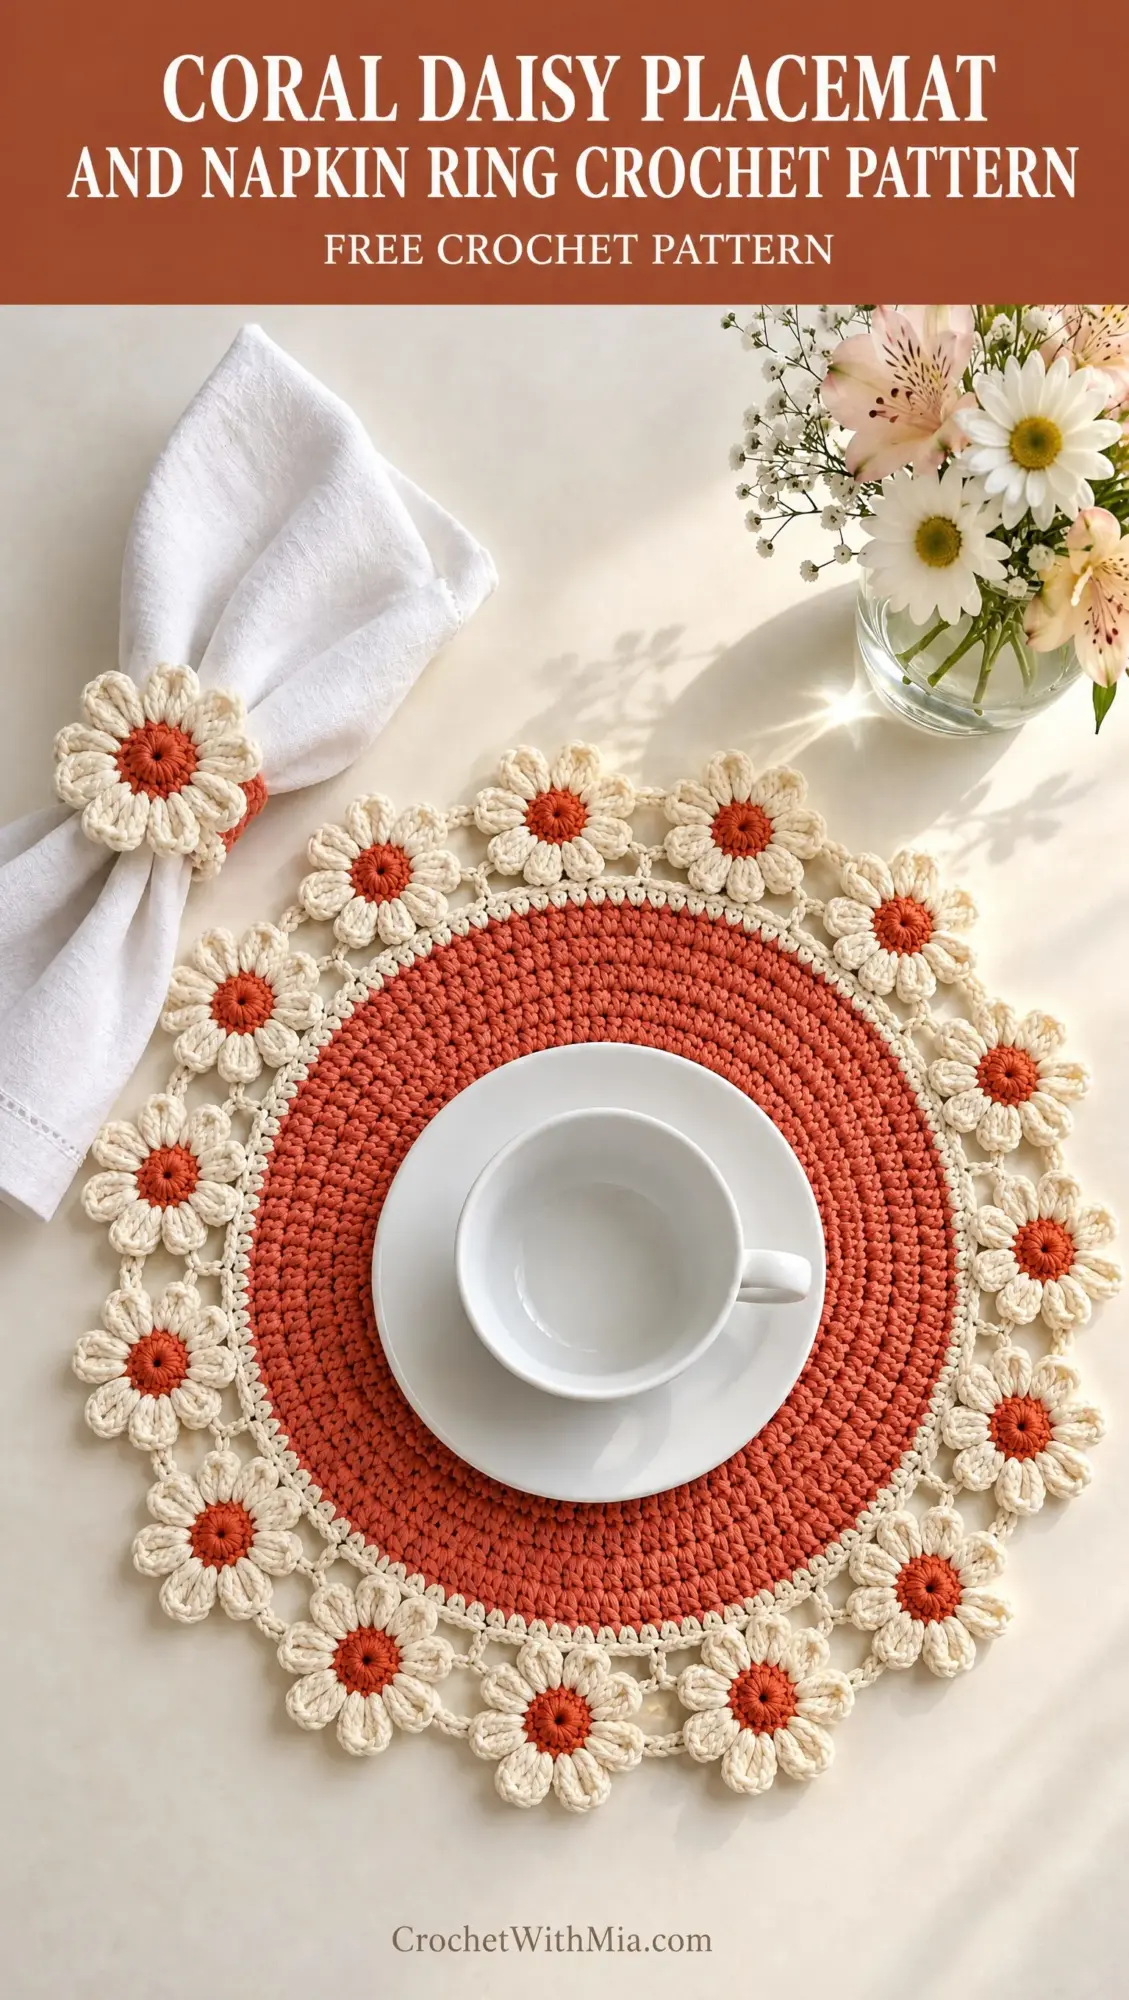
When I sat down to design this table set, I had a few specific goals in mind. I wanted something that felt fresh and springlike, worked up in simple stitches that wouldn’t frustrate anyone, and had that wow factor you get when handmade meets functional. The combination of the warm coral center with those cheerful daisies floating around the edge just makes me so happy every time I look at it.
Get the Ad-Free PDF Pattern
You can find the free pattern below, or you can purchase the ad-free printable PDF from my shop.
Get the Printable PDF →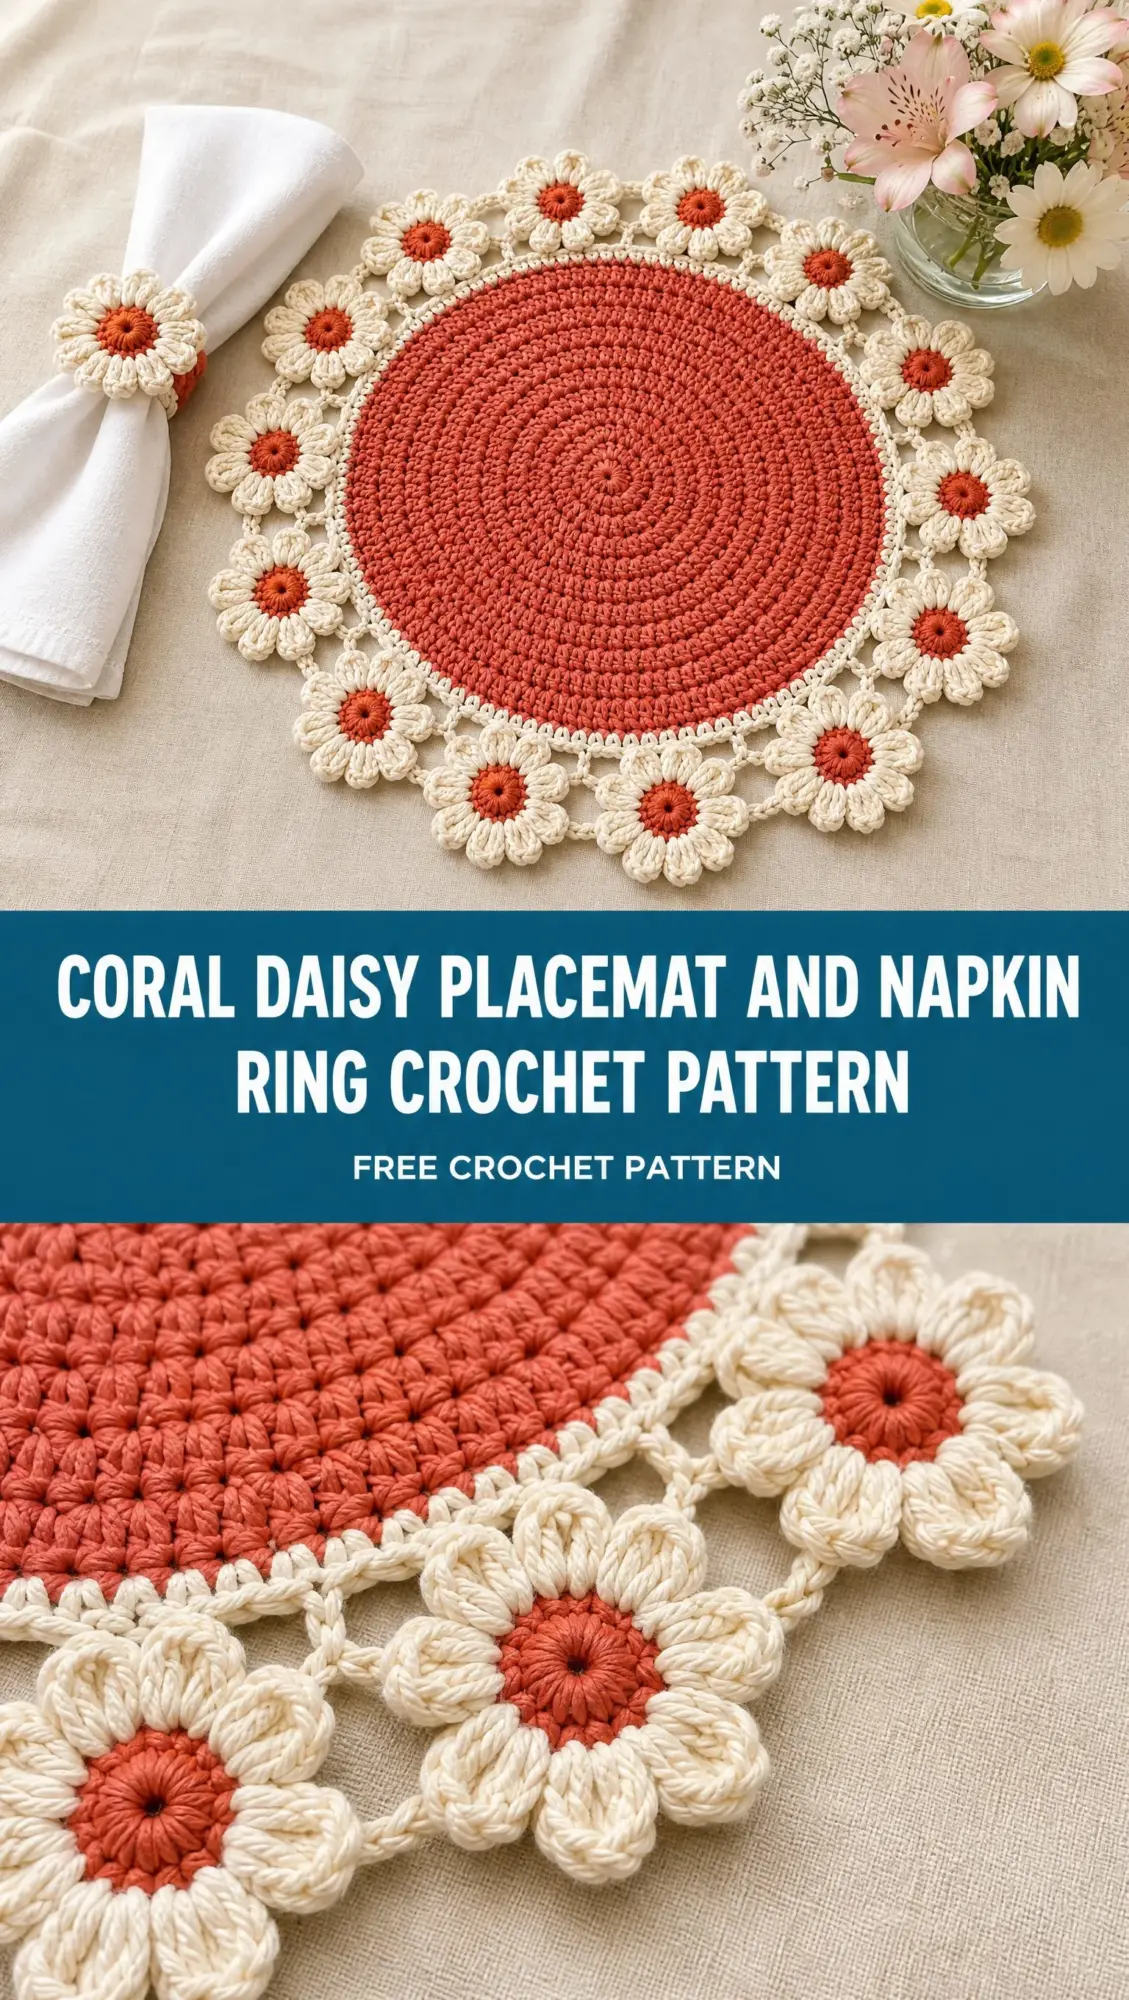
I also really wanted the placemat to have some subtle texture without being complicated. Those concentric ridges you see in the coral section? They come from a simple front loop technique that looks way more impressive than it actually is to work. And the dimensional daisies give you that satisfying feeling of making something special without requiring advanced skills.
I am SO pleased with how this turned out. The whole set feels like sunshine on a table, and I cannot wait for you to make your own!
About This Pattern
This Coral Daisy Placemat and Napkin Ring crochet pattern creates a stunning table setting that measures approximately 14 to 16 inches in diameter for the placemat. The matching napkin ring features a single large daisy and adjusts to fit standard cloth napkins. Together, they make an absolutely gorgeous gift for housewarmings, bridal showers, or anyone who appreciates handcrafted beauty on their table.
The skill level is intermediate, which means you should be comfortable with basic stitches and working in the round. If you have made a hat or a circular dishcloth before, you have all the skills you need. The most "advanced" techniques here are the magic ring and front loop only stitches, and I will walk you through both.
The construction is straightforward. You will work the main placemat from the center outward in continuous rounds, add a cream border, then make individual daisy motifs that get joined around the edge. The napkin ring is even simpler, just a small band with one pretty daisy sewn on top.
Materials You Will Need
Gathering your supplies before you start makes the whole process smoother. Here is everything the pattern calls for:
Yarn:
Cotton yarn is ideal for this project because it holds its shape beautifully, washes well, and lies flat on the table. Look for a worsted weight or DK weight cotton. Brands like Lion Brand 24/7 Cotton, Lily Sugar’n Cream, or Paintbox Cotton work wonderfully.
Tools:
If you tend to crochet tightly, go up to the 4 mm hook. If you work loosely, stick with the 3.5 mm. The goal is a fabric that is firm enough to lie flat but not so stiff that it feels like cardboard.
Stitch Abbreviations and Definitions
Before we dive into the instructions, let me explain every stitch abbreviation you will encounter. Even if you know these already, a quick refresher never hurts.
ch = chain: The most basic crochet stitch. Yarn over, pull through the loop on your hook. This creates the foundation for most projects and is used throughout for turning chains and petal shaping.
sl st = slip stitch: Insert hook, yarn over, pull through both the stitch and the loop on your hook in one motion. Used mainly for joining rounds and finishing petals.
sc = single crochet: Insert hook, yarn over, pull up a loop (2 loops on hook), yarn over, pull through both loops. This is a short, tight stitch that creates a dense fabric.
hdc = half double crochet: Yarn over, insert hook, yarn over, pull up a loop (3 loops on hook), yarn over, pull through all 3 loops. Slightly taller than single crochet, this is the main stitch for the placemat body.
dc = double crochet: Yarn over, insert hook, yarn over, pull up a loop (3 loops on hook), yarn over, pull through 2 loops, yarn over, pull through remaining 2 loops. This taller stitch creates the daisy petals.
tr = treble crochet: Yarn over twice, insert hook, yarn over, pull up a loop (4 loops on hook), then yarn over and pull through 2 loops three times until one loop remains.
st = stitch
sp = space
rep = repeat
Placemat Pattern Instructions
Now for the fun part! Let’s build this beautiful placemat from the center out.
Center Circle
Round 1: With coral yarn, make a magic ring. Chain 2, then work 12 half double crochet (hdc) into the ring. Join with a slip stitch to the top of your chain 2. (12 sts)
Quick tip about the magic ring: This technique creates a tight, closed center with no hole. If magic rings intimidate you, you can substitute by chaining 4 and joining with a slip stitch to form a ring, then working your stitches into that ring instead.
Round 2: Chain 2, work 2 hdc in each stitch around. Join with slip stitch. (24 sts)
Round 3: Chain 2, then work the following pattern: 1 hdc in the next stitch, 2 hdc in the next stitch. Repeat this sequence all the way around. Join. (36 sts)
Rounds 4 through 10: Continue increasing evenly in hdc rounds, adding approximately 12 stitches each round. To do this, you will gradually space out your increases.
Here is how the increase pattern works as your circle grows:
Continue this pattern, adding one more single hdc between increases each round, until your circle measures about 12 inches across.
Keep checking that your circle lies flat as you go. If it starts to ruffle at the edges, you have too many stitches. If it cups like a bowl, you need more increases. Adjust as needed.
Texture Detail Rounds
This is where that gorgeous ridged texture comes in! After your center circle reaches the right size, you will work additional coral rounds using alternating front loop only (FLO) hdc and regular hdc stitches to create those raised concentric rings you see in the finished piece.
To work in the front loop only, instead of inserting your hook under both loops of the V at the top of each stitch, insert it under just the front loop, which is the loop closest to you.
Alternate one round worked in front loop only with one round worked through both loops as normal. This creates subtle ridges that catch the light beautifully. Work these texture rounds until your placemat reaches approximately 12 inches in diameter.
Keep the circle flat and smooth throughout. If you notice any curling or cupping, you may need to add a few extra stitches on your regular rounds to compensate.
Cream Border
Time to frame that pretty coral center with a clean cream edge.
Attach cream yarn at any point around the coral circle.
Round 1: Single crochet (sc) evenly around the coral circle. The exact number will depend on your stitch count, but aim for one sc in each stitch or slightly more if needed to keep the edge flat.
Round 2: Chain 2, hdc around. Join.
Round 3: Sc around and fasten off. Weave in this end securely.
Daisy Motif Ring
The daisies are my favorite part of this entire project. You will make between 12 and 14 separate daisies, depending on how your spacing works out.
Daisy Center
With terracotta yarn:
Round 1: Make a magic ring. Chain 1, then work 10 single crochet into the ring. Join and fasten off, leaving a tail for weaving in later. (10 sts)
Petals
Attach cream yarn to any stitch of your terracotta center.
Petal: Chain 3, work 3 double crochet in the same stitch, chain 3, then slip stitch into the same stitch.
Move to the next stitch of the center and repeat: chain 3, 3 dc, chain 3, slip stitch.
Repeat around every center stitch to create 10 rounded petals. Fasten off and weave in ends.
Shape each petal with gentle blocking. Pinch and fan them out so they look like proper flower petals rather than bunched loops.
Make 12 to 14 of these little daisies, depending on the circumference of your finished placemat.
Connecting the Flowers
This is where everything comes together beautifully.
Arrange your daisies evenly around the placemat edge. Lay them out on a flat surface first and adjust the spacing until they look balanced. If 12 daisies leave too much gap, make a couple more. If 14 feels crowded, stick with fewer.
Join flowers with cream chain loops:
Attach cream yarn between the petals of one daisy. Chain 5, then connect to the next daisy with a slip stitch between its petals.
Repeat around to create a floating openwork floral halo. The chain loops should also connect to the cream border of the placemat at regular intervals to secure everything in place.
Take your time with this step. The chains create that airy, delicate look, and even spacing makes all the difference.
Napkin Ring Pattern
The napkin ring is quick and satisfying, especially after the more involved placemat.
Band
With cream yarn:
Chain enough stitches to create a circle slightly smaller than the napkin circumference when wrapped around a rolled napkin. For a standard cloth napkin, this is usually around 20 to 25 chains, but test yours first. Join to form a ring, being careful not to twist.
Rounds 1 through 5: Work single crochet in rounds until your band measures approximately 1 inch wide.
Fasten off and weave in ends.
Large Daisy Decoration
This daisy is slightly bigger and bolder than the ones on the placemat edge.
Center:
With terracotta yarn, make a magic ring and work 10 sc into it. Join and fasten off.
Petals:
With cream yarn, create 8 to 10 dimensional petals using dc clusters.
Petal: Chain 3, work 3 dc in the same space, chain 3, slip stitch.
Repeat around the center.
Sew the finished flower securely onto the napkin ring band using your yarn needle and matching yarn. Attach it firmly so it stays put during use.
Finishing Your Table Set
Almost done! A few finishing touches will make your work look polished and professional.
Care Instructions
Cotton yarn is durable, but treat your handmade items gently to keep them beautiful for years.
Hand wash gently in cool water with mild soap. Avoid wringing or twisting. Roll in a clean towel to remove excess water, then lay flat to dry.
Avoid harsh detergents to preserve the cotton texture and keep those coral and cream colors vibrant.
With proper care, this set will stay gorgeous through countless dinner parties and everyday meals.
Pattern Notes and Tips
This crochet pattern is designed as a decorative table set inspired by a coral floral daisy theme. Here are a few extra thoughts to help you succeed:
Adjusting the size: Change your hook size and yarn weight to make the finished dimensions larger or smaller. A bulkier yarn with a bigger hook creates a larger placemat. A finer yarn with a smaller hook makes a daintier version.
Making a full set: For a complete table setting for four or six people, multiply your yarn quantities accordingly. Consider making all the daisies at once in a batch to ensure consistent tension.
Color variations: This pattern works beautifully in other color combinations too. Try sage green with white daisies, dusty blue with yellow centers, or classic white with sunny yellow. Make it your own!
Gift giving: This set makes an exceptional gift. Pair the placemat and napkin ring with a coordinating cloth napkin, wrap it in tissue paper, and you have a present that looks like it came from a boutique.
I really hope you enjoy making this Coral Daisy Placemat and Napkin Ring crochet pattern as much as I enjoyed designing it. There is something so satisfying about creating something beautiful AND useful, and this set delivers on both fronts. Thank you for choosing this pattern and trusting me to guide you through the process.
If you make this set, I would absolutely love to see it! Tag me on Instagram or share a photo in our Facebook group. Seeing your finished projects is honestly the best part of my day.
Before you go, save this pattern to your Pinterest boards so you can find it easily when you are ready to start. And please drop a comment below if you give it a try. I love hearing how projects turn out and answering any questions along the way. Happy crocheting!
Want a Quick & Easy Printable Version?
Get a clean, beautifully formatted PDF of this pattern — easy to follow step by step, ready to print or save on any device. No scrolling, no distractions, just the pattern.
Get the Printable PDF →