
I don’t know about you, but I have always been a little obsessed with jewelry that tells a story. There’s something about wearing a handmade piece around your neck that feels so much more personal than anything you could grab off a store rack.
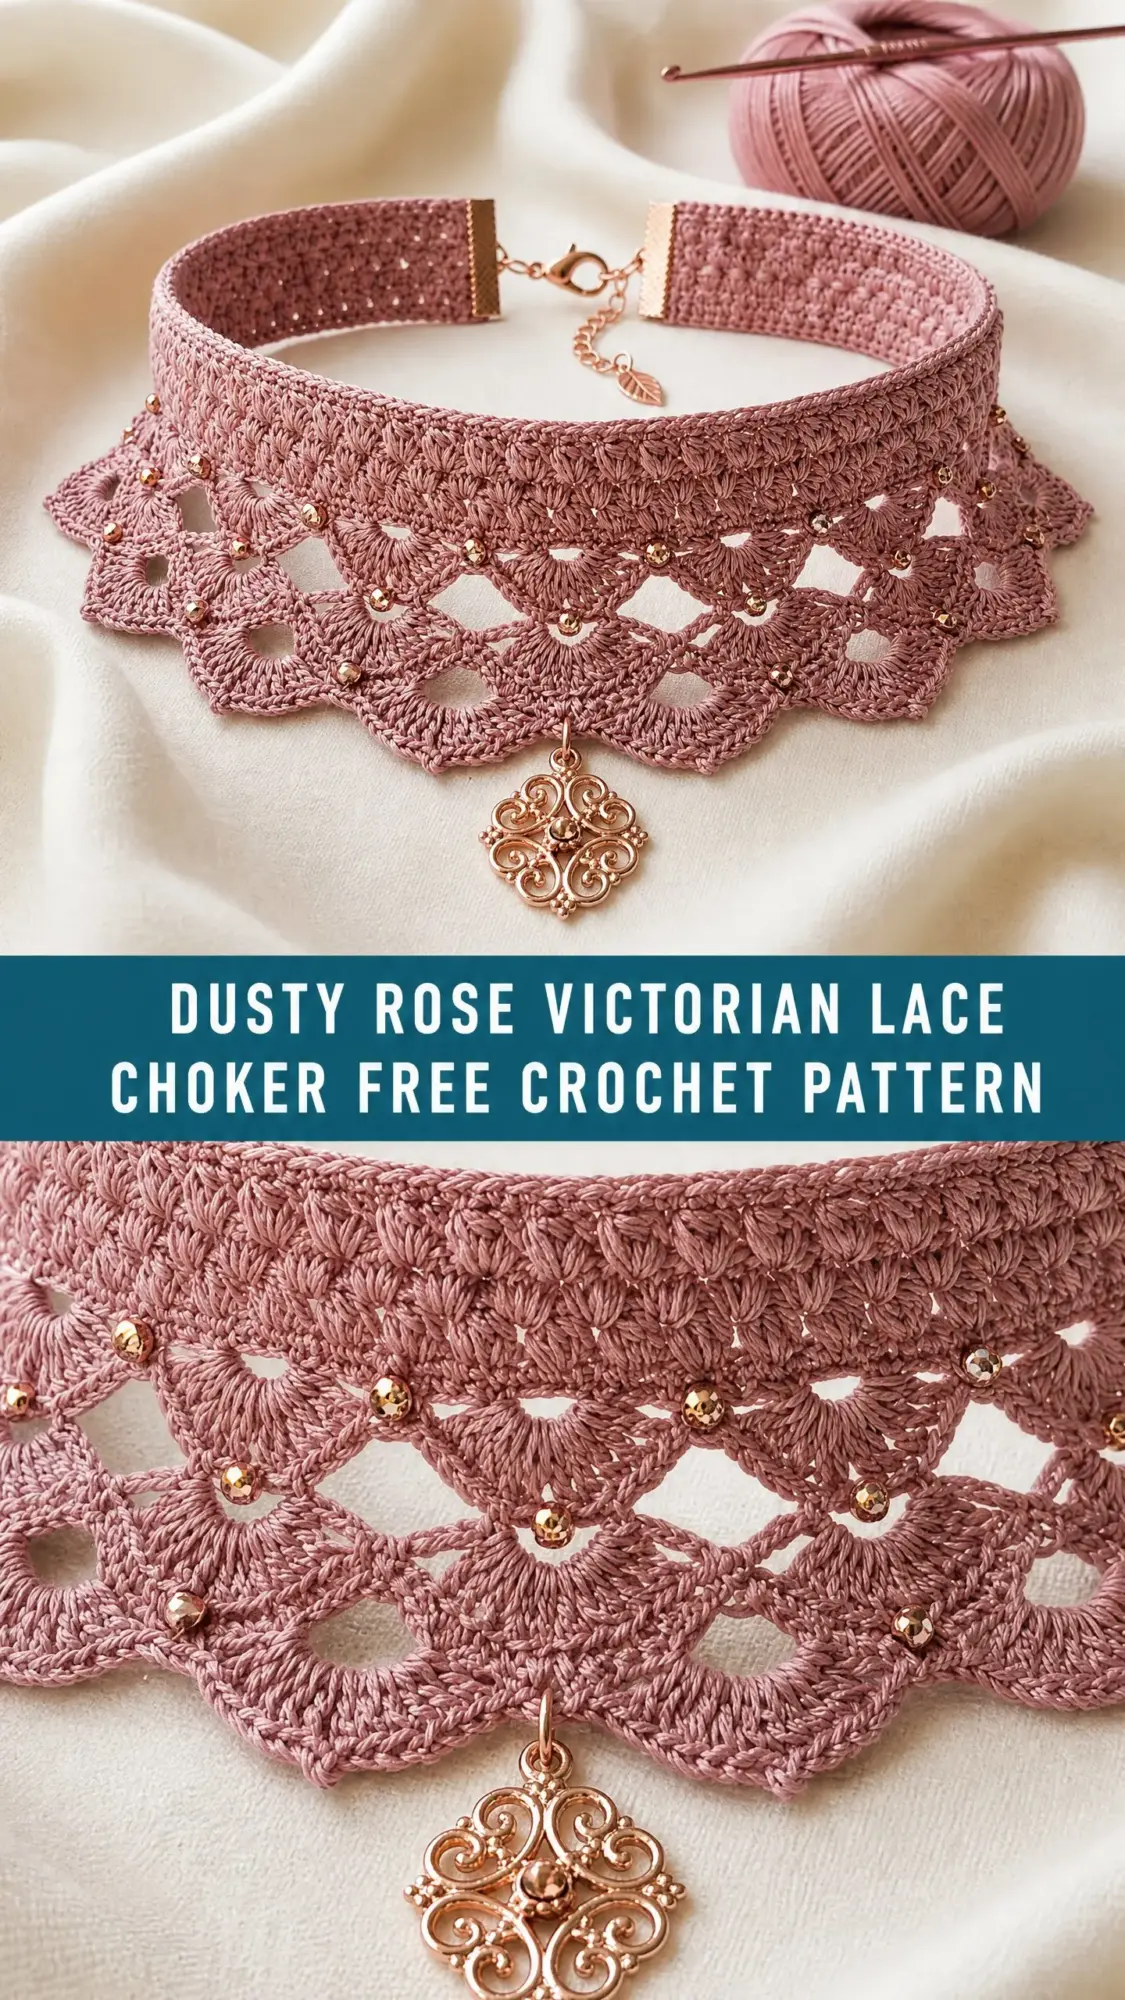
This Victorian lace choker is exactly that kind of project. It combines delicate thread crochet with sparkling beadwork and rose gold hardware for a finished piece that looks like it belongs in a vintage jewelry box. And yes, it takes some patience, but the result? Absolutely worth every stitch.
If you’ve been curious about thread crochet or bead integration, this pattern walks you through everything step by step. Grab your finest hook and let’s make something beautiful together.
About This Crochet Choker Pattern
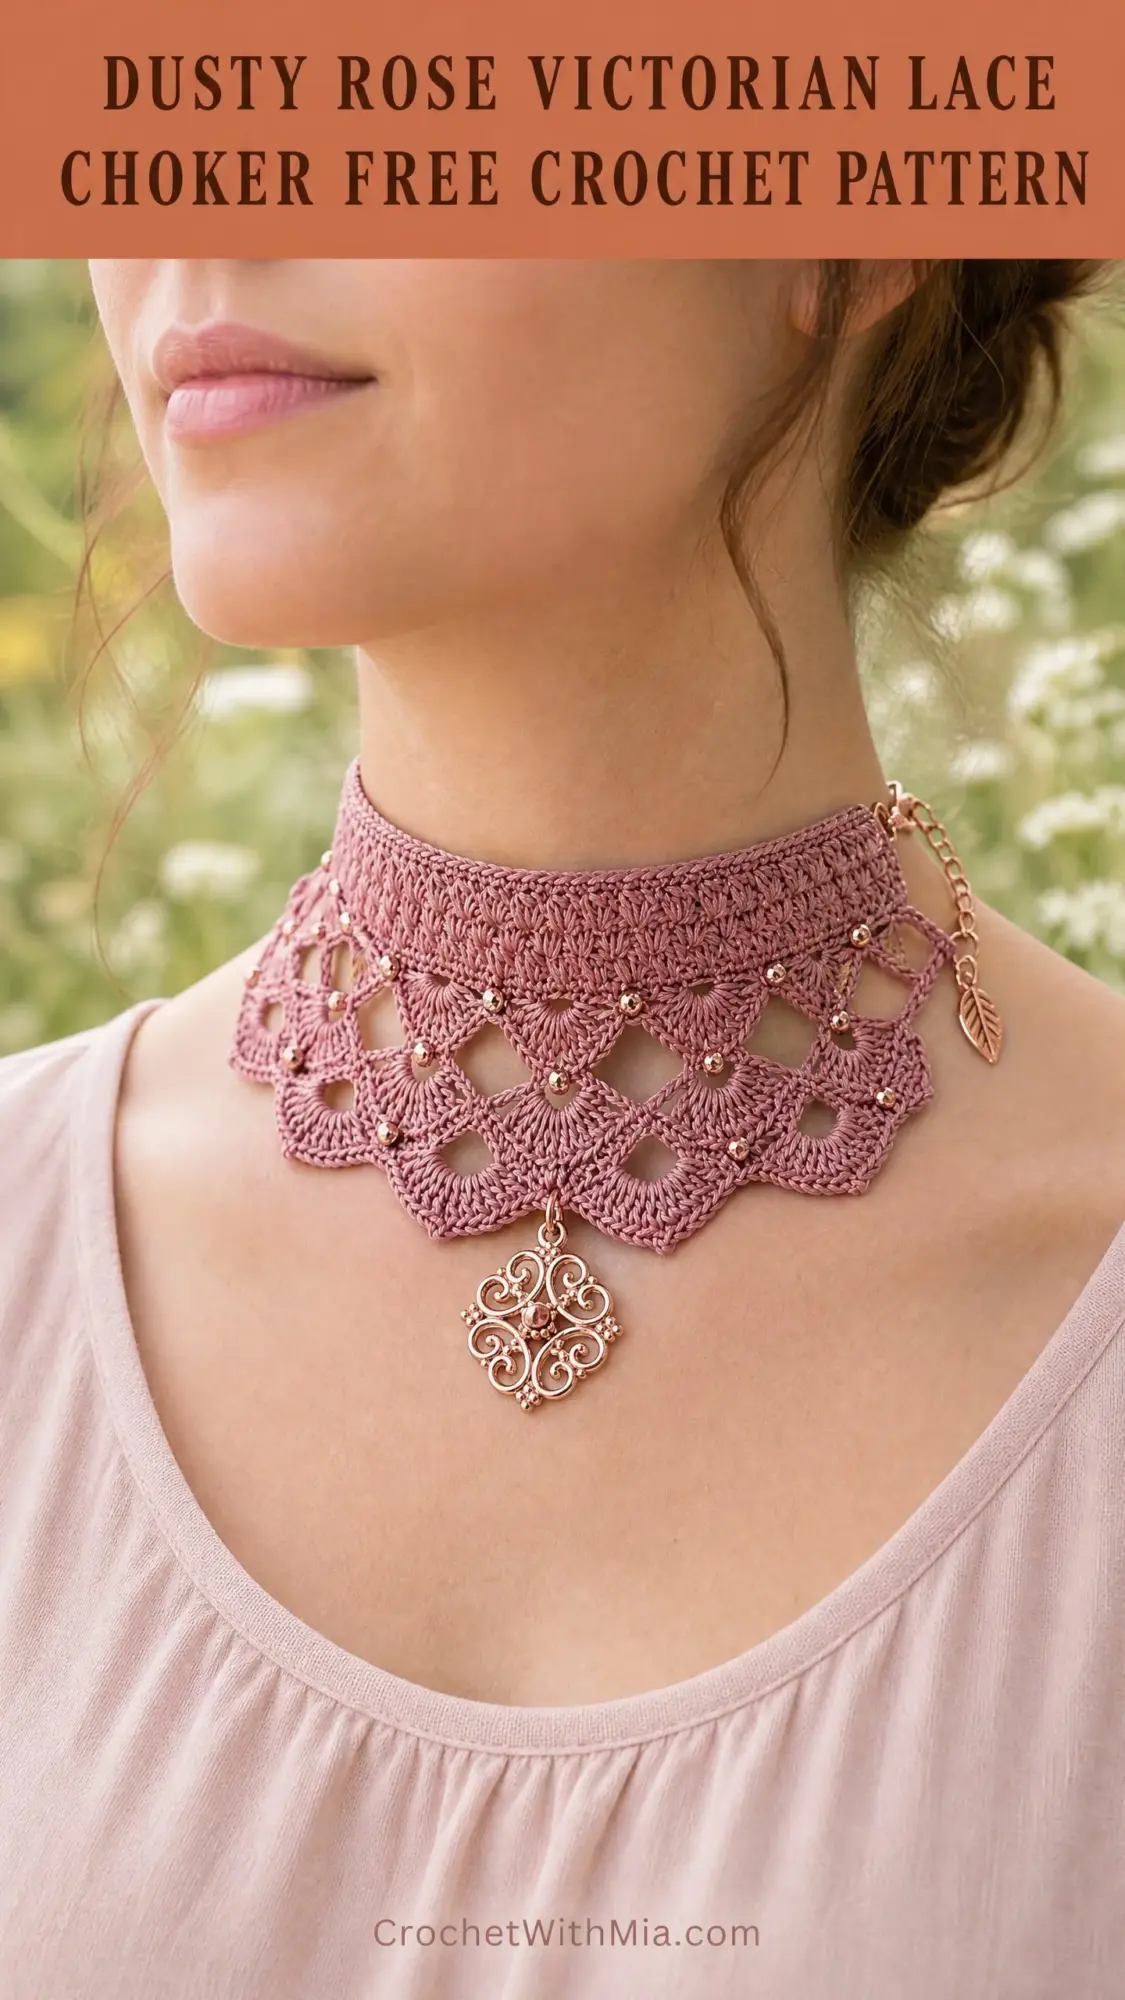
This elegant choker features a wide, structured crochet band worked in fine cotton thread. The lower edge fans outward into a scalloped lace border approximately one inch deeper than the band itself. Small rose gold seed beads get pre-strung onto the thread and worked into the lace during crocheting, catching light beautifully as the piece is worn.
The construction moves from a foundation chain across the length of the choker, building upward in rows to create the band. Then you work the lace edging downward from the lower edge. The upper edge stays clean and straight while the lower edge creates those gorgeous pointed scallops.
A decorative rose gold filigree charm pendant hangs at the center front, and the whole piece closes at the back with ribbon-end crimp findings and a lobster clasp with an extender chain. This allows for an adjustable fit that accommodates different neck sizes comfortably.
Skill Level
This pattern is rated intermediate to advanced. You need to be comfortable working with fine thread and a small hook, reading lace instructions, pre-stringing beads onto thread, placing beads precisely within your stitchwork, maintaining even tension over many rows, and attaching hardware findings to a finished textile piece.
No garment shaping is involved here. But the stitch density and materials demand patience and practice. If you’ve never worked with thread crochet before, I’d suggest practicing with a small swatch first to get comfortable with the tension.
Time Estimate
Plan for 6 to 10 hours depending on your experience with thread crochet and bead work. Don’t rush this one. The fine thread requires focus, and the beadwork adds extra steps that slow things down. But that meditative pace is part of what makes thread crochet so satisfying.
Finished Measurements
Length (excluding clasp and extender): 13 inches / 33 cm
Length (including extender chain): adjustable to 14.5 inches / 37 cm
Band height (straight upper section): 1.25 inches / 3.2 cm
Total choker height including lace border: 2.5 inches / 6.4 cm
These measurements produce a choker that fits a neck circumference of approximately 13 to 14.5 inches / 33 to 37 cm.
Materials Needed for This Victorian Lace Choker Crochet Pattern
Thread: Size 10 crochet cotton thread, approximately 200 yards / 183 meters, in dusty rose or antique mauve
Hook: US Steel Hook Size 7 / 1.65 mm (or size needed to achieve gauge)
Beads: Approximately 80 to 100 size 6/0 seed beads in rose gold or copper metallic
Notions:
Recommended Yarn Options
Aunt Lydia’s Classic Crochet Thread, Size 10, in color Rose (100% mercerized cotton, 350 yards / 320 meters per ball). This widely available thread gives a smooth, slightly lustrous finish that photographs beautifully and holds its shape well after blocking.
DMC Cebelia Crochet Cotton, Size 10, in a dusty mauve or antique pink shade (100% combed cotton, 284 yards / 260 meters per ball). This French cotton has excellent stitch definition and a subtle sheen that complements rose gold hardware.
Lizbeth Crochet Thread, Size 10, by Handy Hands, in Dusty Rose Medium or Victorian Red (100% long-staple Egyptian cotton, 210 yards / 192 meters per ball). Lizbeth threads are tightly twisted and produce very crisp lace stitch definition.
Substitution Note: Use any size 10 (fine/thread weight) 100% cotton or cotton-blend crochet thread. Avoid acrylic or nylon threads as they will not block well enough to maintain the structured lace edge shape. Mercerized cotton is preferred for sheen. Do not substitute a heavier weight.
Gauge
With size 10 cotton thread and US Steel Hook Size 7 / 1.65 mm:
22 stitches = 2 inches / 5 cm in single crochet
10 rows of single crochet = 1 inch / 2.5 cm
Lace border pattern repeat (1 complete fan-and-diamond repeat) = approximately 1.1 inches / 2.8 cm wide
Gauge is critical. The stated finished length depends on accurate gauge. Swatch before beginning and adjust hook size if necessary.
Abbreviations and Stitch Definitions
Before we dive into the pattern, let’s go over every stitch and term you’ll encounter. I’ll define each one in plain English so nothing catches you off guard.
beg: beginning
bead-ch (bead chain): Slide one bead up against the hook, then complete a chain stitch. The bead gets locked into place within the chain.
bead-sc (bead single crochet): Slide one bead up against the hook before inserting the hook into the stitch. Complete the single crochet as normal. The bead sits on the front or back face of your work.
BLO (back loop only): Instead of inserting your hook under both loops of the stitch, you only go through the back loop. This creates a ridge texture.
ch (chain): Yarn over, pull through the loop on your hook. The most basic crochet stitch.
ch-sp (chain space): The gap or hole created by chain stitches in a previous row. You work into this space rather than into a specific stitch.
dc (double crochet): Yarn over, insert hook into stitch, pull up a loop (3 loops on hook), yarn over and pull through 2 loops (2 loops remain), yarn over and pull through remaining 2 loops.
FLO (front loop only): Insert your hook through only the front loop of the stitch.
hdc (half double crochet): Yarn over, insert hook, pull up a loop (3 loops on hook), yarn over and pull through all 3 loops at once.
lp(s) (loops): The loops on your hook or the loops that form the top of each stitch.
rep (repeat): Work the same sequence of stitches again.
RS (right side): The side of your work that faces outward when worn or displayed.
sc (single crochet): Insert hook into stitch, pull up a loop (2 loops on hook), yarn over and pull through both loops.
sk (skip): Pass over a stitch without working into it.
sl st (slip stitch): Insert hook into stitch, yarn over, pull through both the stitch and the loop on your hook in one motion.
sp(s) (spaces): Chain spaces or gaps in the fabric.
st(s) (stitches): The individual stitches in your work.
tch (turning chain): The chain stitches made at the beginning of a row to bring your hook up to the proper height.
tr (treble crochet): Yarn over twice, insert hook, pull up a loop, (yarn over, pull through 2 loops) three times.
WS (wrong side): The side of your work that faces inward or is hidden.
yo (yarn over): Wrap the yarn over your hook from back to front.
Special Stitches for This Crochet Tutorial
Shell Stitch: Work 5 double crochets into the same stitch or chain space. This creates a fan or shell shape. When instructions say "shell in ch-sp," insert your hook into the designated chain space and work all 5 double crochets into that single space.
Picot: Chain 3, slip stitch into the first chain made (the chain closest to the hook when measuring back from the third chain). This creates a small decorative loop at the tip of each scallop point.
Foundation Single Crochet (FSC): This technique creates one chain and one single crochet simultaneously, producing a flexible, non-curling foundation. To work FSC: Start with a slip knot and chain 2. Insert hook into second chain from hook, pull up a loop, yarn over and draw through one loop only (this creates the chain portion), yarn over and draw through both loops (this completes the single crochet). For each subsequent FSC: Insert hook under the two loops of the chain edge of the previous FSC, pull up a loop, yarn over and draw through one loop, yarn over and draw through both loops.
V-Stitch (V-st): Work (1 double crochet, chain 1, 1 double crochet) all into the same stitch or chain space.
Important Pattern Notes
Pre-stringing beads: Before beginning the lace border rows, slide all beads onto the thread ball. You’ll pull individual beads forward as needed during crocheting. String approximately 100 beads to have a comfortable surplus. Use a fine beading needle or fold a small loop of thin wire to thread the cotton through the bead holes.
Construction order: The band is worked first as a flat rectangle from side to side (from one end of the choker to the other), then the lace border is worked downward from the lower edge of the completed band.
Right side marking: Mark the RS with a locking stitch marker when you begin. The RS of the band is the face that will show on the outside of the neck.
Turning chain counts: In the band section, chain 1 at the start of each single crochet row does not count as a stitch. In the lace border, chain 3 at the start of a double crochet row counts as the first double crochet.
Final band length: The finished band length before adding hardware should be exactly 13 inches / 33 cm. Measure after blocking, not before.
Hardware attachment: Ribbon-end crimp findings with a flat jaw of 10 mm accommodate the width of the band end (approximately 1.4 inches). The band is folded minimally, glue is applied inside the crimp jaw, and the jaw is clamped closed with flat-nose pliers.
Size Customization
To adjust choker length: Each 13-stitch repeat in the lace border equals approximately 1.1 inches / 2.8 cm. Add or subtract full repeats of 13 stitches to the foundation to adjust the length.
For a 12-inch choker, use 130 stitches (10 repeats). For a 14-inch choker, use 156 stitches (12 repeats).
To adjust band height: Add or subtract rows of single crochet in the band section. Two additional rows add approximately 0.2 inch / 5 mm of height.
Step by Step Crochet Pattern Instructions
Part 1: The Band
Before beginning, decide whether to use the Foundation Single Crochet method or a standard chain foundation. Both produce the same result. Instructions below use the standard chain method.
Chain 146. (This creates a foundation chain. The working stitch count will be 143 single crochets after the first row is established.)
Row 1 (RS): Starting in the second chain from hook, single crochet across. Do not skip the turning chain at the beginning of this row. Turn. (143 sc)
Row 2 (WS): Chain 1 (does not count as stitch throughout band section). Working in both loops, single crochet across. Turn. (143 sc)
Row 3 (RS): Chain 1. Working in back loops only, single crochet across. Turn. (143 sc)
Row 4 (WS): Chain 1. Working in both loops, single crochet across. Turn. (143 sc)
Row 5 (RS): Chain 1. Working in back loops only, single crochet across. Turn. (143 sc)
Row 6 (WS): Chain 1. Working in both loops, single crochet across. Turn. (143 sc)
Row 7 (RS): Chain 1. Working in back loops only, single crochet across. Turn. (143 sc)
Row 8 (WS): Chain 1. Working in both loops, single crochet across. Turn. (143 sc)
Row 9 (RS): Chain 1. Working in back loops only, single crochet across. Turn. (143 sc)
Row 10 (WS): Chain 1. Working in both loops, single crochet across. Turn. (143 sc)
Row 11 (RS): Chain 1. Working in back loops only, single crochet across. Turn. (143 sc)
Row 12 (WS): Chain 1. Working in both loops, single crochet across. Turn. (143 sc)
Row 13 (RS): Chain 1. Working in back loops only, single crochet across. Do not turn and do not fasten off. This is the final row of the band. (143 sc)
Band Checkpoint
After Row 13, the band should measure 13 inches / 33 cm wide and 1.25 inches / 3.2 cm tall. The alternating BLO and both-loop rows create a subtle ridge texture across the band. If your band does not reach 13 inches / 33 cm in width, your tension is too tight. Try a larger hook. If wider, try a smaller hook. Do not proceed until the band width is correct.
Part 2: The Lace Border
The lace border is worked directly from the lower edge of the completed band. The lower edge is the foundation chain edge at the bottom of Row 1. After completing Row 13 of the band, fold your work and return to the bottom of Row 1. Alternatively, fasten off at end of Row 13, leaving a tail, and rejoin with a slip stitch to the right end of the foundation chain edge with RS facing.
The lace border is worked with RS facing throughout. Do not turn between rows of the border.
Lace Setup Row (RS, working along foundation chain edge): Join thread with slip stitch at right end of lower foundation chain edge. Chain 1. Work 143 single crochets evenly across the lower edge by inserting hook into each remaining loop of the original foundation chain. Turn. (143 sc)
This row establishes the base for the lace pattern. The 143 stitches divide into 11 repeats of 13 stitches.
Lace Row 1: Ch 3 (counts as dc), dc in same first sc, [ch 1, sk 1 sc, dc in next sc] 71 times. Turn. (73 dc counting ch-3, 71 ch-1 sps)
Lace Row 2: Ch 3, 2 dc in first dc (edge half-shell, 3 dc total), ch 2, sc in next dc, ch 2, 5 dc in next dc repeat between asterisks 10 times, ch 2, sc in next dc, ch 2, 3 dc in top of turning chain. Turn. (12 shell groups: two 3-dc half-shells at edges plus ten 5-dc shells in center plus 11 sc in valleys)
Lace Row 3 (diamond and bead row): Ch 1. Sc in first dc (top of edge half-shell). Ch 3, bead-ch (slide 1 bead up, ch 1 to lock bead), ch 3, sc in center dc of 5-dc shell repeat 10 times, ending ch 3, bead-ch, ch 3, sc in top of final edge 3-dc group. Turn. (12 sc, 11 beaded arch repeats)
Lace Row 4 (second shell tier with bead accents): Ch 3. 2 dc in first sc (edge 3-dc). Bead-sc in center of next arch (the bead-ch position), 5 dc in next sc (work shell into the sc between arches) repeat 10 times. Bead-sc in center of last arch. 3 dc in last sc. Turn.
Note: The bead-sc placements add 11 beads across this row.
Lace Row 5 (scallop points with picots): Ch 1. Sc in first dc. Ch 2. In center (3rd) dc of next 5-dc shell work: (dc, ch 1, dc, ch 1, dc). Ch 2. Sc in sc between shells. Repeat from asterisk across, ending after final 5-dc shell. After last repeat: ch 2, in center of last edge half-shell work (dc, ch 1, dc), ch 2, sc in last dc. Do not turn. Do not fasten off yet.
Picot edging along final row: Working back along the tops of the fan points just made, slip stitch to first ch-1 sp of first V-fan. Work picot (ch 3, sl st in first ch of ch-3) in each ch-1 sp across each fan. Sl st to move along connecting sc and ch-2 sps. Continue to each fan point across the full row. Fasten off.
Lace Border Checkpoint
After completing all 5 lace rows, the border should hang approximately 1.25 inches / 3.2 cm below the lower edge of the band. The total choker height should be approximately 2.5 inches / 6.4 cm. The scallop points should be visible and distinct. Count 11 complete fan points across the full length. If any points are pulling or puckering, the piece needs blocking before proceeding.
Finishing Your Victorian Lace Choker
Step 1: Weave all ends. Thread each yarn tail onto a tapestry needle and weave it invisibly through the back of the band stitches for at least 1 inch / 2.5 cm in two directions. Trim close. Do not leave tails near the short ends of the choker where hardware will be applied.
Step 2: Blocking. Submerge the choker in cool water for 10 minutes to allow the cotton to fully saturate. Gently squeeze out excess water. Do not wring. Lay flat on blocking board. Pin the upper edge of the band in a straight line, spacing pins every 0.5 inch / 1.3 cm. Pin each scallop point outward and downward, stretching gently to open the lace diamonds fully. The scallop points should be pulled firmly into their pointed shape. Apply a light layer of fabric stiffener to the lace border only (not the band) using a small brush or spray bottle. Allow to dry completely (8 to 12 hours). Once dry, remove pins. The choker will hold its shape.
Step 3: Attaching ribbon-end crimp findings. Apply a small amount of jewelry adhesive (such as E6000 or GS Hypo Cement) to the inside jaw of one crimp finding. Insert one short end of the choker band into the jaw of the crimp finding, folding the edge over minimally if needed to fill the jaw width. Using flat-nose pliers, crimp the jaw firmly closed on both sides. Hold for 30 seconds. Repeat for the other end. Allow adhesive to cure for at least 2 hours before attaching clasp.
Step 4: Attaching clasp and extender. Using a jump ring, connect the lobster claw clasp to the loop on one crimp finding. Connect the extender chain to the loop on the other crimp finding using a jump ring. The leaf or ornamental drop charm should already be at the free end of the extender chain.
Step 5: Attaching center front pendant charm. Identify the center sc of the lace border (this is the sc in the valley at the 6th repeat out of 11, which sits at the center front). Using a jump ring, loop through a stitch at this position and attach the filigree charm pendant through the jump ring. Close the jump ring securely with pliers.
Step 6: Final inspection. Hold the choker up by the clasp and allow it to hang to check symmetry of the lace border. All 11 fan points should hang at equal depth. The center front charm should hang freely at the lowest point of the center fan.
Care Instructions
Hand wash in cool water with a gentle detergent. Do not machine wash or machine dry. Do not wring. Roll in a clean towel to remove excess water, then lay flat to dry. Re-block if needed after washing to restore scallop point shape. Store flat or coiled loosely in a jewelry pouch. Keep away from perfume and oils, which may discolor the cotton thread over time. The rose gold hardware is plated, so avoid prolonged exposure to moisture. Pat dry immediately if the hardware gets wet.
Final Thoughts on This Crochet Choker Pattern
This dusty rose Victorian lace choker is one of those projects that feels like a true accomplishment when you finish. The combination of delicate thread crochet, sparkling beadwork, and elegant hardware creates a piece of wearable art that you made with your own hands.
Take your time with this one. Enjoy the process. And when you clasp it around your neck for the first time, you’ll understand exactly why thread crochet has captivated crafters for generations.
Thank you so much for choosing this pattern for your next project. I genuinely hope you love making it as much as I loved designing it. If you create your own version, I would absolutely love to see it! Tag me on Instagram or share it in our Facebook group. Seeing your finished pieces is always the best part of my day.
If you enjoyed this Victorian lace choker crochet pattern, go ahead and save it to your Pinterest boards so you can find it whenever you’re ready to start. And please drop a comment below if you make one. I’d love to hear how it turns out for you!