
I don’t know about you, but I have a serious weakness for cute amigurumi that doubles as home decor. There’s just something about a little crocheted creature hanging in a sunny window that makes me unreasonably happy.
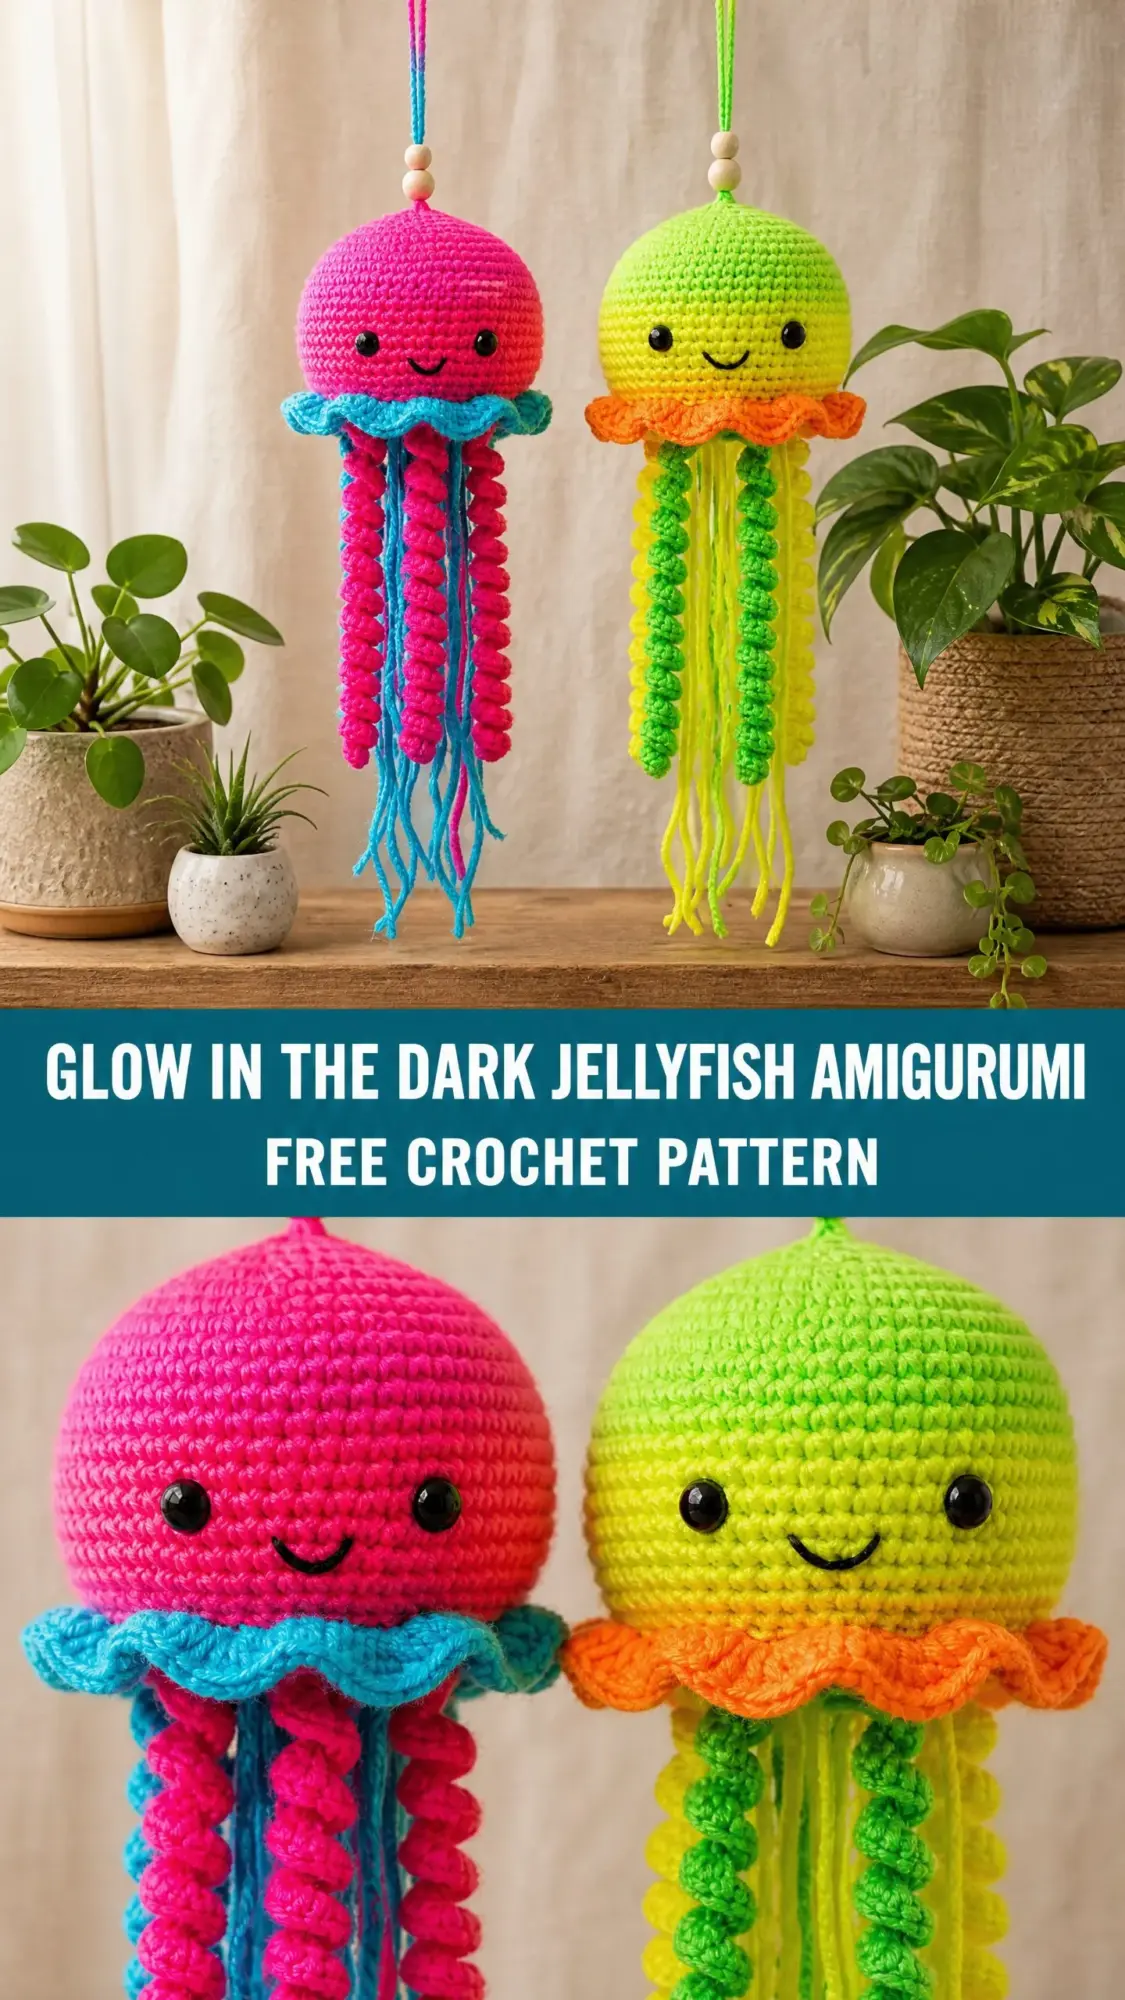
This jellyfish checks every box. It’s cheerful, it’s colorful, and those curly tentacles add the perfect amount of whimsy without being fussy to make. Plus, if you use glow in the dark yarn, you get a fun surprise when the lights go out.
Whether you’re making one for a nursery, a beach house, or just because your craft room needs more personality, this hanging jellyfish amigurumi crochet pattern delivers all the cozy vibes with a manageable skill level. Let me walk you through everything you need to know.
Why You’ll Love This Jellyfish Amigurumi Pattern
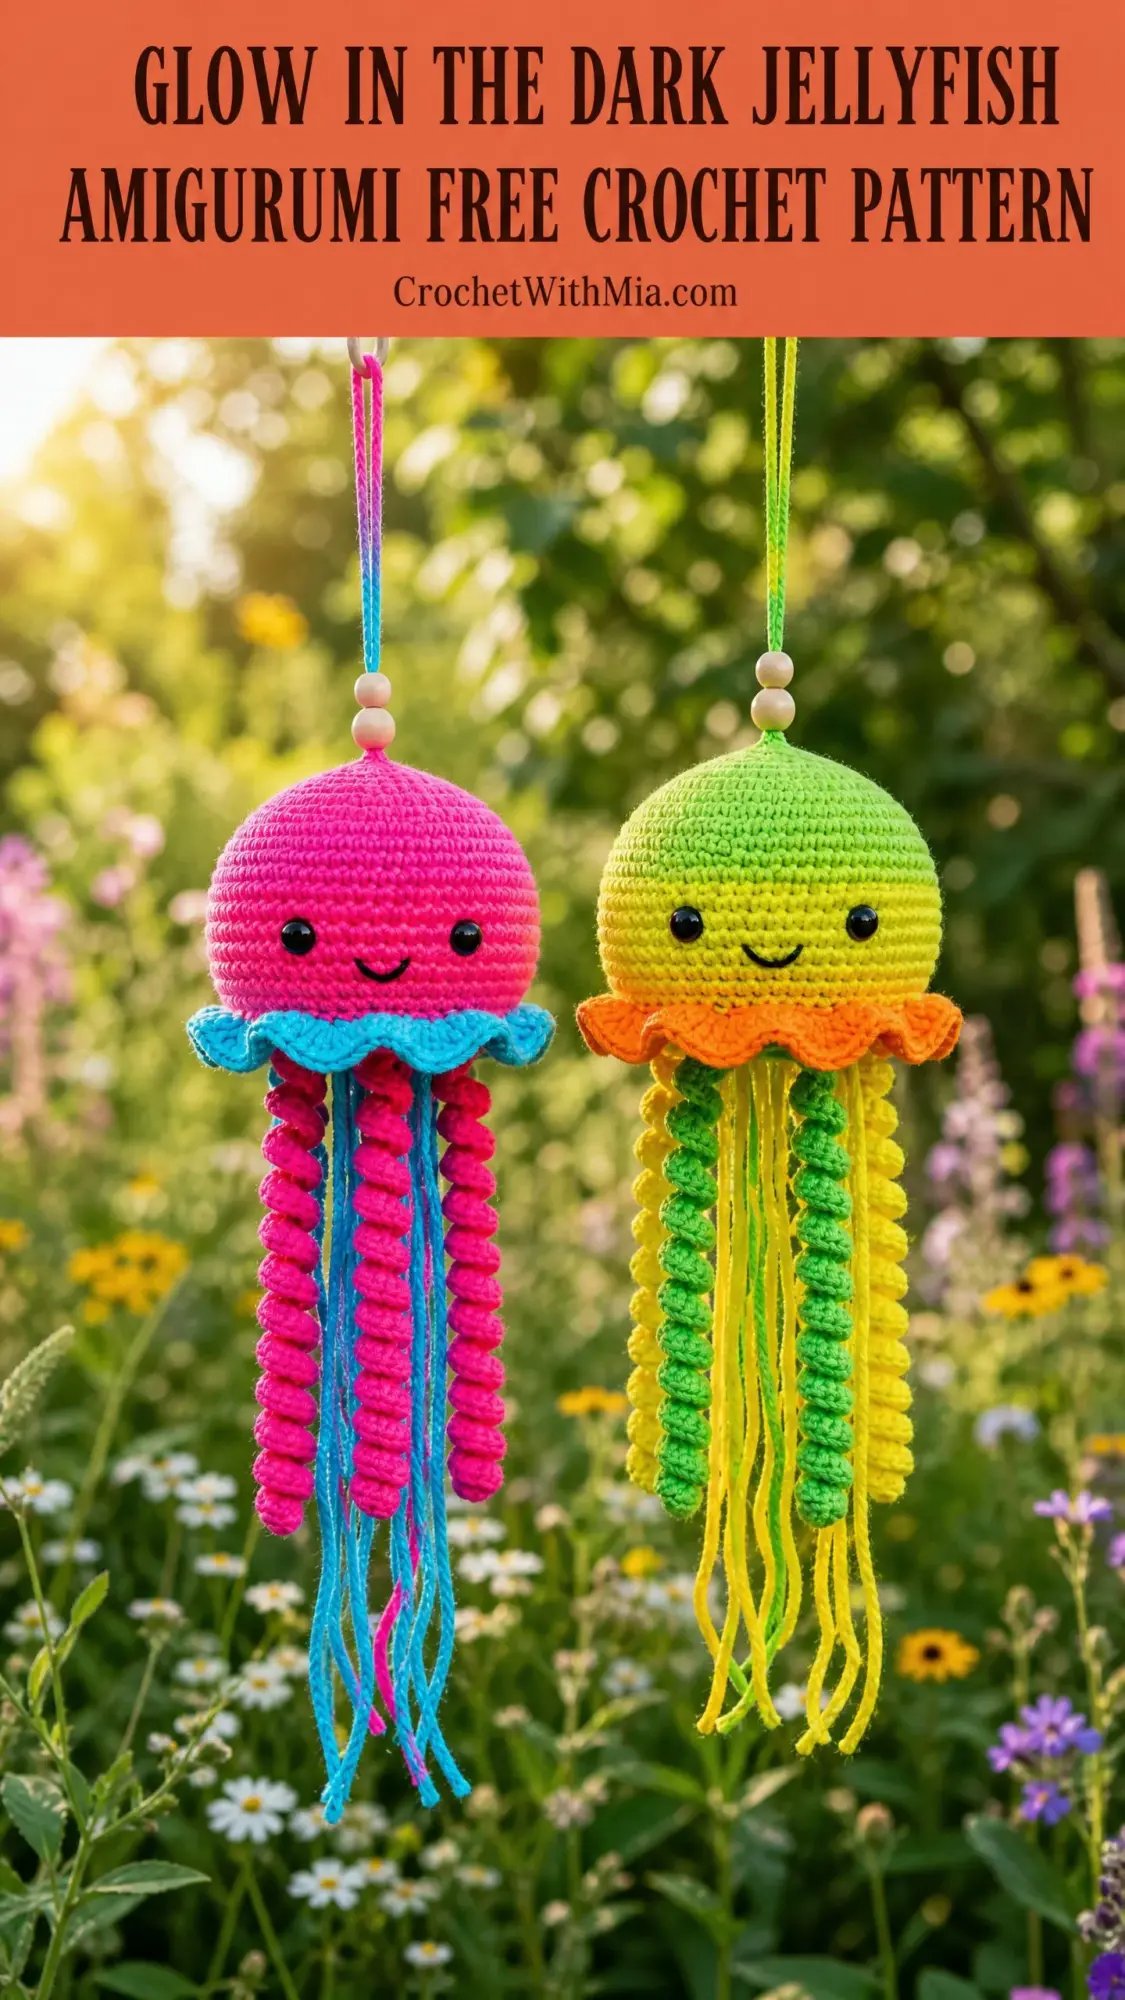
This project hits that sweet spot between interesting and achievable. You’re not just crocheting a basic ball shape. You’re building a dome with a color fade, adding a ruffled frill around the base, and creating a cascade of mixed tentacles that genuinely look like the real thing.
The construction is smart too. Everything moves from top to bottom in a logical order. You start with the bell, add the face, work the frill into a marked round, then attach all the tentacles at the end. No confusing assembly required.
The finished jellyfish measures approximately 4.5 inches across the bell and hangs 14 to 16 inches total. That’s a substantial size that looks impressive without taking forever to complete. Most crocheters finish in 4 to 6 hours, though allow a bit extra if the curly tentacle technique is new to you.
Materials You’ll Need
Gather these supplies before you start. Having everything ready makes the whole process smoother.
Yarn: Worsted weight yarn, which is Category 4, in five colors. Here’s the breakdown:
Total yarn needed: approximately 220 yards
Hook: US size G-6 / 4.0 mm crochet hook
Notions:
Yarn Suggestions
Any smooth worsted weight yarn with good stitch definition works beautifully here. I recommend avoiding fuzzy or chenille yarns because they obscure the stitch texture that makes the dome and tentacle curls look so good.
Lion Brand Pound of Love in Grass, Yellow, and Tangerine gives excellent stitch definition and holds color well for display pieces.
Red Heart Super Saver in Fern, Bright Yellow, and Tangerine is budget friendly and very forgiving for tight amigurumi tension.
Paintbox Yarns Simply DK used doubled works if you can’t find worsted weight. The doubled strand achieves a nearly identical gauge with a slightly softer result.
If you want the actual glow in the dark effect, look for Paintbox Yarns Glow in the Dark or any novelty phosphorescent yarn in Category 4 weight. Just check the gauge and adjust your hook size if needed.
Gauge
18 single crochet stitches and 20 rounds equals 4 inches worked in continuous rounds.
Gauge matters here for getting the correct bell diameter and overall proportions. If your stitches are too loose, the stuffing will show through. If they’re too tight, your jellyfish will be smaller than expected. Swatch first and adjust your hook size up or down as needed.
For amigurumi in general, working slightly tighter than your normal gauge prevents fiberfill from peeking through.
Abbreviations and Stitch Definitions
Let me define every abbreviation before we dive in. If you’re newer to crochet patterns, bookmark this section.
Special Techniques
This pattern uses two special techniques that might be new to you. Don’t worry, they’re easier than they sound.
Ruffle Stitch (for the frill)
This creates that wavy orange edge around the base of the bell. The trick is simple: you work 3 single crochet stitches into every stitch of the base round. This triples your stitch count and forces the fabric to ruffle outward naturally.
Curly Tentacle Method
To make tentacles that spiral and curl, you chain a specific number, then work 3 single crochet stitches into every chain stitch going back toward the start. The excess stitches force the strand to twist into tight spirals. It’s satisfying to watch happen.
Straight Accent Tentacle Method
For the thinner, slightly wavy tentacles that contrast with the curly ones, you chain and then slip stitch back along the entire length. This creates a simple cord texture.
Pattern Instructions
The Bell
Using Color A (bright green) and your 4.0 mm hook:
Rnd 1: MR, work 6 sc into ring. Pull ring closed. (6 sc)
Rnd 2: Inc in each st around. (12 sc)
Rnd 3: (Sc 1, inc) rep 6 times. (18 sc)
Rnd 4: (Sc 2, inc) rep 6 times. (24 sc)
Rnd 5: (Sc 3, inc) rep 6 times. (30 sc)
Rnd 6: (Sc 4, inc) rep 6 times. (36 sc)
Rnd 7: (Sc 5, inc) rep 6 times. (42 sc)
Rnd 8: (Sc 6, inc) rep 6 times. (48 sc)
Rnd 9: Sc in each st around. (48 sc)
Rnd 10: Sc in each st around. (48 sc)
Important: Insert your safety eyes now, between Rounds 10 and 11. Place them approximately 4 stitches apart, centered on what will be the front of the bell. Push the posts through the fabric and secure the backings firmly. You cannot add safety eyes after the bell is stuffed and closed.
Rnd 11: Sc in each st around. (48 sc)
Color change: At the end of Round 11, switch to Color B (yellow-green). On your last stitch, draw up the loop as usual, then complete the single crochet by yarning over with Color B and pulling through both loops.
Rnd 12: Sc in each st around. (48 sc)
Rnd 13: Sc in each st around. (48 sc)
Rnd 14: Sc in each st around. (48 sc)
Rnd 15: Sc in each st around. (48 sc)
Rnd 16: Place a stitch marker in the first stitch of this round and do not remove it. This marks where you’ll attach the frill later. Sc in each st around. (48 sc)
Rnd 17: (Sc 6, dec) rep 6 times. (42 sc)
Rnd 18: (Sc 5, dec) rep 6 times. (36 sc)
Rnd 19: (Sc 4, dec) rep 6 times. (30 sc)
Rnd 20: (Sc 3, dec) rep 6 times. (24 sc)
Begin stuffing the bell firmly with polyester fiberfill now. Add more stuffing as you continue decreasing.
Rnd 21: (Sc 2, dec) rep 6 times. (18 sc)
Rnd 22: (Sc 1, dec) rep 6 times. (12 sc)
Add any final stuffing needed. The bell should be plump and hold a dome shape without looking lumpy.
Rnd 23: Dec 6 times around. (6 sc)
Fasten off, leaving a 6 inch tail. Thread the tail onto your yarn needle and weave through the front loop of each remaining stitch. Pull to close the opening completely. Knot securely and weave in the end.
Checkpoint: Your bell should measure approximately 4.5 inches in diameter at its widest point and about 3.5 inches tall from crown to base.
Smile Embroidery
Thread a short length of black yarn or 2 strands of black embroidery floss onto your yarn needle.
Bring the needle up from inside the bell at a point approximately 2 rounds below the center of the safety eyes.
Work 3 to 4 straight stitches in a shallow upward arc, approximately 0.75 inch wide. Keep it subtle. You want a gentle smile, not a grin.
Secure and weave in ends inside the bell.
The Frill
Locate Round 16 (where you left your marker) on the outside of the bell. The frill is worked into the front loops only of this round.
Join Color C (orange) with a slip stitch into any front loop of Round 16.
Work 3 sc into the front loop of each stitch around. (48 base stitches x 3 = 144 sc total)
Slip stitch to the first sc of the frill round to join.
Fasten off and weave in ends. The frill will ruffle outward naturally around the base of the dome.
Checkpoint: The frill should form a wavy orange ring that stands out from the bell, not one that lies flat against it. If it’s too flat, double check that you worked 3 sc per stitch and used front loops only.
Curly Tentacles (make 6)
Make 3 in Color A (bright green) and 3 in Color B or D (yellow-green or green).
Using your chosen color, ch 31.
Work 3 sc into each chain across, starting in the 2nd chain from hook. (90 sc total)
Fasten off, leaving a 10 inch tail at both ends for attaching.
Watch as the tentacle spirals and curls on its own. This is the fun part.
Straight Accent Tentacles (make 6)
Make 3 in Color E (yellow) and 3 in Color B (yellow-green).
Using your chosen color, ch 36.
Sl st into each chain across, starting in the 2nd chain from hook. (35 sl sts)
Fasten off, leaving a 10 inch tail at both ends for attaching.
Tentacle length tip: Each additional 5 chains adds approximately 1 inch of finished tentacle length. Feel free to customize.
Attaching the Tentacles
Thread one tail of a tentacle onto your yarn needle.
Insert the needle from outside the bell through the base of the frill and into the inside of the bell.
Pull through so about 0.5 inch of the tail is inside. Thread the other tail and do the same.
Tie the two tails together with a double knot inside the bell, pulling firmly so the tentacle hangs snugly.
Repeat for all 12 tentacles, alternating curly and straight tentacles evenly around the circumference.
Checkpoint: Hold the jellyfish by pinching the top of the bell. All tentacles should hang freely and evenly. No single side should feel heavier than the others.
Hanging Loop
Cut approximately 18 inches of neon green cord or thin matching yarn.
Thread both ends through your two wooden beads so they sit together at the midpoint, or thread one bead per tail for a stacked look.
Insert the cord through the top of the bell at the crown, pushing through the closed magic ring area.
Tie the tails together with a secure double knot at your desired loop size.
Your jellyfish is ready to hang.
Size Customization Tips
For a smaller jellyfish (approximately 3 inch bell diameter): Use fingering or sport weight yarn with a US C-2 or D-3 hook. Reduce tentacle chain counts by approximately 30 percent.
For a larger jellyfish (approximately 7 inch bell diameter): Use bulky weight yarn with a US K-10.5 hook. Add one extra increase round after Round 8 (sc 7, inc rep 6 times = 54 sc) and work 4 additional even rounds before decreasing. Increase tentacle chains by approximately 50 percent.
For more drama: Make 16 or 18 tentacles instead of 12 for a fuller cascade.
Care Instructions
Hand wash in cool water with mild detergent. Do not wring. Press gently between towels to remove excess water. Reshape and hang to dry away from direct sunlight, which can fade neon colors over time.
Do not machine wash or tumble dry, as the fiberfill may clump and the safety eyes may loosen.
I really hope you enjoy making this little guy as much as I enjoyed designing it. There’s something so satisfying about watching those tentacles curl up as you work them.
If you make one, I would absolutely love to see it. Tag me on Instagram or share a photo in our Facebook group. Your versions always inspire me.
Save this jellyfish amigurumi crochet pattern to your Pinterest boards so you can find it when you’re ready to start, and drop a comment below if you give it a try. I read every single one and love hearing how your projects turn out.