
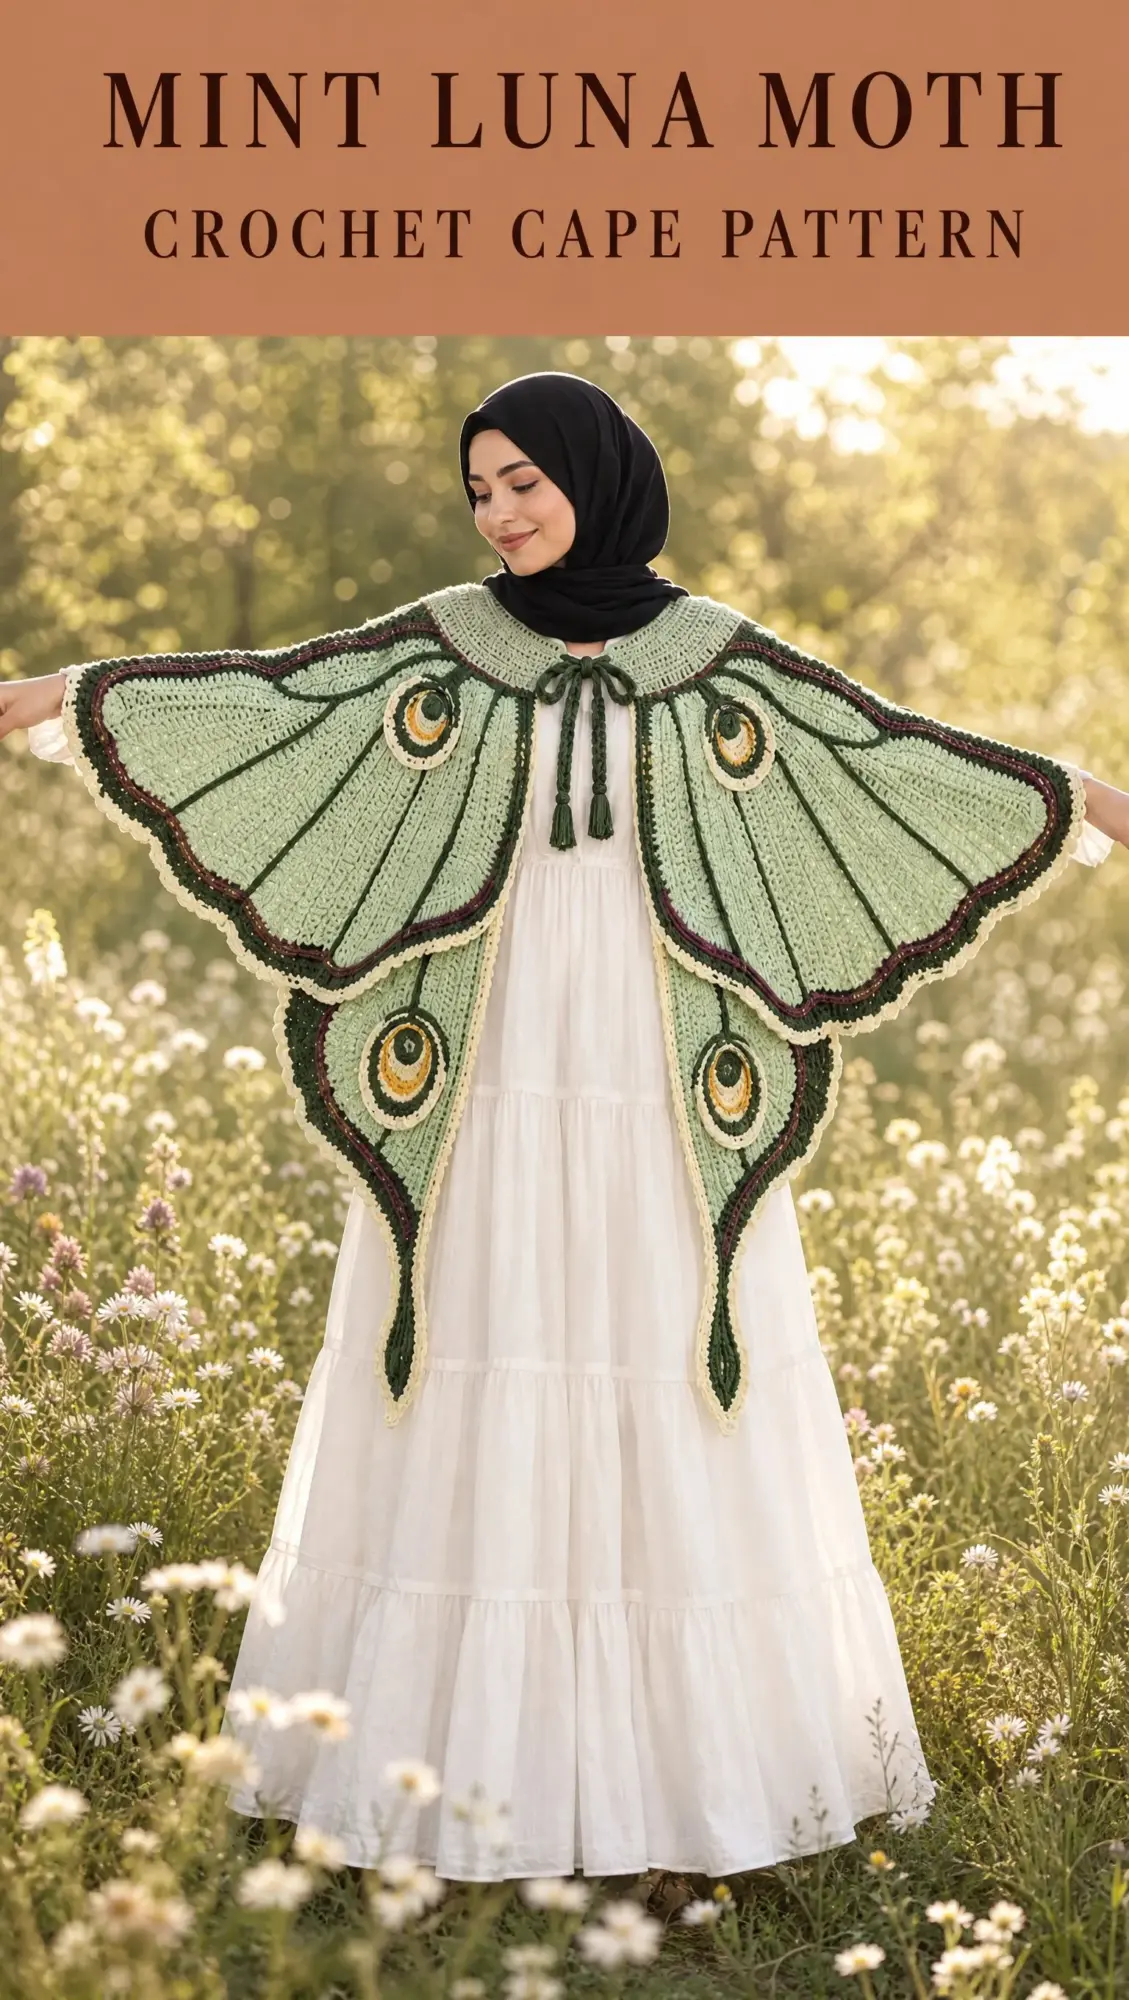
This is a showstopper project. A full wingspan cape with four eye motifs, tapered tails, and surface crochet veins that transform you into a luna moth. The construction is straightforward flat panels seamed together, but the finished piece looks like wearable art.
Get the Ad-Free PDF Pattern
You can find the free pattern below, or you can purchase the ad-free printable PDF from my shop.
Get the Printable PDF →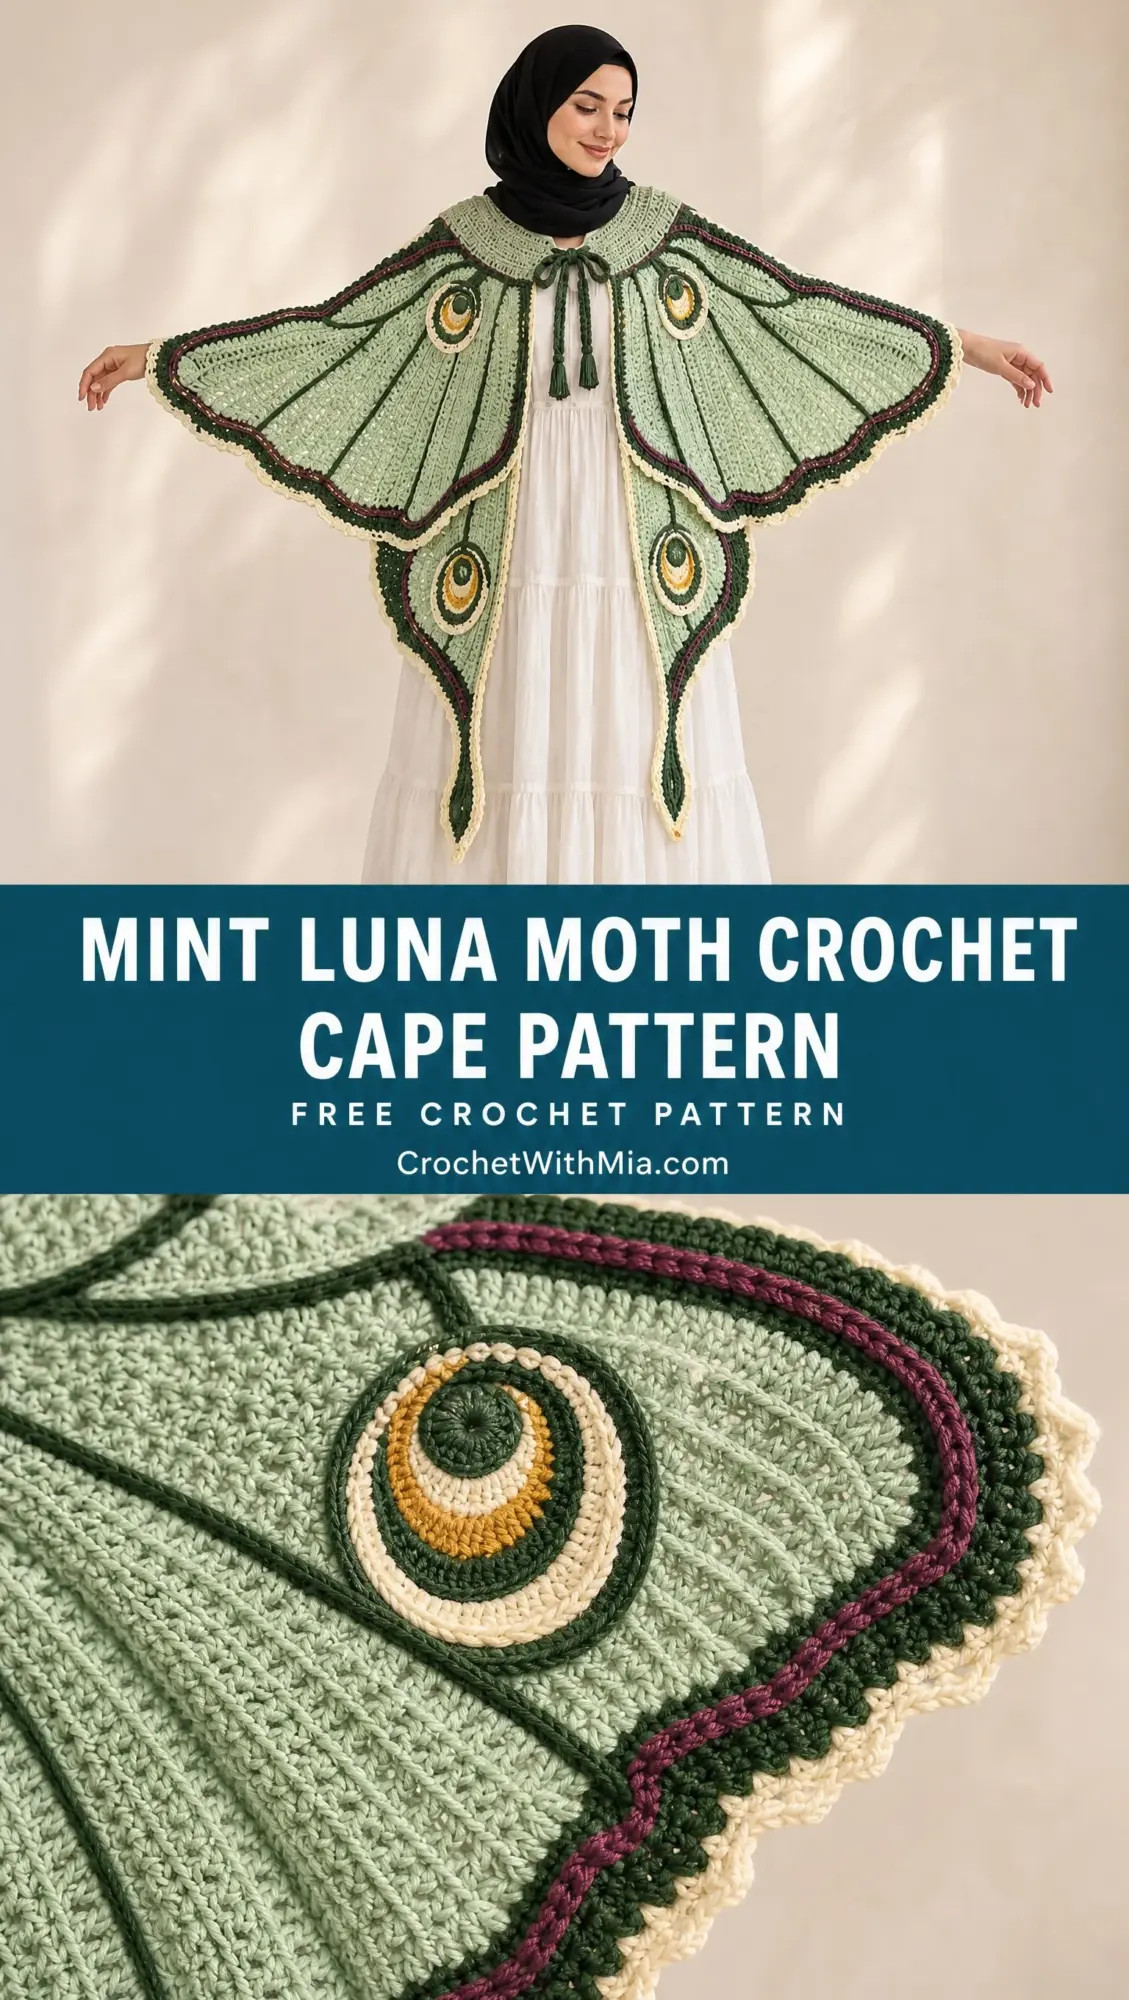
I know what you’re thinking. This looks incredibly complicated. It’s not. If you can single crochet, increase, decrease, and follow a row count, you can make this cape. The magic comes from the assembly and the surface decoration, not from difficult stitches.
The pattern uses DK weight yarn in six colors, a 4.0 mm hook, and builds from five main pieces: a shoulder yoke, two upper wings, and two lower tail wings. You’ll add the forest green veins and eye motifs after everything is sewn together. Let me walk you through the whole thing.
Pattern Overview and Skill Level
The Mint Luna Moth Crochet Cape is rated intermediate. You need experience with shaping, controlled color changes, surface crochet, seaming, and motif placement. If you’ve made garments before or worked colorwork projects, you’re ready for this.
Time estimate: 18 to 26 hours for an experienced crocheter. Allow extra time for the surface veins and finishing details.
Finished measurements:
The front remains open with ties that close only at the throat.
Materials You’ll Need
Yarn: DK weight or light worsted (CYC 3), matte cotton blend recommended. Approximately 1,820 yards (1,665 m) total, which includes a 10% finishing allowance.
Here’s the color breakdown:
| Color | Amount | Use |
|---|---|---|
| A – Pale mint | 900 yd / 823 m | Main wing cells |
| B – Pale sage | 260 yd / 238 m | Shoulder yoke and eye motifs |
| C – Deep forest green | 300 yd / 274 m | Veins, outer edge, ties, eye details |
| D – Warm cream | 180 yd / 165 m | Eye rings and fine outline accents |
| E – Soft yellow | 70 yd / 64 m | Eye centers |
| F – Plum | 110 yd / 101 m | Narrow accent line inside outer edge |
Yarn suggestions: Paintbox Cotton DK, Scheepjes Cotton 8 doubled lightly if needed to match gauge, or a smooth cotton acrylic DK such as Lion Brand Coboo. Substitute by gauge and drape rather than label alone. Avoid very fluffy yarns because they hide the vein lines and eye motif edges.
Hooks: US G-6 / 4.0 mm for the body. US F-5 / 3.75 mm optional for motifs and edging.
Notions: 6 locking stitch markers, tapestry needle, pins, scissors, tape measure.
Gauge
16 single crochet stitches x 18 rows = 4 inches (10 cm) after blocking, worked in single crochet.
This gauge is critical for fit. The 57 stitch starting neckline measures about 14.25 inches (36 cm) before edging. The open throat and ties provide the remaining wearing ease. The yoke expands to 111 stitches, approximately 27.75 inches (70.5 cm) across the outer curve.
Make a gauge swatch, wash it, and measure it before starting. Cotton blend yarns can behave differently after washing.
Abbreviations
Special Techniques
Invisible color change: Work the final yarn over of the last sc with the new color. Carry the unused color only across short sections. Otherwise cut and rejoin to reduce bulk.
Surface slip stitch vein: With RS facing, insert your hook from front to back and bring up a loop of forest green. Follow a pinned guideline, making loose slip stitches through the fabric. Do not pull tight.
Sc2tog (single crochet two together): Insert hook in next stitch, yarn over and pull up a loop. Repeat in the next stitch. Yarn over and pull through all 3 loops on hook.
Blocking: Steam or wet block pieces to measurements before seaming. Cotton blend panels should lie flat without stretching the single crochet fabric thin.
Shoulder Yoke Instructions (Color B – Pale Sage)
Chain 58. Work flat. The ch 1 at the start of a row does not count as a stitch.
| Row | Instructions | Stitch Count |
|---|---|---|
| Row 1 (RS) | Sc in 2nd ch from hook and across | 57 |
| Row 2 | Ch 1, turn, sc across | 57 |
| Row 3 | Ch 1, turn; work 6 evenly spaced inc across row, keeping first and last 3 sts plain | 63 |
| Row 4 | Ch 1, turn, sc across | 63 |
| Row 5 | Ch 1, turn; work 6 evenly spaced inc across row, keeping first and last 3 sts plain | 69 |
| Row 6 | Ch 1, turn, sc across | 69 |
| Row 7 | Ch 1, turn; work 6 evenly spaced inc across row, keeping first and last 3 sts plain | 75 |
| Row 8 | Ch 1, turn, sc across | 75 |
| Row 9 | Ch 1, turn; work 6 evenly spaced inc across row, keeping first and last 3 sts plain | 81 |
| Row 10 | Ch 1, turn, sc across | 81 |
| Row 11 | Ch 1, turn; work 6 evenly spaced inc across row, keeping first and last 3 sts plain | 87 |
| Row 12 | Ch 1, turn, sc across | 87 |
| Row 13 | Ch 1, turn; work 6 evenly spaced inc across row, keeping first and last 3 sts plain | 93 |
| Row 14 | Ch 1, turn, sc across | 93 |
| Row 15 | Ch 1, turn; work 6 evenly spaced inc across row, keeping first and last 3 sts plain | 99 |
| Row 16 | Ch 1, turn, sc across | 99 |
| Row 17 | Ch 1, turn; work 6 evenly spaced inc across row, keeping first and last 3 sts plain | 105 |
| Row 18 | Ch 1, turn, sc across | 105 |
| Row 19 | Ch 1, turn; work 6 evenly spaced inc across row, keeping first and last 3 sts plain | 111 |
| Row 20 | Ch 1, turn, sc across | 111 |
Fasten off, leaving a long tail. Mark the center back stitch (stitch 56). From each outer edge, count inward 28 stitches and place markers. These marked 28 stitch sections receive the upper wings. The center section bridges across the back, and the remaining front stitches create the open throat edges.
Math check: Starting with 57 sc, adding 6 stitches on each of 9 increase rows gives 57 + (9 x 6) = 111 stitches.
Upper Wings Instructions (Make 2 in Color A)
The two upper wings are identical until surface decoration. For the second wing, mirror motif placement and vein direction during finishing. Chain 89.
| Rows | Instructions | Stitch Count |
|---|---|---|
| 1 | Sc in 2nd ch from hook and across | 88 |
| 2-5 | Ch 1, turn, sc across | 88 |
| 6 | Inc in first st, sc to last st, inc in last st | 90 |
| 7-10 | Sc across | 90 |
| 11 | Inc first and last st | 92 |
| 12-15 | Sc across | 92 |
| 16 | Inc first and last st | 94 |
| 17-20 | Sc across | 94 |
| 21 | Inc first and last st | 96 |
| 22-30 | Sc across | 96 |
| 31 | Dec first 2 sts, sc to last 2 sts, dec | 94 |
| 32-34 | Sc across | 94 |
| 35 | Dec each edge | 92 |
| 36-38 | Sc across | 92 |
| 39 | Dec each edge | 90 |
| 40-42 | Sc across | 90 |
| 43 | Dec each edge | 88 |
| 44-46 | Sc across | 88 |
| 47 | Dec each edge | 86 |
| 48-50 | Sc across | 86 |
| 51 | Dec each edge | 84 |
| 52-54 | Sc across | 84 |
| 55 | Dec each edge | 82 |
| 56-58 | Sc across | 82 |
| 59 | Dec each edge | 80 |
| 60-62 | Sc across | 80 |
| 63 | Dec each edge | 78 |
| 64-66 | Sc across | 78 |
| 67 | Dec each edge | 76 |
| 68-70 | Sc across | 76 |
| 71 | Dec each edge | 74 |
| 72-74 | Sc across | 74 |
| 75 | Dec each edge | 72 |
| 76-78 | Sc across | 72 |
| 79 | Dec each edge | 70 |
| 80-82 | Sc across | 70 |
| 83 | Dec each edge | 68 |
| 84-86 | Sc across | 68 |
| 87 | Dec each edge | 66 |
| 88-90 | Sc across. FO | 66 |
Shape the outer top corner: On the arm side edge only, join A 18 rows down from the top. Work 12 short rows of sc, decreasing 1 stitch at the outer edge on every row and ending each row 1 stitch early on the inner side. This rounds the wing tip without changing the main panel count. Fasten off and weave in.
Blocking target per upper wing: approximately 28 inches (71 cm) across top to tip, 18 inches (46 cm) deepest point. Pin a soft rounded arc rather than a sharp triangle.
Lower Tail Wings Instructions (Make 2 in Color A)
Chain 53. The tail panels taper gradually so the final point hangs around the upper thigh rather than forming a very long streamer.
| Rows | Instructions | Stitch Count |
|---|---|---|
| 1 | Sc in 2nd ch from hook and across | 52 |
| 2-6 | Sc across | 52 |
| 7 | Dec each edge | 50 |
| 8-10 | Sc across | 50 |
| 11 | Dec each edge | 48 |
| 12-14 | Sc across | 48 |
| 15 | Dec each edge | 46 |
| 16-18 | Sc across | 46 |
| 19 | Dec each edge | 44 |
| 20-22 | Sc across | 44 |
| 23 | Dec each edge | 42 |
| 24-26 | Sc across | 42 |
| 27 | Dec each edge | 40 |
| 28-30 | Sc across | 40 |
| 31 | Dec each edge | 38 |
| 32-34 | Sc across | 38 |
| 35 | Dec each edge | 36 |
| 36-38 | Sc across | 36 |
| 39 | Dec each edge | 34 |
| 40-42 | Sc across | 34 |
| 43 | Dec each edge | 32 |
| 44-46 | Sc across | 32 |
| 47 | Dec each edge | 30 |
| 48-50 | Sc across | 30 |
| 51 | Dec each edge | 28 |
| 52-54 | Sc across | 28 |
| 55 | Dec each edge | 26 |
| 56-58 | Sc across | 26 |
| 59 | Dec each edge | 24 |
| 60-62 | Sc across | 24 |
| 63 | Dec each edge | 22 |
| 64-66 | Sc across | 22 |
| 67 | Dec each edge | 20 |
| 68-70 | Sc across | 20 |
| 71 | Dec each edge | 18 |
| 72-74 | Sc across | 18 |
| 75 | Dec each edge | 16 |
| 76-78 | Sc across | 16 |
| 79 | Dec each edge | 14 |
| 80-82 | Sc across | 14 |
| 83 | Dec each edge | 12 |
| 84-86 | Sc across | 12 |
| 87 | Dec each edge | 10 |
| 88 | Dec, sc 6, dec | 8 |
| 89 | Dec, sc 4, dec | 6 |
| 90 | Dec, sc 2, dec | 4 |
| 91 | Sc2tog twice | 2 |
| 92 | Sc2tog. FO | 1 |
Block each lower wing to approximately 20 inches (51 cm) from top edge to tip. The top edge remains broad enough to overlap slightly behind the upper wing, giving the layered luna moth silhouette.
Eye Motifs Instructions (Make 4)
Use the 3.75 mm hook if needed for a firm, flat motif. Make 2 larger motifs for the upper wings and 2 smaller motifs for the lower wings.
| Round | Color | Instructions |
|---|---|---|
| 1 | E – Soft yellow | Magic ring, ch 1, 8 sc in ring; join with sl st. (8 sts) |
| 2 | B – Pale sage | Ch 1, 2 sc in each st around; join. (16 sts) |
| 3 | B | Ch 1, *sc in next st, 2 sc in next; rep around; join. (24 sts) |
| 4 | D – Warm cream | Ch 1, *sc in next 2 sts, 2 sc in next; rep around; join. (32 sts) |
| 5 | D | Ch 1, *sc in next 3 sts, 2 sc in next; rep around; join. (40 sts) |
| 6 – large only | C – Forest | Ch 1, *sc in next 4 sts, 2 sc in next; rep around; join. (48 sts) |
For the two small motifs, stop after Round 5. For the two large motifs, complete Round 6. Block flat. Add a narrow cream outline around the forest ring on the large motifs with surface slip stitch if desired.
Optional eye motif crescent detail: To mimic the soft crescent seen in the inspiration, surface slip stitch a half moon inside each yellow center using cream, then place a short forest arc just inside the sage ring. Keep these details flat and avoid raised bobbles or dangling pieces.
Assembly Instructions
1. Block all five body pieces to the listed measurements. Let them dry completely before seaming.
2. Lay the yoke RS up. Place one upper wing beneath the left marked 28 stitch yoke section, aligning the straight top inner edge of the wing with the yoke edge. Pin. Repeat on the right side.
3. With forest green and a tapestry needle, whipstitch each upper wing to the underside of the yoke through approximately 28 matched stitch positions. Keep the seam flexible.
4. Position each lower wing behind its matching upper wing. Overlap 2 to 3 inches (5 to 7.5 cm) at the inner back area. Sew across 18 to 22 stitches only, leaving the outer edges free so the layers can move.
5. At center back, tack the inner top corner of each lower wing to the underside of the yoke, approximately 3 inches (7.5 cm) to either side of the center back marker. This stabilizes the tails.
6. Try on the cape before edging. The upper wing top line should rest over the shoulders and upper arms without pulling the neckline backward. Adjust the overlap by 1 to 2 stitches if needed.
Outer Edge, Plum Accent, and Ties
Work the edging only after the cape is assembled so the line visually unifies all layers.
7. With RS facing, join forest green at the left front yoke edge. Work 1 round/continuous row of sc around the front yoke edge, upper wing perimeter, lower wing exposed perimeter, across the back edges, and up the opposite side. Place 3 sc in each sharp tail tip and approximately 2 sc per 3 row ends along vertical edges. Keep the fabric flat.
8. Work a second forest green sc round over the wing and tail edges only. Along the neckline, keep a single clean forest row.
9. Join plum 1 stitch inside the forest edge and work surface slip stitch around the visible wing perimeter, following the green line at a consistent 1/4 inch (6 mm) inset. At corners, loosen the slips slightly so the line does not pucker.
10. For each throat tie, join forest at a front neck corner, ch 55, sl st back through each chain, then sl st into the neckline and FO. Tie length is approximately 12 to 13 inches (30 to 33 cm). Add no tassels unless desired.
Forest Green Veins
Use removable pins or contrasting waste yarn to map the veins before crocheting them. Keep both sides mirrored.
| Vein | Placement Guide |
|---|---|
| Primary upper vein | From upper inner shoulder seam diagonally toward the rounded wing tip, ending 1.5 inches (4 cm) before the forest border |
| Upper secondary vein 1 | From the primary vein near the shoulder to the upper edge, gently curved |
| Upper secondary vein 2 | From the primary vein across the center of the wing toward the outer edge |
| Upper secondary vein 3 | From the lower third of the primary vein toward the lower rounded edge |
| Lower tail vein | From the top inner join down the center of the tail, following its taper and stopping 1 inch (2.5 cm) above the tip |
Surface slip stitch the lines with forest green using relaxed tension. If the fabric begins to cup, remove the last section and rework more loosely. The lines should sit on the surface without shortening the base fabric.
Eye Motif Placement
Upper eyes: Center each large motif approximately 9 to 10 inches (23 to 25 cm) out from the yoke seam and 6 to 7 inches (15 to 18 cm) below the upper wing edge.
Lower eyes: Center each small motif in the upper half of each tail, approximately 5 inches (13 cm) below the overlap seam.
Pin all four motifs first and compare the cape from several feet away. Adjust until the spacing is balanced and mirrored. Sew motifs with warm cream using small whipstitches through the outermost round. Keep the stitches nearly invisible from the front.
Fitting Checkpoints
| Checkpoint | What to Look For | Correction |
|---|---|---|
| After yoke | Neckline sits below the base of the neck without choking | Add 1 short edging row to front neck edges or loosen tie placement |
| After upper wings pinned | Arm span reaches roughly wrist to wrist when arms are extended | Add or remove 4 straight rows before the taper |
| After lower wings pinned | Tail ends around upper thigh; center hem remains near hip | Shorten by omitting taper bands or lengthen with straight rows before Row 71 |
| After surface veins | Panels remain flat | Undo tight slip stitches and rework with larger hook or looser tension |
| After final blocking | Both sides mirror in length and motif height | Re-pin damp fabric to matched measurements |
Size Adjustments
For a smaller frame: Omit the final 4 rows of each upper wing and 6 rows of each lower tail.
For a larger frame or longer reach: Add 4 to 8 straight rows before the final taper and purchase 10 to 15% extra yarn.
Finishing and Blocking
11. Weave in all ends on the WS, splitting yarn plies and reversing direction once for secure joins.
12. Lightly wet the cape or use steam appropriate to the yarn label. Lay flat on blocking mats.
13. Pin the yoke into a smooth shallow semicircle. Pin each upper wing to the same span and depth. Match the two lower tail lengths exactly.
14. Shape the rounded upper edges smoothly and keep the forest border flat. Do not overstretch the eye motifs.
15. Allow to dry completely before removing pins. Steam only if your chosen fiber tolerates it.
Care Instructions
Hand wash or use a gentle machine cycle in cool water if permitted by the yarn label. Place the cape in a mesh bag to protect the surface veins. Reshape and dry flat. Do not hang while wet, as the tails may lengthen under their own weight.
Troubleshooting Common Issues
Wing edge curls inward: Too few edging stitches or tight tension. Add stitches along row ends and use a larger hook for edging.
Cape pulls backward: Lower tails attached too high or too heavily. Move tail tack points slightly outward or reduce overlap.
Yoke ripples: Too many increases for your gauge. Skip the last increase row and work Row 19 and 20 even.
Eye motifs cup: Motif hook too small or increases too tight. Rework with body hook or block firmly while damp.
Veins distort fabric: Surface slip stitches too tight. Rework with relaxed loops and avoid pulling the working yarn.
Front falls too open: Ties placed too low. Move ties to the top throat corners. Optionally add a hidden snap beneath ties.
Final Thoughts on the Mint Luna Moth Crochet Cape Pattern
This cape is absolutely worth the time investment. Every step builds on the last, and watching it come together during assembly is genuinely thrilling. The moment you spread your arms and see those wings extend is pure magic.
Thank you so much for choosing this pattern. I hope you love making it as much as I loved designing it. If you make one, I would absolutely love to see it! Tag me on Instagram or share in my Facebook group.
Save this Mint Luna Moth Crochet Cape Pattern to your Pinterest boards so you can find it when you’re ready to start. And if you make one, please drop a comment below. I love seeing your finished capes and hearing which color combinations you chose!
Want a Quick & Easy Printable Version?
Get a clean, beautifully formatted PDF of this pattern — easy to follow step by step, ready to print or save on any device. No scrolling, no distractions, just the pattern.
Get the Printable PDF →