
Go grab that gorgeous skein of fingering weight cotton you’ve been saving for something special. You know the one. It’s been sitting in your stash waiting for a project worthy of its beauty, and this elegant bridal-inspired shawl is exactly what it’s been waiting for.
Get the Ad-Free PDF Pattern
You can find the free pattern below, or you can purchase the ad-free printable PDF from my shop.
Get the Printable PDF →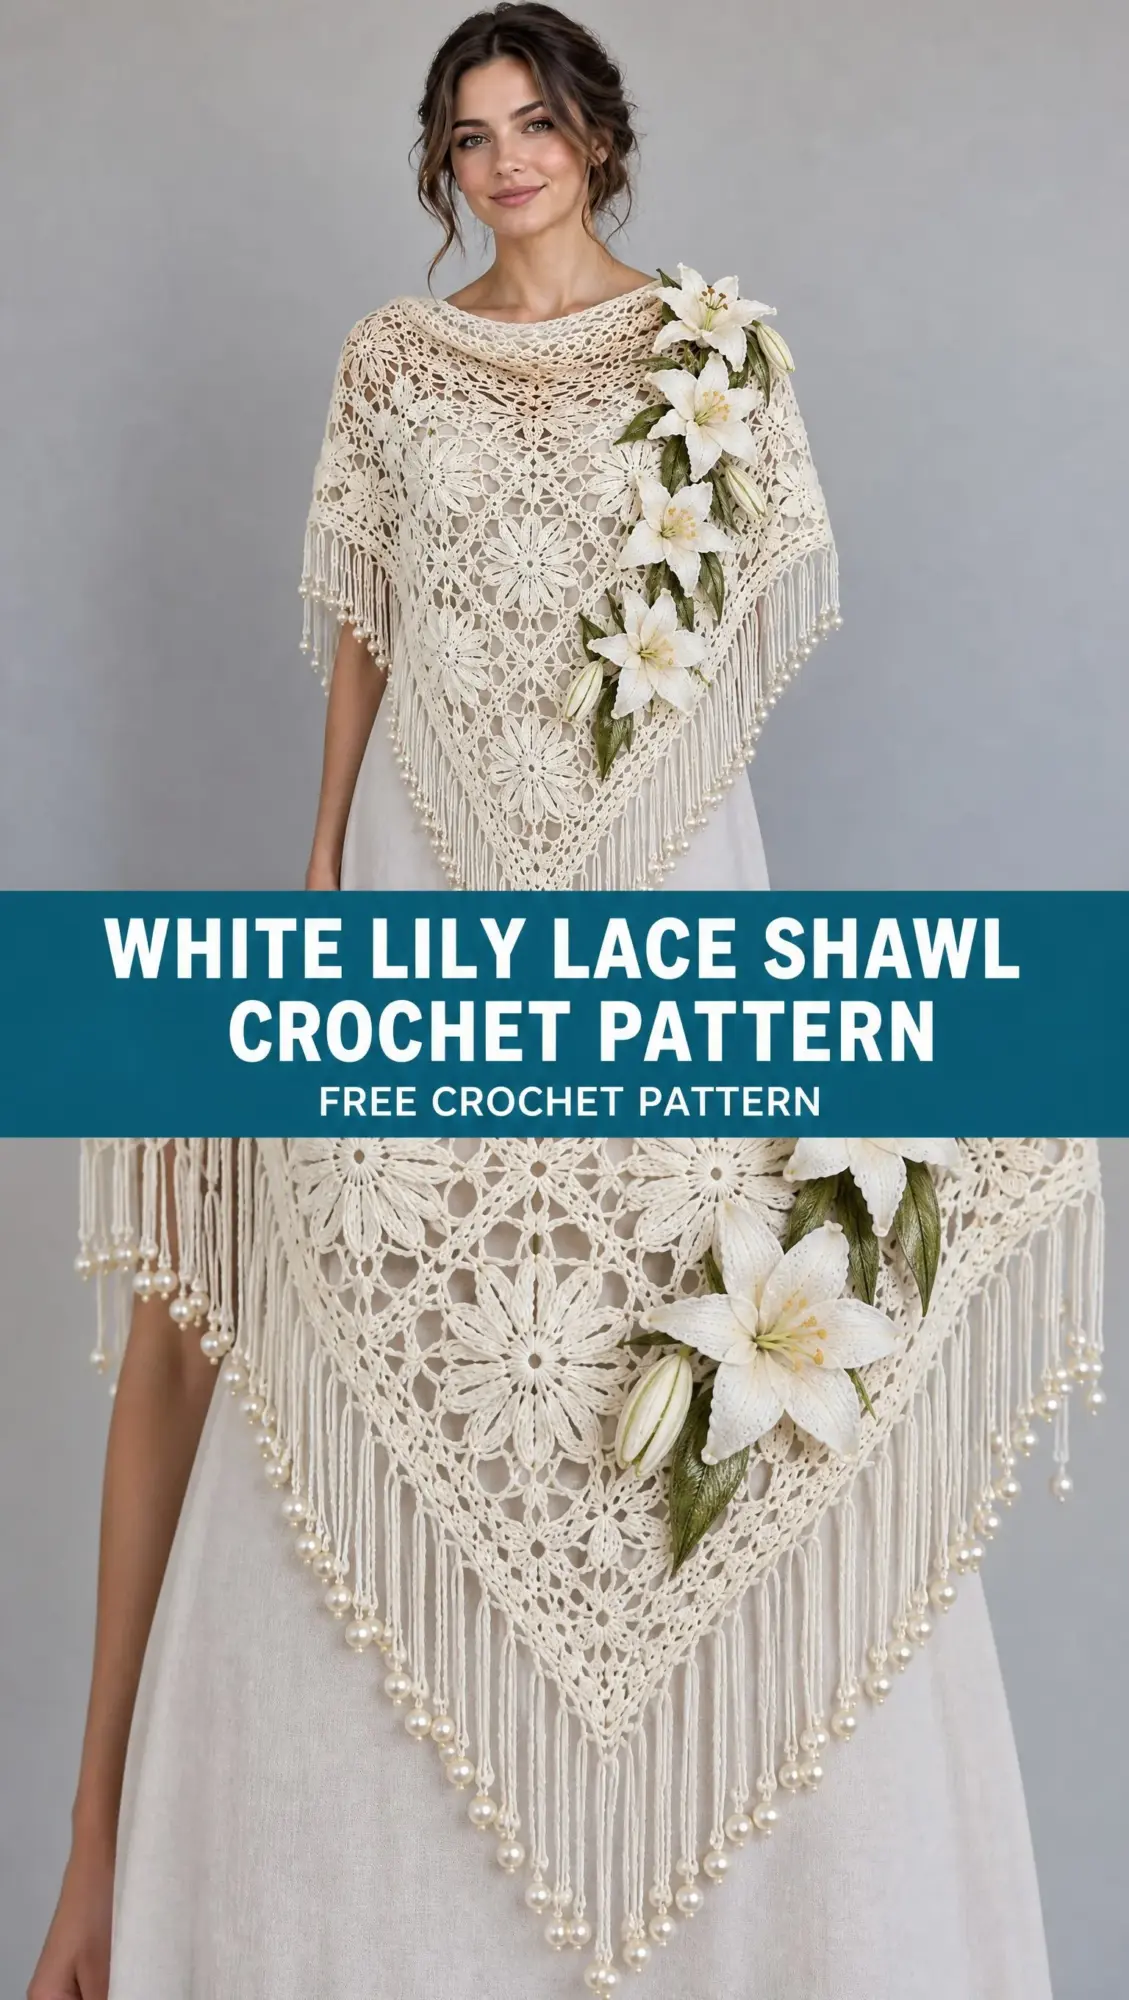
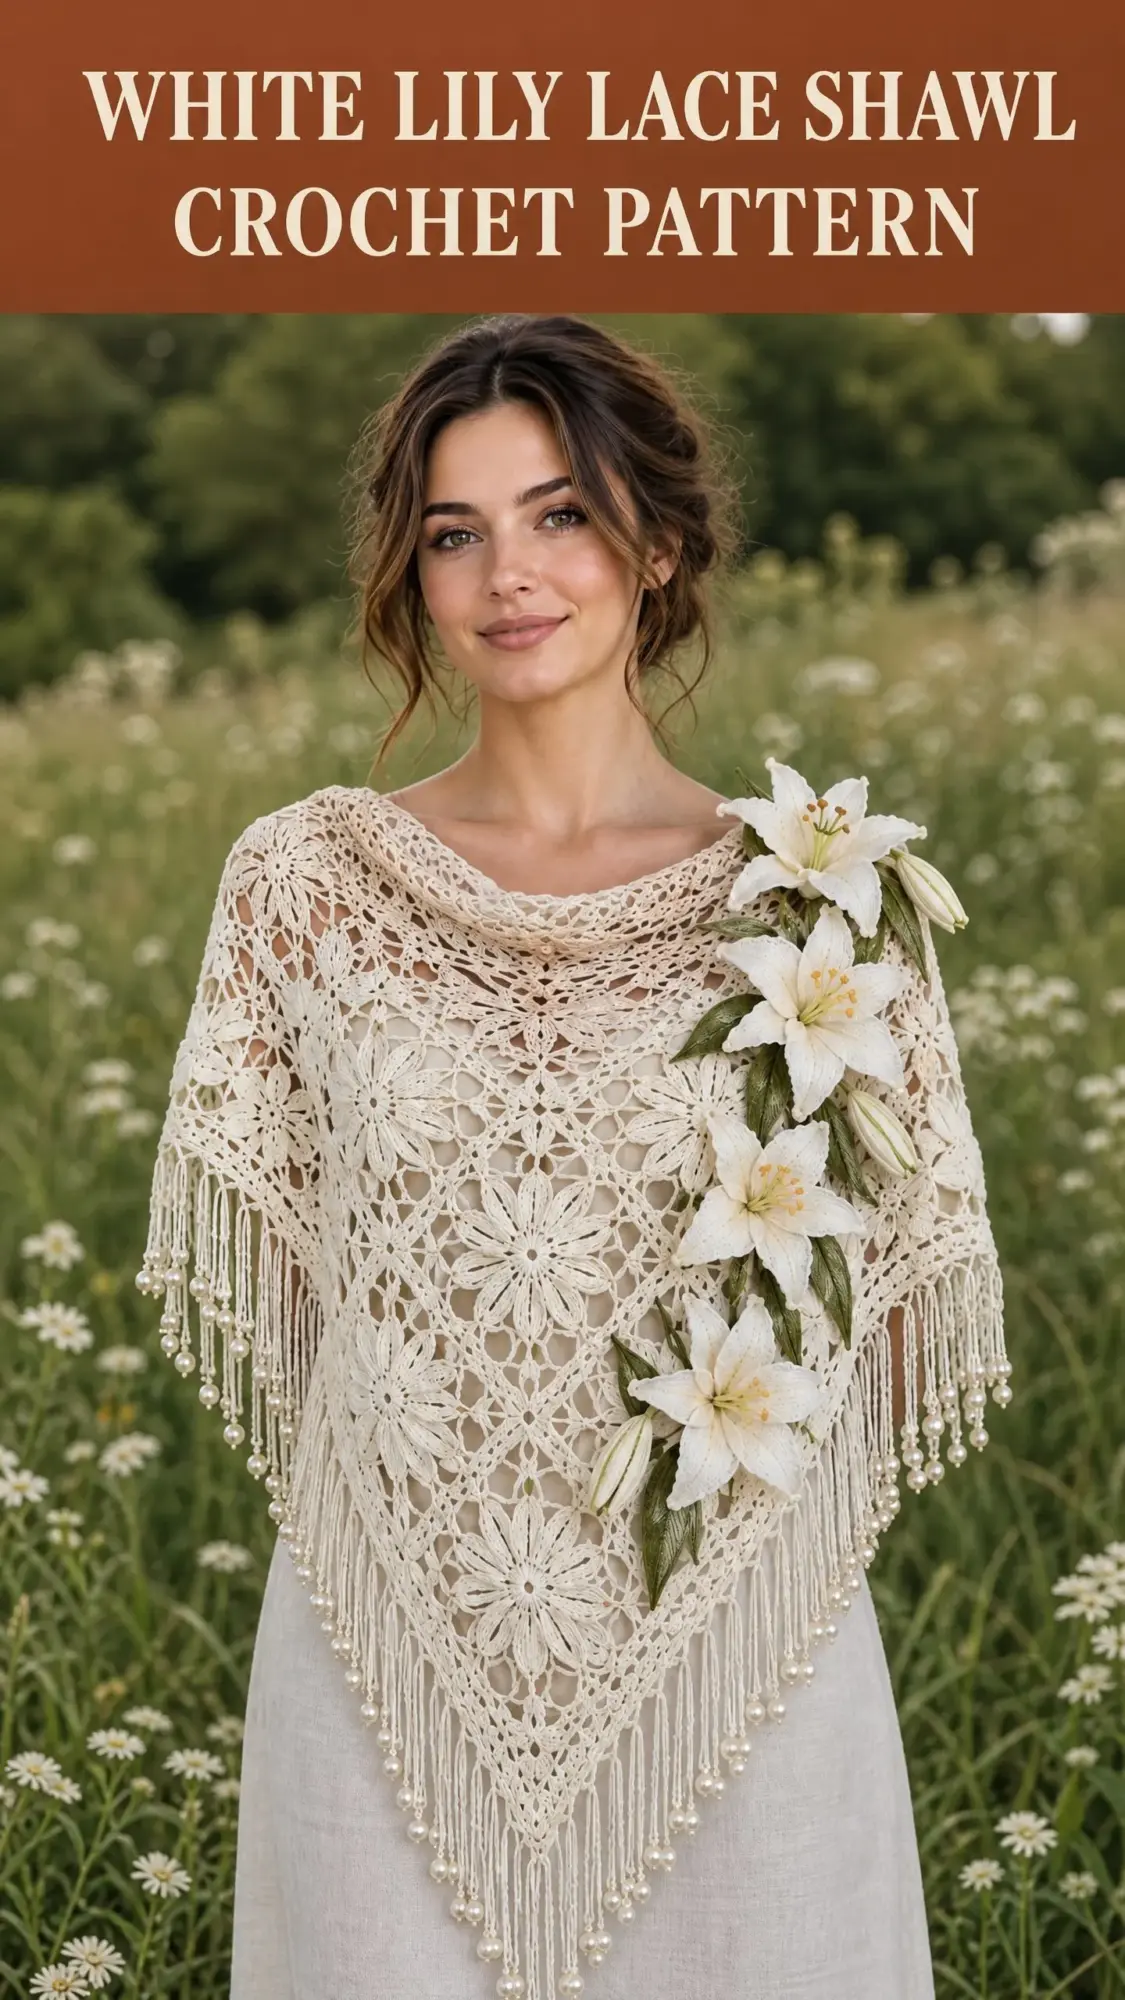
This White Lily Lace Shawl combines a delicate triangular lace body with dimensional crochet lily appliques that cascade from one shoulder toward the center point. The construction is genuinely interesting. You’ll work from the bottom up, building the triangle through center increases, then add open mesh sections and shell stitches before finishing with a picot border. The five layered lily flowers with their slim leaves create a stunning focal point that looks far more complicated than it actually is.
I’ll be honest with you about the skill level here. This pattern is marked intermediate, and that’s accurate. If you’re comfortable with basic stitches and have made a few projects with chain spaces and shell patterns, you can absolutely do this. The lily appliques are worked separately and sewn on at the end, so you can take your time perfecting each flower before attaching them.
Why This Shawl Makes a Perfect Special Occasion Piece
The White Lily Lace Shawl was designed with weddings in mind, but it works beautifully for any occasion where you want to feel elegant. The finished piece measures approximately 70 inches across the wingspan and 34 inches deep, giving you generous coverage that drapes beautifully over the shoulders.
The combination of the airy lace body and the dimensional flowers creates visual interest without overwhelming the wearer. Whether you’re making this for yourself, a bride, or someone celebrating a milestone moment, the result is a true heirloom piece.
Materials You’ll Need
Before you begin, gather these supplies:
Yarn: Fingering weight cotton or bamboo blend yarn, approximately 900 to 1100 yards in ivory or soft white for the main color. You’ll also need a small amount of yellow yarn for the lily centers.
Hook: 2.5 mm to 3.0 mm crochet hook. Adjust based on your gauge swatch.
Notions: Yarn needle for weaving in ends and sewing on appliques, stitch markers to track your center point, and blocking pins for finishing.
The pattern recommends smooth yarn for the clearest lace definition. Cotton and bamboo blends work particularly well because they hold their shape after blocking and show off the stitch detail beautifully.
Gauge Information
Your gauge should be approximately 24 double crochet stitches by 12 rows equaling 4 inches after blocking.
I cannot stress enough how important blocking is for this project. Your gauge before blocking will look quite different from your finished piece. Make a small swatch, block it, then measure. This will save you from any surprises when you complete the full shawl.
Abbreviations and Stitch Definitions
Let me walk you through every abbreviation you’ll encounter in this pattern:
ch (chain): The foundation stitch. Yarn over, pull through the loop on your hook.
sc (single crochet): Insert hook into stitch, yarn over and pull up a loop (2 loops on hook), yarn over and pull through both loops.
dc (double crochet): Yarn over, insert hook into stitch, yarn over and pull up a loop (3 loops on hook), yarn over and pull through 2 loops, yarn over and pull through remaining 2 loops.
tr (treble crochet): Yarn over twice, insert hook into stitch, yarn over and pull up a loop (4 loops on hook), yarn over and pull through 2 loops three times.
sl st (slip stitch): Insert hook into stitch, yarn over and pull through both the stitch and the loop on your hook in one motion.
sp (space): The gap created by chain stitches in the previous row.
st (stitch): A single stitch of any type.
sk (skip): Pass over the indicated number of stitches without working into them.
inc (increase): Adding stitches to make your fabric wider.
Shawl Body Pattern Instructions
Foundation
Chain 6. Slip stitch into the first chain to form a ring. This ring becomes the bottom point of your triangle.
Row 1
Chain 4. This counts as one double crochet plus one chain. Work 3 double crochet into the ring, chain 2, work 3 double crochet into the ring, chain 1, then work 1 double crochet into the ring. Turn your work.
This first row establishes the center V shape that will define your triangle throughout the project. The chain 2 space in the middle is your center point.
Row 2
Chain 4, then work 1 double crochet in the same space. Work double crochet across to the center chain space. In the center space, work 2 double crochet, chain 2, then 2 double crochet. This creates your center increase. Continue working double crochet across and finish with 2 double crochet in the last space. Turn.
Row 3
Chain 4, then work 1 double crochet in the same space. Work double crochet in each stitch until you reach the center. In the center chain 2 space, work 2 double crochet, chain 2, then 2 double crochet. Continue working double crochet across. Finish with 2 double crochet in the last space.
Continuing the Body
Repeat Row 3 until your shawl reaches approximately 32 inches deep. Keep maintaining the center V increase throughout each row and focus on keeping your edges straight and even.
Place a stitch marker in your center chain 2 space if it helps you keep track. Some crocheters find it useful to count their stitches every few rows to make sure the increases are staying symmetrical on both sides.
Lace Section Instructions
Once your body reaches the target depth, you’ll transition into the open lace section that adds airiness and visual interest.
Creating the Open Mesh
Next Row: Chain 5, skip 2 stitches, then work 1 double crochet in the next stitch. Repeat this pattern across the entire row, creating open chain spaces.
Adding the Shell Pattern
Following Row: Work a shell pattern by placing 2 double crochet, chain 2, then 2 double crochet all in each chain space from the previous row.
Repeat these two lace rows for 12 to 15 rows total. The alternating mesh and shell rows create the beautiful textured lace effect visible in the finished shawl.
Final Border Instructions
The border frames your shawl with a delicate picot edge that adds a professional finish.
Round 1
Work single crochet evenly around all edges of the shawl. When you reach the center point at the bottom, place 3 single crochet stitches to keep the point sharp and defined.
Round 2
Work the following pattern around the entire edge: single crochet, chain 3, single crochet in the next stitch. Repeat this sequence all the way around.
Round 3
Now you’ll create the picot edging. Work single crochet, chain 3, then slip stitch into the first chain to close the picot. Work single crochet in the next stitch. Repeat this picot pattern around the entire shawl.
Crochet Lily Applique Instructions
The dimensional lilies are what make this shawl truly special. You’ll make 5 flowers total, each with two layers of petals.
Lily Center
Using your yellow yarn, make a magic ring. Work 10 single crochet stitches into the ring. Join with a slip stitch to complete the round.
First Petal Layer
Attach your white yarn to the center. Chain 3, work 2 double crochet, chain 3, then slip stitch into the same stitch. Repeat this pattern around to create six petals total.
Outer Petal Layer
Attach a second strand of white yarn. You’ll work larger petals behind the first layer to create dimension. Chain 5, work 3 treble crochet, chain 5, then slip stitch. Continue around to complete the outer petal layer.
After finishing each lily, shape the petals gently with your fingers. This helps them look more natural and three dimensional.
Leaf Instructions
Make 8 leaves to arrange between your lily flowers.
Chain 10. Single crochet in the second chain from the hook. Then work the following stitches along the chain: half double crochet, double crochet, treble crochet, double crochet, half double crochet, single crochet.
Slip stitch back down the opposite side of the foundation chain. This creates a symmetrical leaf shape with a pointed tip.
Assembly Instructions
Arrange your five completed lilies diagonally from one shoulder of the shawl toward the center point at the bottom. Lay them out on the shawl before sewing to find the most pleasing arrangement.
Sew each flower securely using matching yarn and your yarn needle. Take small stitches through the back of each flower center to keep them firmly attached.
Add the leaves between the flowers, tucking them partially behind the lily petals for a natural look.
Hide all your yarn ends by weaving them carefully inside the stitches on the back of your work.
Blocking Your Finished Shawl
Blocking transforms this project from nice to stunning. Do not skip this step.
Soak your completed shawl in lukewarm water for about 15 to 20 minutes. Gently squeeze out the excess water without wringing or twisting the fabric.
Lay the shawl flat on blocking mats or a clean towel. Pin it into a triangular shape, stretching the lace openings evenly across the entire piece.
Allow the shawl to dry completely before removing the pins. This might take 24 hours or more depending on humidity.
Customization Ideas
The pattern offers flexibility for making this shawl your own. You can add more lily appliques for a fuller floral cascade, or extend the lace rows for additional depth and drama.
Consider using a contrast color for the lily centers if you want them to stand out more. Pale gold, soft peach, or even a hint of green would all complement the ivory base beautifully.
Tips for Success
Work in good lighting so you can see your stitches clearly in the fine yarn. Fingering weight can be tricky to work with if you’re straining to see.
Use stitch markers liberally. Mark your center point, the beginning of each lace section, and any other spots where you want to track your progress.
Take breaks. Lace work requires concentration, and tired hands make mistakes. Better to work in shorter sessions and enjoy the process.
The finished shawl makes an incredible gift for weddings, anniversaries, or any occasion that calls for something handmade and meaningful.
Thank you so much for choosing this pattern for your next project. I truly hope you love making it as much as I loved designing it. If you create this shawl, I would absolutely love to see your finished piece. Tag me on Instagram or share it in my Facebook group so we can celebrate your beautiful work together.
If this pattern caught your eye, go ahead and save it to your Pinterest boards so you can find it easily when you’re ready to start. And please drop a comment below if you make one. I love hearing how your projects turn out and seeing the color combinations you choose!
Want a Quick & Easy Printable Version?
Get a clean, beautifully formatted PDF of this pattern — easy to follow step by step, ready to print or save on any device. No scrolling, no distractions, just the pattern.
Get the Printable PDF →