Let me guess. You saw this adorable barrel bag and thought, "That looks way too complicated for me." I get it. The structured shape, the fabric patches, the zipper, the hardware. It seems like a lot, right?
Get the Ad-Free PDF Pattern
You can find the free pattern below, or you can purchase the ad-free printable PDF from my shop.
Get the Printable PDF →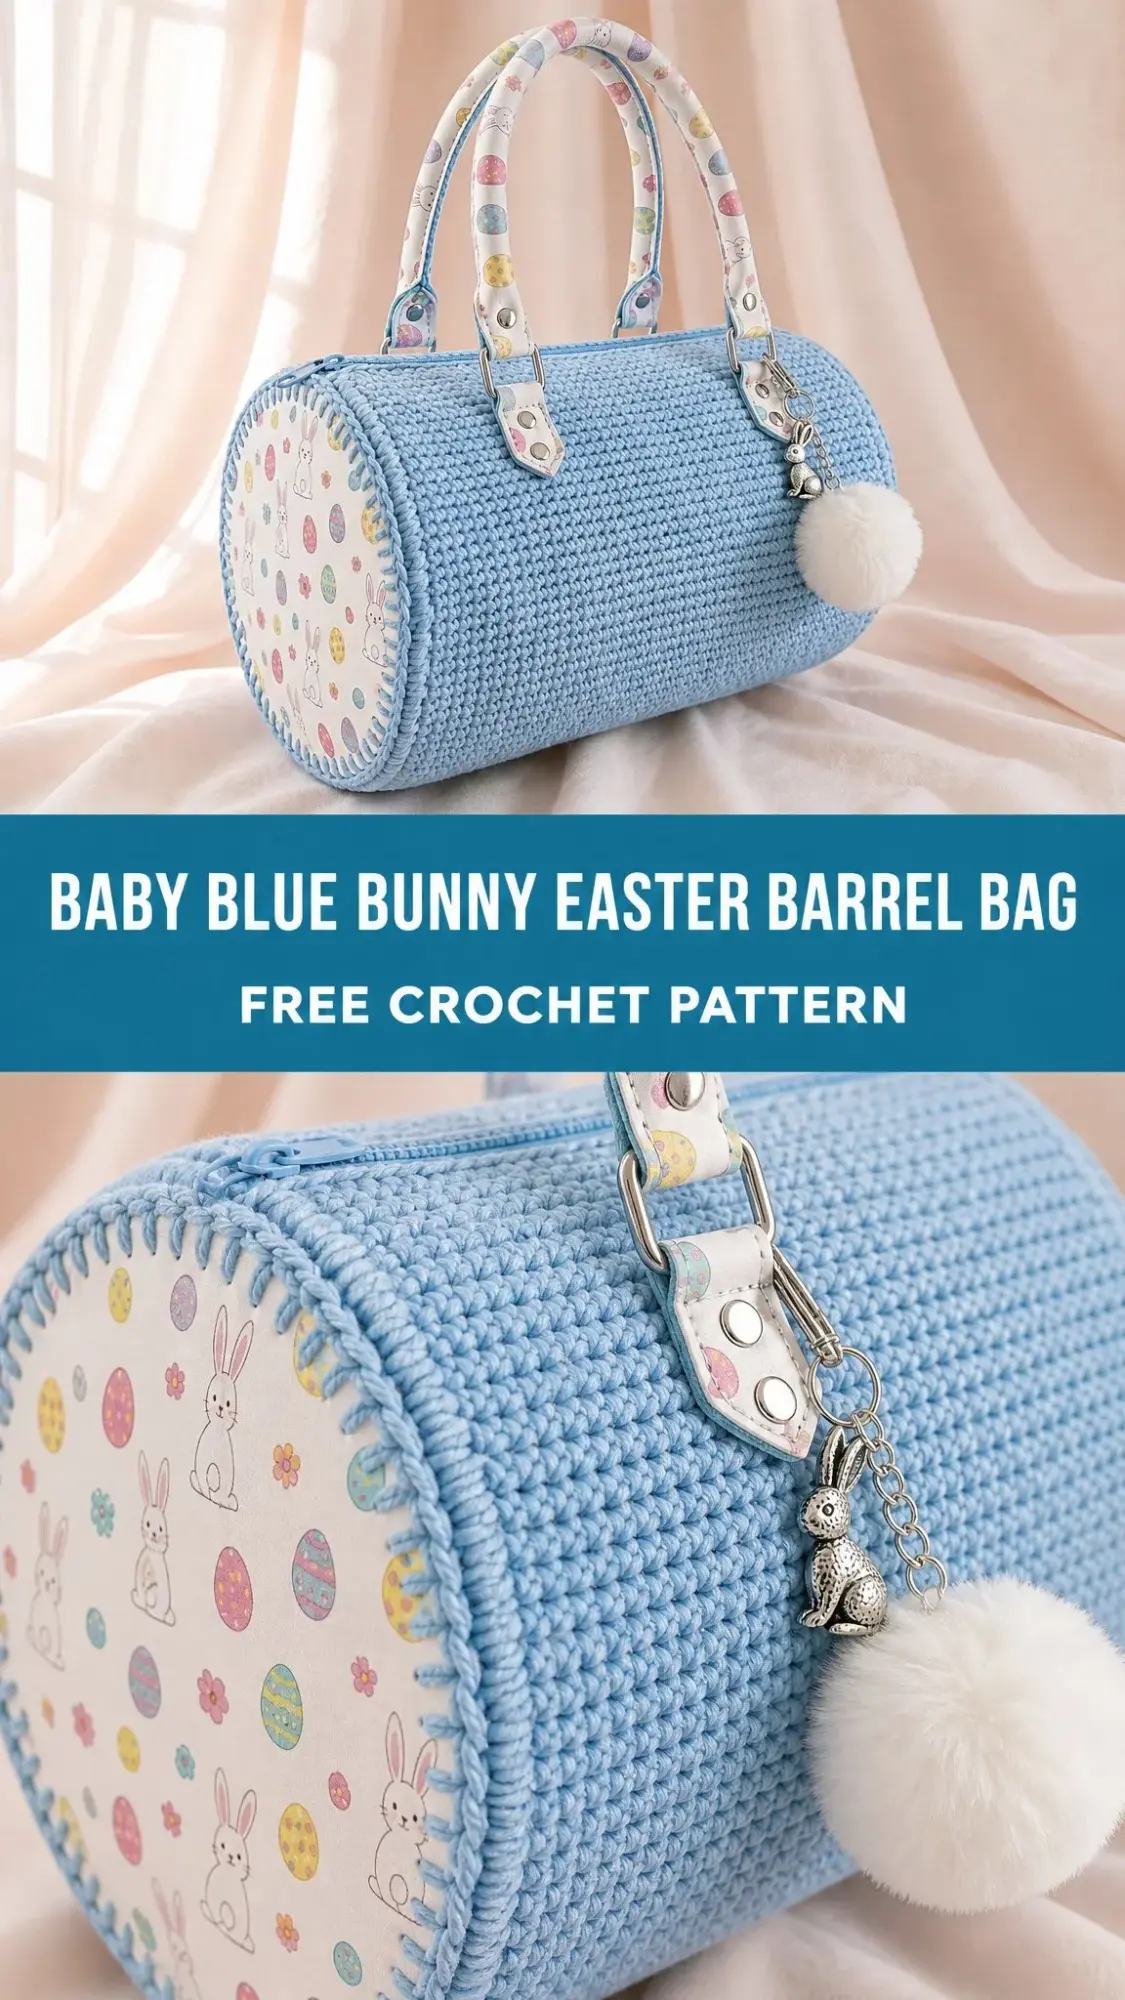
Here’s the truth. This bag is built from the most basic stitch in crochet: the single crochet. That’s it. The body is just a rectangle worked in rows. The end panels are simple flat circles with easy increases. Everything else is assembly, and I walk you through every single step.
Whether you’ve been crocheting for years or you just mastered the single crochet last month, you can absolutely make this bag. The construction is logical, the pieces are straightforward, and the result looks like something you’d find in a boutique. Let me show you exactly how it comes together.
About This Baby Blue Bunny Easter Barrel Bag Pattern
This sweet barrel bag features a crocheted body in soft baby blue, two circular end panels topped with bunny and Easter egg fabric patches, a zipper closure along the top, fabric-covered rope handles, and an adorable pom-pom charm with a tiny bunny. It’s the perfect spring accessory, Easter gift bag, or nursery keepsake.
The finished bag measures 11 inches (28 cm) long with an end panel diameter of 6.25 inches (16 cm). The approximate circumference is 19.5 inches (49.5 cm), and the handle drop is 6.25 inches (16 cm). These dimensions create a perfectly proportioned barrel shape that holds its structure beautifully.
Skill level: Intermediate. The stitches themselves are simple, but you’ll need consistent gauge, flat circle shaping skills, zipper sewing ability, and careful handle placement.
Time estimate: Approximately 8 to 12 hours total, including all crochet work, patch preparation, zipper installation, handle covering, and finishing.
Materials You’ll Need
Gather these supplies before you begin:
Yarn:
Hook:
Notions and Hardware:
Recommended yarns: Paintbox Cotton DK works beautifully for crisp stitch definition and comes in many pastel shades. Lion Brand 24/7 Cotton DK gives a smooth, durable finish with a polished look. Knit Picks/WeCrochet Dishie provides a firm worsted cotton for extra sturdiness.
Substitution note: Choose a smooth cotton or cotton-blend yarn that creates a firm fabric at gauge. Acrylic can work, but cotton holds the barrel shape more cleanly. If using a true worsted weight yarn, adjust your hook size and check your diameter before assembly.
Gauge
18 single crochet stitches × 18 rows = 4 inches × 4 inches (10 × 10 cm) in single crochet, worked firmly and blocked lightly.
Gauge matters here. The body panel uses 88 stitches for the bag circumference and 50 rows for the 11-inch length. If your gauge is off, your end panels won’t fit your tube properly. Please swatch and adjust your hook size before starting the main pieces.
Stitch Abbreviations and Definitions
Let me define every stitch and term you’ll encounter:
Special techniques you’ll use:
Invisible join: Cut your yarn and pull the tail through the final stitch. Thread the tail through the first stitch of the round from front to back, then down through the final stitch to mimic a top loop. This creates a seamless finish.
Single crochet join seam: Hold your edges together with the right side facing out. Insert your hook through both layers, yarn over, pull through both layers, yarn over and pull through both loops on your hook. This creates a neat, sturdy seam.
Pattern Notes Before You Begin
Body Panel Instructions
With baby blue yarn, you’ll create the main rectangle. Work all rows firmly but without pulling the side edges inward.
Foundation: Chain 89. Single crochet in the 2nd chain from the hook and in each chain across. Turn. (88 sc)
Rows 2 through 50: Chain 1, single crochet in each stitch across. Turn after each row. (88 sc)
Check your work: Your panel should measure approximately 19.5 inches (49.5 cm) wide by 11 inches (28 cm) tall.
Join the tube: Bring the foundation edge to the Row 50 edge with the right side facing out. Single crochet through both edges across to form a tube. Fasten off, leaving a long tail. (88 join stitches)
Optional texture refinement: For a slightly more corded surface, work Rows 2 through 50 through the back loop only. For the smoothest photo-style finish, work standard single crochet through both loops.
Top Zipper Opening
Flatten your tube with the seam centered at the bottom. Mark a straight 11 inch (28 cm) opening along the top. You’ll sew the zipper after both ends are attached so the opening doesn’t distort during joining.
Checkpoint
Before adding end panels, your tube should be about 11 inches (28 cm) long and just under 6.25 inches (16 cm) across when gently rounded.
End Panels and Bunny Patches
Make 2 circular panels in white or cream yarn. Join each round with a slip stitch to the first single crochet, then chain 1 to begin the next round.
Round 1: Magic ring, 8 single crochet in ring, join. (8 sc)
Round 2: Increase in each stitch around, join. (16 sc)
Round 3: (Single crochet in next stitch, increase) 8 times, join. (24 sc)
Round 4: (Single crochet in next 2 stitches, increase) 8 times, join. (32 sc)
Round 5: (Single crochet in next 3 stitches, increase) 8 times, join. (40 sc)
Round 6: (Single crochet in next 4 stitches, increase) 8 times, join. (48 sc)
Round 7: (Single crochet in next 5 stitches, increase) 8 times, join. (56 sc)
Round 8: (Single crochet in next 6 stitches, increase) 8 times, join. (64 sc)
Round 9: (Single crochet in next 7 stitches, increase) 8 times, join. (72 sc)
Round 10: (Single crochet in next 8 stitches, increase) 8 times, join. (80 sc)
Round 11: (Single crochet in next 9 stitches, increase) 8 times, join, invisible finish. (88 sc)
Patch Preparation
Cut two fabric circles approximately 5.6 inches (14.2 cm) in diameter. Press under a scant 1/4 inch (6 mm) edge or use lightweight fusible web. Center one patch on each crochet circle and hand stitch around the edge with small, neat stitches.
Edge Round
With baby blue yarn, join at any stitch and single crochet evenly around each circle through the crochet panel only. Keep 88 single crochet stitches around. Fasten off, leaving a long sewing tail on each panel.
Assembly Instructions
Attaching the End Panels
Step 1: Place 4 markers around each tube end at 22-stitch intervals. Place matching markers on each end panel. This divides everything into 4 equal quarters.
Step 2: Pin one panel to one tube end with the right side facing out. Single crochet join or whipstitch through both layers around, matching your markers as you go. (88 joins)
Step 3: Repeat for the second end, adding light stabilizer or lining before the final few inches are closed. You should now have a rounded barrel shape.
Installing the Zipper
Fold the top opening edges inward by about 1/4 inch (6 mm). Center the 11 inch (28 cm) zipper under the opening and hand stitch through the zipper tape and crochet edge using small backstitches. Reinforce both zipper ends with extra stitches.
Handle Tabs and Handles
Tabs (make 4): Cut or crochet four sturdy tabs approximately 1 × 3.25 inches (2.5 × 8 cm). Fold each around a D-ring. The finished visible tab should be about 1 inch.
Placement: Position two tabs on each side of the zipper, approximately 2 inches (5 cm) in from each end panel. Sew through the lining or stabilizer for extra strength. Keep the pairs symmetrical.
Handles: Cover two 16 inch (40.5 cm) rope pieces with printed fabric. Attach each end to a D-ring. This creates a 6.25 inch handle drop.
Adding the Charm
Clip the bunny charm and pom-pom to one handle tab or D-ring. Keep charms removable for easier washing.
Size Customization Tips
Want a different size? Here’s how to adjust:
Blocking and Shaping
Steam lightly from above without flattening the stitch texture. Shape the barrel over a rolled towel until completely dry. Avoid heavy wet blocking after the zipper and fabric patches are attached, as this can distort them.
Troubleshooting Common Issues
Circle cups inward: This usually means too few increases or tight tension. Rework the round, keeping 8 increases per round.
Circle ruffles: Too many increases or loose tension. Use the stated counts and maintain firm tension.
Tube twists: The join was made with edges offset. Match row ends carefully before seaming.
Zipper waves: The opening stretched while sewing. Pin your zipper fully before stitching and use small, even stitches.
Care Instructions
Spot clean only. Do not machine wash. Reshape gently and air dry flat. Always remove the pom-pom and charm before cleaning.

Final Thoughts on This Easter Barrel Bag Pattern
This Baby Blue Bunny Easter Barrel Bag is proof that beautiful, structured accessories don’t require complicated stitchwork. Every stitch in this bag is a basic single crochet. The magic comes from consistent gauge, thoughtful assembly, and those sweet finishing touches like the fabric patches and pom-pom charm.
I hope this pattern gives you the confidence to try something that looks impressive but is totally achievable. The barrel shape, the bunny patches, the professional hardware. You can do all of it.
Thank you so much for choosing this pattern. I genuinely hope you love making it as much as I loved designing it. If you create your own Baby Blue Bunny Easter Barrel Bag, I would absolutely love to see it. Tag me on Instagram or share a photo in our Facebook group. Your finished projects always make my day.
If you found this pattern helpful, save it to your Pinterest boards so you can find it easily when you’re ready to start. And please drop a comment below if you make one. I love hearing how your projects turn out and answering any questions along the way. Happy crocheting!
Want a Quick & Easy Printable Version?
Get a clean, beautifully formatted PDF of this pattern — easy to follow step by step, ready to print or save on any device. No scrolling, no distractions, just the pattern.
Get the Printable PDF →