
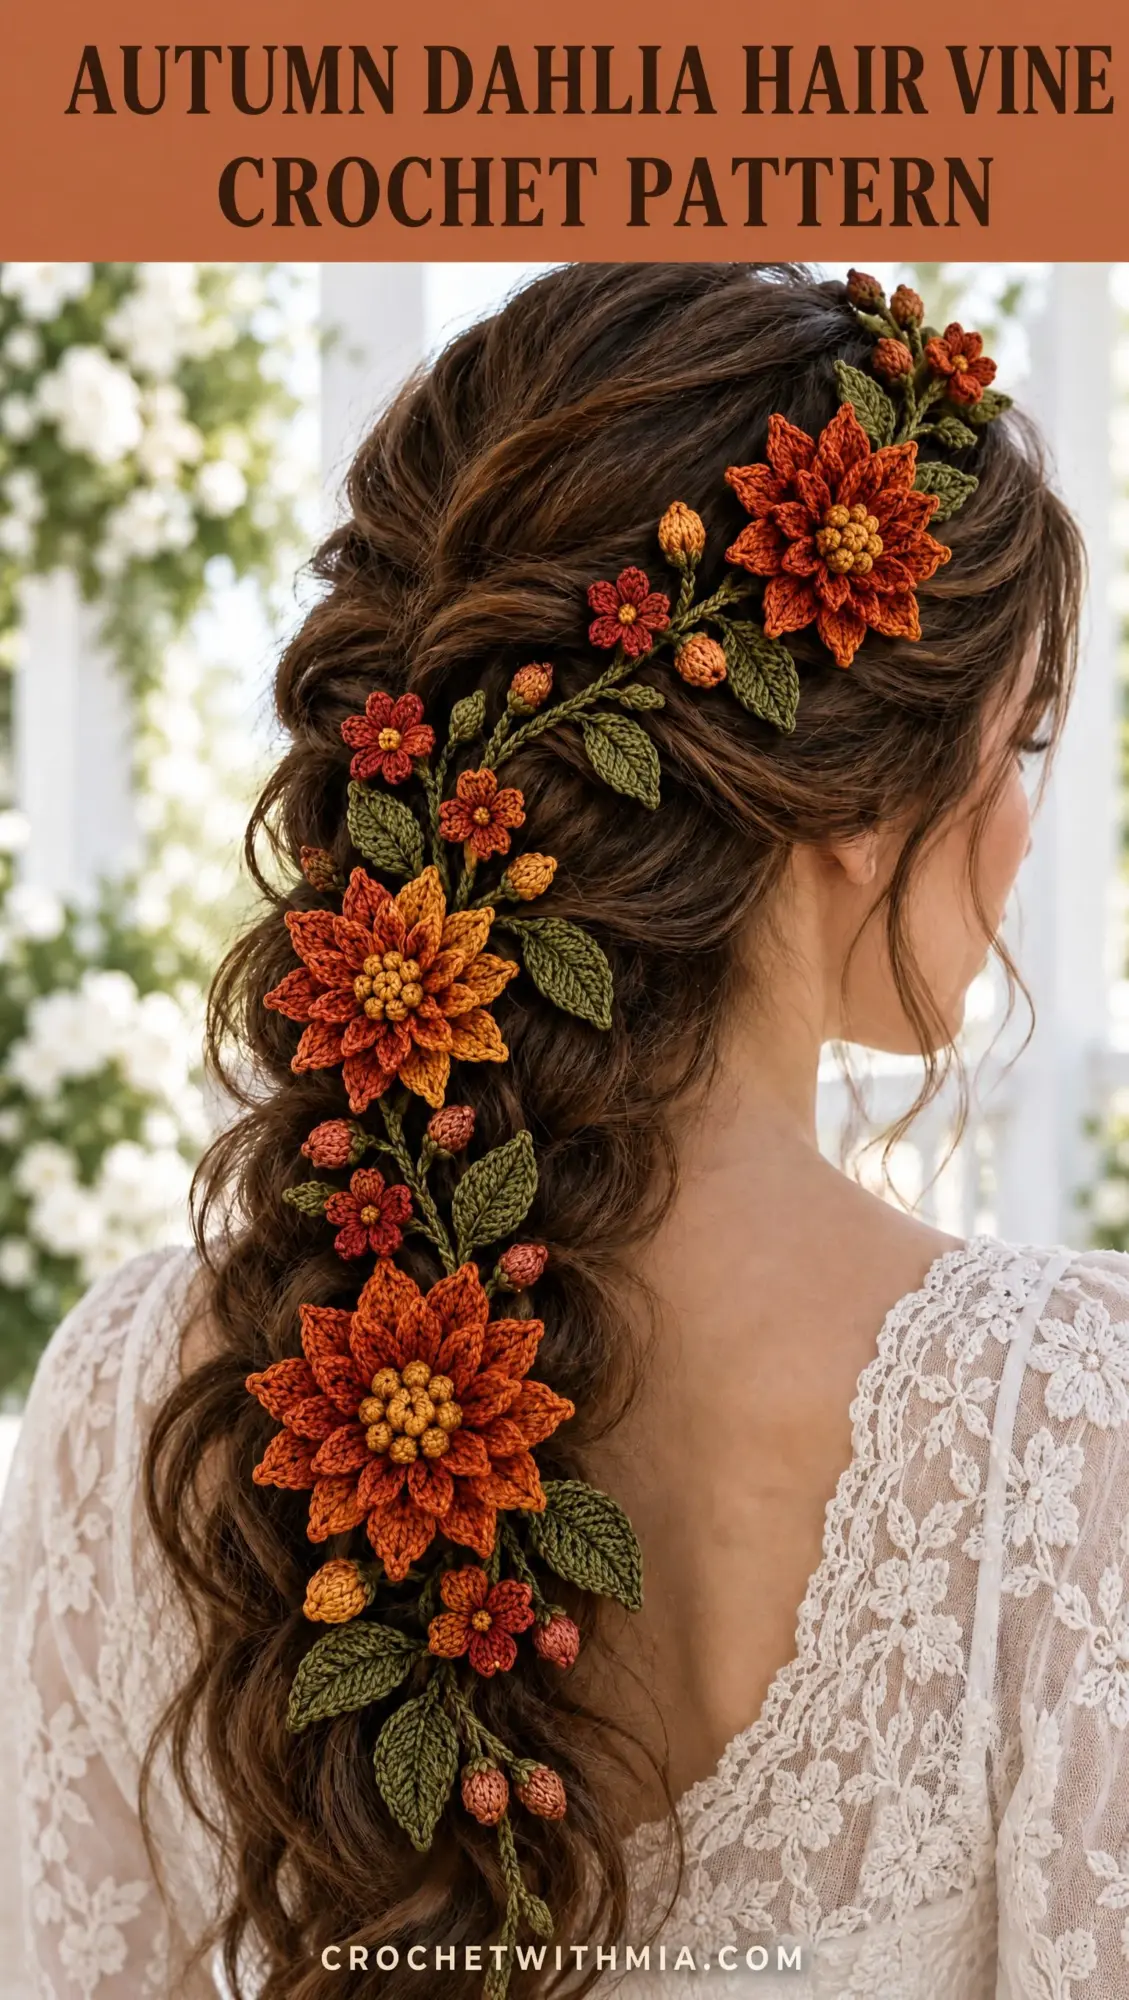
This is a thread crochet hair vine with dimensional dahlias, small blossoms, buds, and veined leaves on a flexible Romanian cord framework. The whole piece measures 27 to 30 inches long and sits beautifully on braids or half-up hairstyles. If you can work basic stitches in fine thread and follow BLO construction, you can absolutely make this.
Get the Ad-Free PDF Pattern
You can find the free pattern below, or you can purchase the ad-free printable PDF from my shop.
Get the Printable PDF →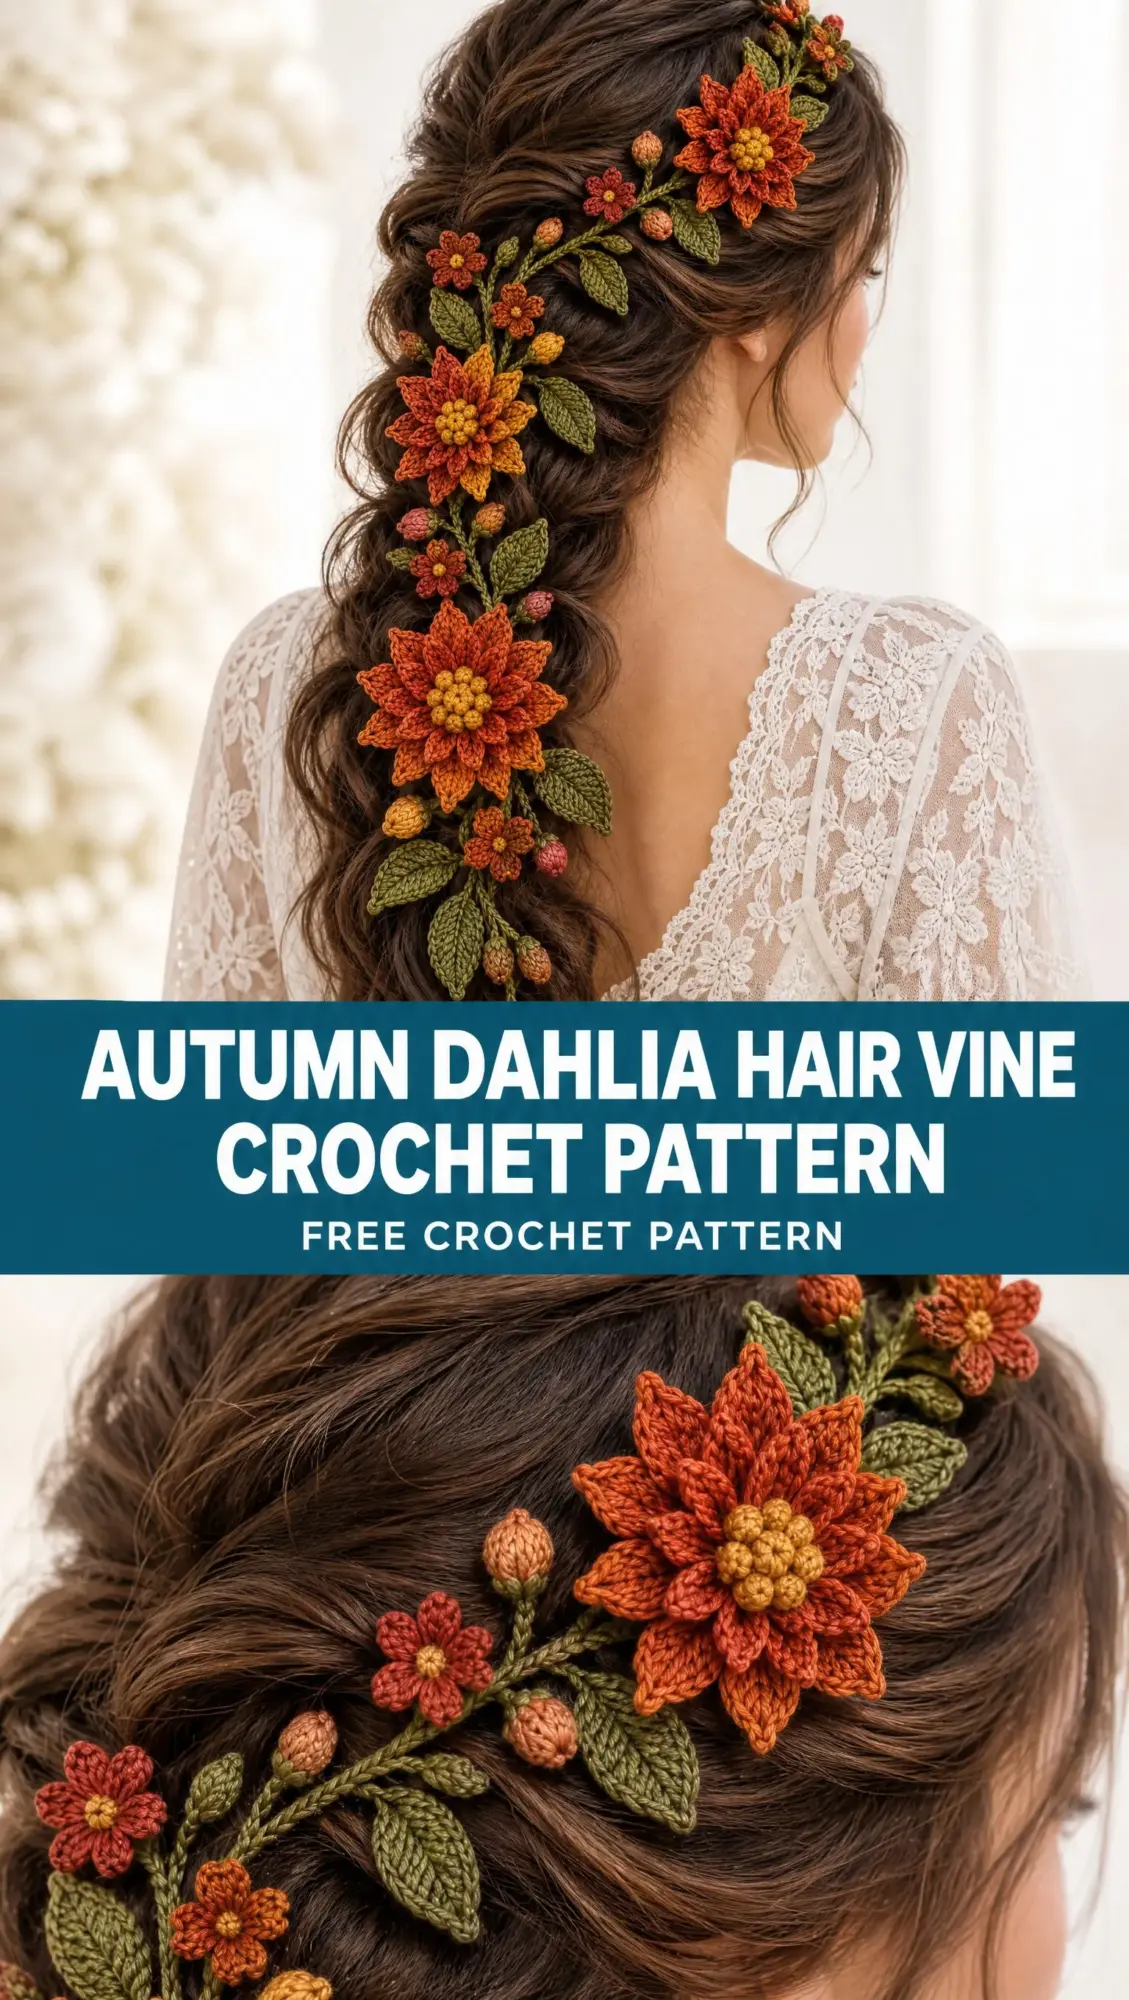
The design uses burnt orange, copper, golden ochre, and deep olive to create that perfect autumn palette. Everything gets sewn onto the cord framework after you finish the individual motifs, so you can work in short sessions and build toward the final piece at your own pace.
I love that this vine stays lightweight and intentionally open. Hair stays visible between the flowers, which keeps the whole look soft and romantic rather than heavy or costume-like.
Materials You Will Need
The pattern calls for size 10 crochet cotton or lace-weight mercerized cotton. You will need approximately 220 to 260 yards total, broken down by color:
For your hook, grab a 1.50 mm steel crochet hook. You can size up to 1.75 mm or down to 1.25 mm depending on your tension. The goal is firm fabric that holds its shape.
You will also need a fine tapestry needle, a sharp sewing needle for hidden joins, small scissors, a blocking mat, rustproof pins, and stitch markers. Optional but helpful: fabric stiffener diluted 1:3 for extra crispness on leaves and outer petals.
For wearing the finished piece, have 7 to 10 bobby pins or U-pins that match your hair color. Two mini combs are optional for extra security at the crown.
Yarn Suggestions
The pattern recommends Aunt Lydia’s Classic Crochet Thread Size 10 for crisp stitch definition. Scheepjes Maxi Sweet Treat works beautifully with its smooth mercerized finish and broad color range. DMC Cebelia No. 10 is another excellent choice for small botanical motifs.
Choose a smooth cotton that holds a pointed shape. Avoid fuzzy fibers, very soft bamboo, or anything with stretch. If you substitute lace-weight yarn, match the finished motif dimensions rather than chasing exact gauge.
Gauge Information
Gauge is not critical, but firm tension is essential. Working single crochet (sc) flat with size 10 cotton and a 1.50 mm hook, aim for approximately 11 sc by 12 rows equals 1 inch. A finished large dahlia should measure 2.5 to 3 inches across after light blocking.
Abbreviations and Special Techniques
Before diving into the motifs, let me walk you through every abbreviation and the special techniques this pattern uses.
Basic Abbreviations:
The 4-dc Bobble
This creates the textured centers on your dahlias. Yarn over, insert hook in stitch, yarn over and pull up a loop, yarn over and pull through 2 loops. You have started a partial double crochet. Repeat this partial dc 3 more times in the same stitch. You now have 5 loops on your hook. Yarn over and pull through all 5 loops. Chain 1 firmly to close. Push the bobble to the front of your work.
The Pointed Chain Petal
This technique creates those gorgeous narrow petals with crisp points. Chain the stated length. Beginning in the 2nd chain from hook, work toward the base using the listed stitches. Work 3 tall stitches in the last chain to turn the tip. Continue down the unused loops on the opposite side of the foundation chain. Slip stitch back into the same base stitch. You get a narrow two-sided petal with a beautiful point.
Romanian Cord
This is the backbone of your vine. Chain 2. Single crochet in the 2nd chain from hook. Rotate the tiny work clockwise so the side loop of the previous sc faces you. Insert your hook under that side loop and work 1 sc. Rotate clockwise again. Each new sc exposes a side loop. Work 1 sc into it. Repeat to your desired length. Keep stitches tight and rotate consistently in the same direction for a slender cord.
Left-handed note: You can follow the same stitch counts and motif sequence. Your work will naturally mirror the written direction. For Romanian cord, rotate counterclockwise instead of clockwise if that feels more natural.
Large Dahlia Pattern (Make 1)
This is your showstopper flower, measuring 2.5 to 3 inches across when finished.
Base Disk
Round 1: With burnt orange, MR, 6 sc. Do not join. [6 sts]
Round 2 BLO: Inc around. [12 sts]
Round 3 BLO: (Sc, inc) 6 times. [18 sts]
Round 4 BLO: (2 sc, inc) 6 times. [24 sts]
Round 5 BLO: (3 sc, inc) 6 times. [30 sts] Sl st to next st and fasten off.
Outer Petal Tier (15 petals in Round 5 front loops)
Join burnt orange to any exposed front loop of Round 5. Sl st in next front loop, ch 8. Beginning in 2nd ch: sl st, sc, hdc, dc, tr, dtr. Work 3 dtr in final chain. Down opposite side work dtr, tr, dc, hdc, sc, sl st. Sl st again into the same base loop. Skip 1 front loop. Repeat around. [15 petals]
Second Tier (12 petals in Round 4 front loops)
Join copper to any front loop of Round 4. Work one petal in every other loop: ch 7. Down first side: sl st, sc, hdc, dc, tr. Work 3 tr in final ch. Opposite side: tr, dc, hdc, sc, sl st. Sl st into base. [12 petals]
Third Tier (9 petals in Round 3 front loops)
Join burnt orange. Work in every other Round 3 front loop: ch 6. Sl st, sc, hdc, dc. Work 3 tr in final ch. Opposite side: dc, hdc, sc, sl st. Return to base. [9 petals]
Inner Tier (6 petals in Round 2 front loops)
Join golden ochre or copper. Work in every other Round 2 front loop: ch 5. Sl st, sc, hdc. Work 3 dc in final ch. Opposite side: hdc, sc, sl st. Return to base. [6 petals]
Ochre Bobble Center
With golden ochre, MR, 6 sc. Round 2: (4-dc bobble in next st, sc in same st) around. [6 bobbles plus 6 sc] Fasten off with a long tail. Cup the bobbles inward, place over the center opening, and sew securely through Rounds 1 and 2 of the dahlia base.
Petal shaping tip: Pin the flower face-up. Stretch each outer petal gently from base to tip, then angle alternating petals slightly left and right. Do not flatten the tiers. The dahlia should remain domed.
Medium Dahlia Pattern (Make 1)
Base: Work Rounds 1 through 4 of the large base only. [24 sts]
Outer tier in Round 4: 12 petals using the Large Dahlia second-tier petal (ch 7).
Middle tier in Round 3: 9 petals using the ch-6 petal.
Inner tier in Round 2: 6 petals using the ch-5 petal.
Add the same 6-bobble ochre center.
Finished diameter: approximately 2.1 to 2.4 inches.
Medium-Small Dahlia Pattern (Make 1)
Base: Round 1: 6 sc. Round 2 BLO: 12 sc. Round 3 BLO: 18 sc.
Outer tier in Round 3: 9 ch-6 petals.
Inner tier in Round 2: 6 ch-5 petals.
Center: MR, 6 sc. Work a 3-dc bobble in each st, separated by ch 1. Sew to center.
Finished diameter: approximately 1.75 to 2 inches.
Five-Petal Rust Blossom (Make 5)
Use rust, copper, or a mix of both. These flowers should remain flatter and lighter than the dahlias.
MR, ch 1, 5 sc into ring. Join with sl st. [5 sts]
Petal: Sl st in next st, ch 5. Beginning in 2nd ch: sl st, sc, hdc, dc. Work 3 dc in last ch. Down opposite side: hdc, sc, sl st. Sl st into same base st. Repeat once in each of the 5 base stitches. [5 petals]
Center: With golden ochre, bring yarn up through center and make 3 tight French-knot-style wraps using the needle. For an all-crochet center, use MR, 5 sc, close tightly, fasten off and stitch to flower.
Finished diameter: 0.75 to 1 inch.
Closed Copper Buds (Make 7)
Bud Body (Make 4 small, 3 medium)
Small: With copper, MR 6 sc. Round 2: inc around [12 sts]. Round 3: sc around [12 sts]. Round 4: dec around [6 sts]. Stuff lightly with trimmed cotton tails, close, leaving a sewing tail.
Medium: MR 6 sc. Round 2: inc around [12 sts]. Rounds 3 and 4: sc around [12 sts]. Round 5: dec around [6 sts]. Close lightly stuffed.
Olive Calyx
Join deep olive to the bottom center of the bud. Ch 4, sl st in 2nd ch, sc, hdc. Sl st back at bud base. Repeat 4 times evenly around to form four pointed sepals. Ch 5 for a stem, then sl st back along the chain. Fasten off with a long tail.
Keep buds light: Use only a few trimmed thread ends as stuffing. Overstuffed buds become heavy and make the vine rotate in the hair.
Veined Olive Leaves
Leaves are worked around both sides of a foundation chain. The final surface slip-stitch vein adds that crisp central line.
Large Leaf (Make 6)
Ch 12. Beginning in 2nd ch: sl st, sc, hdc, dc, tr, tr, dc, hdc, sc, sl st. Work 3 sc in last chain.
Continue down opposite side: sl st, sc, hdc, dc, tr, tr, dc, hdc, sc, sl st. Join at base and fasten off.
Vein: Join olive at base on front. Surface sl st loosely along the center chain ridge to the tip. Fasten off.
Medium Leaf (Make 6)
Ch 10. Work sl st, sc, hdc, dc, tr, dc, hdc, sc. Work 3 sc in last ch. Mirror the sequence down the opposite side. Add a surface slip-stitch vein.
Small Leaf (Make 4)
Ch 8. Work sl st, sc, hdc, dc, hdc, sc. Work 3 sc in last ch. Mirror down the opposite side. Add a surface slip-stitch vein.
Blocking leaves: Steam-block lightly from 3 to 4 inches above the work without touching the iron to the cotton. Pin the tip sharp and pull the sides only enough to reveal the stitch vein. Leaves should remain softly curved, not board-flat.
Building the Flexible Vine Framework
Main Cord
With deep olive, make Romanian cord 27 to 30 inches long. Measure without stretching.
At each end, form a 0.4 inch loop by folding the final 0.8 inches back and stitching it securely to the cord. These end loops can take a bobby pin or mini comb.
Mark the cord from the crown end at 2.5, 5, 8, 11.5, 15, 19, 23, and 27 inches. These are placement guides, not rigid rules.
Side Branches (Make 9)
| Branch | Length | Use |
|---|---|---|
| A-B | 2.5 inches each | Crown blossoms and buds |
| C-D-E | 3.5 inches each | Upper leaves and small dahlia |
| F-G | 4.5 inches each | Middle dahlia, buds, paired leaves |
| H | 5 inches | Lower side bloom |
| I | 5.5 inches | Large lower dahlia support |
Make each branch as Romanian cord. Leave 6 inch tails at the base. Sew the branch base to the main cord for 0.4 to 0.6 inches so the join is smooth and cannot pivot.
Hairpin Loops
At 7 points along the main vine, use olive thread to make a tiny loop. Insert the needle through the cord, create a loop approximately 0.25 inches wide, wrap the base twice and secure. Place loops behind leaves where possible. The loops should fit one bobby pin but remain nearly invisible.
No wire required: The pattern is designed as a soft all-crochet accessory. If you need stronger shaping for stage wear, a 0.3 mm nylon monofilament can be carried inside the Romanian cord, but metal wire is not necessary for normal bridal or portrait use.
Assembly Guide
Lay the main vine diagonally on a towel with the crown end at upper right and the lower end extending down-left, mimicking how it will sit on the hairstyle. Pin the cords in a gentle S-curve before sewing motifs. Keep 0.5 to 1.25 inches of open cord visible between clusters.
Suggested Placement Sequence
0 to 5 inches (crown end): 2 small rust blossoms, 2 small buds, 3 small or medium leaves
5 to 10 inches: Medium-small dahlia on a side branch, 1 blossom, 2 buds, 4 leaves
10 to 17 inches: Medium dahlia angled slightly outward, 1 blossom, 1 bud, 4 leaves
17 to 24 inches: Large dahlia low on braid, 1 blossom, 1 medium bud, 3 leaves
24 to 30 inches: Taper with 1 bud and 2 narrow leaves. Leave final 1 to 2 inches light.
How to Sew Each Motif
Thread a motif tail onto the tapestry needle. Position the motif so its prettiest face is outward and the attachment point sits behind a petal or leaf.
Pass the needle through the Romanian cord, then through the motif base only. Never go through visible petal faces.
Take 3 to 5 small stitches across a 0.2 to 0.4 inch area. Pull firm enough to prevent wobble but not so tight that the cord buckles.
For dahlias, add a second anchor on the opposite side of the base disk. Large flowers need two-point anchoring.
Weave the tail through the underside of the flower or inside the cord for at least 0.6 inches before trimming.
Balance Check
Lift the finished vine by the crown end. It should hang without one section twisting heavily forward. If the large lower dahlia flips, add a leaf on the opposite side of the cord or shift the branch attachment by 0.25 to 0.5 inches.
Finishing and Blocking
Arrange the completed vine on a blocking mat in its intended diagonal S-curve. Pin the cord at intervals without stretching. Pin dahlia outer petals only. Leave inner tiers raised.
Mist lightly with water. For very soft cotton, use a small amount of diluted fabric stiffener only on the back half of the leaves and outer dahlia petals. Allow to dry completely before removing pins.
Wearing Your Hair Vine
Create the half-up twisted braid first and secure it normally. Place the crown end near the upper right crown and angle the vine toward the left back of the head.
Slide bobby pins through the hidden crochet loops, crossing pins in an X where extra grip is needed. Let the lower vine follow the braid rather than pulling the braid toward the vine. Add pins behind the medium and large dahlias.
Gently bend side branches to expose strands of hair between clusters.
Comfort check: The vine should feel light and secure, not tight. If a pin pulls the scalp, move it to a neighboring hidden loop rather than increasing tension.
Care Instructions
Store flat or loosely coiled in a shallow box. Never compress the dahlia centers. Spot clean with cool water and a tiny amount of mild soap. Blot, do not wring. Re-block petals after cleaning. Keep away from hairspray until the accessory is already positioned. Alcohol-heavy sprays can discolor some cotton dyes.
Troubleshooting Common Issues
Dahlia looks flat: Cup the base slightly while sewing in the center. Steam outer petals only. Angle alternate petals up and down.
Petals curl sideways: Tension is too tight or chain is twisted. Rework the petal with a relaxed chain and block from base to tip.
Flower is too large: Use a 1.25 mm hook, omit one outer tier, or substitute the medium size.
Cord twists: Romanian cord rotation was inconsistent. Steam lightly and roll the cord between fingers. Severe twist is best reworked.
Vine looks too dense: Remove one leaf or bud from each cluster and increase visible cord between groups.
Vine slides in hair: Add more hidden pin loops and cross bobby pins beneath the braid.
Customization Ideas
For a shorter shoulder-length style, make the main cord 20 to 22 inches and use 2 dahlias, 4 blossoms, 5 buds, and 12 leaves.
For a fuller bridal cascade, add motifs rather than making individual flowers larger.
To make it more autumnal, shift the medium dahlia toward copper, use deeper rust for small blossoms, and make 2 to 3 leaves in muted moss or brown-olive.
To make it bridal but lighter, use warm ivory for one small dahlia and two blossoms while keeping the olive framework and ochre centers.
Thank you so much for choosing this pattern! I really hope you love making your Autumn Dahlia Hair Vine as much as I loved designing it. If you found this tutorial helpful, please save it to your Pinterest boards so you can find it easily when you are ready to start. And I would absolutely love to see your finished piece, so drop a comment below or tag me on social media when you make yours!
Want a Quick & Easy Printable Version?
Get a clean, beautifully formatted PDF of this pattern — easy to follow step by step, ready to print or save on any device. No scrolling, no distractions, just the pattern.
Get the Printable PDF →