
Layered crochet with multiple colors and intricate feather motifs might look intimidating, but I promise this pattern is more approachable than you think.
Get the Ad-Free PDF Pattern
You can find the free pattern below, or you can purchase the ad-free printable PDF from my shop.
Get the Printable PDF →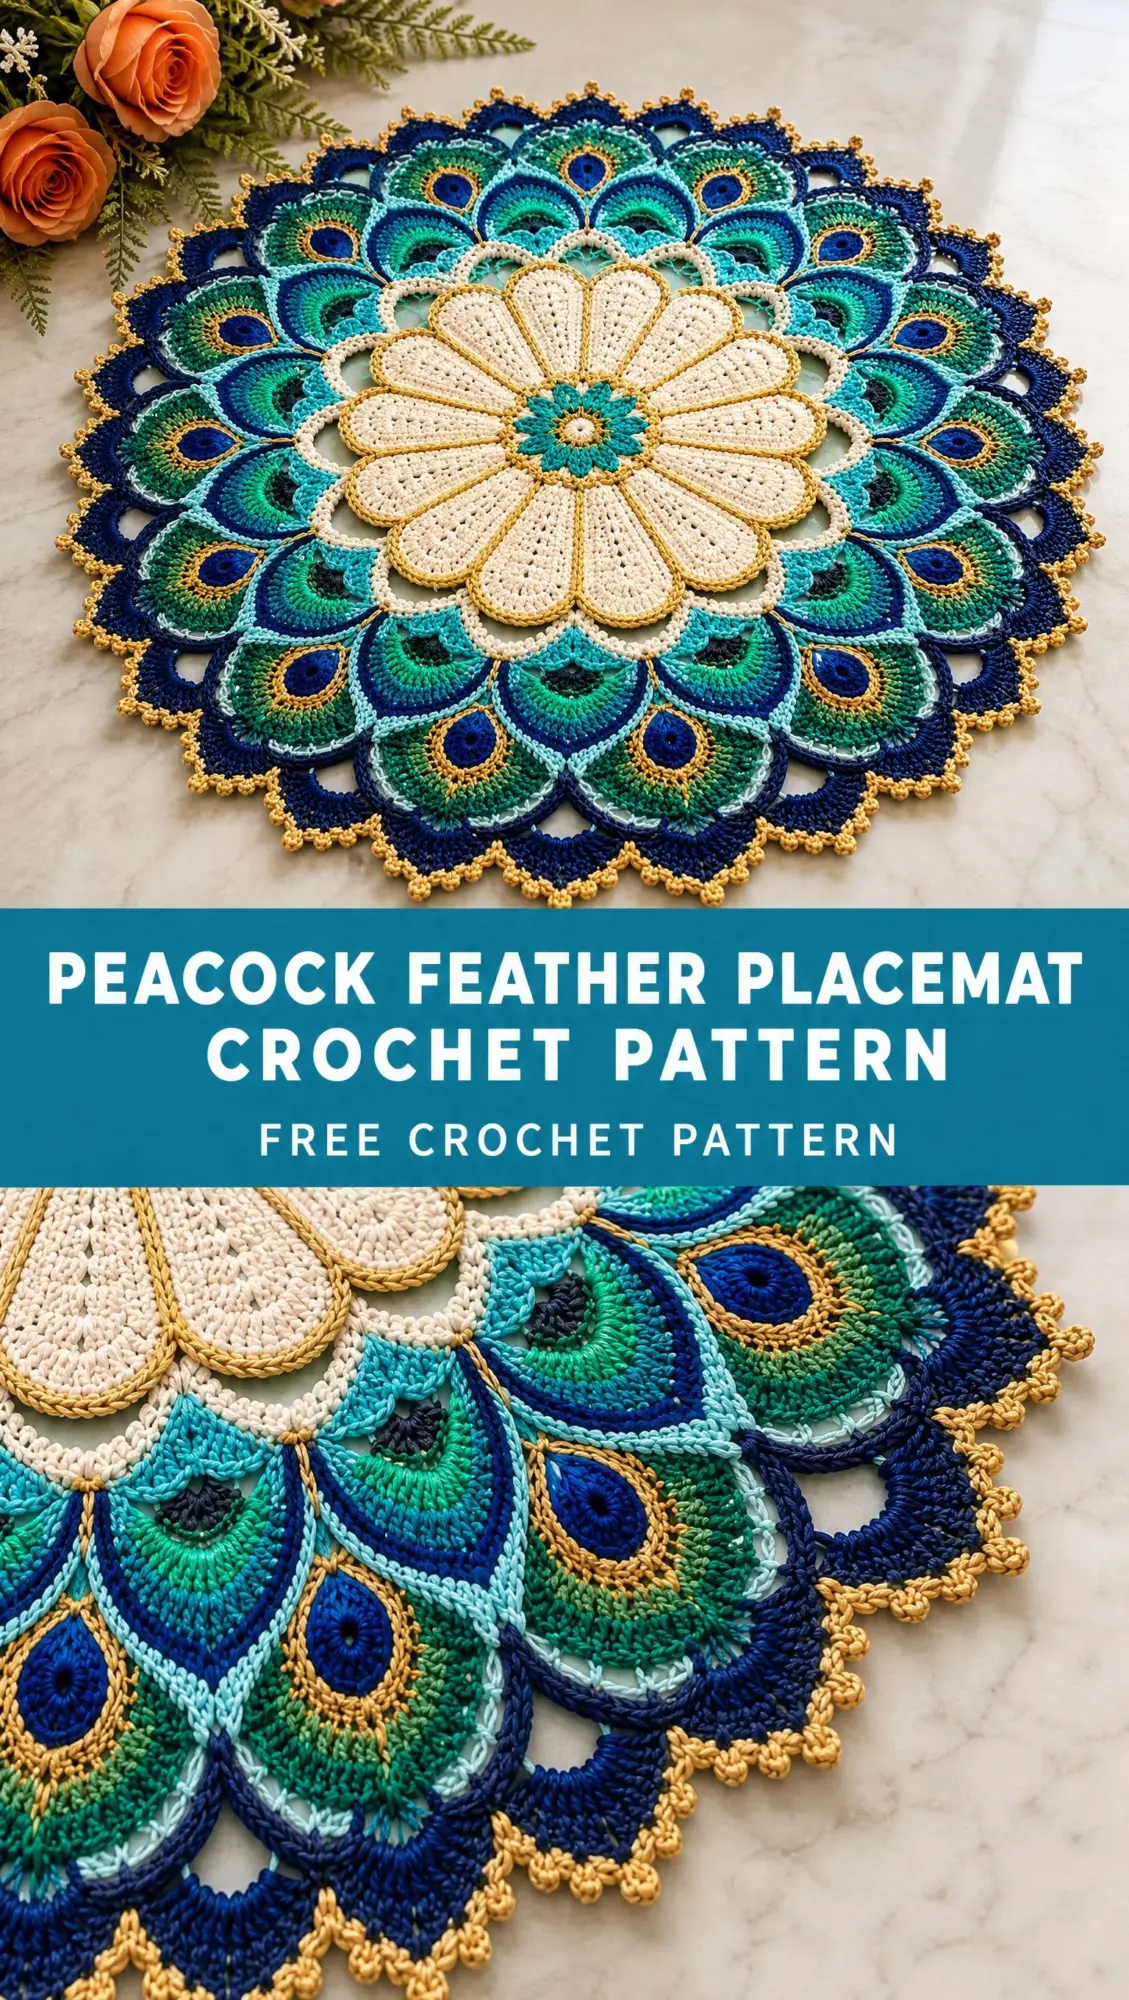
Yes, those peacock eyes look complex. Yes, there are six different yarn colors. And yes, the finished piece has a stunning mandala quality that seems like it belongs in a museum. But here is the truth: if you can work basic stitches like double crochet, treble crochet, and slip stitch, you already have the skills you need. The magic comes from following the rounds carefully and trusting the process.
This pattern is designed for advanced intermediate crocheters, but confident beginners who take their time will absolutely succeed. I am going to walk you through every round, explain every special technique, and give you all the troubleshooting tips I know. Let’s turn that gorgeous peacock inspiration into something real.
About This Peacock Feather Placemat
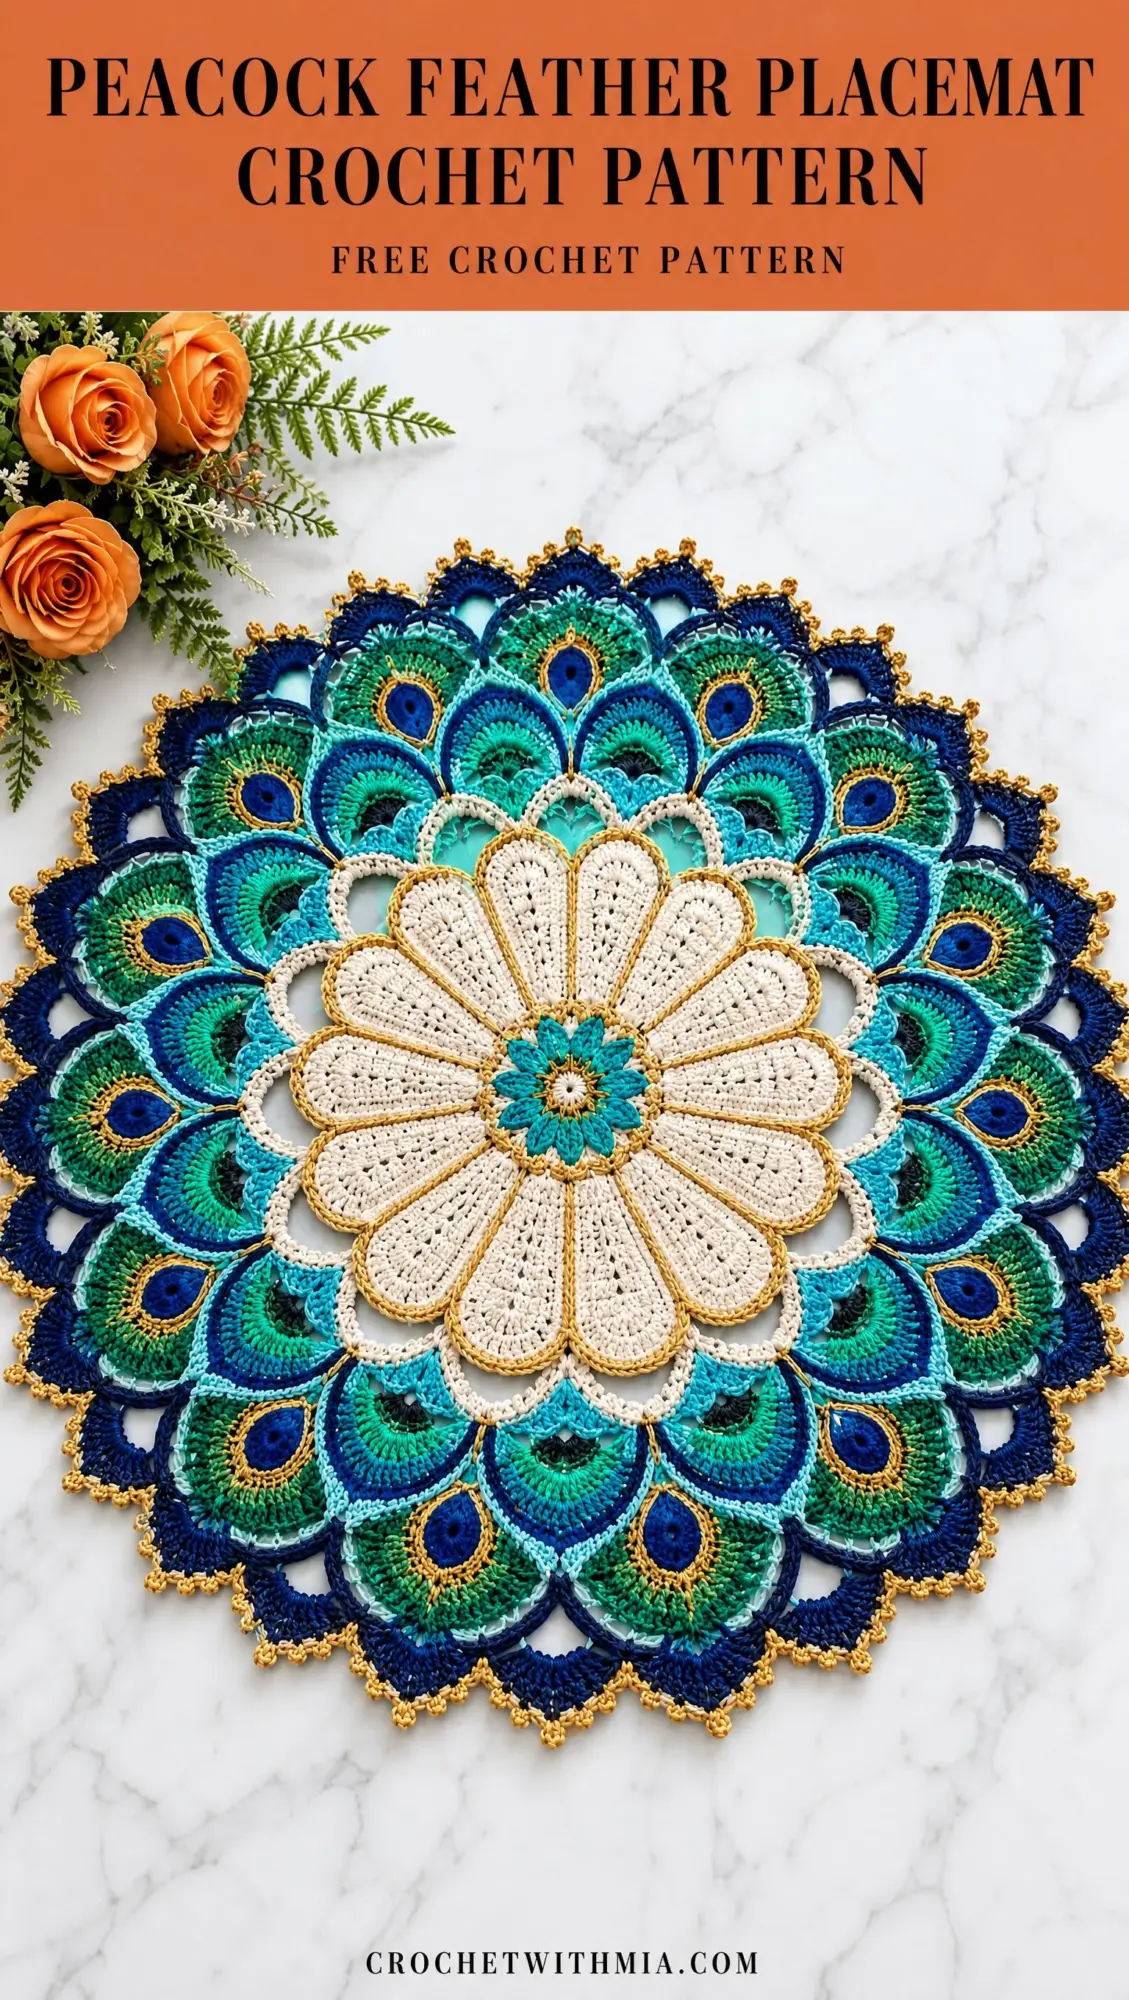
This stunning circular placemat begins with a compact turquoise starburst center, expands into a broad ivory sixteen-petal flower edged with gold, then transitions through three offset rings of elongated feather-eye fans. The outer rings carry emerald, cobalt, and navy accents so those signature peacock eye shapes remain distinct while the lace stays flat and open. A navy shell-and-picot border with gold accents completes the design.
The finished diameter measures approximately 14 to 16 inches (35.5 to 40.5 cm) after blocking. The piece is worked in joined rounds with 16 repeating sectors, creating that beautiful radial symmetry you see in the photos.
Why this level? The stitches themselves are familiar, but the project requires consistent tension, color changes, working into chain spaces, reading repeated fan structures, and correcting minor cupping or ruffling before the next ring is added. If you have made doilies or mandalas before, you are ready for this.
Materials You Will Need
Gather these supplies before you begin:
| Item | Recommended Amount/Specification |
|---|---|
| Main cotton | Sport/fine DK mercerized cotton, total 430 to 520 yards (395 to 475 m) |
| Ivory (Color A) | 170 to 200 yards (155 to 183 m) |
| Turquoise (Color B) | 75 to 90 yards (69 to 82 m) |
| Emerald (Color C) | 60 to 75 yards (55 to 69 m) |
| Cobalt (Color D) | 45 to 60 yards (41 to 55 m) |
| Navy (Color E) | 65 to 80 yards (59 to 73 m) |
| Gold accent (Color G) | 25 to 35 yards (23 to 32 m), fine cotton or crochet metallic carried alone |
| Hook | 3.0 mm (US D/3) or size needed for flat fabric |
| Notions | Tapestry needle, scissors, 16 locking markers, rustproof blocking pins, blocking mat |
Yarn suggestions: Scheepjes Catona, YarnArt Jeans, or DROPS Safran work beautifully. Choose smooth, tightly plied cottons with similar thickness.
Substitution note: Avoid very fuzzy or loosely plied yarn because it softens the feather-eye outlines. Metallic gold should be fine and flexible. If it is thicker than the cotton, switch to a slightly smaller hook only for the gold outline rounds.
Gauge and Size Checkpoints
Exact stitch gauge is less important than maintaining a flat circle. Check the piece on a table after every major section. Do not rely on blocking to remove strong cupping or heavy ruffling.
| Checkpoint | Expected Diameter | Adjustment if Needed |
|---|---|---|
| After Round 6 | 3.5 to 4 inches (9 to 10 cm) | If cupping: loosen tension or use 3.25 mm hook |
| After Round 12 | 8 to 8.5 inches (20 to 21.5 cm) | This is the key center checkpoint |
| After Round 18 | 11 to 12 inches (28 to 30.5 cm) | If ruffling: reduce one chain in each large arch on next round |
| Final | 14 to 16 inches (35.5 to 40.5 cm) | Wet-block to an even circle; pin each shell tip |
Abbreviations (US Terms)
Here are all the abbreviations used in this pattern:
Left-handed crocheters: Work the same stitch counts and repeats in the opposite direction around the circle. The finished design is radially symmetrical, so no shaping changes are required.
Special Stitches and Construction Notes
Gold Outline Slip Stitch
With gold, surface sl st loosely along the top loops or designated chain line. Keep the stitches relaxed enough that the fabric lies flat. Do not pull the outline tight around curves.
Feather Fan
A feather fan is worked into one large chain arch. It grows from short stitches at each edge to taller stitches in the middle, then back down, creating an elongated teardrop/eye silhouette.
Eye Oval
The cobalt eye oval is a small flat oval worked directly into the center chain-space of an emerald fan: sc, hdc, 3 dc, hdc, sc around the same anchor, then outlined once in gold. It must lie flat. Do not stuff or layer it as a separate applique.
Marker setup: After the flower center is established, place a marker at the center of each of the 16 ivory petals. The feather rings are aligned to these 16 sectors. On offset rounds, the new fan centers fall between the markers.
Step-by-Step Pattern Instructions
Color key: A = Ivory, B = Turquoise, C = Emerald, D = Cobalt, E = Navy, G = Gold
Join each round with a sl st unless directed otherwise. Ch 3 at the start of a dc round counts as 1 dc.
Center Starburst (Rounds 1 to 4)
Round 1 (B): Make a magic ring. Ch 3, 15 dc in ring; join. (16 dc)
Round 2 (B): Ch 1, 2 sc in each st around; join. (32 sc)
Round 3 (B): Sl st in next sc, ch 5, sk next sc; rep from around; join in first sl st. (16 ch-5 loops)
Round 4 (G): Join gold in any ch-5 loop. (Sc, ch 2, sc) in loop, ch 1; rep from around. Fasten off. (16 small gold points)
Ivory Flower (Rounds 5 to 12)
Round 5 (A): Join in any ch-5 loop behind the gold point. 7 dc in loop, sc in next loop; rep from around, placing the final sc in the first loop base. (16 rounded petals)
Round 6 (A): Sl st to 2nd dc of first petal. Sc in next dc, hdc in next, 2 dc in each of next 3 dc, hdc in next, sc in next; ch 2 and skip the valley sc; rep from around. (16 enlarged petals)
Round 7 (G): Join at first sc of any petal. Surface sl st loosely across the outer edge of each petal, working 1 sl st in each stitch and 2 sl st around each ch-2 valley. Fasten off.
Round 8 (A): Join in any ch-2 valley. Ch 3, 2 dc in same sp, ch 2, 3 dc in next valley; rep from around; join. (16 3-dc groups, 16 ch-2 sps)
Round 9 (A): Sl st to first ch-2 sp. Ch 3, 5 dc in same sp; sc in center dc of next 3-dc group, 6 dc in next ch-2 sp; rep from around; join. (16 outer petal lobes)
Round 10 (A): Sl st to 2nd dc of first 6-dc lobe. Sc in next dc, hdc in next, 2 dc in each of next 2 dc, hdc in next, sc in next, ch 3, sk valley sc; rep from around. (16 petals, 16 ch-3 valleys)
Round 11 (A): Join in any ch-3 valley. (Sc, ch 7, sc) in valley, ch 1; rep from around. (16 large transition arches)
Round 12 (G): Join in any ch-7 arch. Work 9 loose sl sts around each ch-7 arch and 1 sl st in each intervening ch-1. Fasten off.
Checkpoint: Center should now measure about 8 to 8.5 inches (20 to 21.5 cm).
Feather Ring 1: Turquoise and Navy (Rounds 13 to 16)
Round 13 (B): Join in any ch-7 arch. In each arch work: sc, hdc, 2 dc, 3 tr, 2 dc, hdc, sc. Ch 3 between arches. Repeat around. (16 elongated turquoise fans)
Round 14 (E): Join at first sc of any fan. Sl st in each stitch across fan, ch 1, then work (sc, ch 3, sc) in the ch-3 gap. Continue around. This navy dividing line sharpens each fan.
Round 15 (B): Join in each navy ch-3 gap in turn: *(Sc, ch 9, sc) in gap, ch 2; rep around. (16 offset foundation arches)
Round 16 (G): Surface sl st around the outer curve of each turquoise fan only. Fasten off. Keep the gold line fine and relaxed.
Feather Ring 2: Cobalt and Emerald (Rounds 17 to 20)
Round 17 (D): Join in any ch-9 arch. In each arch work: sc, hdc, 2 dc, 3 tr, 2 dc, hdc, sc. Ch 3 between arches. (16 cobalt fans, offset between Ring 1 fans)
Round 18 (C): Join at the first st of any cobalt fan. *Sc in first 2 sts, hdc in next 2, 2 dc in each of next 3 sts, hdc in next 2, sc in last 2; ch 4 over the gap. Rep around. The emerald layer should widen each feather without closing the lace.
Round 19 (E): Surface sl st across the outer edge of every emerald fan. In each ch-4 gap work (sc, ch 3, sc). Continue around. Fasten off.
Round 20 (C): Join in any navy ch-3 gap. *(Sc, ch 11, sc) in gap, ch 2; rep around. (16 large outer-ring foundation arches)
Feather Ring 3 with Eye Ovals (Rounds 21 to 25)
Round 21 (C): In each ch-11 arch work: sc, hdc, 2 dc, 4 tr, 2 dc, hdc, sc. Ch 3 between arches. (16 large emerald outer fans)
Round 22 (D) Eye Ovals: Working into the center chain of each ch-11 foundation arch from Round 20 (behind the fan), join cobalt and make: sc, hdc, 3 dc, hdc, sc all around that same center chain. Sl st to close. Fasten off after each eye or carry invisibly along the back. Repeat 16 times. Each oval should sit centered and flat inside its emerald fan.
Round 23 (G): Join gold at one cobalt oval. Surface sl st evenly around the oval perimeter; fasten off. Repeat for all 16 eyes. Use 12 to 14 relaxed sl sts per oval.
Round 24 (E): Join at edge of any emerald fan. Surface sl st across the outer fan edge. At each fan center work (sc, ch 3, sc) to form a pointed navy tip; ch 2 across each gap. Continue around.
Round 25 (E): In each ch-2 gap work 5 dc. In each center ch-3 tip work 7 dc. Join. This produces alternating navy shells, with the larger shell aligned to each feather center.
Final Gold Picot Edge (Round 26)
Round 26 (G): Join gold at first dc of any 7-dc center shell. *Sl st in first 2 dc, (sc, picot) in next dc, (sc, picot) in center dc, (sc, picot) in next dc, sl st in last 2 dc; sl st across the 5-dc gap shell with one picot in its center. Rep around. Fasten off and weave in securely.
Flatness correction: If the work begins to ruffle at Rounds 20 to 21, replace each ch-11 arch with ch 10. If it cups, use ch 12. Make the same adjustment in all 16 repeats so the circle stays symmetrical.
Quick Round Checklist
Use this handy reference to track your progress and color changes:
| Round | Color | Section |
|---|---|---|
| 1 | B | center |
| 2 | B | center |
| 3 | B | star loops |
| 4 | G | star points |
| 5 | A | petals |
| 6 | A | petals |
| 7 | G | petal outline |
| 8 | A | flower expansion |
| 9 | A | outer petals |
| 10 | A | outer petals |
| 11 | A | transition arches |
| 12 | G | flower outline |
| 13 | B | fan ring 1 |
| 14 | E | divider |
| 15 | B | offset arches |
| 16 | G | fan outline |
| 17 | D | fan ring 2 |
| 18 | C | fan expansion |
| 19 | E | divider |
| 20 | C | outer arches |
| 21 | C | outer fans |
| 22 | D | eye ovals |
| 23 | G | eye outlines |
| 24 | E | fan tips |
| 25 | E | shell border |
| 26 | G | picot edge |
Assembly, Finishing, and Blocking
1. Weave in all cotton ends by threading through at least 1.5 inches (4 cm) of matching-color stitches, changing direction once. Metallic ends should be secured through several dense stitches rather than only through chain spaces.
2. Wash or soak according to the yarn label. Roll in a towel to remove excess water. Do not wring.
3. Pin the center first so the ivory flower is circular. Then pin all 16 outer feather centers at equal radius. Finally pin the navy shell tips. Measure across opposite points as you work so the placemat remains round.
4. Allow to dry completely before removing pins. Steam is optional only if the yarn label permits it. Never press the iron directly onto the crochet.
Troubleshooting Common Issues
| Issue | Cause | Fix |
|---|---|---|
| Center cups upward | Tension too tight or hook too small | Move up 0.25 mm for ivory rounds or loosen gold surface sl sts |
| Outer border ruffles | Foundation arches too long | Reduce Round 20 arches from ch 11 to ch 10 |
| Feather eyes twist | Oval too dense or gold outline too tight | Use fewer outline sl sts and spread the oval over a wider center anchor |
| Fans look crowded | Chain gaps pulled tight | Work chain spaces loosely and block each gap open |
| Gold buckles the edge | Metallic thread tension too firm | Use a larger hook for gold or work surface sl sts more loosely |
Care Instructions
For best results, hand wash in cool water with mild detergent, reshape while damp, and dry flat. Store flat or loosely rolled. Avoid hanging, which can stretch the openwork. If used under warm dishes, confirm the fiber is 100% cotton and avoid direct contact with very hot cookware.
Frequently Asked Questions
Can I make it larger?
Yes! Repeat one additional foundation-and-fan ring before the final navy border. Increase the foundation arch by 1 to 2 chains and keep 16 repeats.
Can I omit the metallic gold?
Absolutely. Replace gold with a warm ochre or antique-gold cotton of the same weight.
Can I use thread crochet cotton?
Yes, but the finished diameter will be smaller unless you use a larger thread and hook. Work by the measurement checkpoints, not only by hook size.
Why are there 16 repeats?
Sixteen sectors divide evenly into the flower petals and all three feather rings, which keeps the visual rhythm balanced and makes offset placement straightforward.
Time Estimate
Plan for approximately 10 to 14 hours of working time, depending on your thread handling speed and blocking process. This is a wonderful project to work on over several evenings or a relaxing weekend.
I hope you absolutely love making this Peacock Feather Placemat Crochet Pattern as much as I loved putting together this tutorial for you. The layered colors and those stunning eye motifs really do come together beautifully once you trust the process.
If you found this pattern helpful, I would love for you to save it to your Pinterest boards so you can find it easily when you are ready to start. And please, leave a comment below if you make one! I always love seeing your finished projects and hearing how the pattern worked for you.
Want a Quick & Easy Printable Version?
Get a clean, beautifully formatted PDF of this pattern — easy to follow step by step, ready to print or save on any device. No scrolling, no distractions, just the pattern.
Get the Printable PDF →