
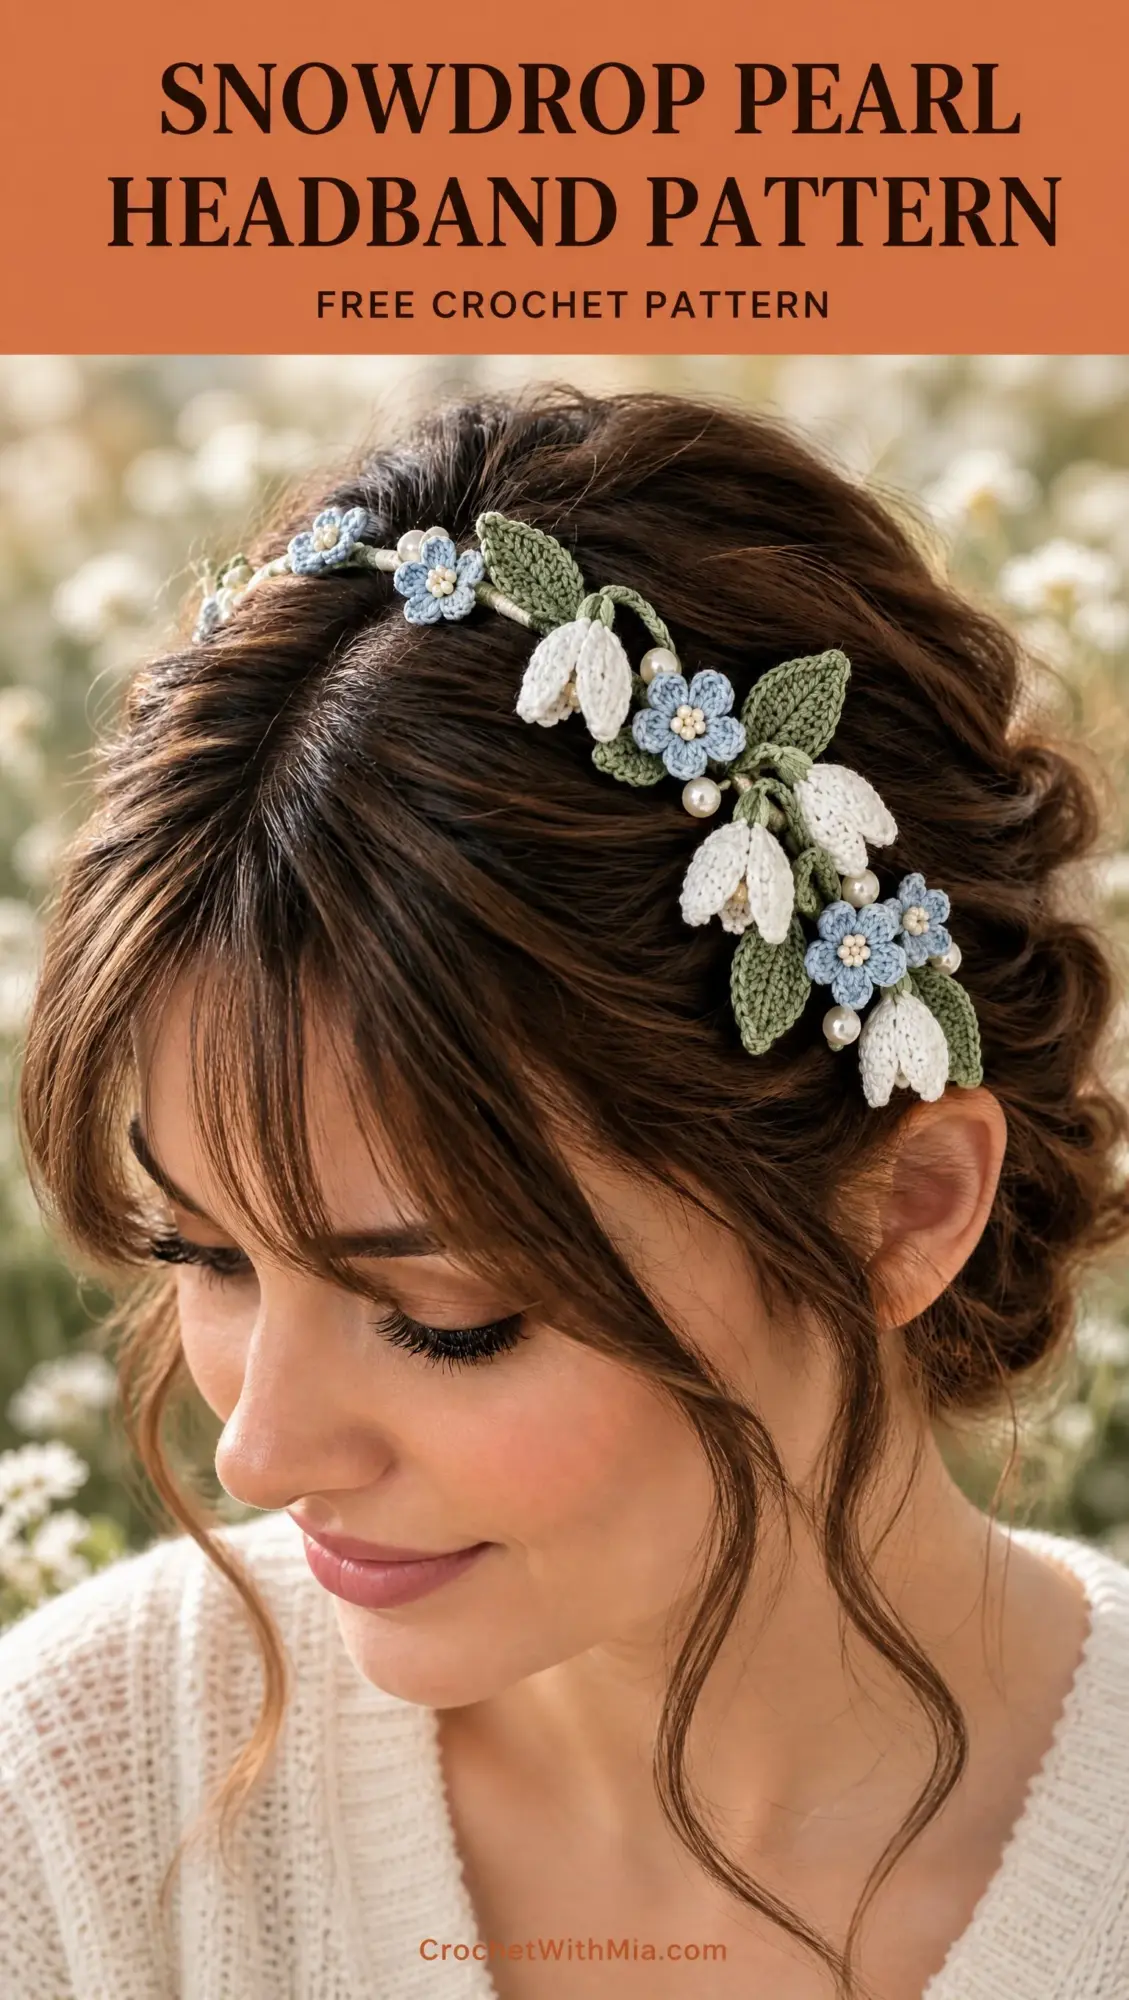
This pattern creates a delicate floral headband with ivory snowdrop bells, silver-blue blossoms, eucalyptus leaves, and scattered pearls. The construction is modular, meaning you crochet each motif separately and then sew everything onto a wrapped headband base. If you can work basic stitches and handle small pieces, you can make this.
Get the Ad-Free PDF Pattern
You can find the free pattern below, or you can purchase the ad-free printable PDF from my shop.
Get the Printable PDF →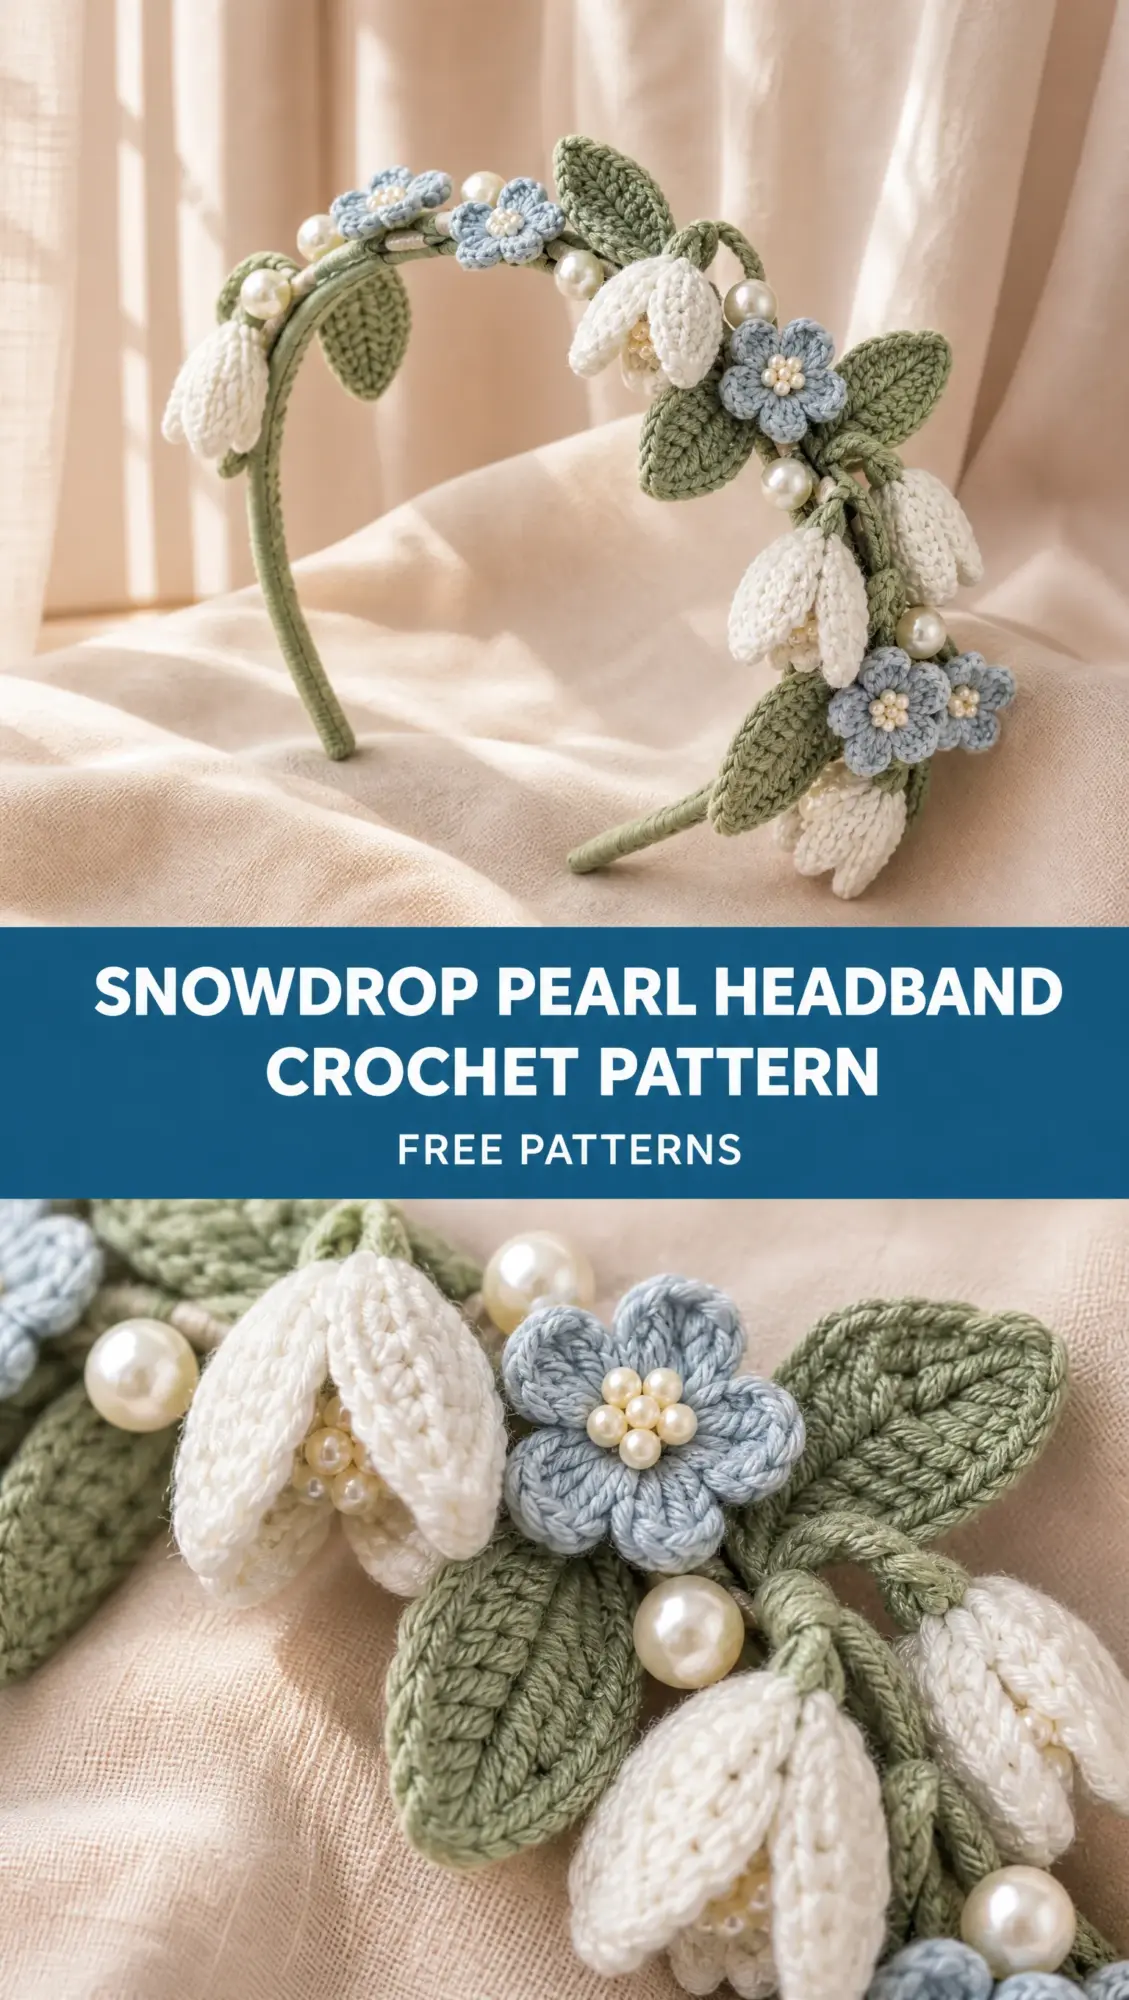
The finished piece fits adult head circumferences of 21 to 23 inches and has a floral span of approximately 10 to 11 inches from the left crown to the right ear. The design is intentionally asymmetrical, with the right temple carrying the fullest cluster while the left side stays airy and light.
Fine mercerized cotton thread and tiny pearl beads give this headband an elegant, almost bridal quality. It works beautifully for winter weddings, special occasions, or anytime you want to wear something handmade and lovely.
Materials You Will Need
Gathering your supplies before you start will make this project flow smoothly. Here is everything the pattern calls for:
Headband Base:
Yarn:
Tools:
Embellishments:
Optional:
Yarn Note: Choose smooth, tightly twisted cotton for this project. Fuzzy yarn hides the tiny stitch definition and makes the flowers look bulky. The crisp texture of mercerized cotton really lets these delicate motifs shine.
Abbreviations and Definitions
Before diving into the pattern, let me walk you through every abbreviation you will encounter. I have included plain-English definitions so even if you are newer to reading patterns, you will know exactly what to do.
ch = chain: Wrap yarn over hook and pull through the loop on your hook. This creates one chain stitch.
sl st = slip stitch: Insert hook into stitch, yarn over, and pull through both the stitch and the loop on your hook in one motion. This is a very short, flat stitch often used to join or move across work.
sc = single crochet: Insert hook into stitch, yarn over and pull up a loop (2 loops on hook), yarn over and pull through both loops. This creates a short, tight stitch.
hdc = half double crochet: Yarn over, insert hook into stitch, yarn over and pull up a loop (3 loops on hook), yarn over and pull through all 3 loops at once.
dc = double crochet: Yarn over, insert hook into stitch, yarn over and pull up a loop, yarn over and pull through 2 loops, yarn over and pull through remaining 2 loops.
tr = treble crochet: Yarn over twice, insert hook into stitch, yarn over and pull up a loop, [yarn over and pull through 2 loops] 3 times.
st(s) = stitch(es)
sp = space
MR = magic ring: A adjustable loop that you work your first round of stitches into, then pull tight to close the center hole.
yo = yarn over: Wrap the yarn over your hook from back to front.
rep = repeat
FO = fasten off: Cut yarn and pull the tail completely through the final loop to secure your work.
Special Techniques
This pattern uses a few techniques that might be new to you. Here is how to work each one:
Tiny Cream Bobble
This creates the cute textured center of the silver-blue blossoms. Work it into one stitch or ring like this: [yarn over, insert hook, yarn over and pull up a loop, yarn over and pull through 2 loops] 3 times in the same spot, then yarn over and pull through all 4 loops on your hook. Push the bobble toward the front with your fingertip before continuing to the next stitch.
Invisible Motif Finish
This technique gives your motifs a professional, seamless look. After your last stitch, cut yarn leaving a sewing tail. Pull the tail completely through the final loop. Thread the tail on a needle, pass under both loops of the first stitch of the round, then back down through the center of the final stitch. This creates a clean faux stitch that looks like part of the round.
Neat Sewing Method
When attaching motifs, sew through the back loops or underside bars only. Catch the wrapped band without passing the needle all the way around it whenever possible. Use several tiny anchoring stitches instead of one large visible stitch. This keeps all your connections hidden.
Part 1: Wrapped Headband Base
The foundation of your headband is a simple wrapped base. Take your time here because a neat wrap makes the finished piece look polished.
Step 1: Prepare the band. Try on the blank headband and mark the center crown and the approximate right-temple point. If the blank has hard end caps, leave the last 1/2 inch (1.3 cm) on each end unwrapped.
Step 2: Anchor the yarn. With eucalyptus yarn, leave a 6 inch (15 cm) tail. Tie a small secure knot on the underside near one end or tack the yarn with a tiny dot of flexible fabric glue. Allow it to dry before wrapping.
Step 3: Wrap evenly. Wind the yarn around the band in close parallel turns. Each wrap should touch the previous wrap without overlapping. Keep tension firm and consistent. Rotate the band as you work rather than twisting the yarn.
Step 4: Secure the far end. At the opposite end, pass the yarn under the last 5 to 6 wraps with a tapestry needle, pull snug, then weave back in the opposite direction. Trim. Add a tiny dot of flexible glue only if needed.
Step 5: Add hidden anchor points. With matching sewing thread, place small tack stitches through the wrap at the center crown, right temple, and both ends. These prevent the wrapping from shifting when motifs are sewn on.
Fit Check: The finished floral work adds very little stretch. Make sure the wrapped band is comfortable before attaching motifs. Try it on and adjust if needed before moving forward.
Part 2: Snowdrop Bell Flowers
Make 4 to 5 bells in ivory. Each flower is built from three narrow cupped petals joined at the top around a tiny green calyx. Finished length is about 1 to 1.25 inches (2.5 to 3.2 cm).
A. Narrow Cupped Petal (Make 3 Per Bell)
1. Ch 7.
2. Starting in 2nd ch from hook: sl st in next ch, sc in next ch, hdc in next 2 ch, dc in next ch, 5 dc in last ch.
3. Rotate to work along the unused loops on the opposite side of the foundation chain: dc in next ch, hdc in next 2 ch, sc in next ch, sl st in final ch.
4. FO leaving a 7 inch (18 cm) sewing tail. Do not block flat. Gently pinch the lower half lengthwise to create a soft cup.
B. Green Calyx Cap
5. With eucalyptus, make MR. Ch 1, work 6 sc into ring. Join with sl st. Tighten ring firmly.
6. Next round: [ch 3, sl st in 2nd ch from hook, sc in next ch, sl st in same base st] 3 times, spacing the points evenly around the ring. FO with a long tail.
C. Assemble One Bell
7. Overlap the narrow top ends of three ivory petals so they form a triangular tube. Sew the top 1/4 inch (6 mm) together, leaving the lower petals free and gently drooping.
8. Place the green calyx over the joined top. Sew through the calyx center and petal tops several times. Shape the three petals so they hang slightly apart rather than forming a closed bud.
9. Use the remaining green tail to create a 1/4 to 3/8 inch (6 to 10 mm) stem: twist or wrap the tail around a short doubled strand of green yarn, then secure. Leave a final sewing tail for attachment.
Part 3: Silver-Blue Five-Petal Blossoms
Make 5 to 6 blossoms. Each flower has five rounded petals and one small cream bobble center.
10. With silver-blue yarn, make MR.
11. Repeat 5 times into ring: [sl st, ch 2, 2 dc, ch 2, sl st]. Pull the MR almost closed but leave a tiny center opening. Join with sl st to first stitch and FO.
12. Thread cream yarn through the center. Work one tiny cream bobble into the center opening, or create a bobble separately and stitch it over the ring. Secure all tails on the back.
13. Steam-block very lightly from a distance or pin petals into five even rounded lobes and allow to dry. Do not flatten the bobble.
Part 4: Eucalyptus Leaves
Make 7 to 9 leaves in muted eucalyptus green: 4 to 5 small and 3 to 4 medium. Slight variation makes the finished band look natural.
Small Leaf
14. Ch 6.
15. Starting in 2nd ch: sl st, sc, hdc, dc, 5 dc in last ch.
16. Work down opposite side: dc, hdc, sc, sl st. FO with a 7 inch (18 cm) tail.
Medium Leaf
17. Ch 8.
18. Starting in 2nd ch: sl st, sc, hdc, dc in next 2 ch, tr in next ch, 5 tr in last ch.
19. Work down opposite side: tr, dc in next 2 ch, hdc, sc, sl st. FO with a long tail.
Optional Central Vein
For a more botanical look, thread a slightly darker green strand and work a line of tiny backstitches along the foundation-chain spine of each leaf. Keep the stitches loose enough that the leaf remains flexible.
Part 5: Pearl Accents
Use 8 to 12 small 3 to 4 mm pearls. Pearls should appear as scattered highlights, not a continuous row. Use strong matching sewing thread doubled through the needle.
Part 6: Motif Layout Guide
Design Rule: Keep every motif low against the band. The right-temple area should be fuller, while the left crown should look lighter and more open.
Here is the recommended placement for each zone:
Left Crown: 1 blue blossom, 1 small leaf, optional pearl. Keep 1 to 1.5 inches (2.5 to 4 cm) of visible wrapped band before the first motif.
Upper-Left Transition: 1 small snowdrop bell angled downward, 1 blue blossom, 1 medium leaf.
Center Crown: 1 leaf and 1 pearl with a small gap so the arrangement does not become a solid wreath.
Right-Temple Cluster: 2 to 3 snowdrop bells, 2 to 3 blue blossoms, 3 to 4 leaves, and 4 to 6 pearls. Layer leaves beneath flowers. Position bells to droop toward the ear.
Near Right Ear: Finish with 1 small blue blossom or leaf and 1 pearl, then leave the remaining band clear.
Part 7: Final Assembly
1. Arrange before sewing. Lay the headband on a folded towel or foam form. Pin all motifs in place first. Take a photo so you can restore the arrangement if pieces shift.
2. Sew leaves first. Attach leaves by stitching through the lower third and the center spine only. Let the leaf tips remain free for dimension. Angle tips along the diagonal flow of the band.
3. Attach blue blossoms. Sew each flower at its center and at one hidden point beneath a petal. Do not stitch every petal down. The edges should remain softly raised.
4. Attach snowdrop bells. Sew the green calyx or short stem firmly to the wrapped band. Add one tiny hidden stitch behind an upper petal if the bell swings too freely. Let the three ivory petals hang downward.
5. Create the fuller right-temple cluster. Overlap leaf bases and flower centers slightly. Place the largest visual mass just above the right temple rather than directly over the ear. Keep the silhouettes delicate and low.
6. Add pearls. Sew pearls into the small gaps between motifs. Use the right-temple cluster for most beads and only 1 to 2 pearls on the lighter left side.
7. Hide every connection. Run sewing tails beneath several wraps on the underside of the band. Reverse direction once before trimming. No knots or yarn ends should be visible from the front or side.
8. Final shaping. Mist the crochet motifs very lightly with water. Shape petals and leaves with fingertips, keeping bells cupped and blue blossoms open. Allow the headband to dry completely on a rounded form.
Shaping and Finishing Notes
Motif Count Checklist
Use this list to track your progress:
Troubleshooting Common Issues
Flowers look bulky: Use finer cotton or a smaller hook. Also reduce the number of attaching stitches so petals remain free.
Snowdrop petals spread too wide: Sew the upper 1/4 inch (6 mm) of all three petals together more firmly and pinch them while damp.
Band wrapping shifts: Add hidden tack stitches through the wrap and base at 1.5 to 2 inch (4 to 5 cm) intervals.
Pearls flop: Use doubled sewing thread and pass through each pearl twice, anchoring around more than one yarn wrap.
Cluster feels too symmetrical: Remove one motif from the left side and add it above the right temple. Vary leaf angles and flower spacing.
Customization Options
More Minimal: Use 3 snowdrops, 4 blue blossoms, 5 leaves, and 6 pearls. Concentrate all flowers from center crown to right temple.
More Bridal: Replace half of the silver-blue blossoms with ivory blossoms, use all ivory thread for the band wrap, and increase pearls to 14 to 16 while keeping them 3 mm or smaller.
More Winter-Blue: Use a cooler silver-blue for blossoms and a dusty sage-green for leaves. Keep the snowdrops and bobble centers warm ivory to maintain contrast.
Care Instructions
Quick Build Sequence
If you want a quick overview, here is the order of operations:
1. Wrap and stabilize the headband base
2. Crochet 12 to 15 snowdrop petals and assemble 4 to 5 bells
3. Crochet 5 to 6 silver-blue flowers and add cream bobble centers
4. Crochet 7 to 9 eucalyptus leaves
5. Lightly block motifs
6. Pin the full asymmetrical arrangement in place
7. Sew leaves, blossoms, then snowdrops
8. Add pearls last
9. Hide all tails and shape the finished band
Final Thoughts on This Snowdrop Pearl Headband Crochet Pattern
This headband takes patience, but the result is something truly special. Each tiny motif comes together to create a wearable piece of art that looks far more complicated than it actually is. Once you understand the basic petal and leaf shapes, you can mix and match to create your own variations.
Thank you so much for choosing this pattern! I would absolutely love to see your finished headband. If you make one, please share a photo on Instagram or Facebook and tag me so I can admire your work.
If you loved this Snowdrop Pearl Headband crochet pattern, save it to your Pinterest boards so you can find it whenever inspiration strikes. And if you make one, drop a comment below. I always love hearing how your projects turn out!
Want a Quick & Easy Printable Version?
Get a clean, beautifully formatted PDF of this pattern — easy to follow step by step, ready to print or save on any device. No scrolling, no distractions, just the pattern.
Get the Printable PDF →